Task panes and persisting settings
In this unit, you'll learn how you can use task panes in Outlook add-ins and how to store user settings for use across devices.
Pinnable task panes
By default, if a user has an add-in task pane open for a message in the Reading Pane, and then selects a new message, the task pane is automatically closed. Pinning allows the task pane to stay activated.
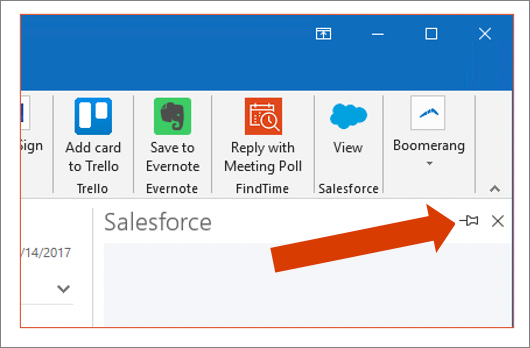
Pinnable task panes are ideal for heavily used add-ins. In these cases, the user may prefer to keep that pane open, eliminating the need to reactivate the add-in on each message.
Note
Pinnable task panes are currently only available to Microsoft 365 subscribers using the following:
- Outlook 2016 or later on Windows (build 7668.2000 or later for users in the Current or Office Insider Channels, build 7900.xxxx or later for users in Deferred channels)
- Outlook 2016 or later on Mac (version 16.13.503 or later)
- Modern Outlook on the web
Developers must specify in the manifest that the task pane supports pinning and "listen" for new item selections to update the task pane UI.
Implement a pinnable task pane
To implement a pinnable task pane, add the SupportsPinning element to your add-in manifest:
<Action xsi:type="ShowTaskpane">
  <SourceLocation resid="readTaskPaneUrl" />
  <SupportsPinning>true</SupportsPinning>
</Action>

// Set up ItemChanged event to listen for new item selections in Outlook
Office.context.mailbox.addHandlerAsync(Office.EventType.ItemChanged, function(eventArgs) {
  // Update UI based on the new current item...this should check for null item
});
You'll also need to implement a handler for the ItemChanged event so your add-in can update the UI when a new item is selected.
The ItemChanged handler should account for null because the user could have no selection, which would return a null item.
Office.js for mail add-ins
Let's look at some common tasks developers face when creating add-ins for Outlook using Office.js.
Write to the message body
The following example shows some basic message body operations. The body.getAsync() method is used to read the body of a message. Notice the coercion type that's specified. In this sample, we're asking for the content to be returned as HTML.
Before inserting data into the message body, you should check the format of the message using the body.getTypeAsync() method.
The sample shows inserting data into two different places in the message:
- the position of the current cursor
- the beginning of the body
// Get item body
item.body.getAsync(coercionType: Office.CoercionType.Html, function (asyncResult) {
  // asyncResult.value;
}
// Insert data in item body
item.body.getTypeAsync(function (r) { // check the format of the message body
  if (r.status != Office.AsyncResultStatus.Failed && r.value == Office.MailboxEnums.BodyType.Html) {
    // Insert data at the current cursor position
    item.body.setSelectedDataAsync("<b>Hello!</b>", { coercionType: Office.CoercionType.Html,
      asyncContext: { var3: 1, var4: 2 } }, function (asyncResult) {
    });
    // Insert data at the beginning of the item body
    item.body.prependAsync("<b>Hello!</b>", { coercionType: Office.CoercionType.Html,
      asyncContext: { var3: 1, var4: 2 } }, function (asyncResult) {
    });
...
Get or set message and appointment recipients
The following sample demonstrates how to get and set the recipients for both messages and appointments.
The use getAsync() method is primarily for compose add-ins. Read add-ins have direct access to recipients using the properties item.to, item.cc, and item.bcc.
Each recipient is set using an array of objects, where each object has a displayName and emailAddress property.
// Get recipients
const item = Office.context.mailbox.item;
let toRecipients;
if (item.itemType == Office.MailboxEnums.ItemType.Appointment) // Handle appointment vs message
  toRecipients = item.requiredAttendees;
else
  toRecipients = item.to;

// Perform the async get (compose add-in…read add-in can simply call item.to)
toRecipients.getAsync(function (asyncResult) { };

// Perform the async set
toRecipients.setAsync(
  [
    {
      "displayName":"Graham Durkin",
      "emailAddress":"graham@contoso.com"
    },{
      "displayName" : "Donnie Weinberg",
      "emailAddress" : "donnie@contoso.com"
    }
  ], function (r) {
        // check status.
});
Note
The sample looks at required attendees and recipients in the To field, however, it also works for optional attendees and recipients in the Cc and Bcc fields.
Get or set appointment recurrence
This sample demonstrates how to set an appointment recurrence setting, which is a more complex object using the SeriesTime object.
// Get and set recurrence
const seriesTimeObject = new Office.SeriesTime();
seriesTimeObject.setStartDate(2019,10,2);
seriesTimeObject.setEndDate(2019,11,2);
seriesTimeObject.setStartTime(10,30);
seriesTimeObject.setDuration(30);

const pattern = {
  "seriesTime": seriesTimeObject,
  "recurrenceType": "weekly",
  "recurrenceProperties": {"interval": 1, "days": ["tue", "thu"]},
  "recurrenceTimeZone": {"name": "Pacific Standard Time"}};

// Set recurrence
Office.context.mailbox.item.recurrence.setAsync(pattern, function(asyncResult) { .. });
// Get recurrence
Office.context.mailbox.item.recurrence.getAsync(function(asyncResult) { .. });
Roaming settings
Roaming settings are a valuable tool for an add-in to save configurable information that is stored on the mail server and available on any device
The following sample demonstrates how to get, set, and remove a user's roaming setting.
// Roaming Settings
Office.initialize = function () {
  const settings = Office.context.roamingSettings;

  // Save roaming settings for the mailbox to the server so always available
  settings.set("cookie", Date());
  settings.saveAsync(function(asyncResult) {});

  // Remove a roaming setting
  settings.remove("cookie");
  settings.saveAsync(function(asyncResult) {});

  // Get roaming setting
  const val = settings.get("cookie");
}
Tokens and APIs (Exchange Web Services)
This sample demonstrates how to call the Exchange Web Services (EWS) from an add-in using Office.js.
// Call Exchange Web Services (EWS)
const mailbox = Office.context.mailbox;
mailbox.makeEwsRequestAsync(mailbox.item.itemId, function(result) {
  // result.value contains the EWS getItem information in XML format
  const response = $.parseXML(result.value);
  const extendedProps = response.getElementsByTagName("ExtendedProperty")
});

// Note add-ins calling EWS must be installed by an Exchange admin
Note
In order to call the EWS from an add-in, an Exchange admin must install the add-in and you must parse all the XML submitted to and received from the EWS in your add-in.
Get attachments
The following sample demonstrates how to get attachments using Office.js.
Outlook add-ins can't pass the attachments of a selected item directly from the client. Instead, Outlook can return an OAuth 2.0 access token the add-in can use to call the Outlook REST APIs.
// Get attachments
const svcRequest = { attachmentToken: '', ewsUrl: Office.context.mailbox.ewsUrl, attachments: [] };
Office.context.mailbox.getCallbackTokenAsync(function(asyncResult, userContext) {
  // get access token returned from getCallbackTokenAsync and capture attachment metadata
  svcRequest.attachmentToken = asyncResult.value;
  for (let i = 0; i < mailbox.item.attachments.length; i++) {
    svcRequest.attachments[i] = JSON.parse(JSON.stringify(mailbox.item.attachments[i].$0_0));
  }
  $.ajax({
    url: './api/YourApiFprProcessingAttachments',
    type: 'POST',
    data: JSON.stringify(svcRequest), // contains metadata on all attachments and access token
    contentType: 'application/json;charset=utf-8'
  })
});
Add or remove attachments
The following sample demonstrates how to add and remove an attachment from an Outlook item.
// Attach a file
Office.context.mailbox.item.addFileAttachmentAsync(
  'https://webserver/picture.png',
  'picture.png', { asyncContext: null }, function (asyncResult) {
    // Validate status asyncResult.status
  }
);

// Attach an Outlook item
Office.context.mailbox.item.addItemAttachmentAsync(
  itemId,
  'Welcome message', { asyncContext: null }, function (asyncResult) {
    // Validate status asyncResult.status
  }
);

// Remote an attachment
Office.context.mailbox.item.removeAttachmentAsync(
  attachmentId,
  { asyncContext: null }, function (asyncResult) {
    // Validate status asyncResult.status
  }
);
Summary
In this unit, you learned how you can use task panes in Outlook add-ins and how to store user settings for use across devices.