Create a Microsoft Entra ID application
Every conversation in Omnichannel for Customer Service is eventually distributed to an omnichannel user. An omnichannel user could represent a live agent or a copilot user. A copilot user is essentially a user in Omnichannel for Customer Service that is supported by an application. In this case, the server application is a Microsoft Copilot Studio copilot. Omnichannel for Customer Service refers to these copilots as application users. When conversations are routed to the application user, the Microsoft Copilot Studio copilot takes over and provides the necessary interaction with the customer.
Because the copilot is an application user, the application that supports the copilot needs to be registered in Microsoft Entra ID. Microsoft Entra ID authenticates the application just as it would a human user. Before a copilot can be integrated, you need to create an application registration in Microsoft Entra ID. After the application registration is defined, a Microsoft Copilot Studio copilot can be associated with the registered application.
Only users with necessary permissions can add items in your Azure tenant and make the necessary application registrations. You can create the application registration as follows:
Go to the Azure portal.
Register your apps. Go to Microsoft Entra ID and create a new registration under App registrations.
Define the three primary areas to create the application registration as follows:
Name - User-facing name of the application. This information can be changed later, if necessary.
Supported account types - This area defines who can access the application.
Redirect URI (optional) - This option is the URL where the app is located. This isn't mandatory.
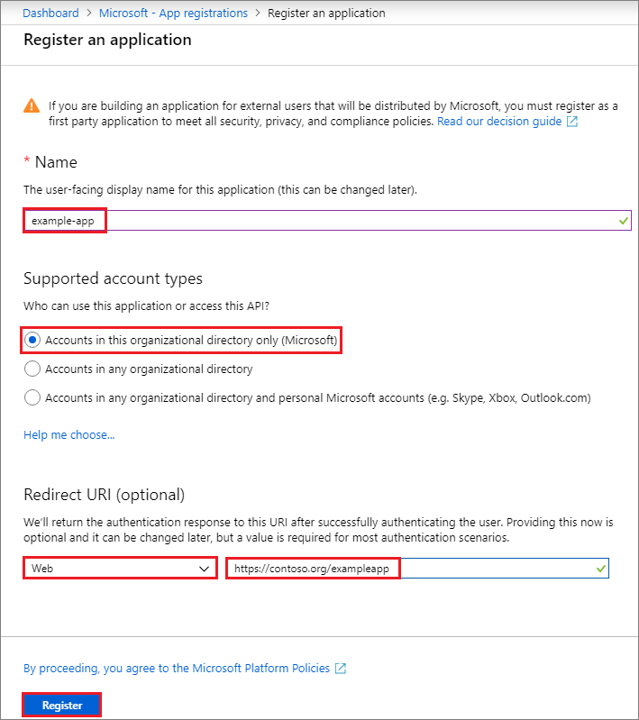
After you define the necessary information, select the Register button.

For more information, see creating an Microsoft Entra ID Application.
This process creates the initial application registration. For purposes of this learning module, these steps fulfill the necessary requirements to deploy the Microsoft Copilot Studio copilot to the application. However, depending on your deployment scenario, technology being used, security policies, and so on, you might need to configure other items in the application.
Other items that you might want to consider include:
Assign a role to the application - Allows the application to access other resources in your Azure subscription. For more information, see Assign a role to the application.
Certificates and secrets - Help manage authentication and control application security. For more information, see Certificates and Secrets.
Access policies on resources - Allows you to define other permissions that your application might need. For more information, see Configure Access Policies.
Now that you created an application registration, you can build the Microsoft Copilot Studio copilot and configure it to hand off conversations to Omnichannel for Customer Service.