Anchor a guide
When you open a guide in Dynamics 365 Guides, the first thing that you see is the anchoring instructions for the guide. Like the calibration of HoloLens, anchoring a guide is an important step.
You anchor a guide to make sure that the holographic instructions line up with your real-world environment. If the holograms don't line up, you'll likely be confused when you try to do a task. You could even cause damage.
Four types of anchors
The way that you anchor your guide depends on the type of anchor that the author selected for the guide. There are four types of anchors:
- Holographic anchor
- Object anchor
- QR code anchor
- Circular code anchor
This topic covers using the holographic anchor. For more information on the other types, see Anchor a guide in the Dynamics 365 Guides HoloLens app (for operators).
Anchor your guide by using a holographic anchor
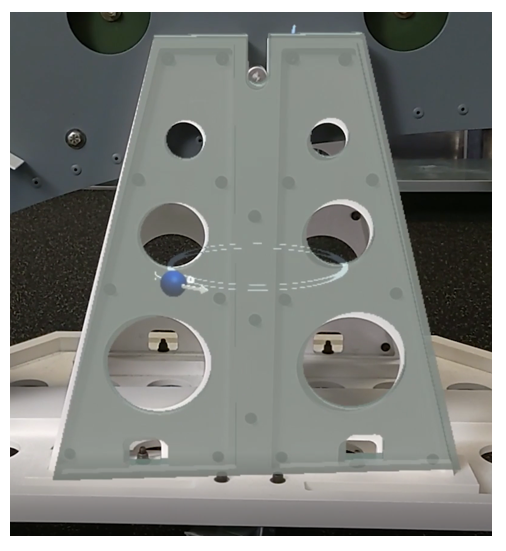
For a holographic anchor, you align a hologram on your HoloLens with a similar object in the real world. For example, in the following illustration, a holographic anchor is being aligned with its physical counterpart in the real world.
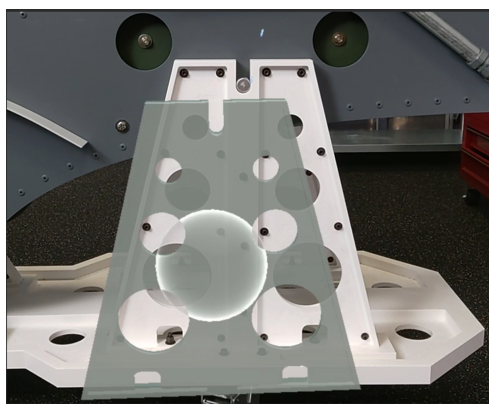
To align the holographic anchor with its real-world counterpart, air tap and hold to move the hologram. Tap and hold the blue spheres to rotate the hologram as required.
Tip
You can re-align holographic content that might seem offset from the real world (for example, a rectangle that should be referencing a tool, but is floating in the air away from the tool bench). When using a holographic anchor, select the Anchor button to make sure the digital version of the real object and the object itself are still aligned.