Generate data
Now that the solution with a completed Power Apps application is installed, you need business data. In this task, you'll run the application and generate business data.
To navigate back to Power Pages from the design studio, select the home icon at the top left of the page.
Select the Pages in a Day solution to open it.
Note
To open the solution in a new tab, right-click the Power Pages in a Day solution and select the Open in new tab option.
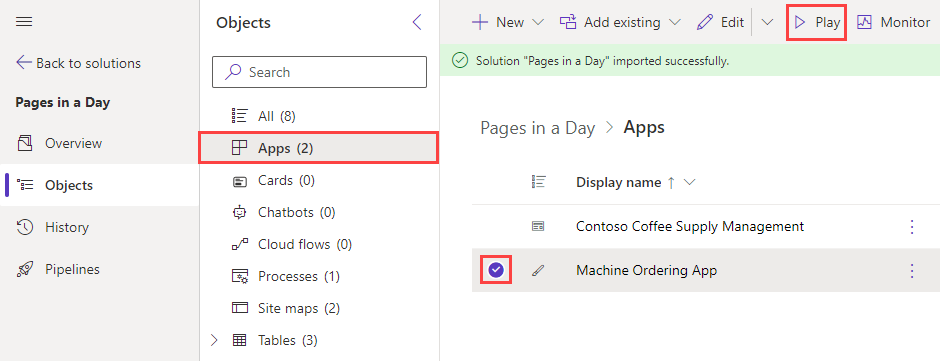
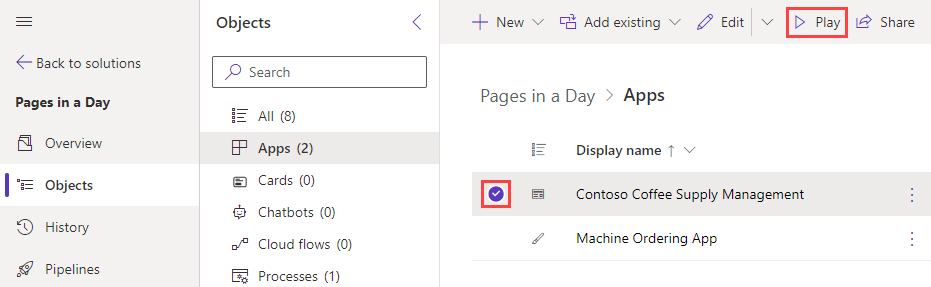
Select the Apps node.
Select Machine Ordering App.
From the main menu, select Play.
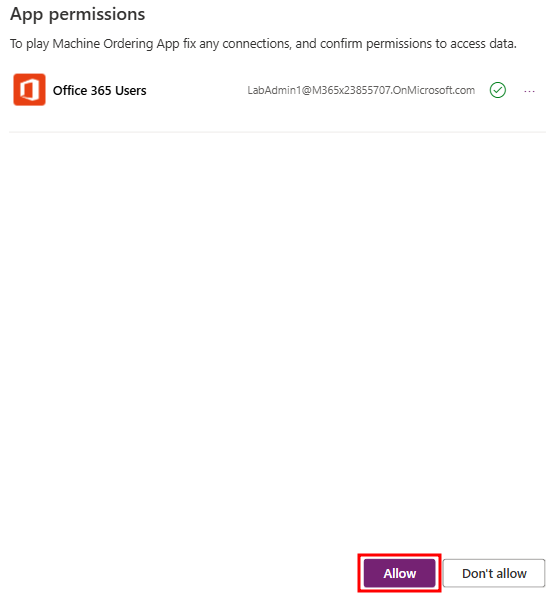
A new tab will open in your browser. You might be prompted to sign in with an account. Choose the authentication account that you've been signed in with.

You'll be prompted to grant permission to connect to Office 365 Users. Select Allow.
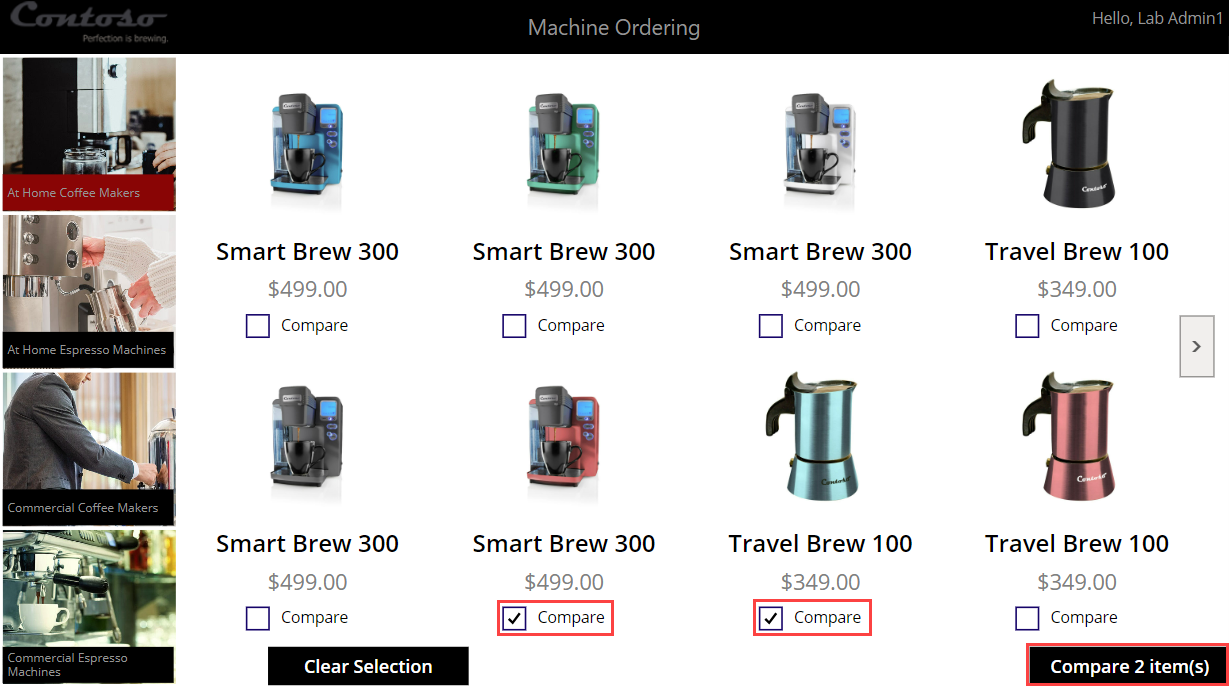
Select a couple of machines and then select Compare in the lower-right corner of the screen. If the Compare button doesn't show, select the Fit to screen icon in the upper right, as shown in the following screenshot.

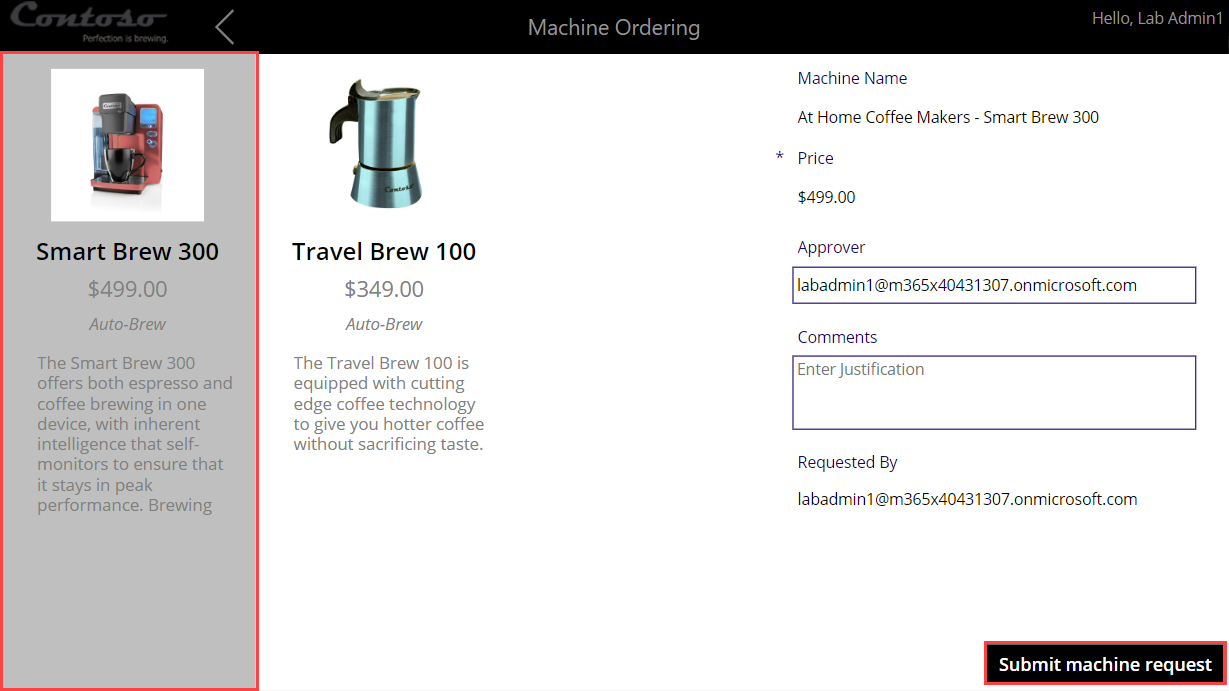
Select one of the devices and then select Submit machine request. Well done, you've now placed a device order.
You'll be redirected to a submission success screen. Select OK to return to the main screen.
Optional: Repeat the previous steps a few times to add more sample data to your Microsoft Dataverse environment.
When complete, you can close the browser tab to return to Apps within the Power Pages in a Day solution.
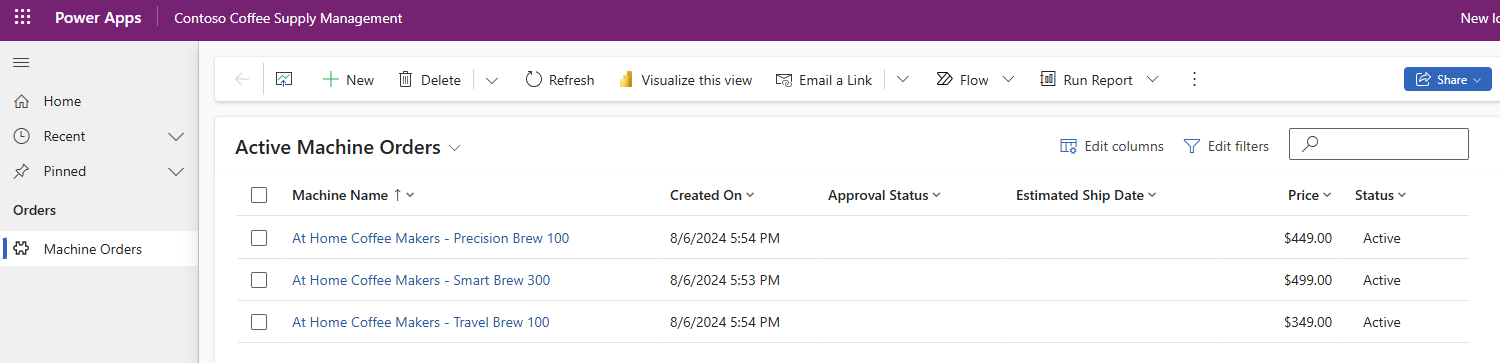
Select the Contoso Coffee Supply Management app (be careful not to select the name, as this will take you into editing the app) and then select Play from the ribbon at the top of the page.
A new tab will open in your browser, showing a list of records that you created from the canvas app.
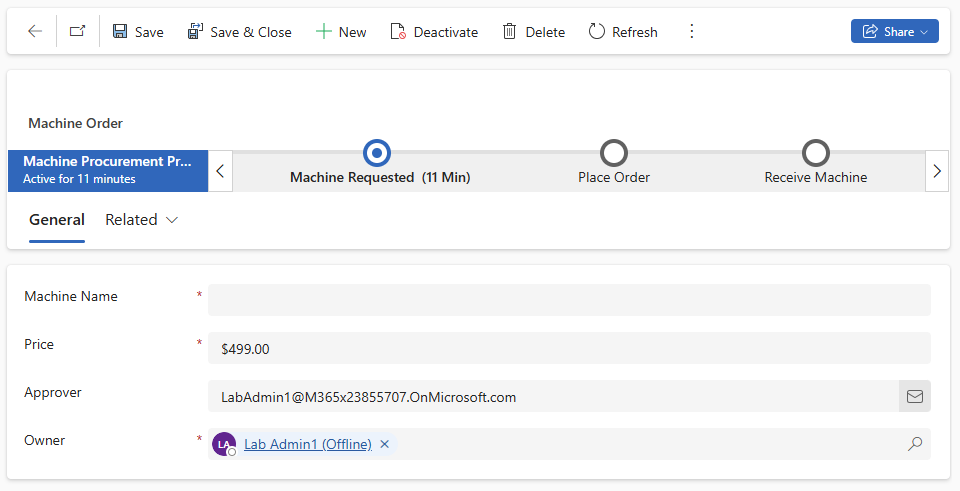
Select one of the machine names to open its record and view its form.


Now, you've completed all prerequisite actions that are required for this workshop.