Exercise - Build your first copilot
Microsoft Copilot Studio helps you quickly create AI-powered solutions to some of your customer support challenges; no developers or data scientists are required.
In this exercise, you'll create, deploy, and test your first Copilot by using a topic that you planned in the Plan your first Copilot module. If you didn't complete that module, you can use the sample material in the Microsoft Excel file provided as part of the exercise materials.
Task: Sign in to create a Copilot
Your first task is to sign in so that you can create your Copilot.
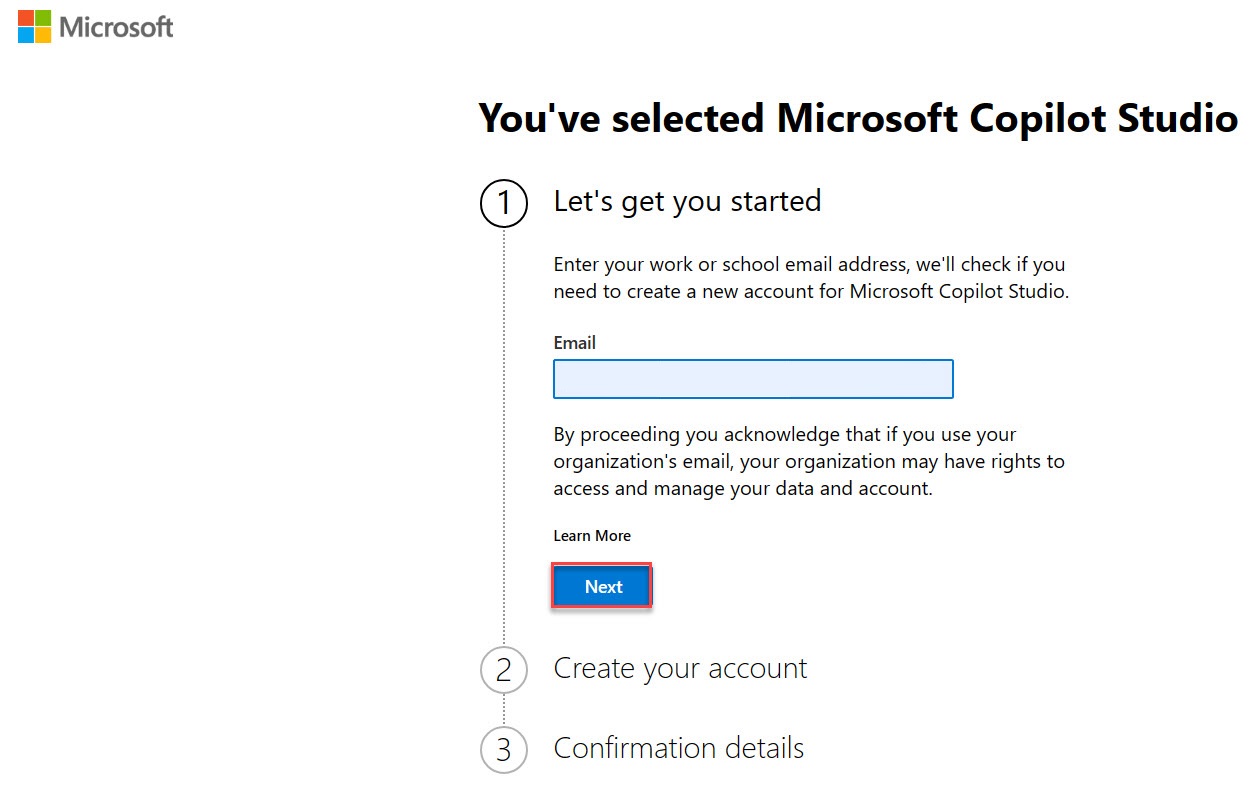
Go to https://copilotstudio.microsoft.com/ and type in your email that you'll use to build the Copilot. Sign in with your work, school, or developer account if you aren't working with an instructor.
Note
Your account might already have been set up. If screens similar to the following images don't show, you can skip to step 7.
Select Next.
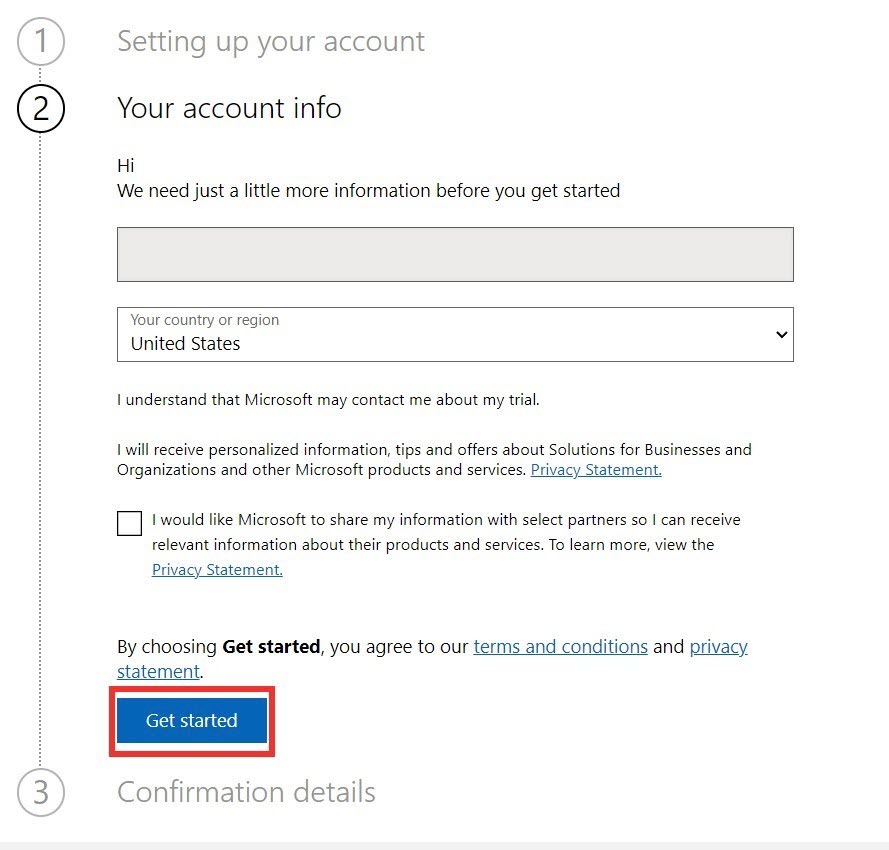
Select Get started.
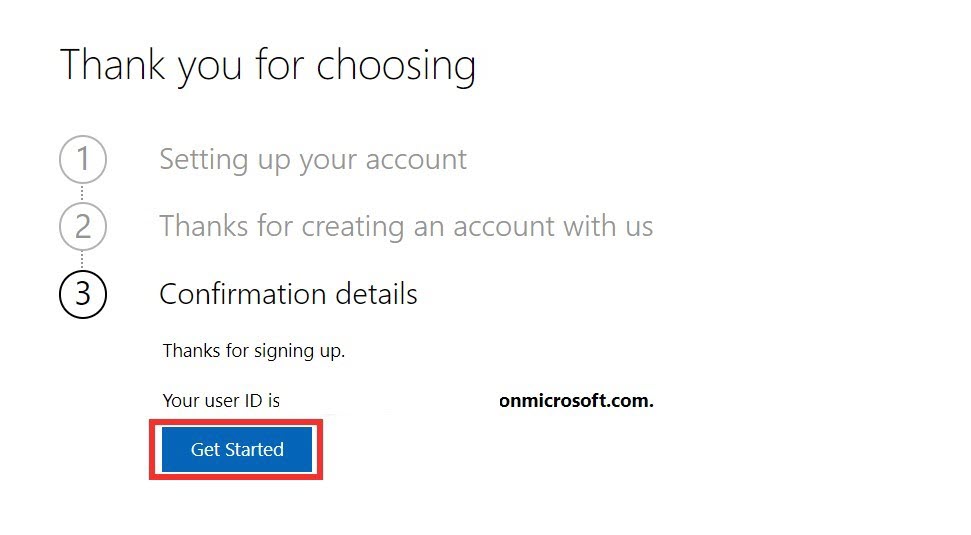
Select Get started under Confirmation details.
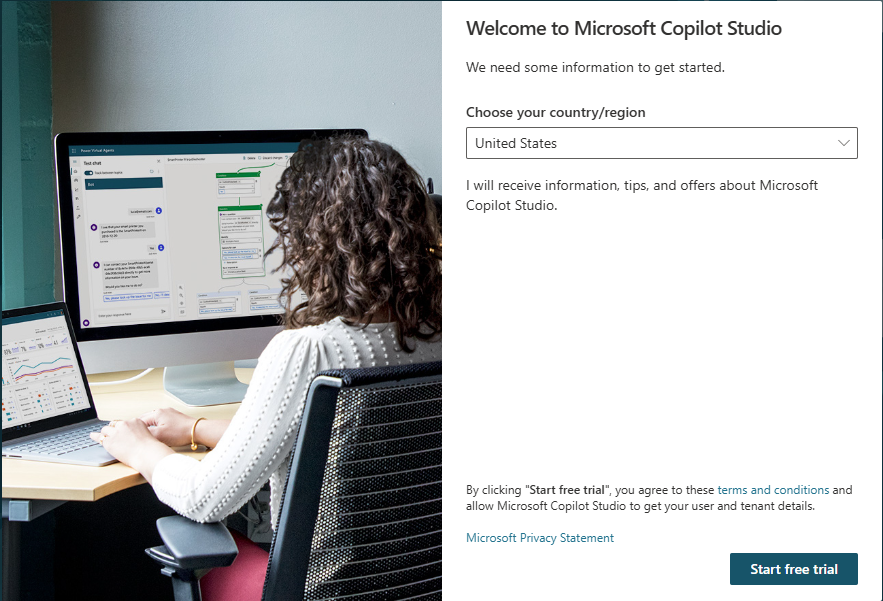
Select your country/region and then select Start free trial.
Important
Skip to here if your account was already set up.
You should be redirected to
copilotstudio.microsoft.com. If not, go to the maker environment URL for Microsoft Copilot Studio:copilotstudio.microsoft.com. An Environment selector box is located in the upper-right corner. An environment is where your organization stores, manages, and shares the Copilot, business data, apps, and Microsoft Power Automate flows. You can select the Environment selector button to display the Copilots within that environment.
If you're working with an instructor, confirm now with your instructor the environment to use, if you didn't already do so. If you aren't working with an instructor, and you're using your own environment, for the purposes of this course, you can use the default environment. Alternatively, if your tenant allows, an admin can create your own environment to use in
admin.powerplatform.com.For more information, see Manage default environment.
Once you're in the correct environment, select Create from the left menu, and choose New copilot.

This screen allows you to set up your Copilot by describing what you want to a conversational AI. For now, select Skip to configure in the top right so we can name and create our first Copilot.
Name your Copilot
User 1 Contoso Customer Service, choose your preferred language, and select the Create button at the top right of the screen.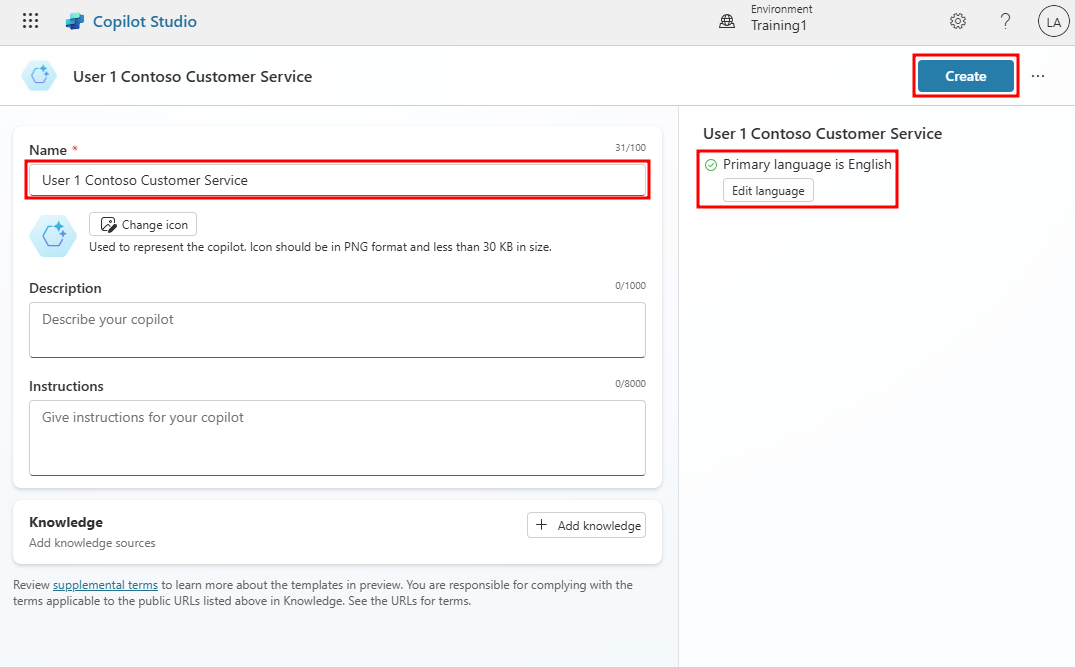
Note
After you've selected Create, the process of creating the first Copilot within a new environment can take up to 15 minutes. Subsequent Copilots are created much faster.
Note
After creating the Copilot, a pop-up window may appear showing new features in Copilot Studio. To continue past this, click Next three times and Done at the end.
After you create your Copilot, it appears in the list under the Copilots menu in the left navigation bar.
Tip
If you've created a Copilot in this environment before, to create another, select the Copilots menu item on the navigation bar and then select New Copilot.
Within the Copilots menu, you can select from the Copilots that are available to you. Selecting the ellipses next to a Copilot brings up drop-down with controls like open the Copilot, export the Copilot, and delete. You can also select the name of the Copilot, which opens it.


Task: Take a quick tour of the user interface
Microsoft Copilot Studio makes it easier for you to build basic to advanced Copilots. The following section reviews the main pages of the maker experience for Microsoft Copilot Studio.
Because the Copilot area was explained in the preceding section, the ensuing section will cover the main options that are available after you select a Copilot.

Overview
- Displays your home page, including a summary of the Copilot's Details, Knowledge, Topics, Actions, and Publish status.
Knowledge
- Allows you to provide a knowledge base as grounding data for your Copilot that enables it to pull information from specific data you provide.
Topics
- Provides a list of all the Topics available to your Copilot. These Topics are conversation paths you develop to determine how your Copilot responds to specific scenarios.
Actions
- Allows you to build Actions that your Copilot can complete. These actions are similar to Power Automate flows like automating a database entry.
Analytics
- Provides view metrics to monitor how well your Copilot is operating. The various Analytics sections include: Customer satisfaction, Sessions, Billing, and Boost conversations.
Channels
- Allows you to publish and connect your Copilot with various websites, web-services, and integrations into your own website.