Exercise - Create your first topic
In this exercise, you'll create your first topic. This topic is a simple demo exercise that gives your agent functionality before publishing to a demo website in the next unit.
Section 1: Create a new topic manually
In this first task, you manually create a new topic by following these steps:
Select Topics from the top menu within your recently created agent.
Select the + Add a topic button at the top of the screen and choose the From blank option.
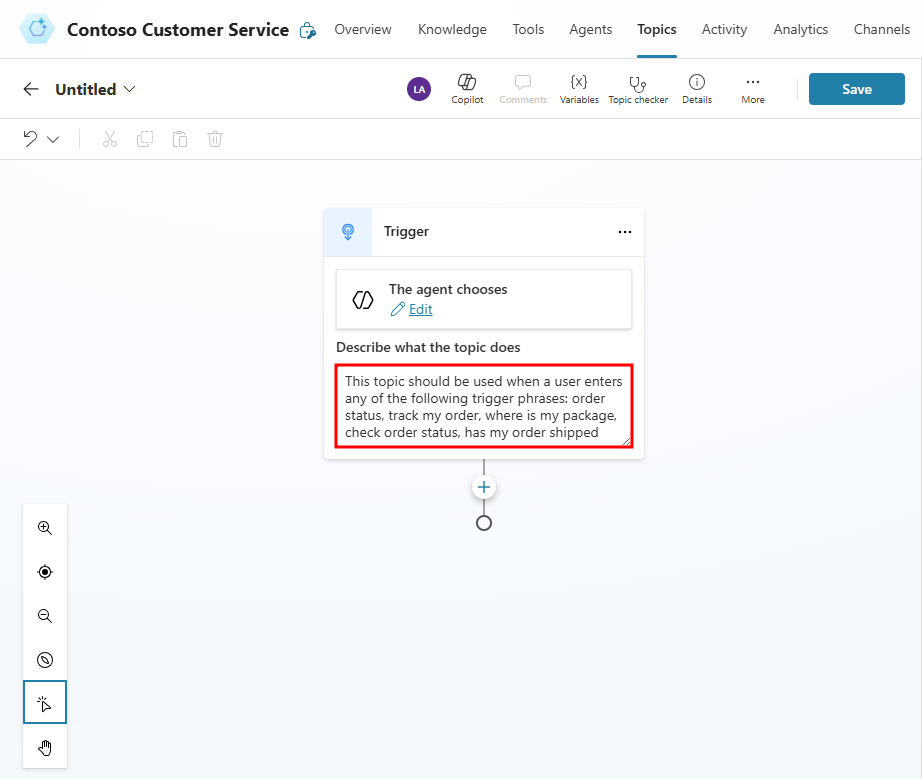
In the Trigger node of the newly created topic, add the following text to the text box under Describe what the topic does:
This topic should be used when a user enters any of the following trigger phrases: order status, track my order, where is my package, check order status, has my order shipped.This is the topic description that your agent will use to decide when to use this specific topic. All newly created agents default to generative orchestration, which means the agent decides when to use specific topics based on the topic's description in its trigger node.
Select the Details button within the top right corner to open the Topic Details pane. Rename your topic to
Check Order Status, and then select Save.


Section 2: Review the topic UI
Now that you created your first topic, though it has no content beyond the trigger description, you can explore the authoring user interface (UI) to become more familiar with it.

Topic title - The name of the topic that you're currently creating, which is visible on the Topics page.
Productivity bar - Where you have access to productivity tools, such as copy and paste.
Authoring canvas controls - You can use these controls to navigate the authoring canvas, which can become large for extensive topics. The included controls are zoom, grab, and selection.
Nodes - This section shows nodes, which are referred to as the items within an authoring canvas in Microsoft Copilot Studio. Often, nodes have a type that drives what options are available and required. Examples include the message node, question node, or topic node.
Copilot, Comments, Variables, Topic checker, Details, and more - This area includes Copilot, which enables you to utilize Microsoft Copilot to help build your agents, and Comments where you can collaborate with multiple users or take notes on the agent's production. The Variables tab helps you keep track of all known variables used in your topic. Topic checker is a debugging tool you can run to test if your topic has any bugs or errors. Details allows you to edit the name, description, and status of your topic, and create or observe the input and output variables of the selected topic. Under the More tab, you can find the Analytics section that displays the statistics on engagement with your agent, and the code editor, where you can interact with your topic in a lower-level language as opposed to the graphical interface.
Authoring canvas - The area where you'd create your topic. This area is referred to as a canvas due to the empty space that it gives you to build and connect nodes. It might look empty to begin with, but when you start adding nodes, such as conditions, the canvas fills up quickly.
Section 3: Question nodes
As an agent author, you should use the Question node when you're expecting a response from the user and you want to do something based on that information. The user response is stored in a variable, and question nodes can also use entities and slot filling features, both concepts that are covered in the next module. The Question node also has access to authoring tools like rich text, speech authoring, images, videos, and adaptive cards.
In the topic that you have open from the previous task, select the + symbol below the trigger node in the canvas, then select Ask a question to add a new Question node.
Enter
What would you like to do with your order?in the question field, then set the Identify value to User's entire response. This node sends the user a question after the topic is triggered.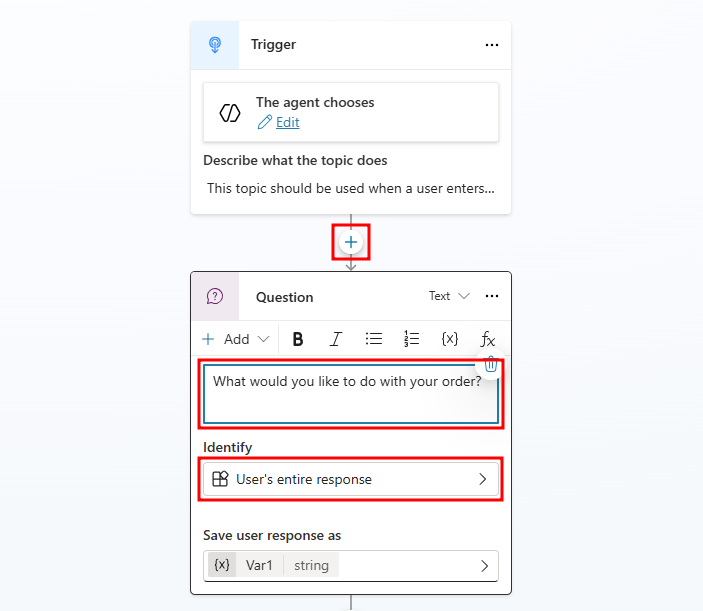

Section 4: Message nodes
You can use the Message node to display a message to the user. This message can be simple based on the topic of the conversation. In direct contrast to the Question node, the Message node doesn't expect or store an answer from the user. The Message node has rich text options that you can display in text. You can also use variables within message nodes in the body of text displayed to the user, which is dynamic based on the data stored within them. This capability allows messages to be more personal, such as Hello {name}, I can get those order details for you, one moment. Variables can also store data to perform automation or calculations on them. Later exercises cover variables more in depth.

To add another node, select the + button below the Question node. Then, select Send a message. Enter a message that acknowledges the customer's question, such as
Thank you for your question!.
End the conversation for the customer in this demo scenario. Select the Add node button below the message node within the authoring canvas. Hover over the Topic Management option, and then select End conversation to end the conversation.

Then, within the top-right corner of the screen, select the Save button.


Other ways to end a conversation exist, such as directing to a feedback topic or transferring the conversation, but they aren't covered in this exercise.
Section 6: Use Copilot in Microsoft Copilot Studio to create a topic
Creating topics in Microsoft Copilot Studio is more effortless than before. Now, you can create a topic in Microsoft Copilot Studio by using natural language to describe what you want the topic to do. With the Create from description with Copilot feature, you can automatically build a topic, reducing some manual steps that you experienced from the first task in this unit. In this task, you'll learn how simple and quick creating a topic with Copilot can be.
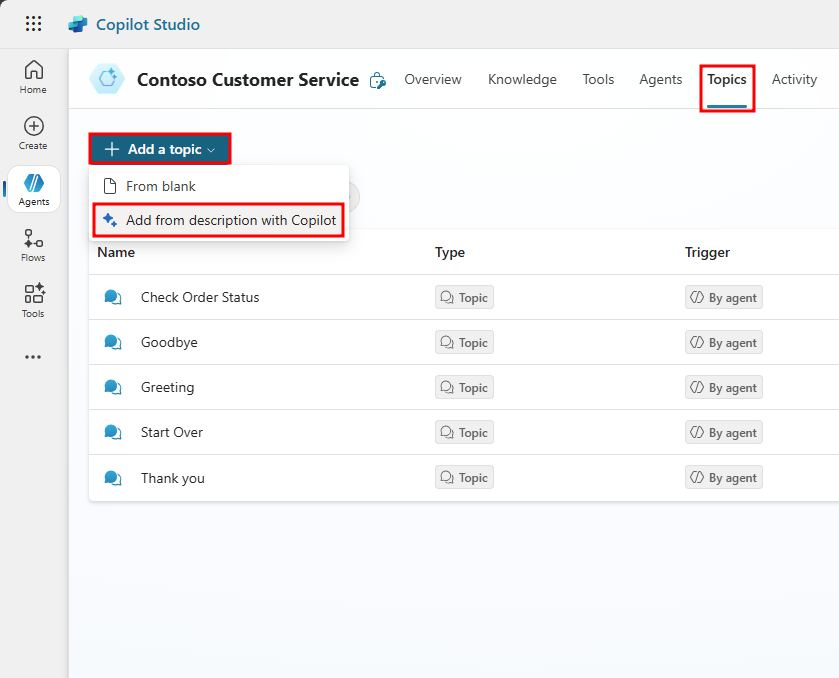
Select Topics from the top navigation menu to create a new topic.
Select the + Add a topic button and choose Add from description with Copilot.
A new window appears, asking you to Name your topic and enter a description in the Create a topic to... space.
Enter
Order Statusin the Name your topic field.In the Create a topic to... space, enter
Create a topic that provides the status of an order for a customer, asking them their name, order number, and when it was ordered.Select Create.

Copilot creates your topic, including the trigger phrases, question nodes, entity selection, variable naming, and message node confirmation.
Select the Copilot button in the upper part of the authoring canvas (if the Edit with Copilot panel isn't open already).
Within the Edit with Copilot panel, in the field What do you want to do?, enter
Add a question to ask the user to choose their preferred contact method, choosing from email, phone, or SMS. Then, select Update.
Copilot automatically adds a question node, which both asks the customer for their contact method, and stores their choice in a variable.


The Copilot feature in Microsoft Copilot Studio drastically reduces authoring time, allowing you to create and edit topics by using natural language. Additionally, the Edit with Copilot panel shows what updates have been created, and it provides suggestions for what you can update in your topic.
To complete the exercise, exit the topic without saving. If you accidentally saved the topic, turn off the topic by switching the Status toggle to Off, as shown in the following screenshot.

Section 7: Test your agent
Now, you will test the Check Order Status topic that you created in the first task.
Select the Test button in the top right corner of the screen to open the testing panel.

The Conversation Start message appears, and your agent starts a conversation. In response, enter
Order statusto trigger the Check Order Status topic you previously created. Notice the question node you added gets sent along with the activity map displaying the Check Order Status topic is currently in progress.
Note
If you previously had a conversation open in the test pane, you will need to select the circle icon at the top of the chat window to refresh the chat and start a new conversation.


Your message appears, and your agent responds as instructed by the topic designed in the previous steps. Now, the topic is working as it should, and it's time to publish your agent.