Exercise - Deploy a web app to Azure
In a previous exercise, you created a dynamic web application using Eclipse. you tested the web app locally using an Apache Tomcat server that was running on your computer.
In this exercise, you'll use the Azure Toolkit for Eclipse to create a new Azure App Service, deploy your web app to Azure, and then test your web app. This exercise uses Eclipse on your desktop computer. However, the Azure Toolkit will create the App Service and App Service plan in an Azure sandbox account, so the results should be the same as if you were running the web app locally.
Sign in to Azure from Eclipse
Start Eclipse if it isn't already running, and open the SampleWebApp project.
In the Azure Toolkit for Eclipse toolbar, click Show Azure Explorer.

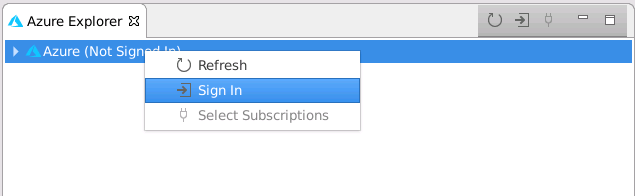
In the Azure Explorer window, right-click the Azure icon, and then click Sign in.
On the Azure Sign In page, click Device Login, and then click Sign in.

On the Azure Device Login window, click Copy&Open. This action copies the device code displayed in the window to the clipboard.

A web browser window will open. At the Enter code prompt, paste the device code you copied to the clipboard, and then click Next

When prompted, sign in to Azure with the same account that you used to create the Azure sandbox.
In the Your Subscriptions page, select the Concierge Subscription. This is a subscription created specifically for the sandbox.

Deploy the web app to your Azure subscription
In the Project Explorer pane, right-click SampleWebApp, select Azure, and then click Publish as Azure Web App.

In the Deploy Web App window, click Create to create a new Azure App Service.

In the Create App Service window, specify the following values, and then click Create:
Note
The web app must have a unique name. We suggest using something like [your name or initials]samplewebapp. Use this name wherever you see [your-webapp-name] in this exercise.
Property Value Name [your-webapp-name] Subscription Concierge Subscription Runtime Linux Linux Runtime TOMCAT 8.5-java-11 App service plan Select Create new and accept the default name and location, but change the Pricing Tier to Free_F1 for this exercise. Resource Group [sandbox resource group name] App Settings Leave empty 
In the Deploy Web App window, verify that your new app service is selected, and then click Deploy to deploy your web app to Azure.

The Azure Activity Log window will appear, showing the status of the deployment operation.

Wait until the message in the Progress column changes to Published before continuing.
Test the web app in Azure
In the Azure Explorer window, right-click Web Apps, and then click Refresh.
Expand Web Apps. Verify that your new web app is listed.

Right-click the web app, and then click Open In Browser.

In the web browser, verify that the web app displays similar results to when it ran locally. The main difference will be the IP address, which will be the real IP address of your computer rather than 127.0.0.1 (localhost).

Click the refresh button in the web browser, and verify that the time updates.
Close the web browser and return to Eclipse.
Congratulations! You've used the Azure Toolkit for Eclipse to create an App Service in Azure, deploy a web app to your app service, and tested your web app.