Exercise - Send an email when virtual machines change
You're ready to perform an action based on your logic app receiving a published event.
In the previous exercise, you completed the initial setup of the logic app. Now, you now need the logic app to send an email notification that contains details whenever any change occurs to any virtual machine in your resource group.
In this exercise, you'll learn how to set up a condition that enables the logic app to inspect a published event, respond with a logic app action, and send an email.
Add a condition
First, let's create a condition that runs the logic app whenever a certain event is published.
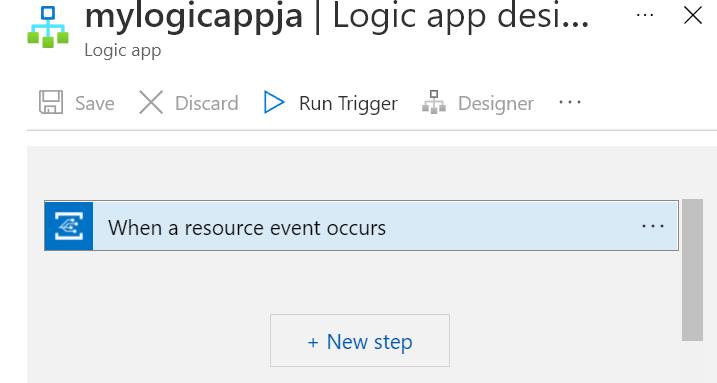
In the Azure portal, the Logic app you created should be active. If not, select Home, and under Recent resources, select the Logic app you just created.
In the Logic app menu, under Development Tools, select Logic app designer. The Logic app designer pane for your logic app appears.
In the Event Grid under When a resource event occurs, select New step. The Choose an operation pane appears.
In the Search connectors and actions search box, enter condition as your filter, and the press Enter. From the results, select Control. The control workflow dialog box appears.
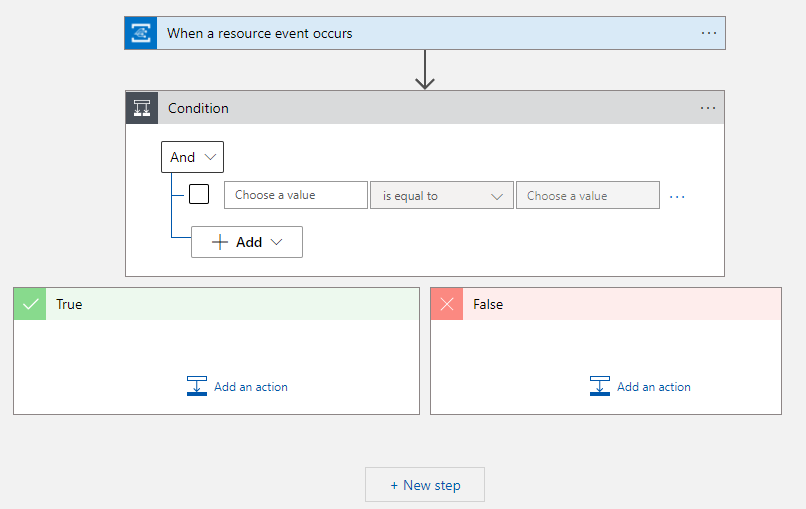
On the Actions tab, select Condition Control.

The Logic app designer adds an empty condition to your workflow, including action paths to follow, based on a true or false condition.
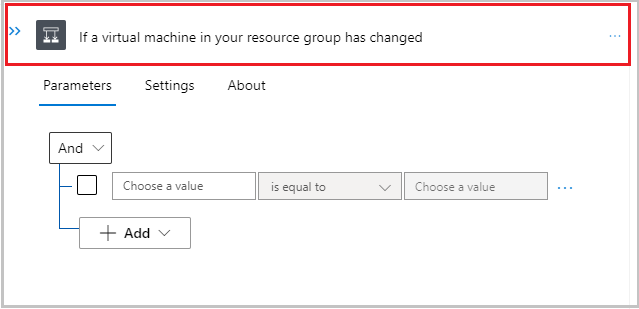
In the Condition title bar, select the ellipsis icon and in the context menu, select Rename. Enter If a virtual machine in your resource group has changed.
In the condition work area, select Choose a value, then select the Expression tab.
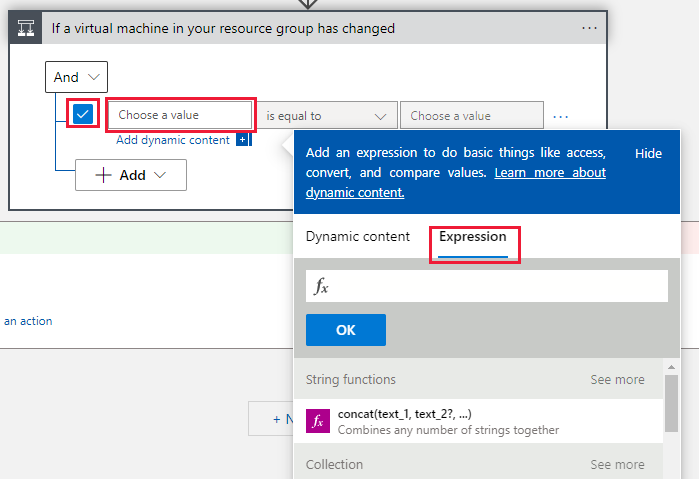
In the function field, enter the value
triggerBody()?['data']['operationName']and select OK.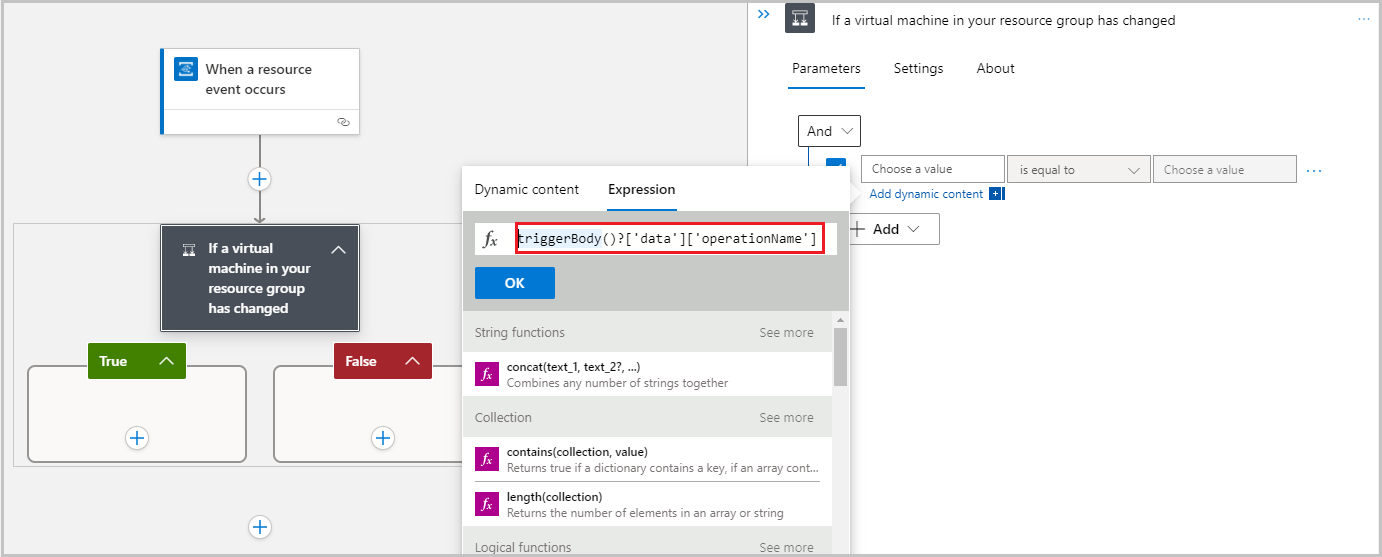
Leave the middle box as is equal to, then select the remaining Choose a value box and enter the value
Microsoft.Compute/virtualMachines/write.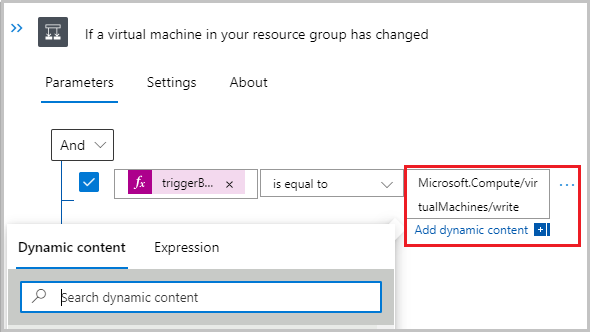
In the Logic app designer command bar, select Save.
Note
In the command bar, select Code view to view the JSON text of the operation you are creating. Select Designer to return to the editor.
email notification
Now we can add an email action based on the logic app being triggered. The following steps use Office 365 Outlook. If you don't have an Office 365 account, you can also use Outlook.com. The configuration steps for email programs may differ, so you may need to adjust accordingly.
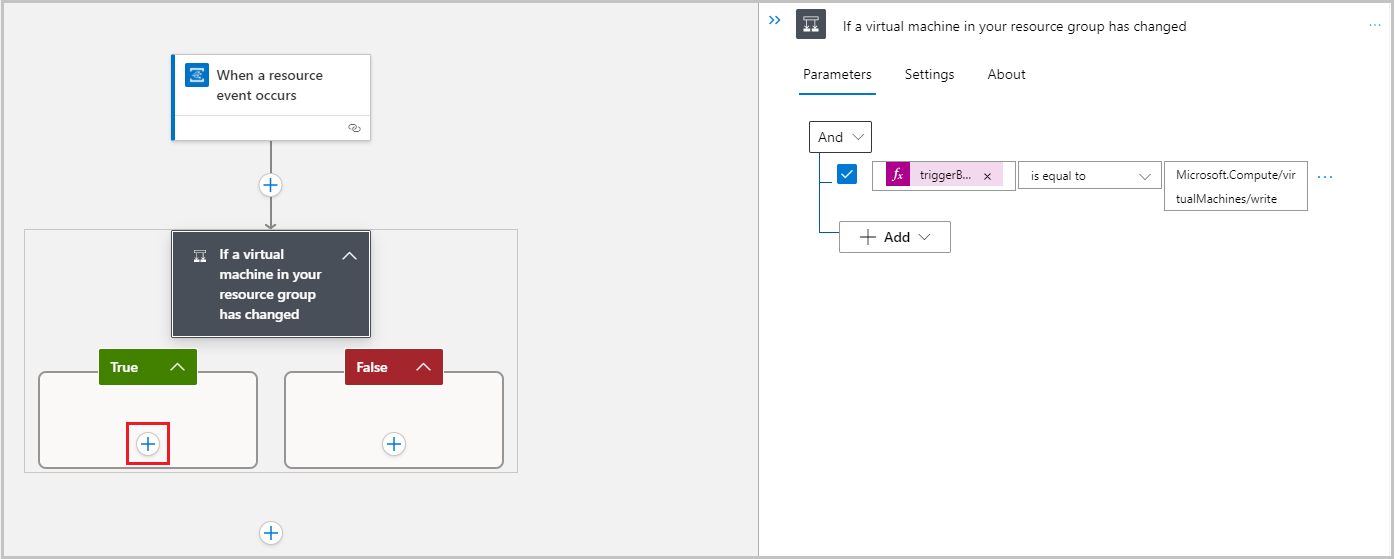
In your Logic app's Logic app designer pane, in the When a resource event occurs condition's True box, select Add an action. The Choose an operation pane appears.
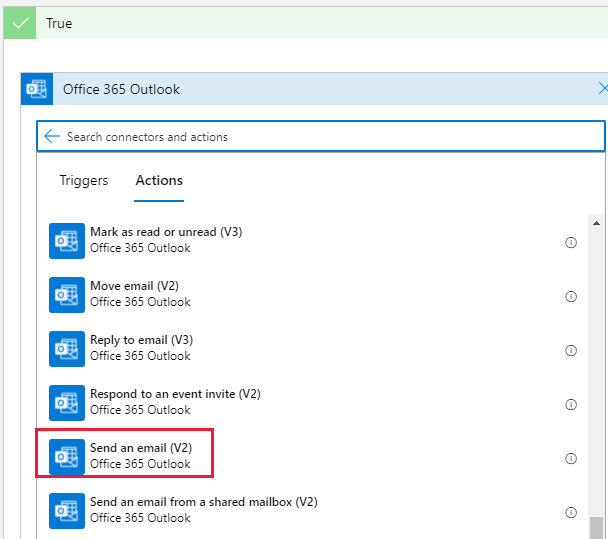
In the Search connectors and actions search box, enter send an email as your filter, then select the Office 365 Outlook provider.
From the results list, scroll down to and select Send an email (V2).
If you don't already have a connection for your email provider, you might be prompted to sign in to your email account. Select Sign in and allow the authorization to complete.
On the action's title bar, select the ellipsis, select Rename, and rename the Send an email (V2) to action to Send email when virtual machine updates.
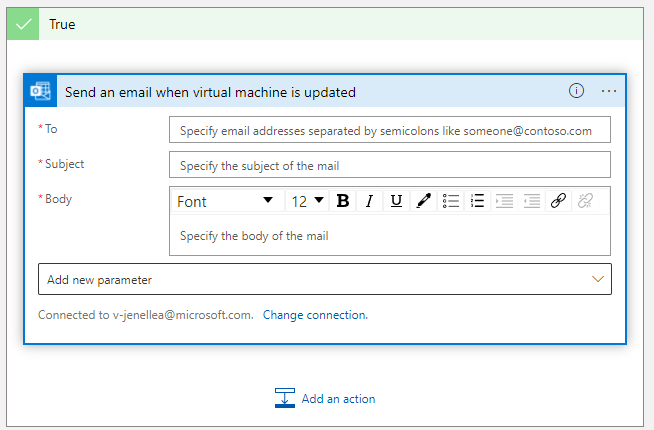
In the To field, add your own email address to test the workflow in the next section.
In the Subject field, type Resource updated. You can also drag fields from the Dynamic content window to this field.
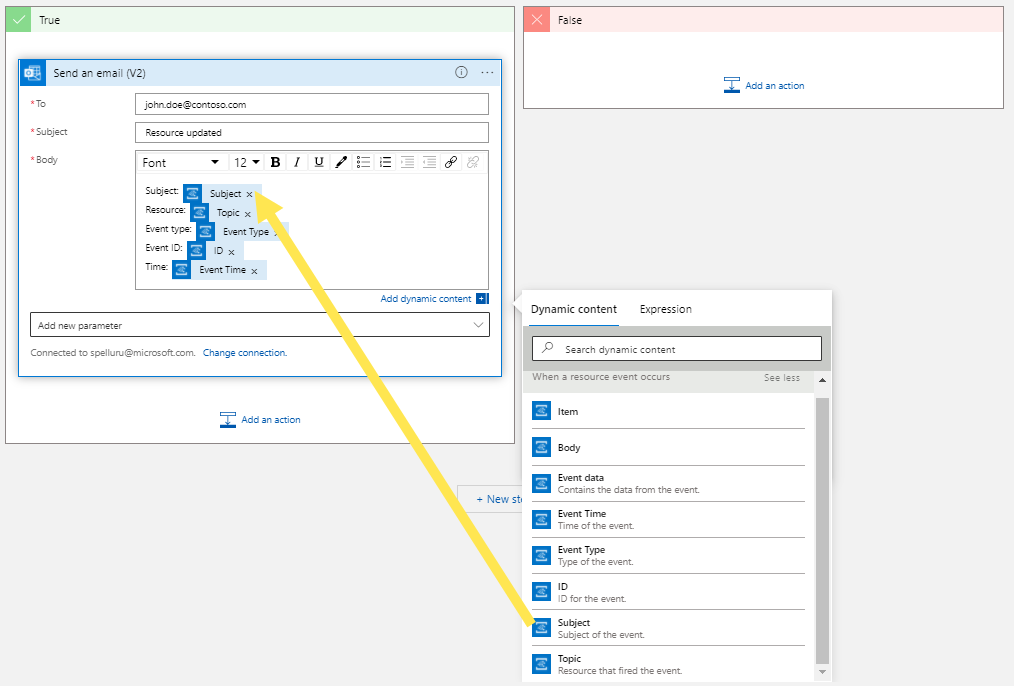
Click in the Body field, type Subject: into the Dynamic content window, then select Subject from the Dynamic Content pop-up window.
If you see the following message in the Dynamic content window, select See more to see all the fields.
We can't find any outputs to match this input format. Select See more to see all outputs from previous actions.Repeat these steps to build the Body field as show in the following image.
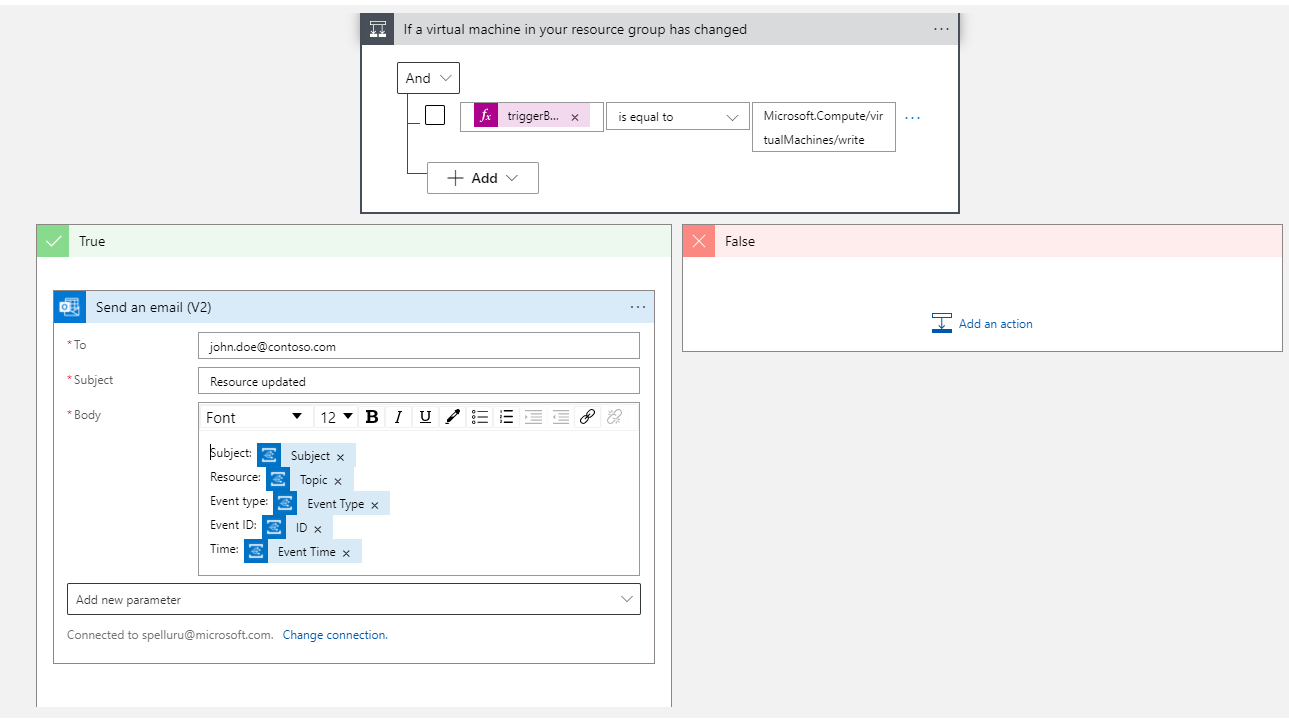
Your email action should look similar to the following. If you selected a different email account type (Outlook.com or Gmail), your inputs might differ.
Your finished logic app should look similar to the following screenshot.
In the command bar, select Save to save your logic app.
Test your workflow
You've created and configured a logic app to listen for virtual machine events and send an email notification. Event details are dynamically written into the body of the email.
The final step is to test the complete workflow.
In the search bar at the top of the Azure portal, search for vm1, and select the virtual machine in the results. Your vm1 virtual machine pane appears.
In the left menu pane, under Availability + scale, select Size.
Select a new size of DS2_v2 from the list for the virtual machine, then select Resize.
Select Resize again to confirm.
Wait to be notified that your virtual machine has been resized, allowing time for the email to be generated and processed. After a few minutes, you should receive an email that looks similar to the following:
Subject: /subscriptions/0000000000-0000-0000-0000-0000000000000/resourcegroups/learn-8b04c19e-f5ab-4567-80cb-a4a1e257d6dd/providers/Microsoft.Compute/virtualMachines/vm1
Resource: /subscriptions/0000000000-0000-0000-0000-0000000000000/resourcegroups/learn-8b04c19e-f5ab-4567-80cb-a4a1e257d6dd
Event type: Microsoft.Resources.ResourceWriteSuccess
Event ID: f917484e-eb07-428c-9a54-5c2e819a9eaf
Time: 2021-12-10T03:59:18.7494126Z