Exercise – Set up copilot template for store operations
In this exercise, you assume the role of Oscar and perform the following tasks.
Task - Set up Microsoft Azure Cognitive Search connection
Microsoft Azure Cognitive Search is a cloud service that helps you create a search index from your data sources. As Oscar, you need to connect your data sources to Azure Cognitive Search to turn on the Q&A feature of copilot template for store operations.
To set up this connection, follow these steps:
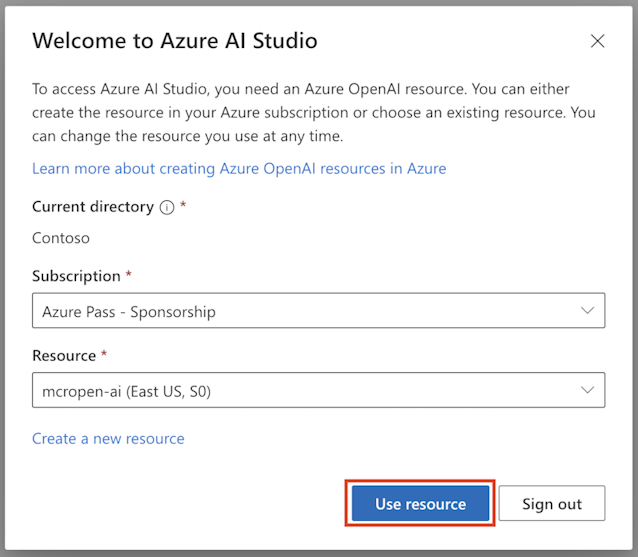
Sign in to Azure OpenAI Studio by using your admin account.
On the Welcome pop-up window, select your subscription and then enter mcropen-ai (East US, S0) as your Resource. Select Use resource.
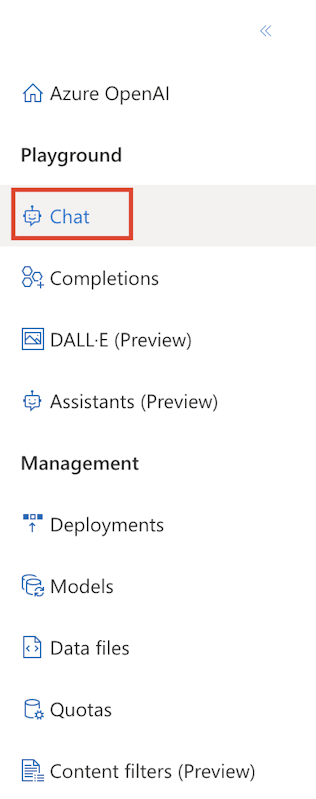
Under Playground, on the right panel, select Chat.
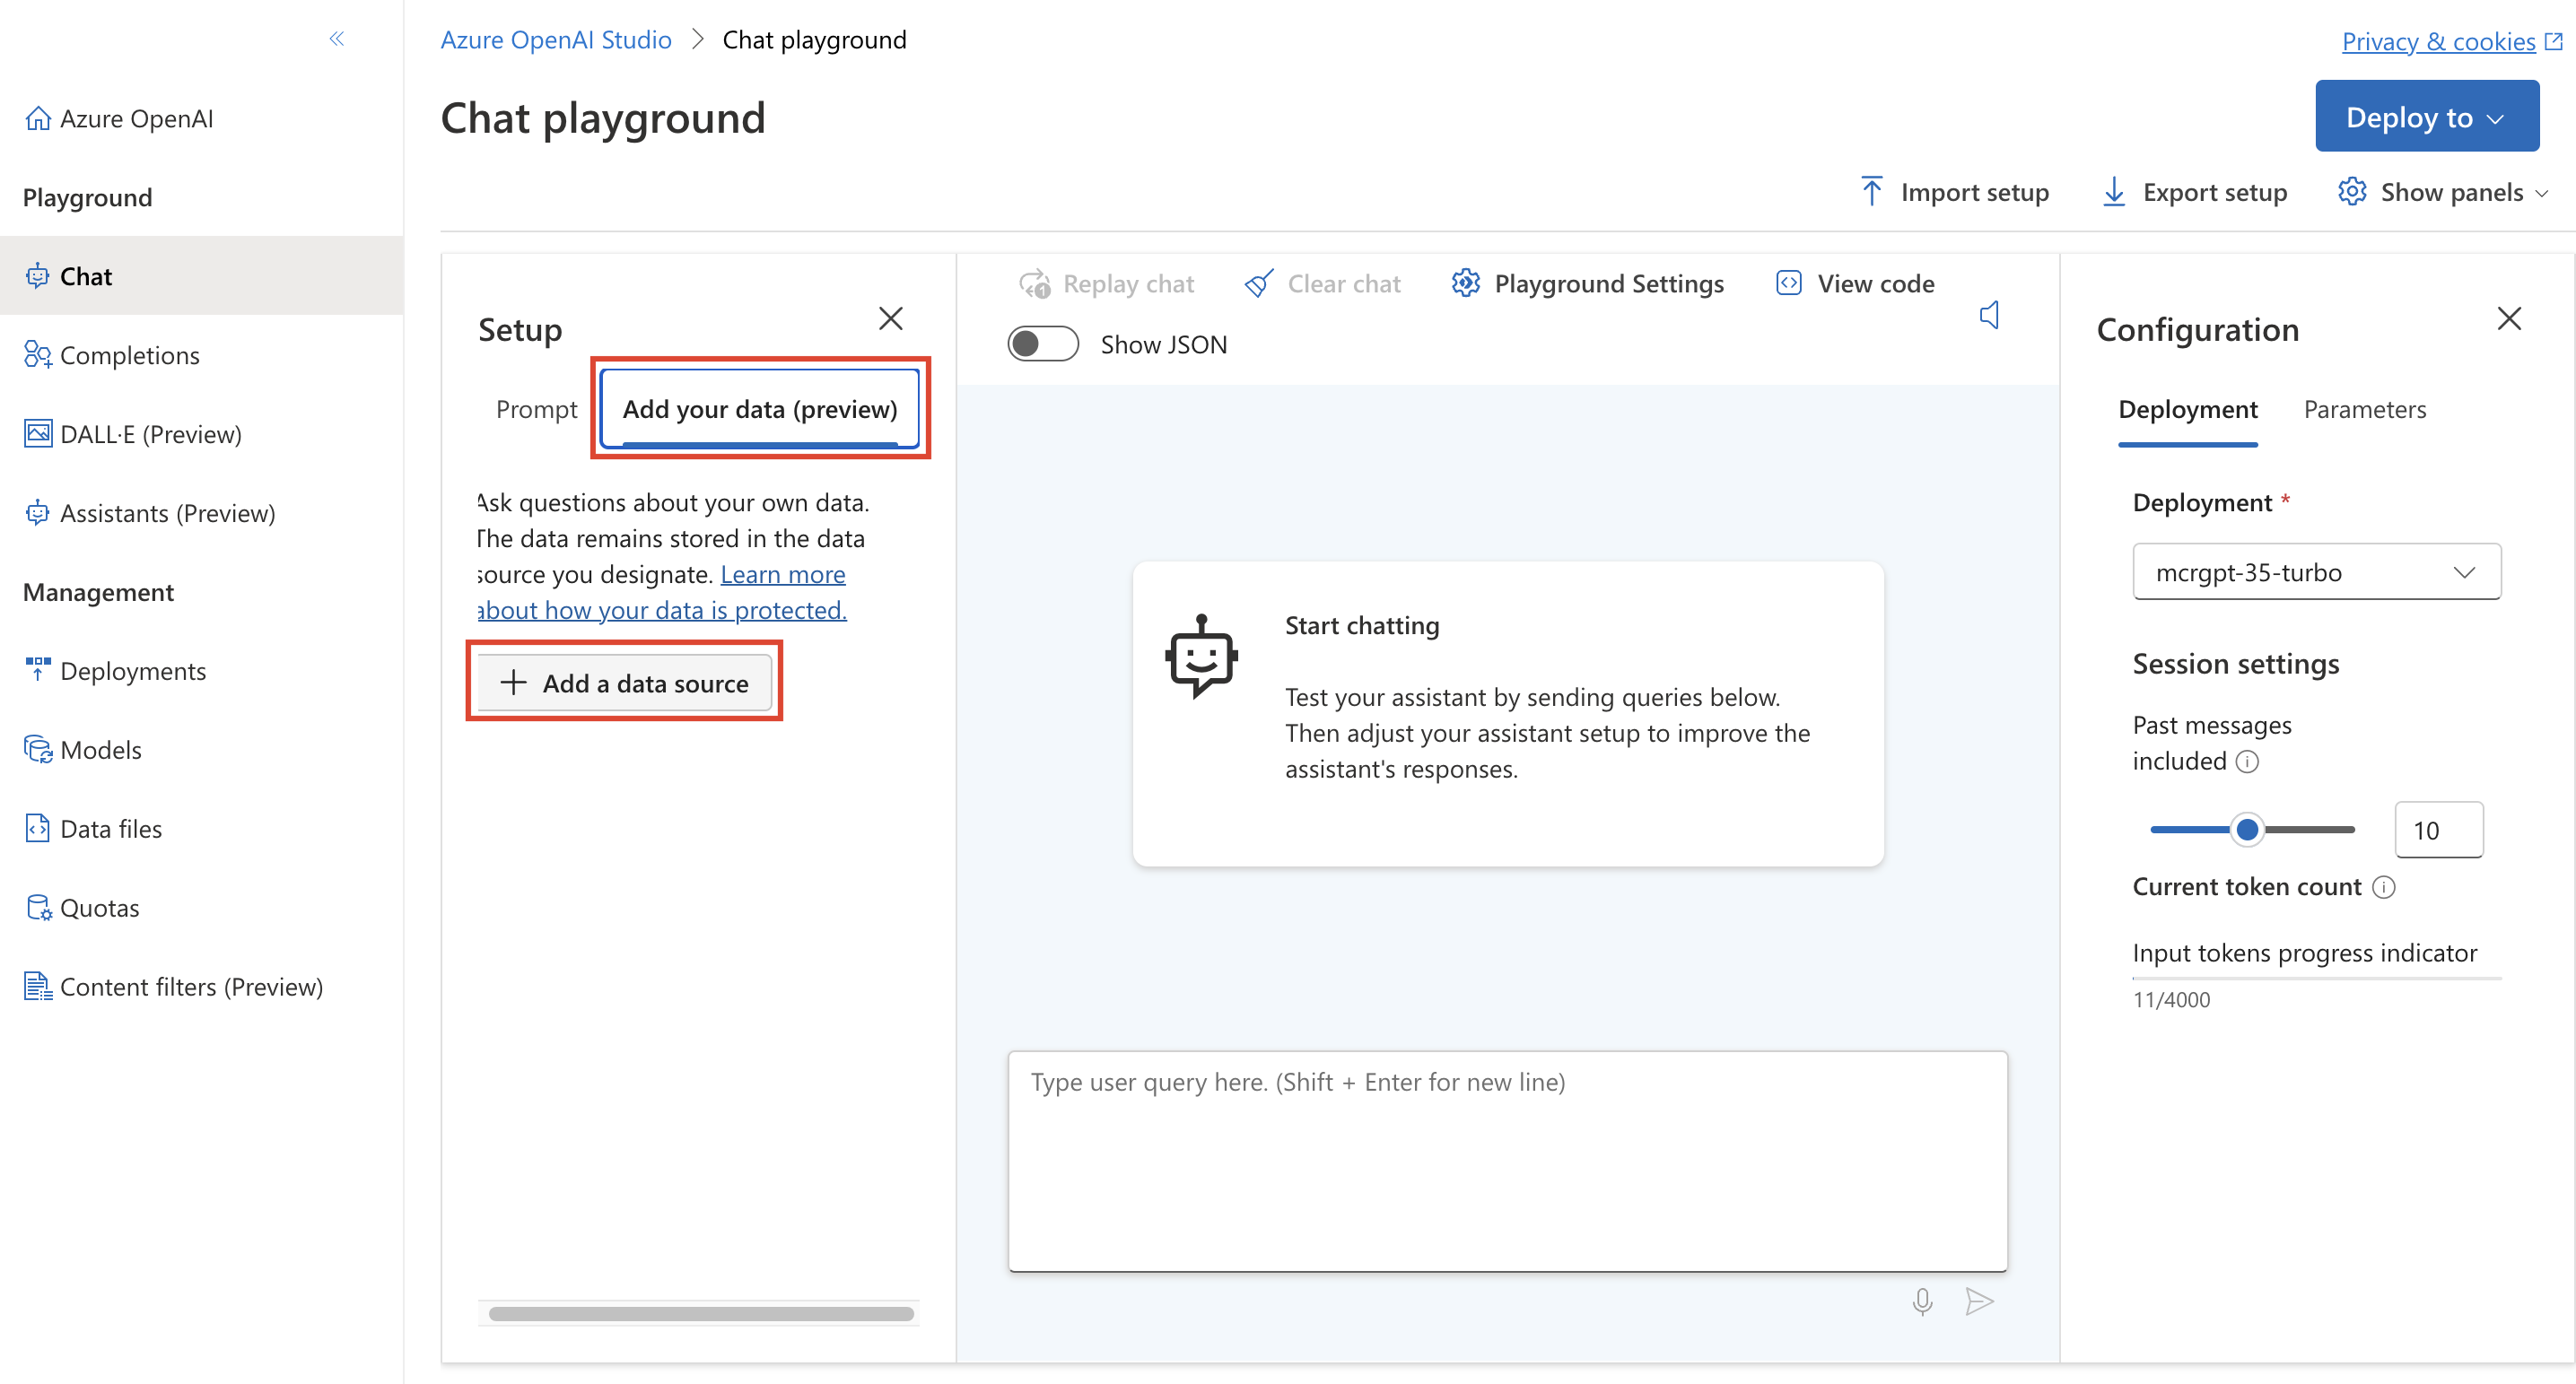
When the Chat playground is open, select the Add your data (preview) tab. Select Add a data source.
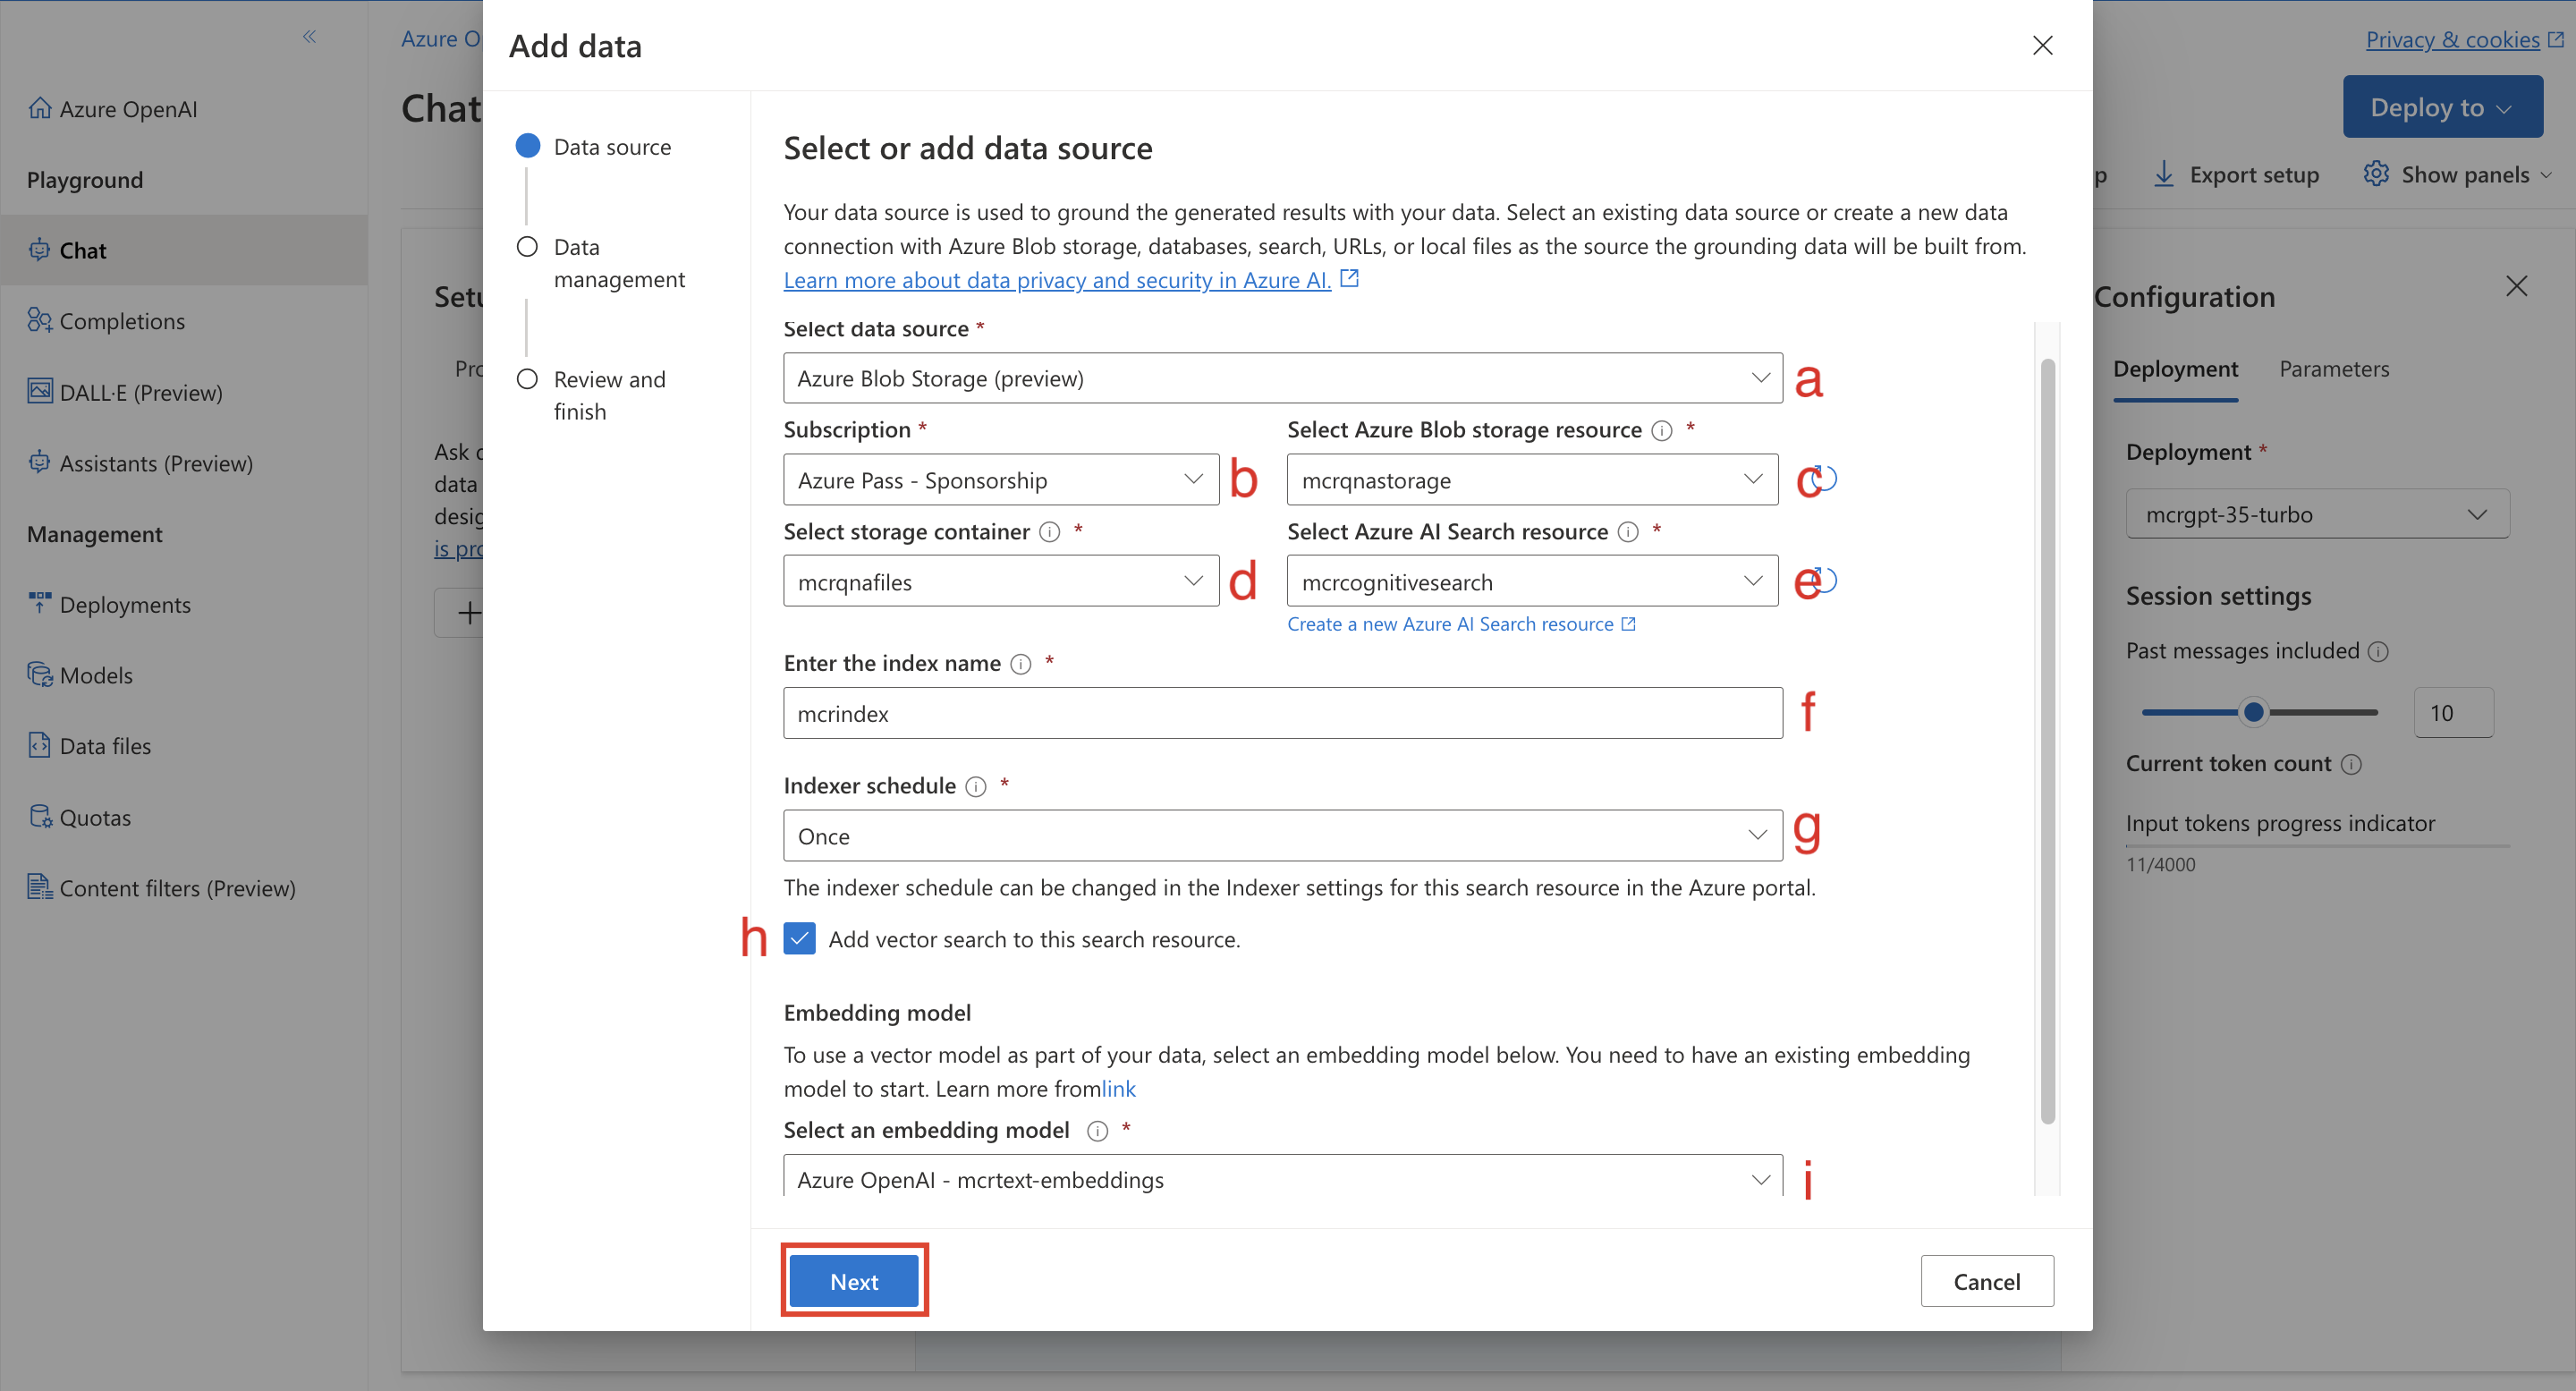
In the Data source workflow, fill in the fields with the following information, select the acknowledgment checkbox, and then select Next.
Select data source - Azure Blob Storage
Subscription - Select your subscription
Select Azure Blob storage resource - mcrqnastorage
Select storage container - mcrqnafiles
Select Azure AI Search resource - mcrcognitivesearch
Enter the index name - mcrindex
Indexer schedule - Once
Select the Add vector search to this resource checkbox to turn on vector embeddings.
Select an embedding model - Azure OpenAI - mcrtext-embeddings
In the Data management workflow, fill in the fields with the following information and then select Next.
Search type - Hybrid + semantic
Acknowledgment checkboxes - Select both checkboxes to give your consent to account usage.

In the Review and finish workflow, select Save and close.
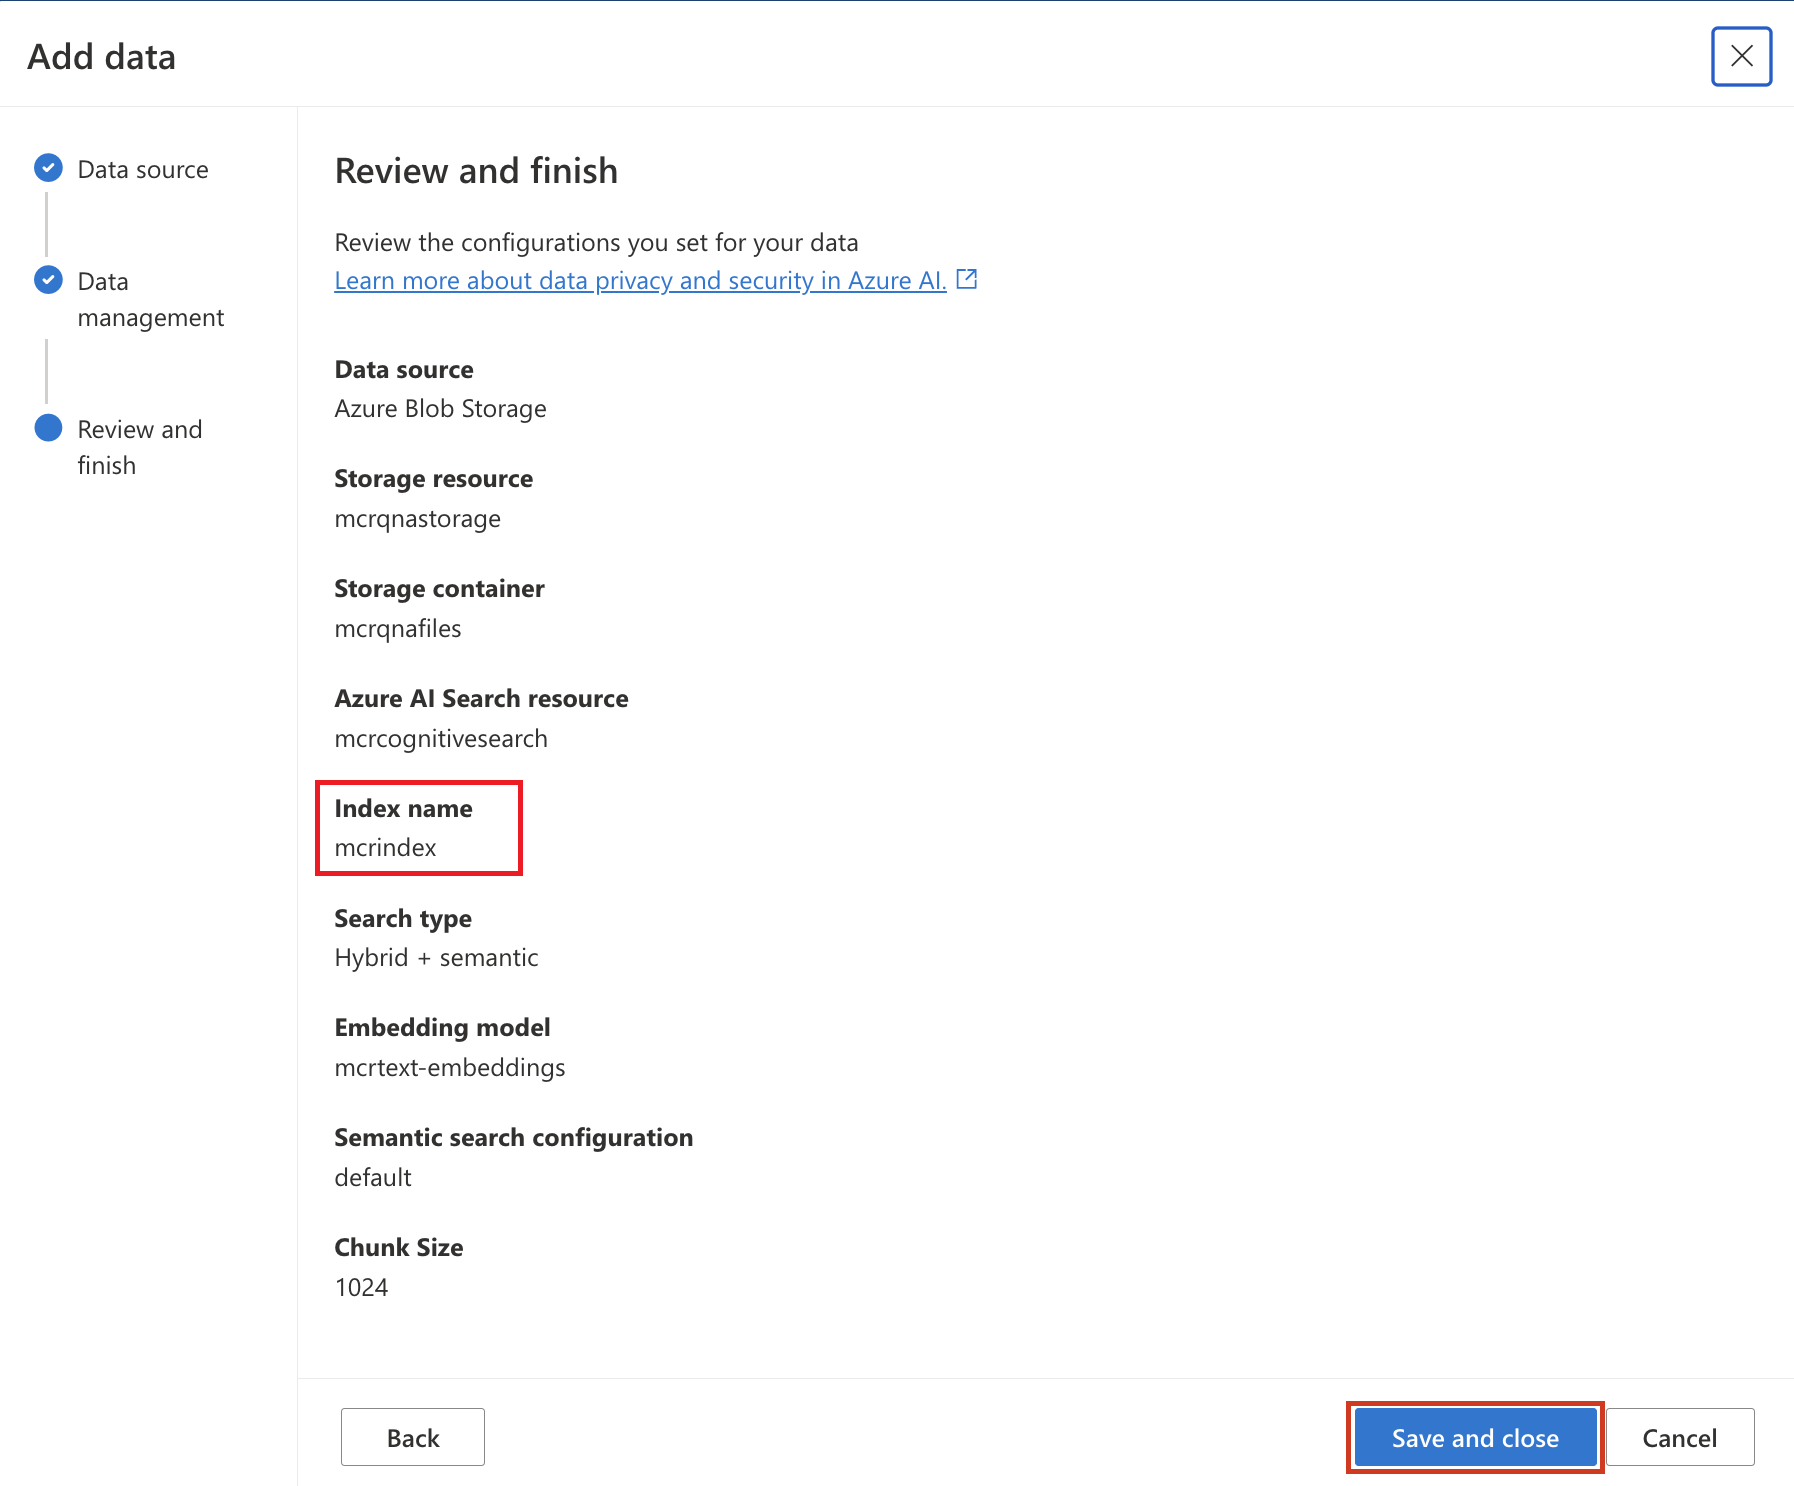
Important
Note the index name. You need this value to link Store Operations Assist with Azure OpenAI accounts.


Data should show as being added on the Add your data (preview) page.

Task - Create an app registration
As Oscar, you create an app registration, which allows you to create an identity for your app and generate a client secret. You need these credentials to authenticate your app with Azure OpenAI.
To create an app registration, follow these steps:
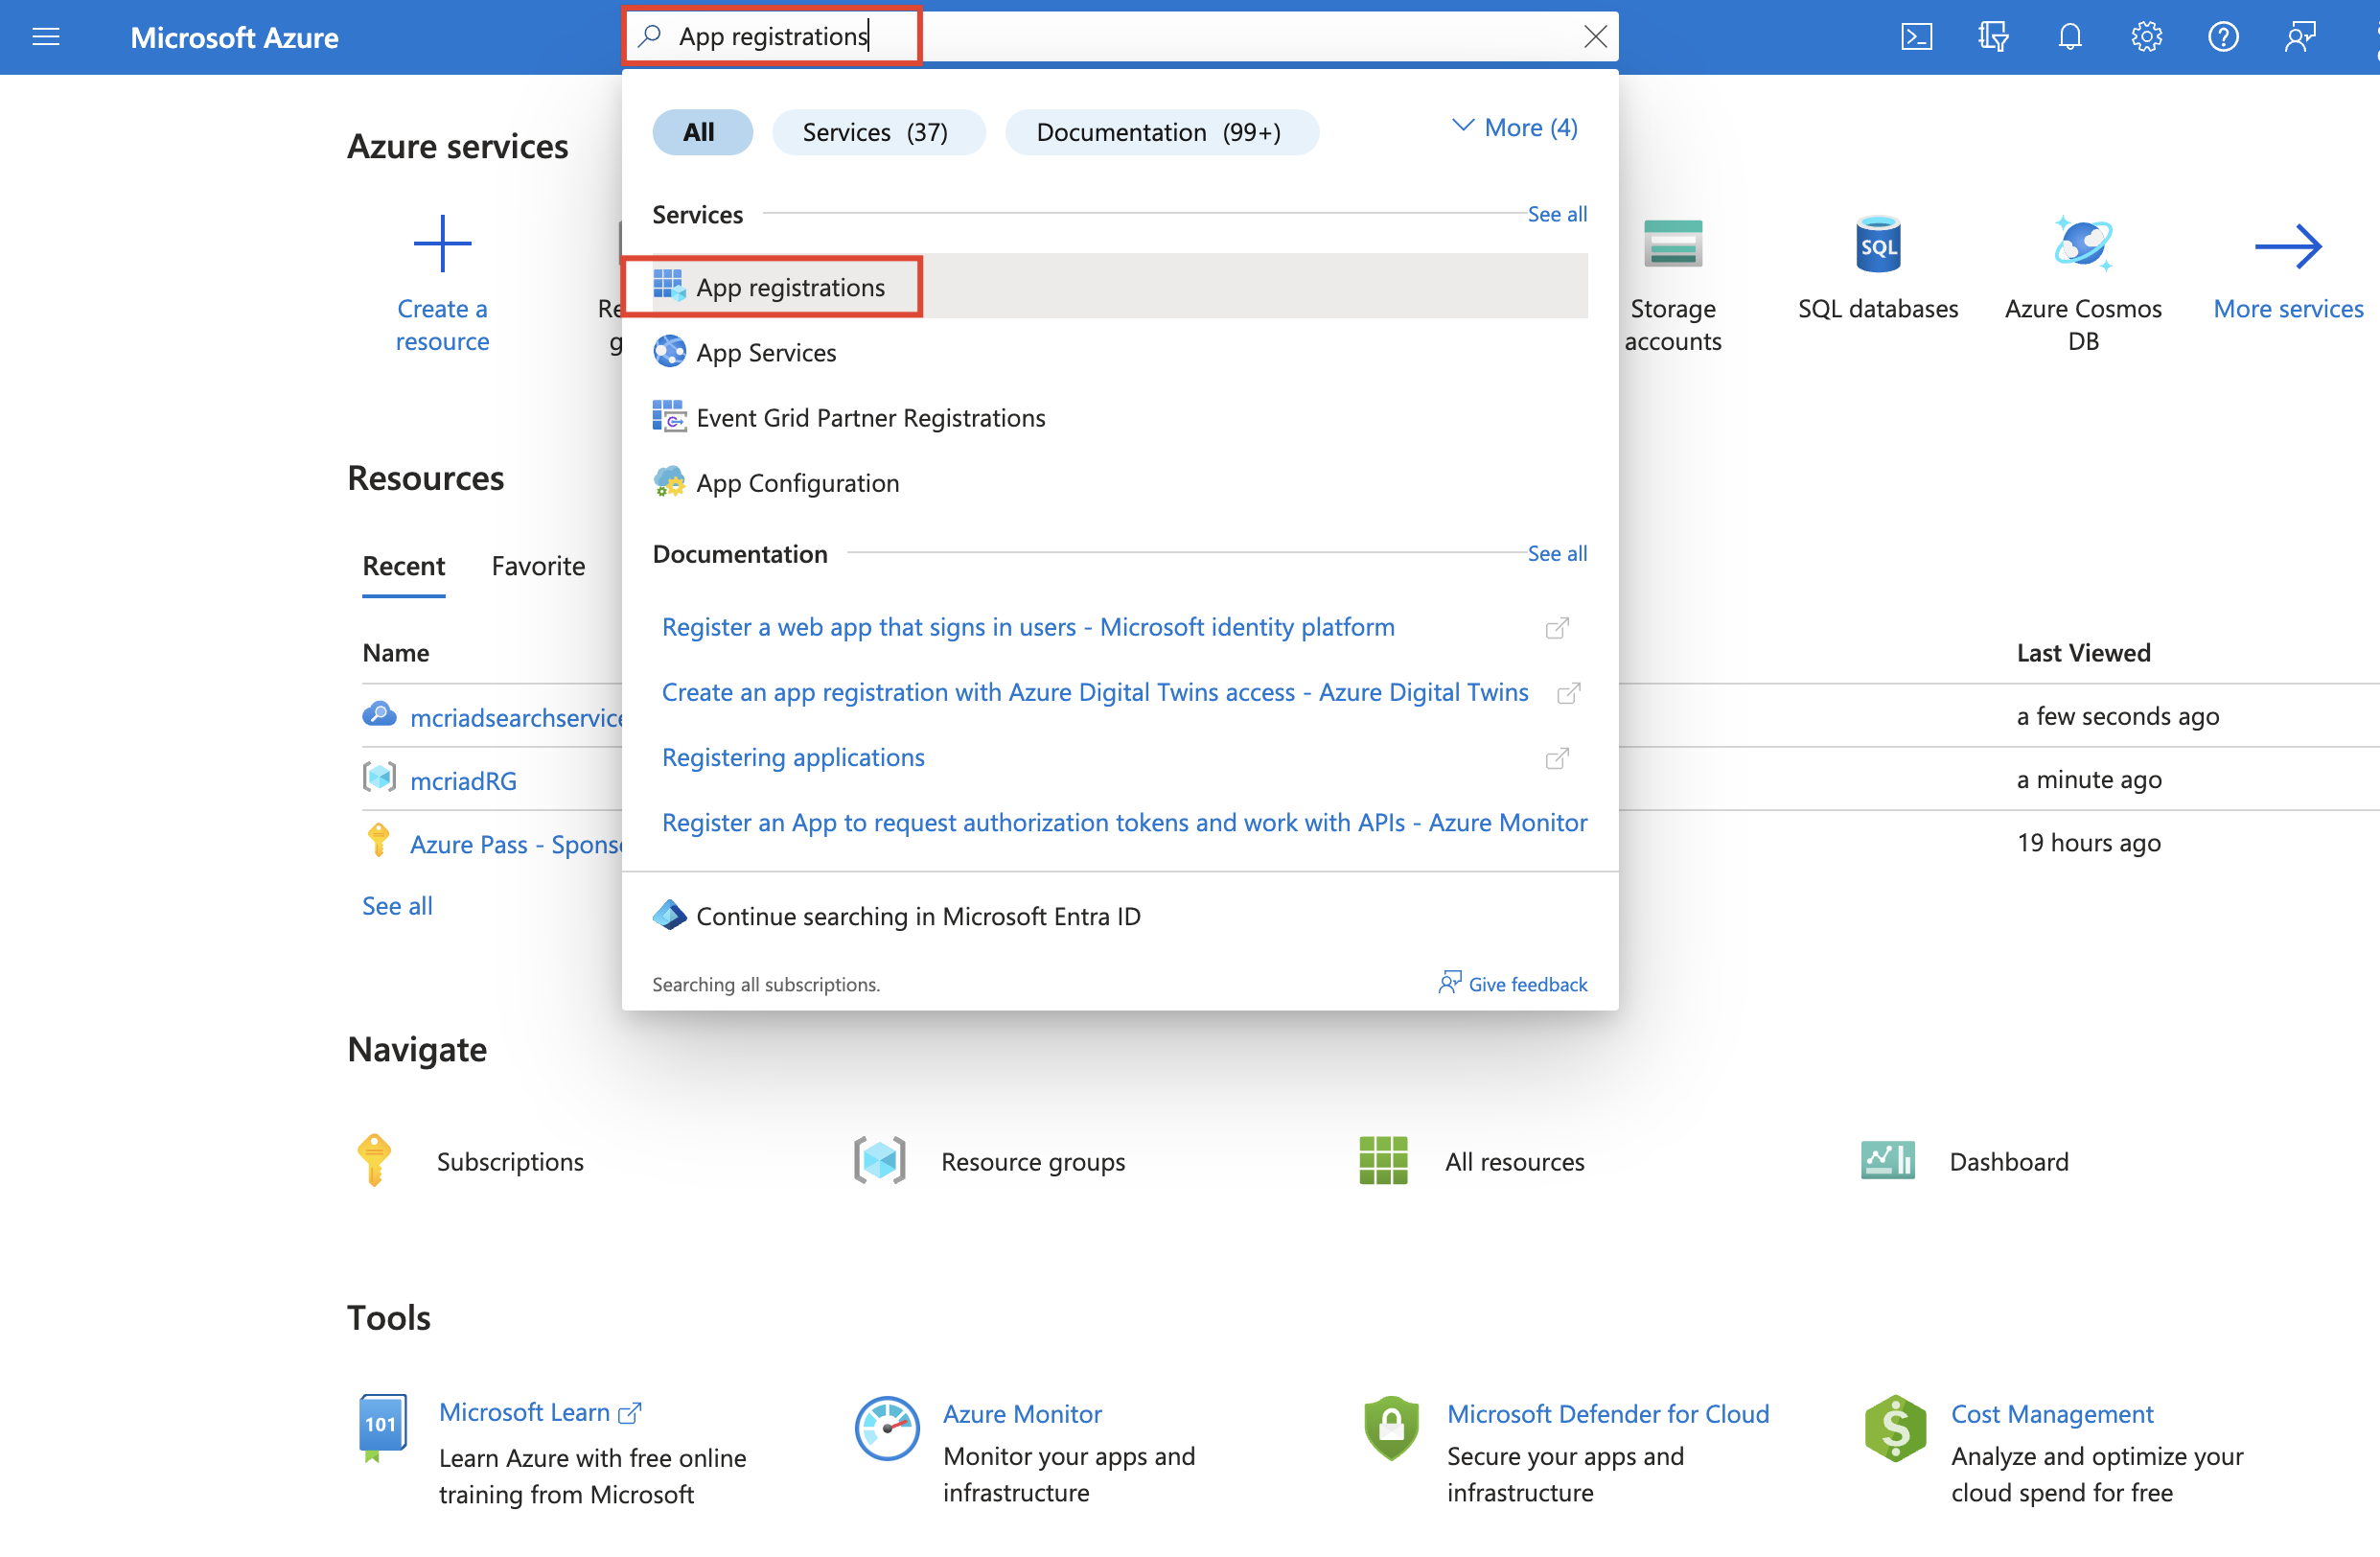
Go to Microsoft Azure portal.
In Azure portal, search for and select App registrations.
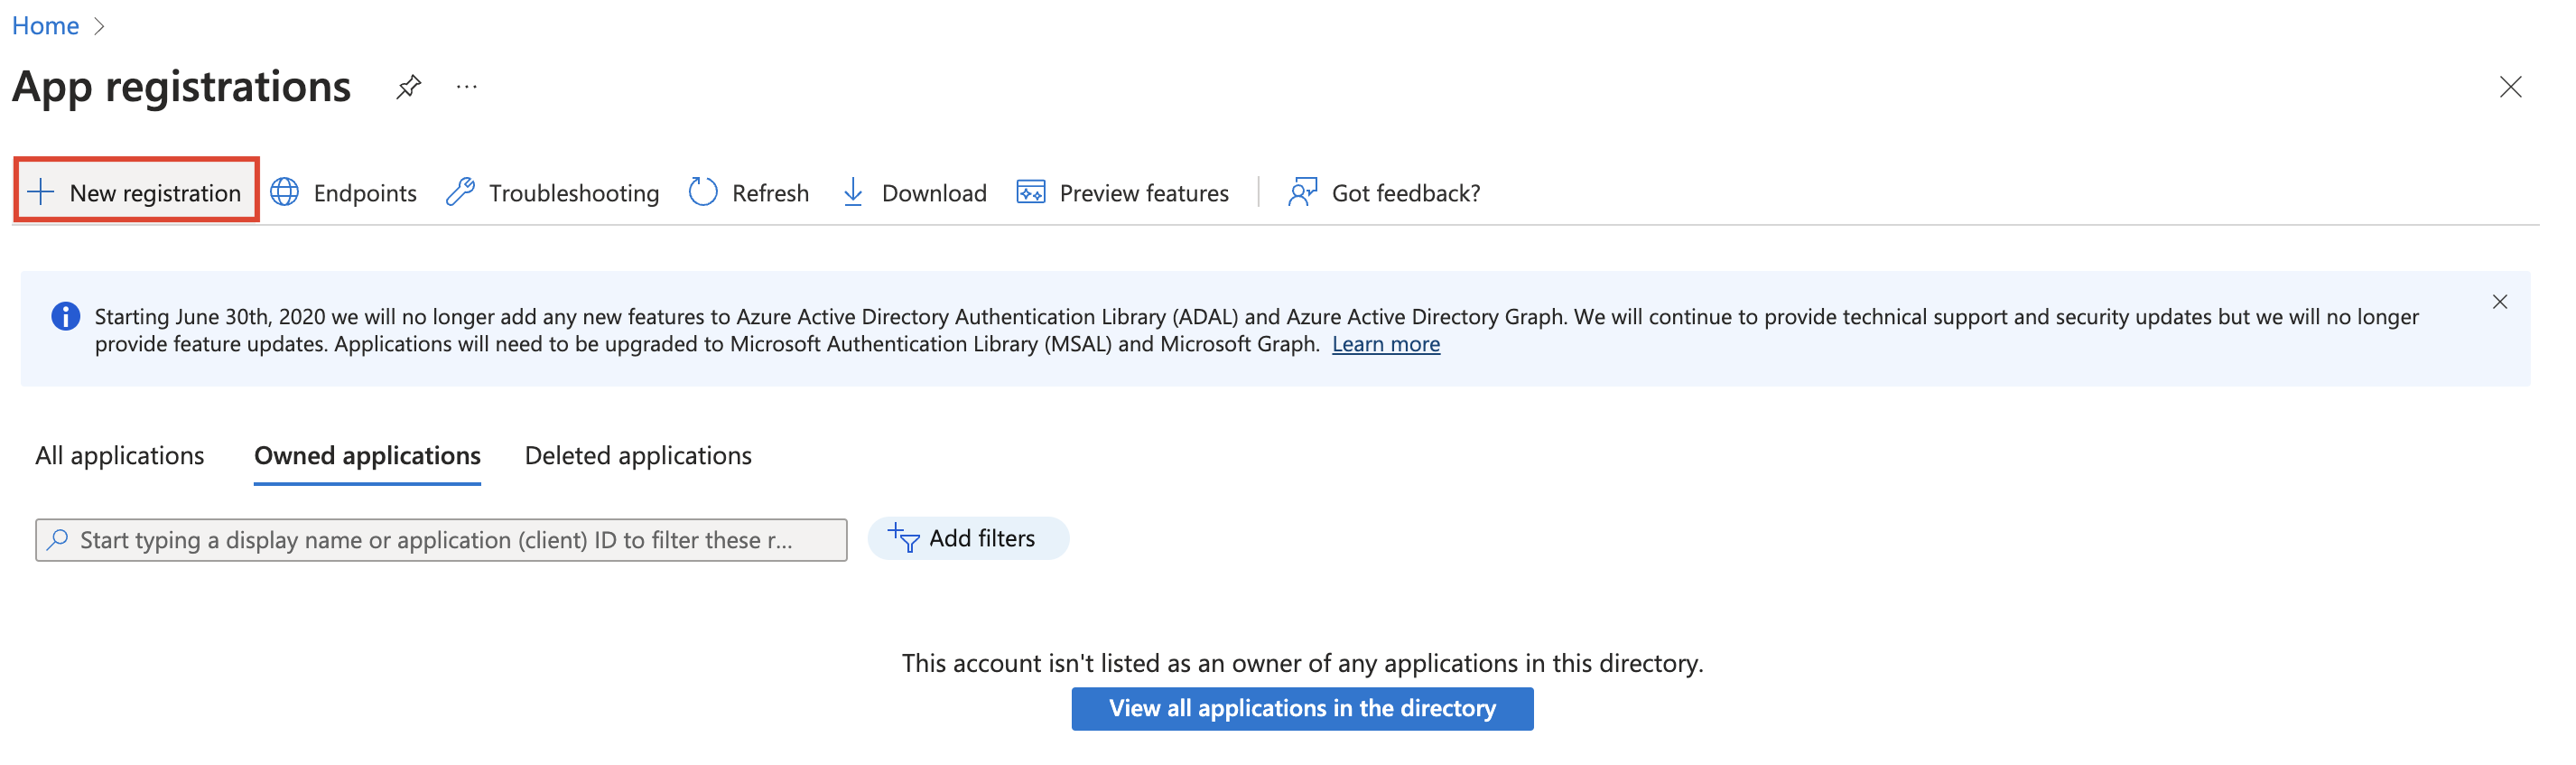
Select New registration.
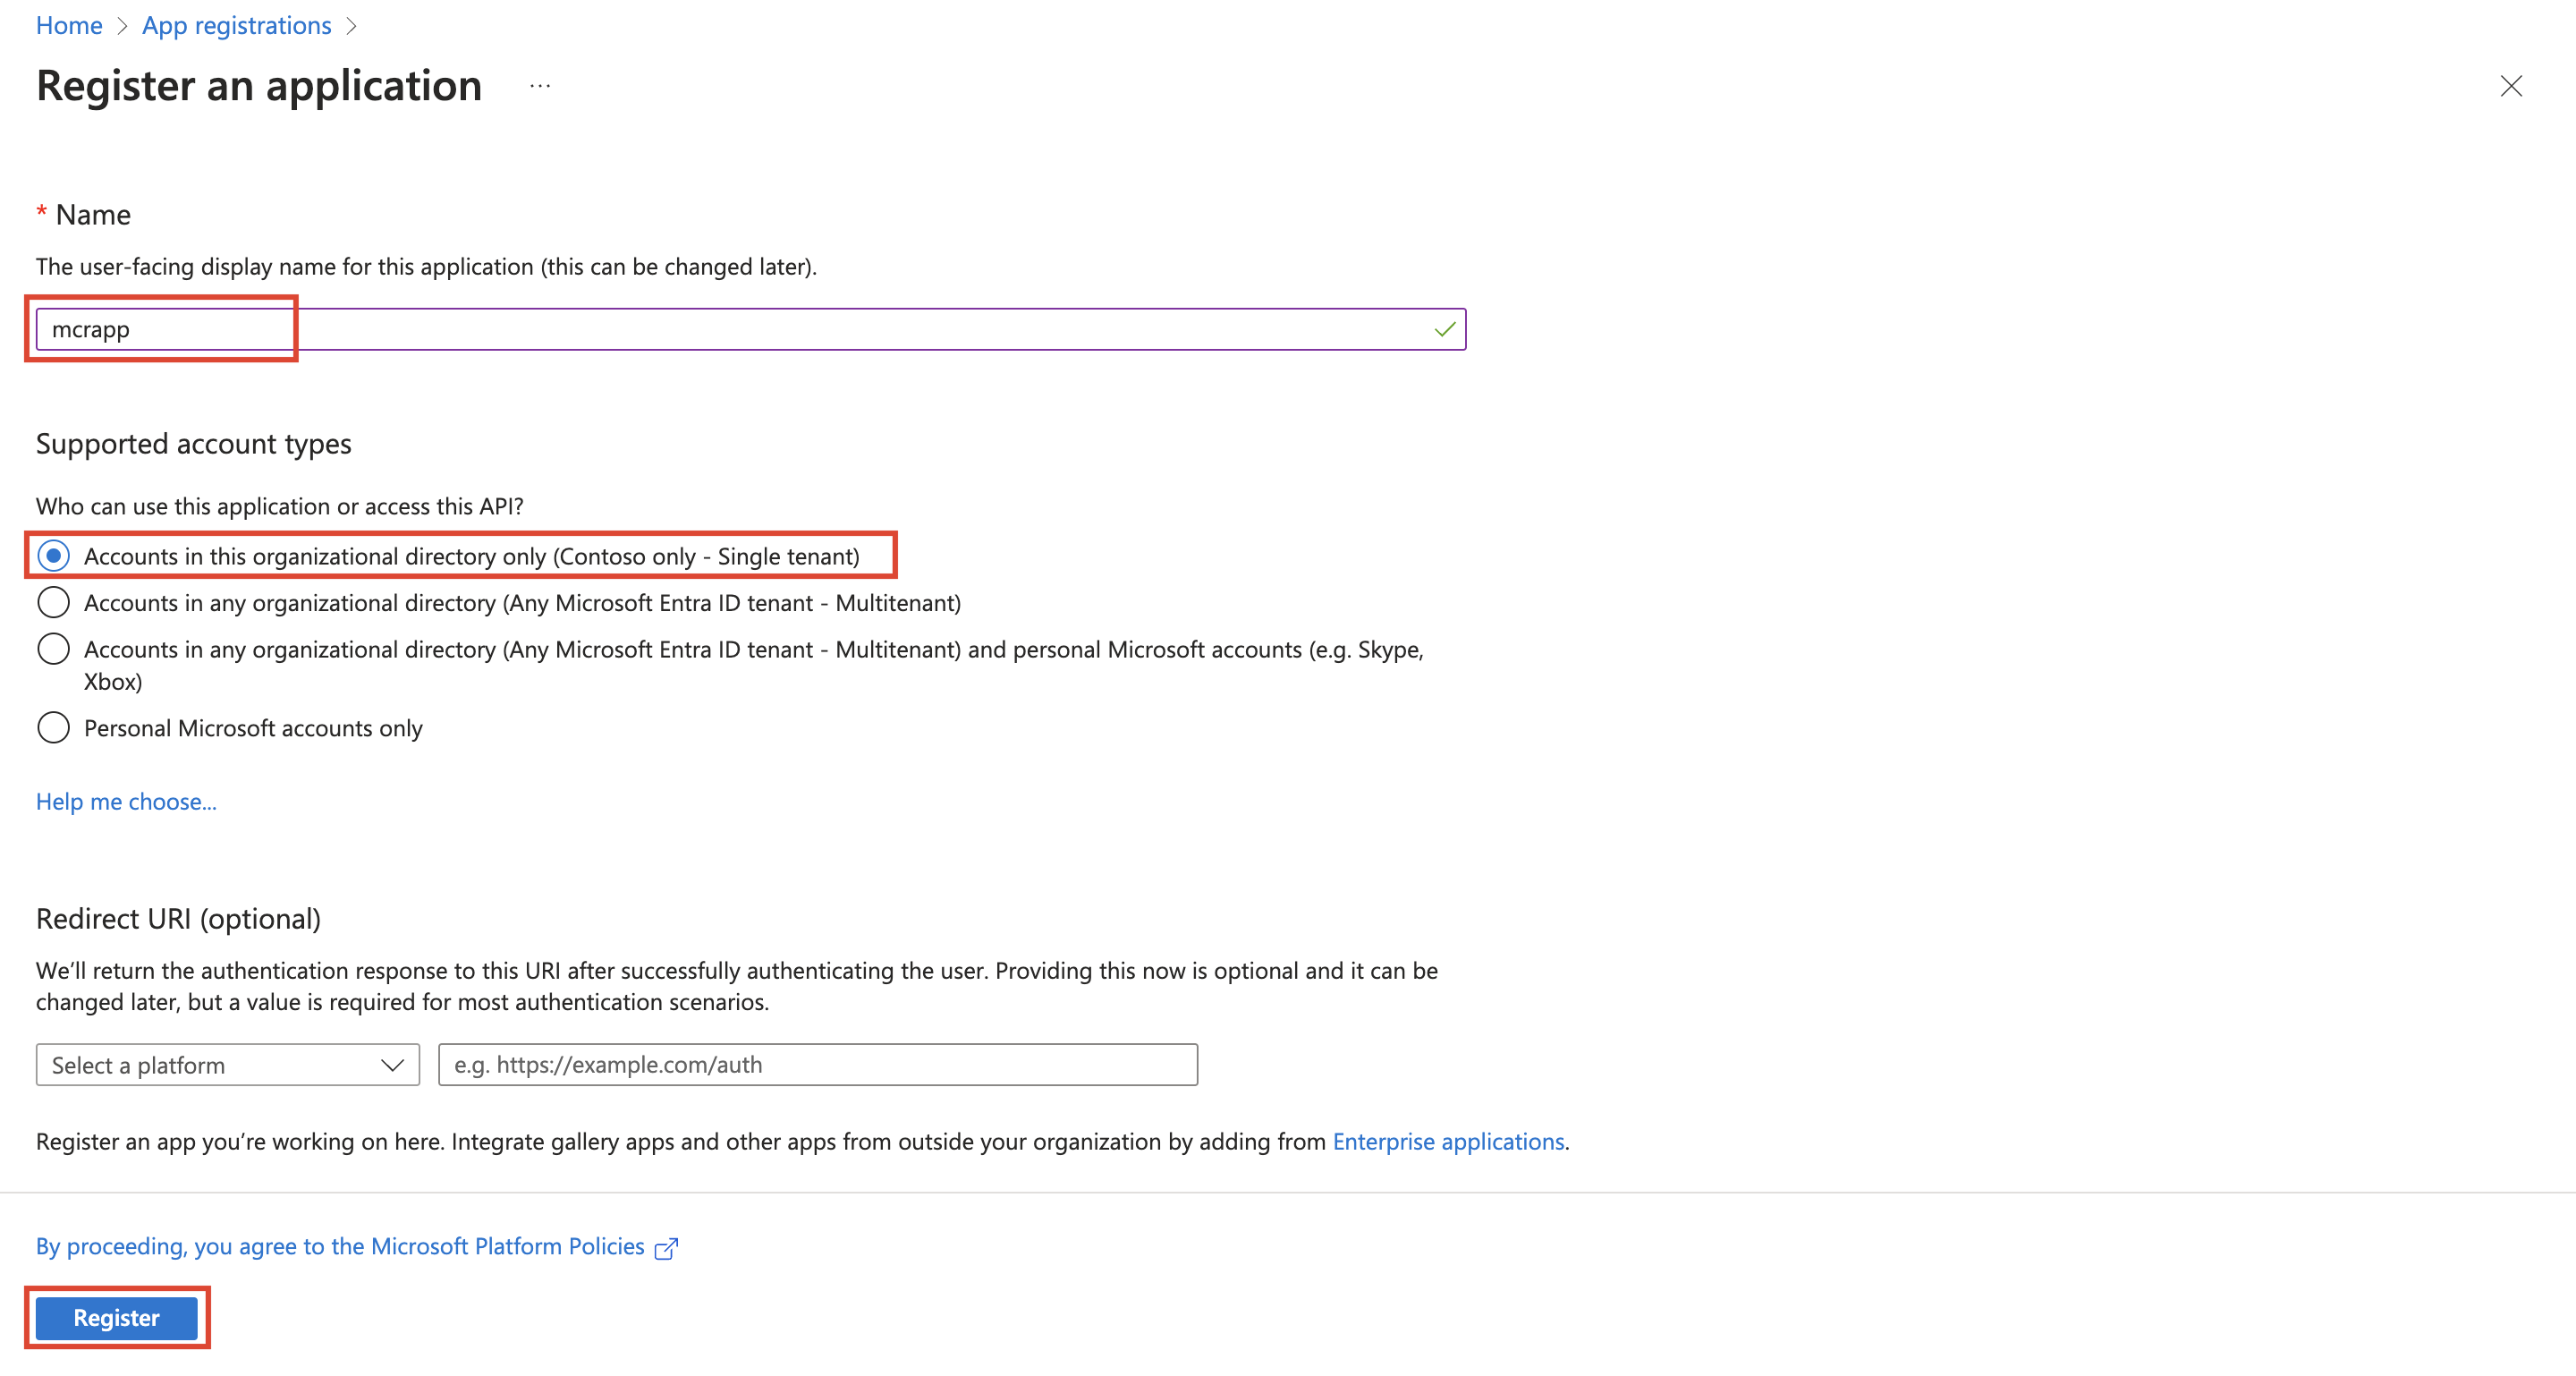
Enter mcrapp* in the Name field. Under Supported account types, select the Accounts in this organizational directory only (Contoso only - Single tenant) option. Select Register to create a new app registration.
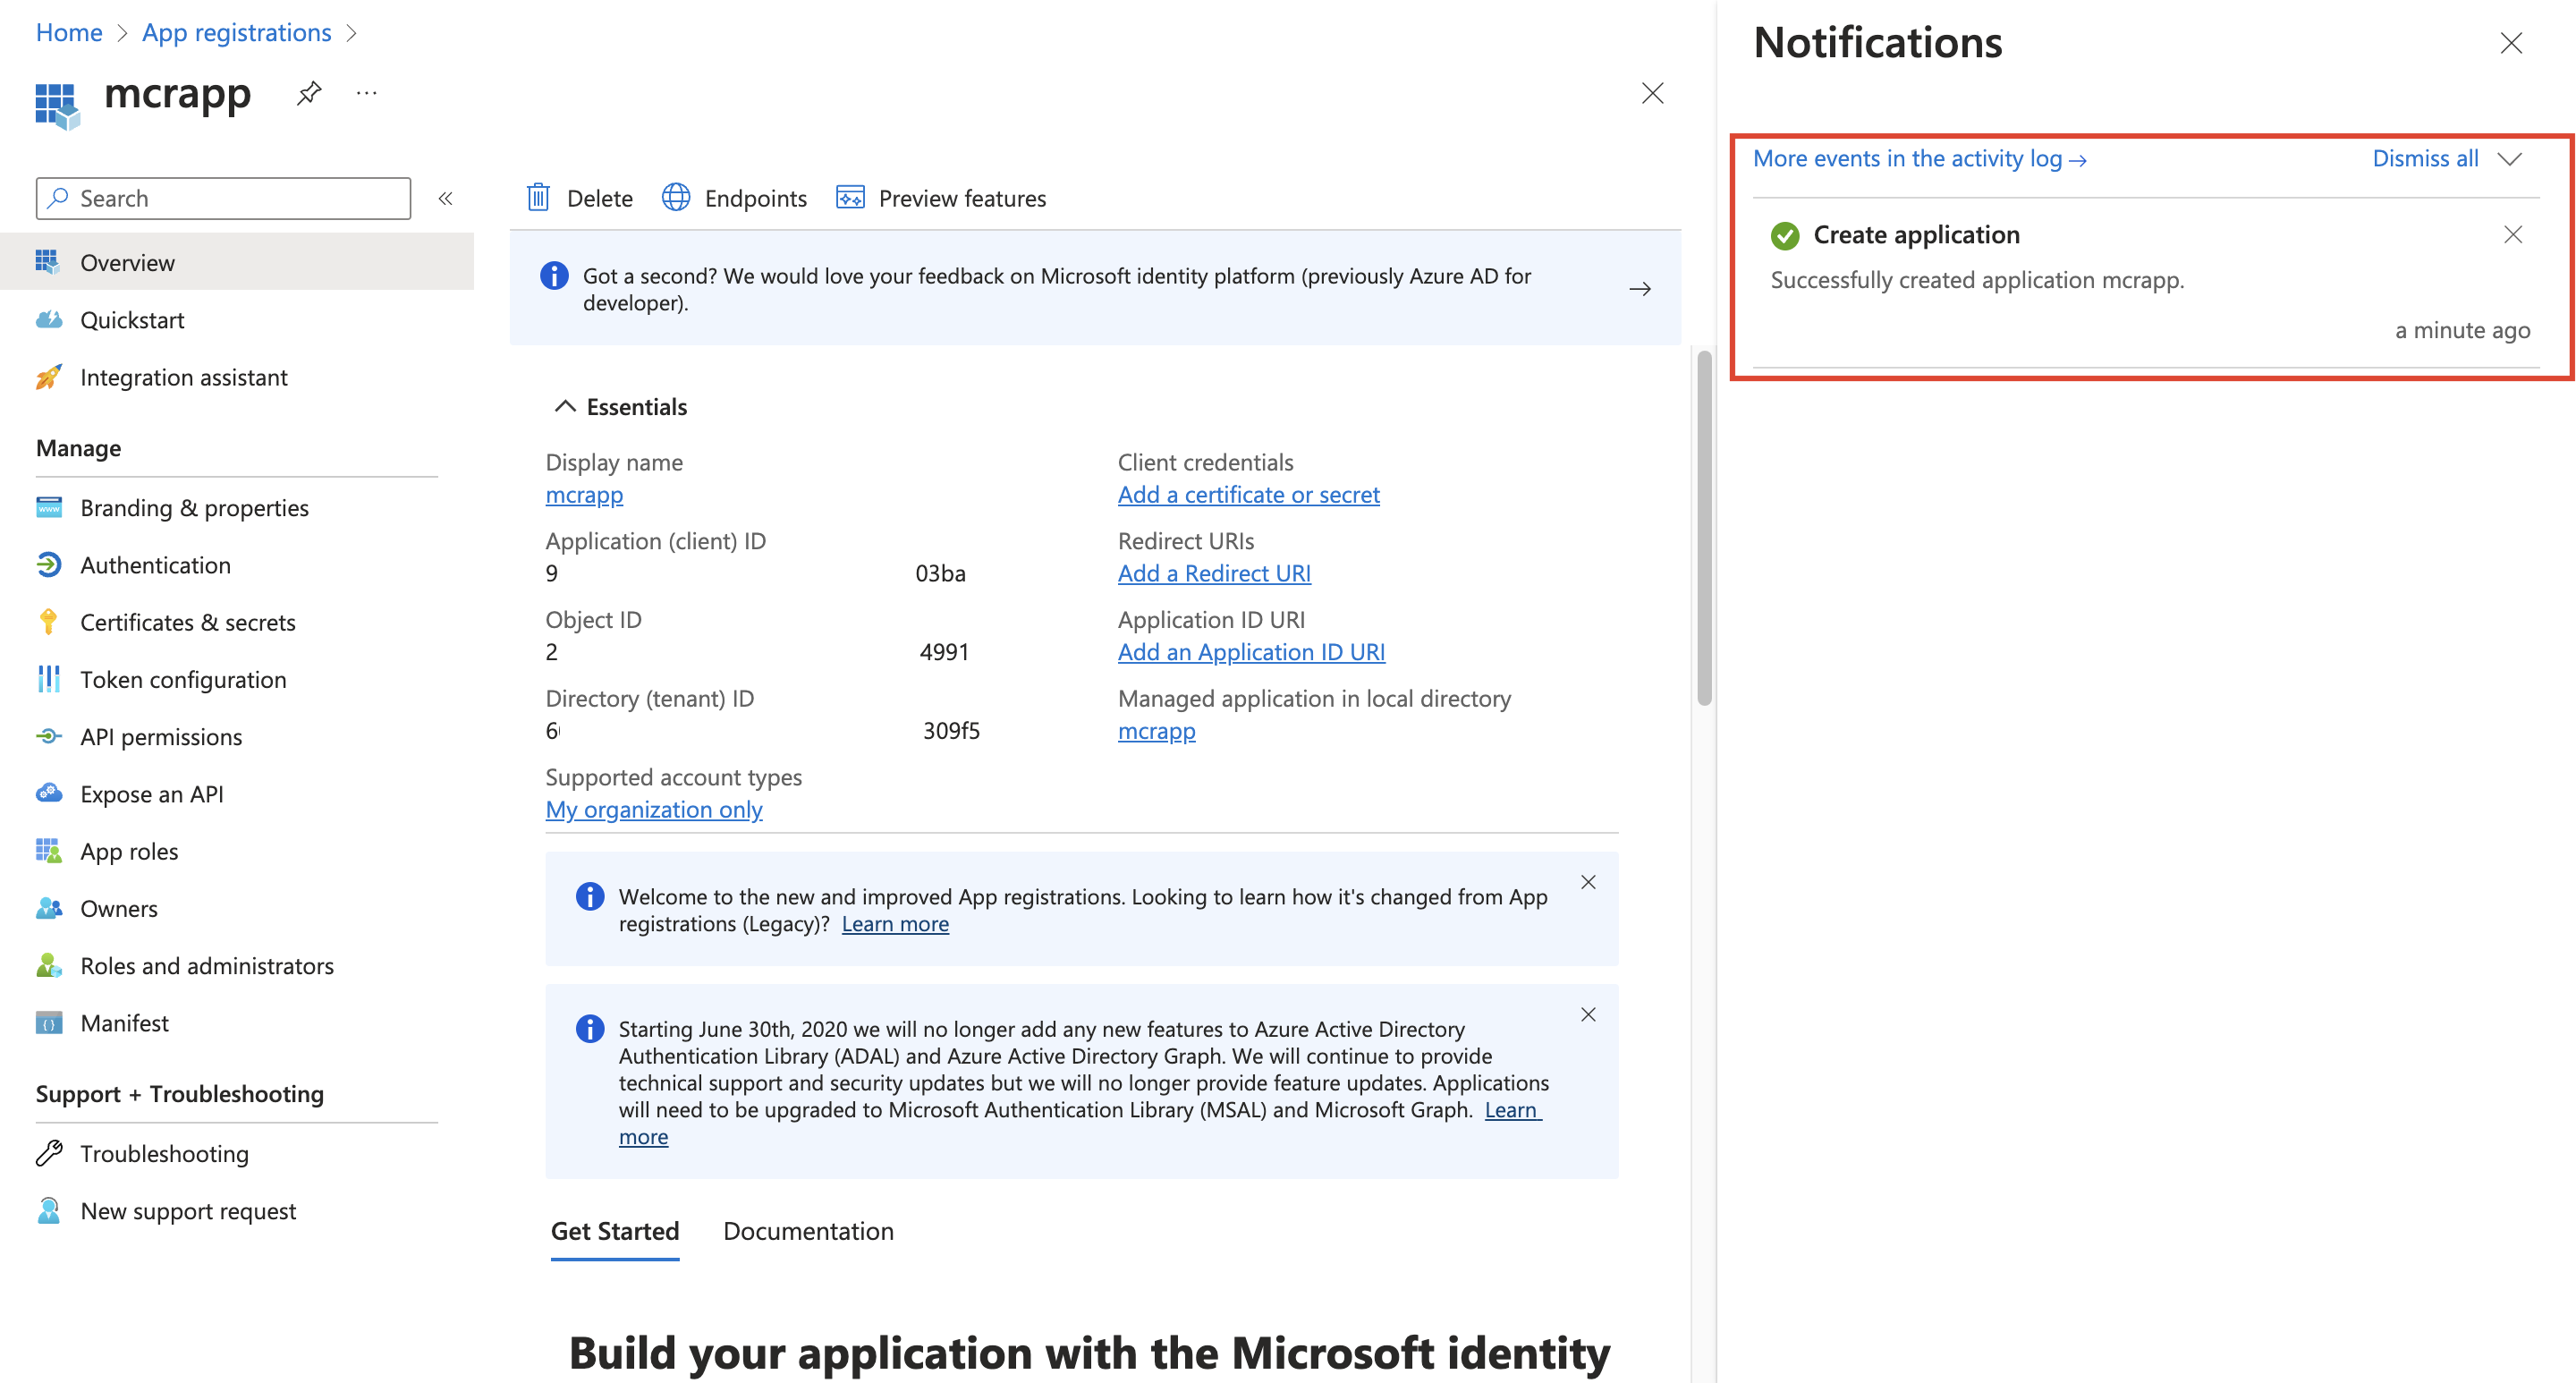
The successful app registration message should display.
The program redirects you to the overview of mcrapp. From the left pane, select Certificates & secrets. On the Client secrets tab, select + New client secret.

Fill in the following information and then select Add.
Description - AI Assistant Client Secret
Expires - 180 days
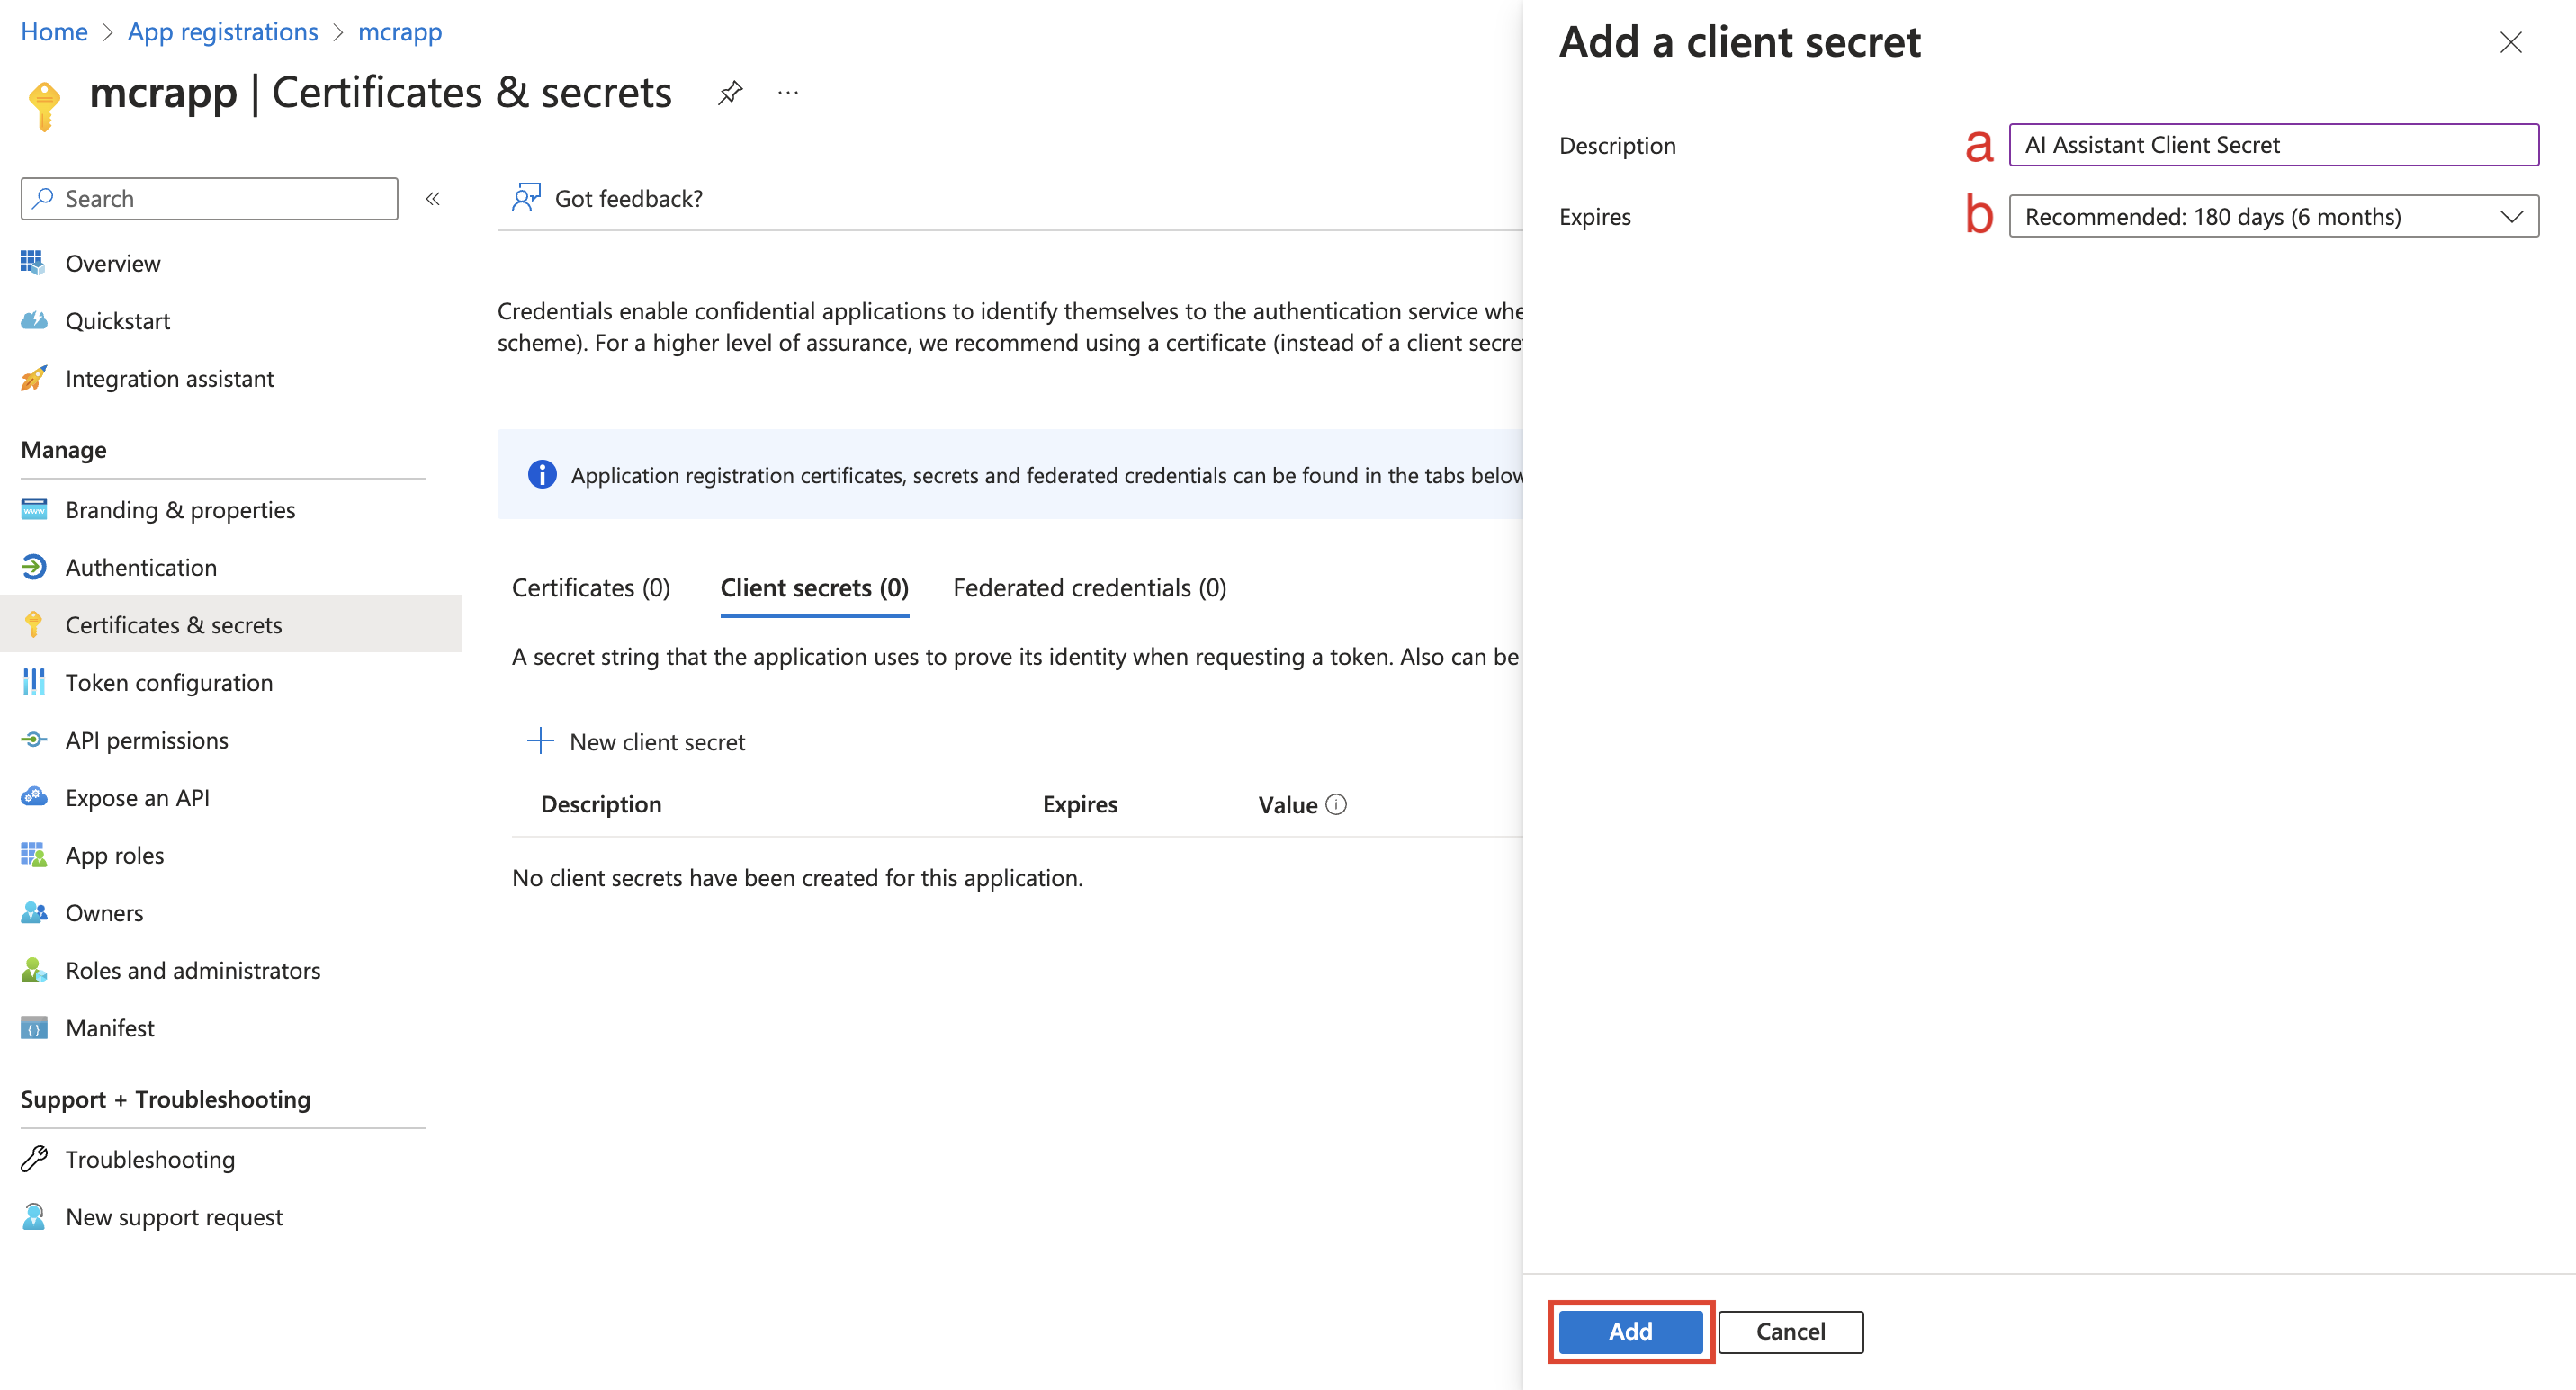
Save the client secret value because it's required for a later configuration.
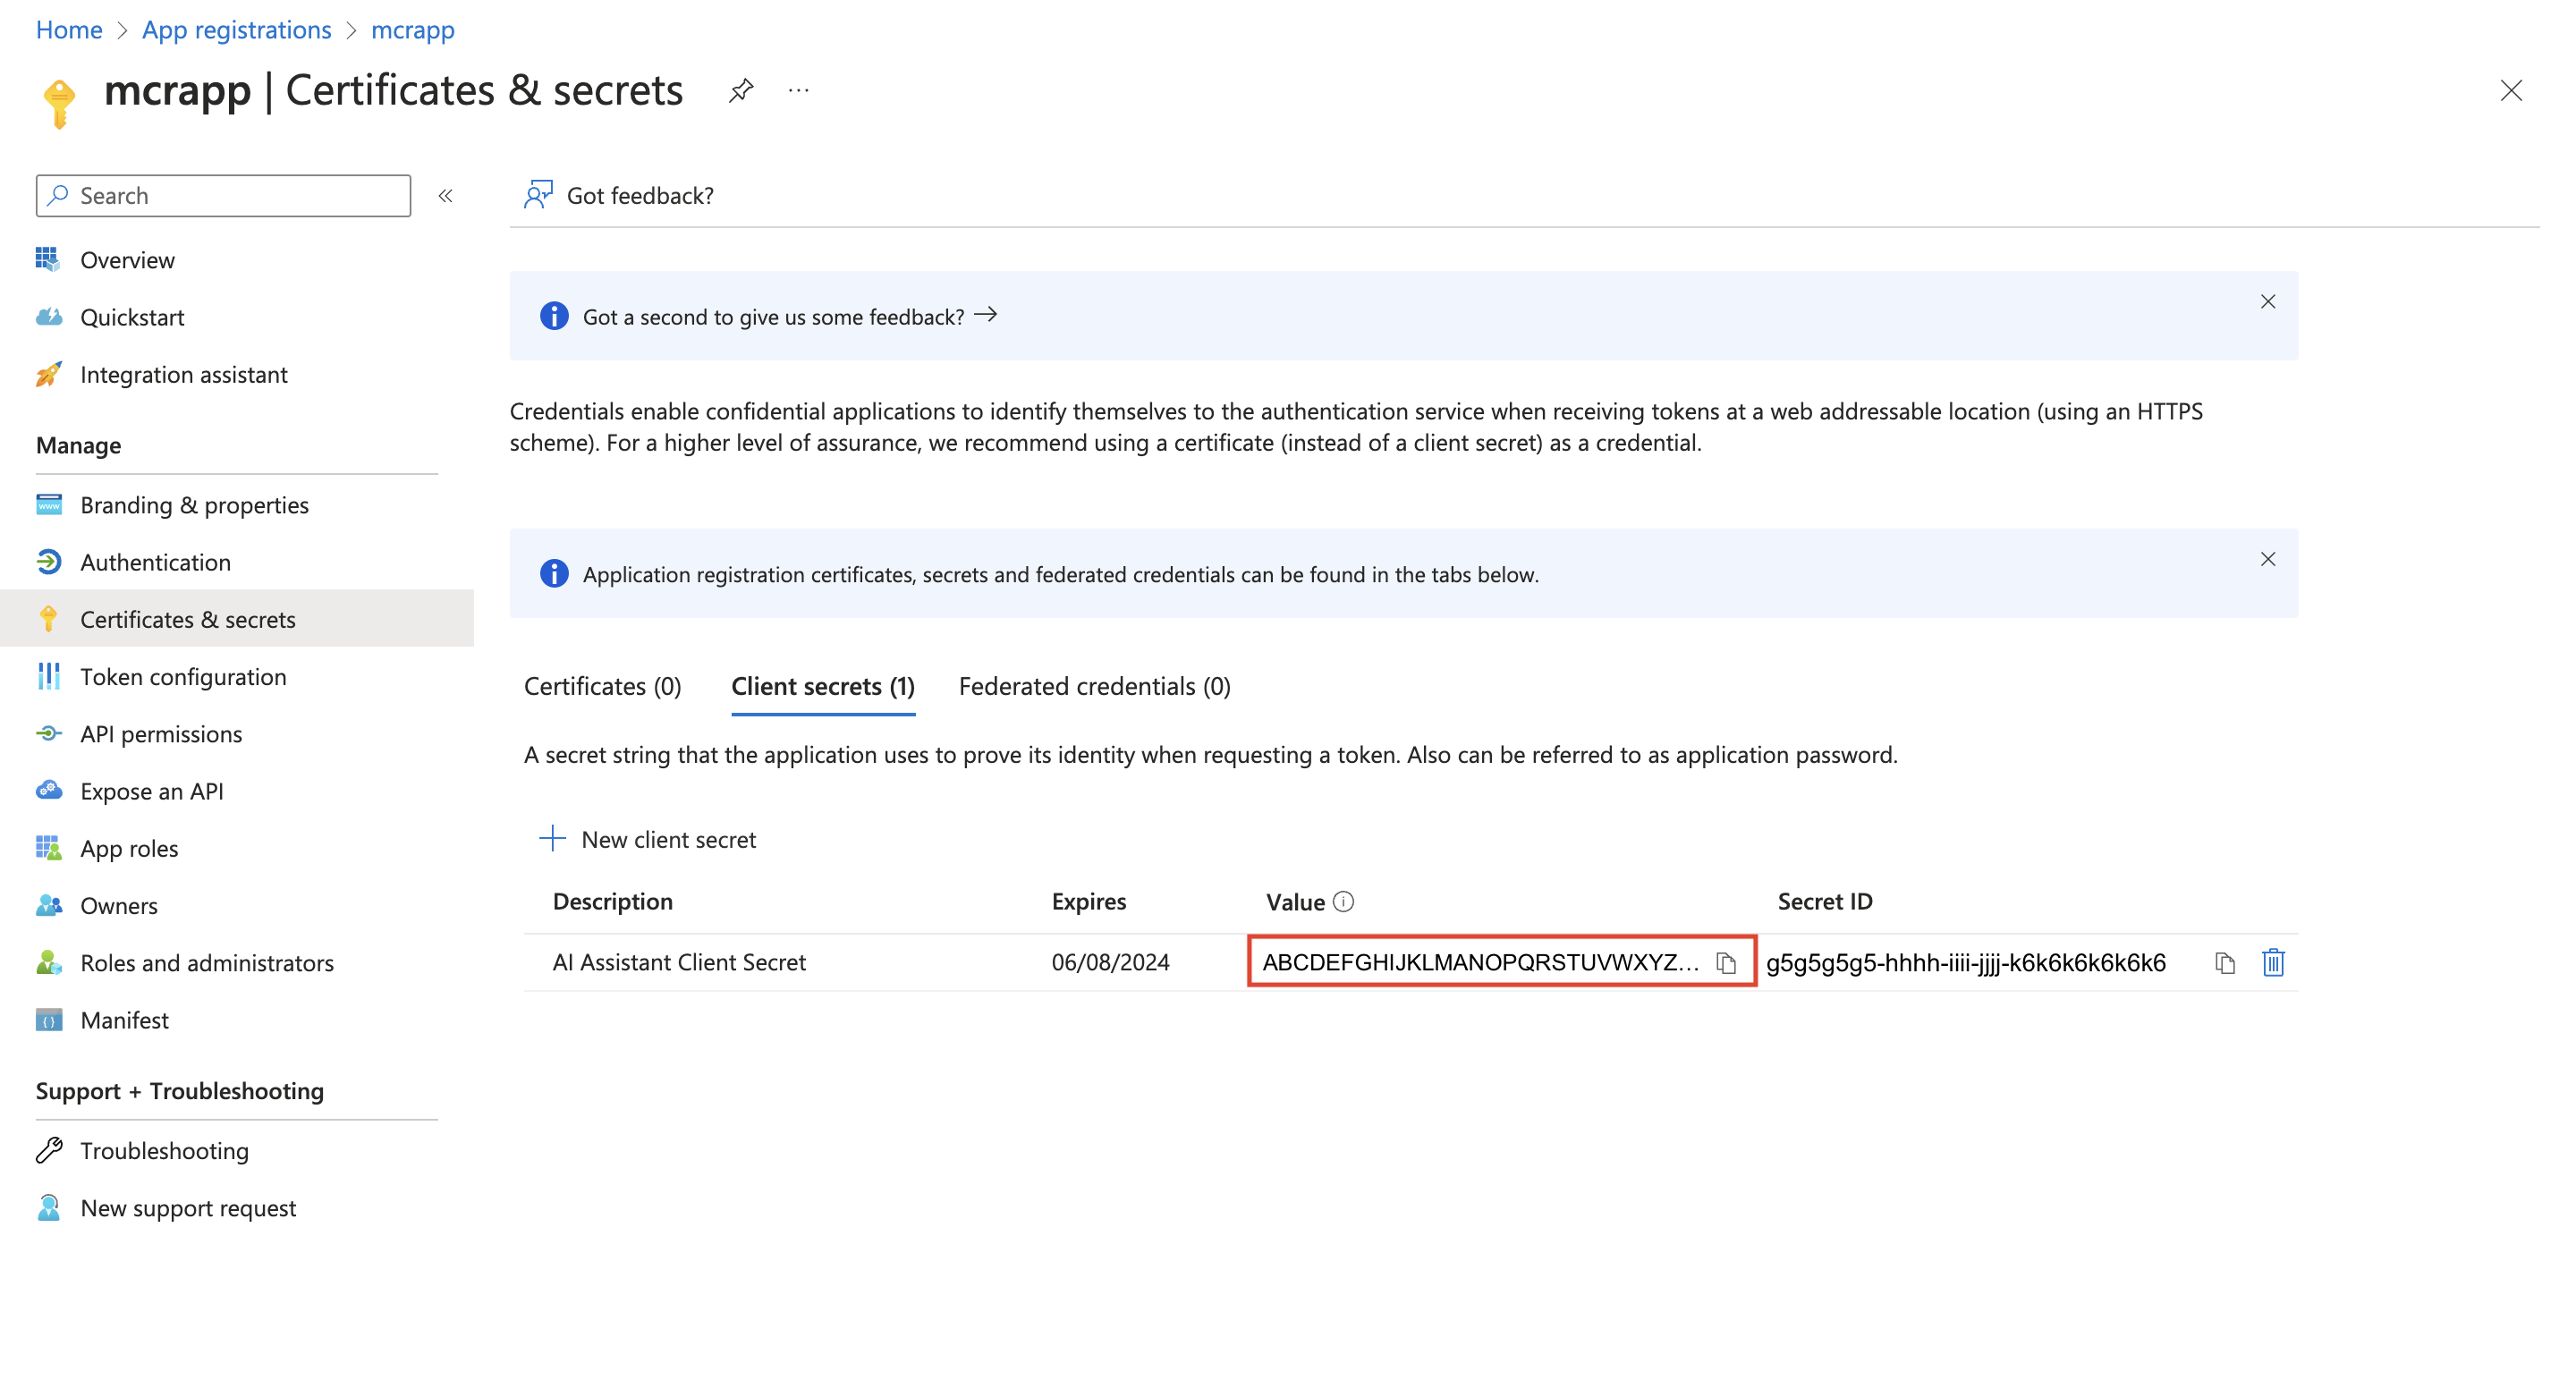
Caution
Note the client secret value. You need this value to link Store Operations Assist with Azure OpenAI accounts. After you refresh the tab or screen, the client secret value no longer displays, and you can't copy it later. Therefore, we recommend that you save the client secret value during app registration.
Select App registrations. The newly registered app mcrapp now shows on the All applications tab. Save the Application (client) ID because it's required for a later configuration.
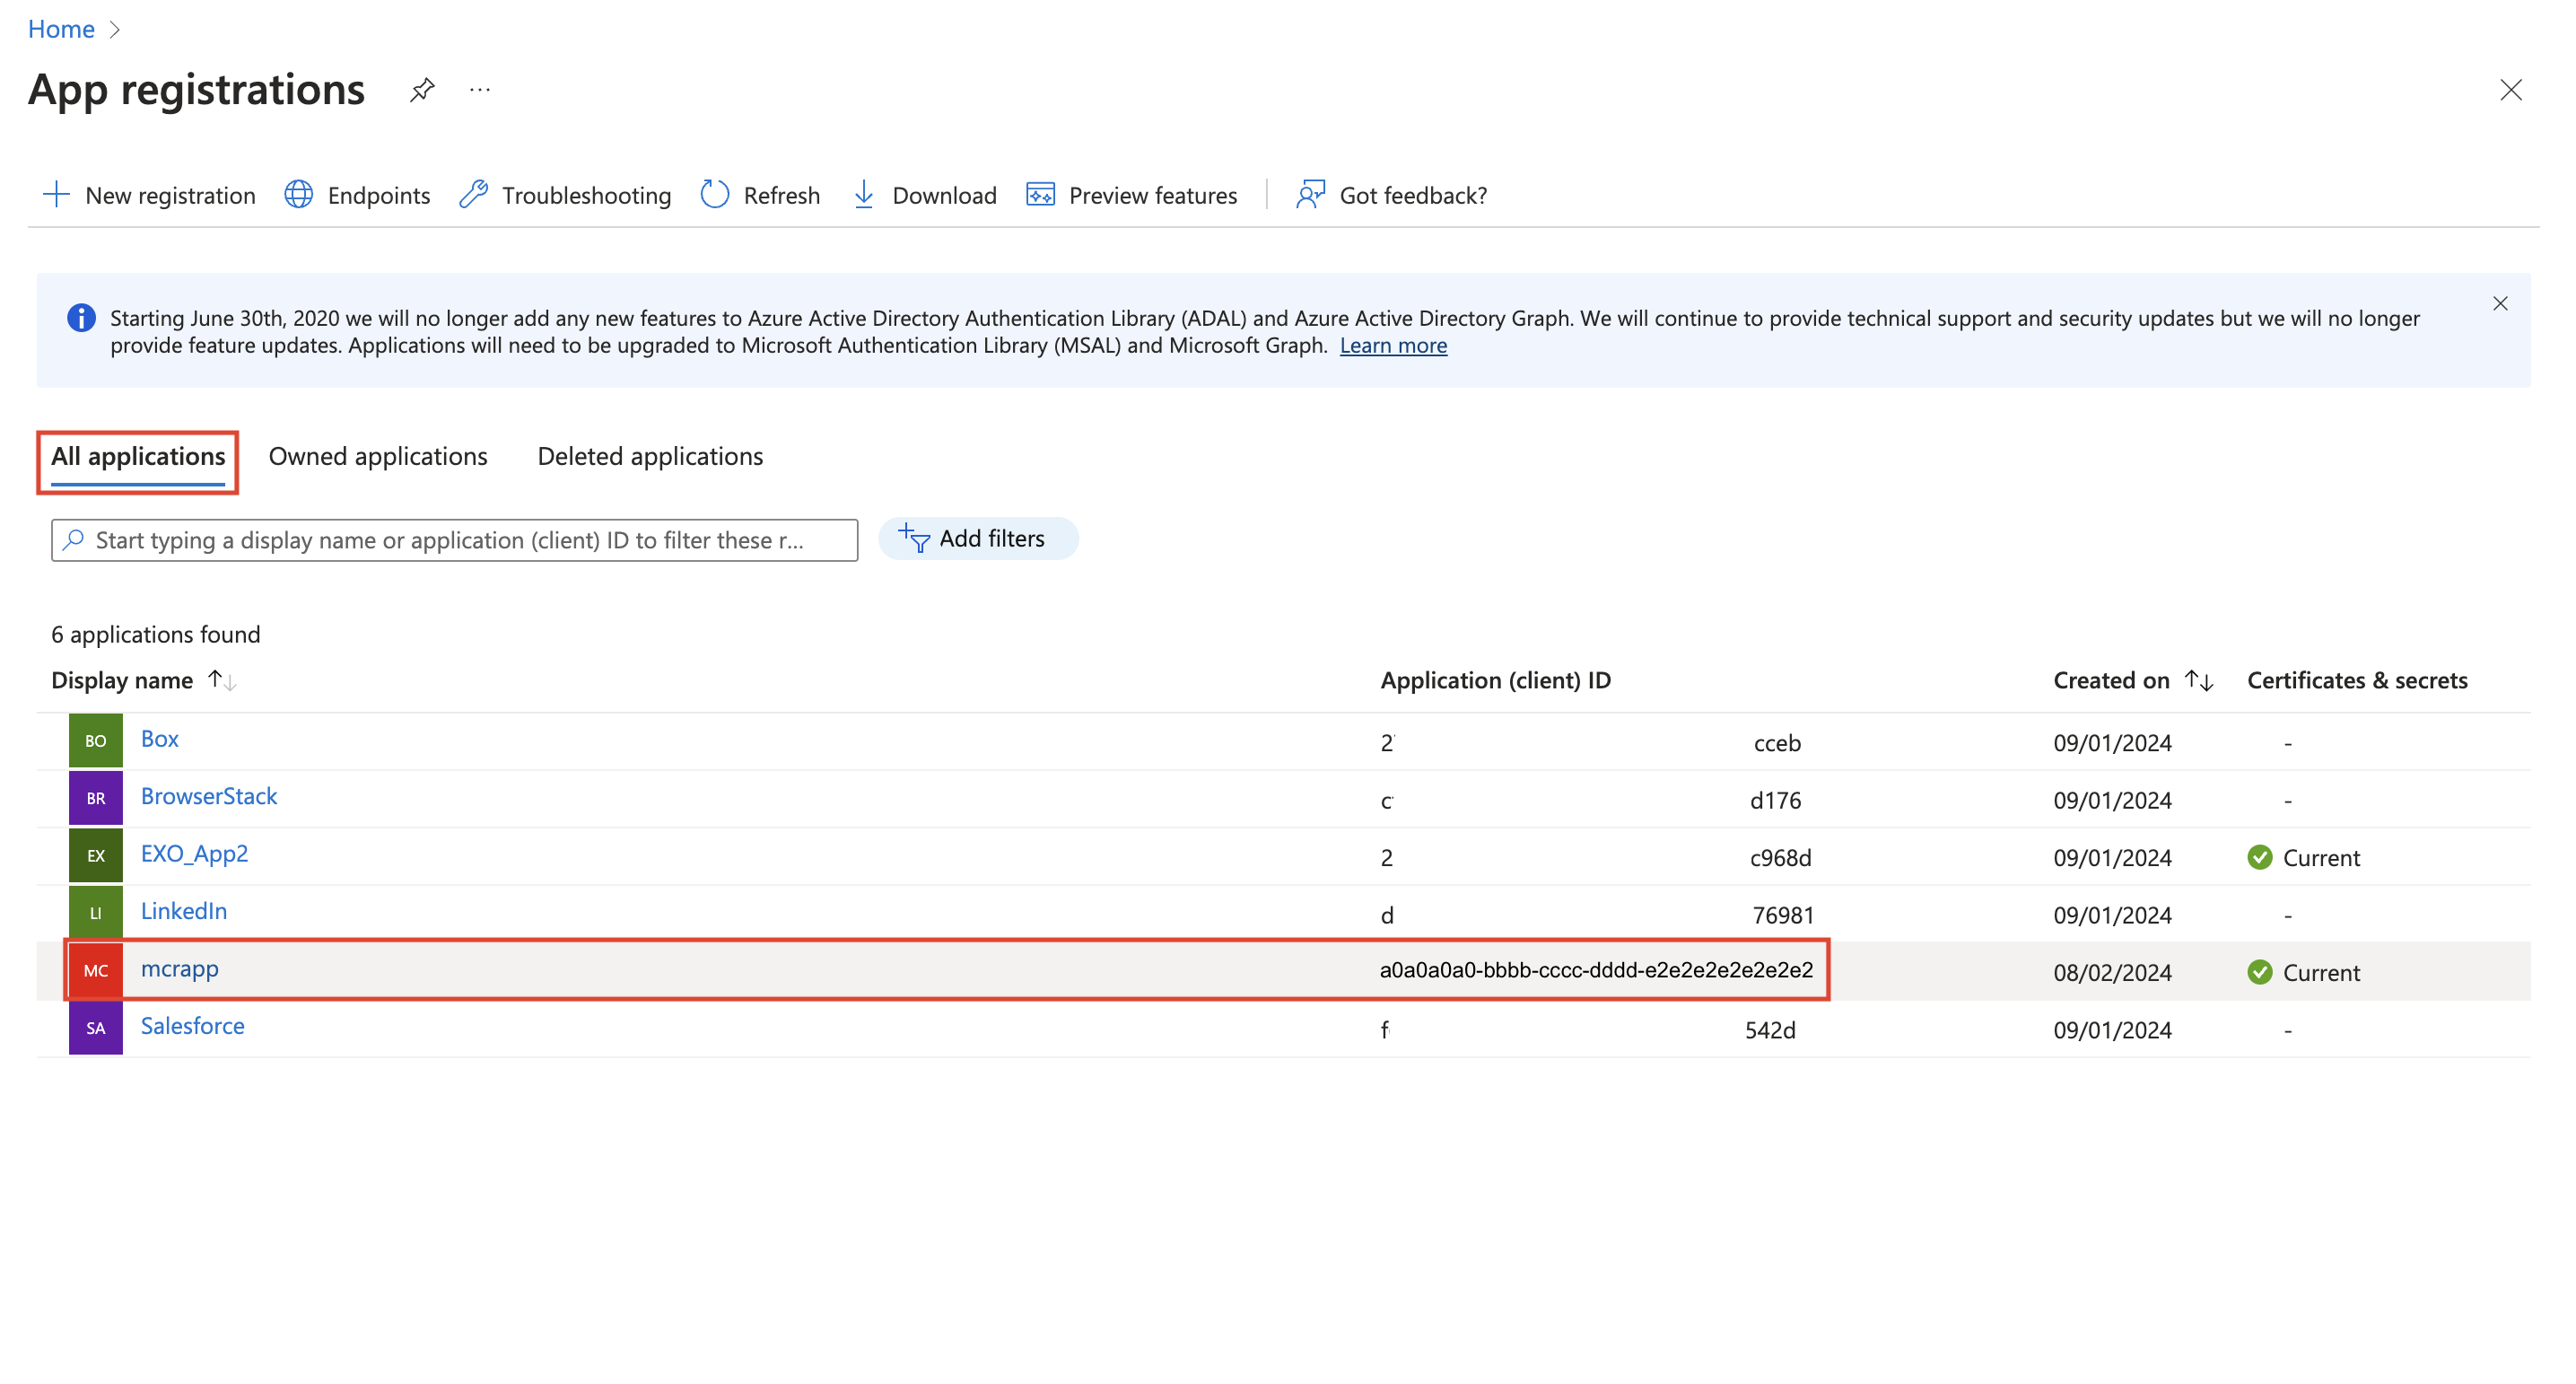
Important
Note the Application ID. You need this value to link Store Operations Assist with Azure OpenAI accounts.


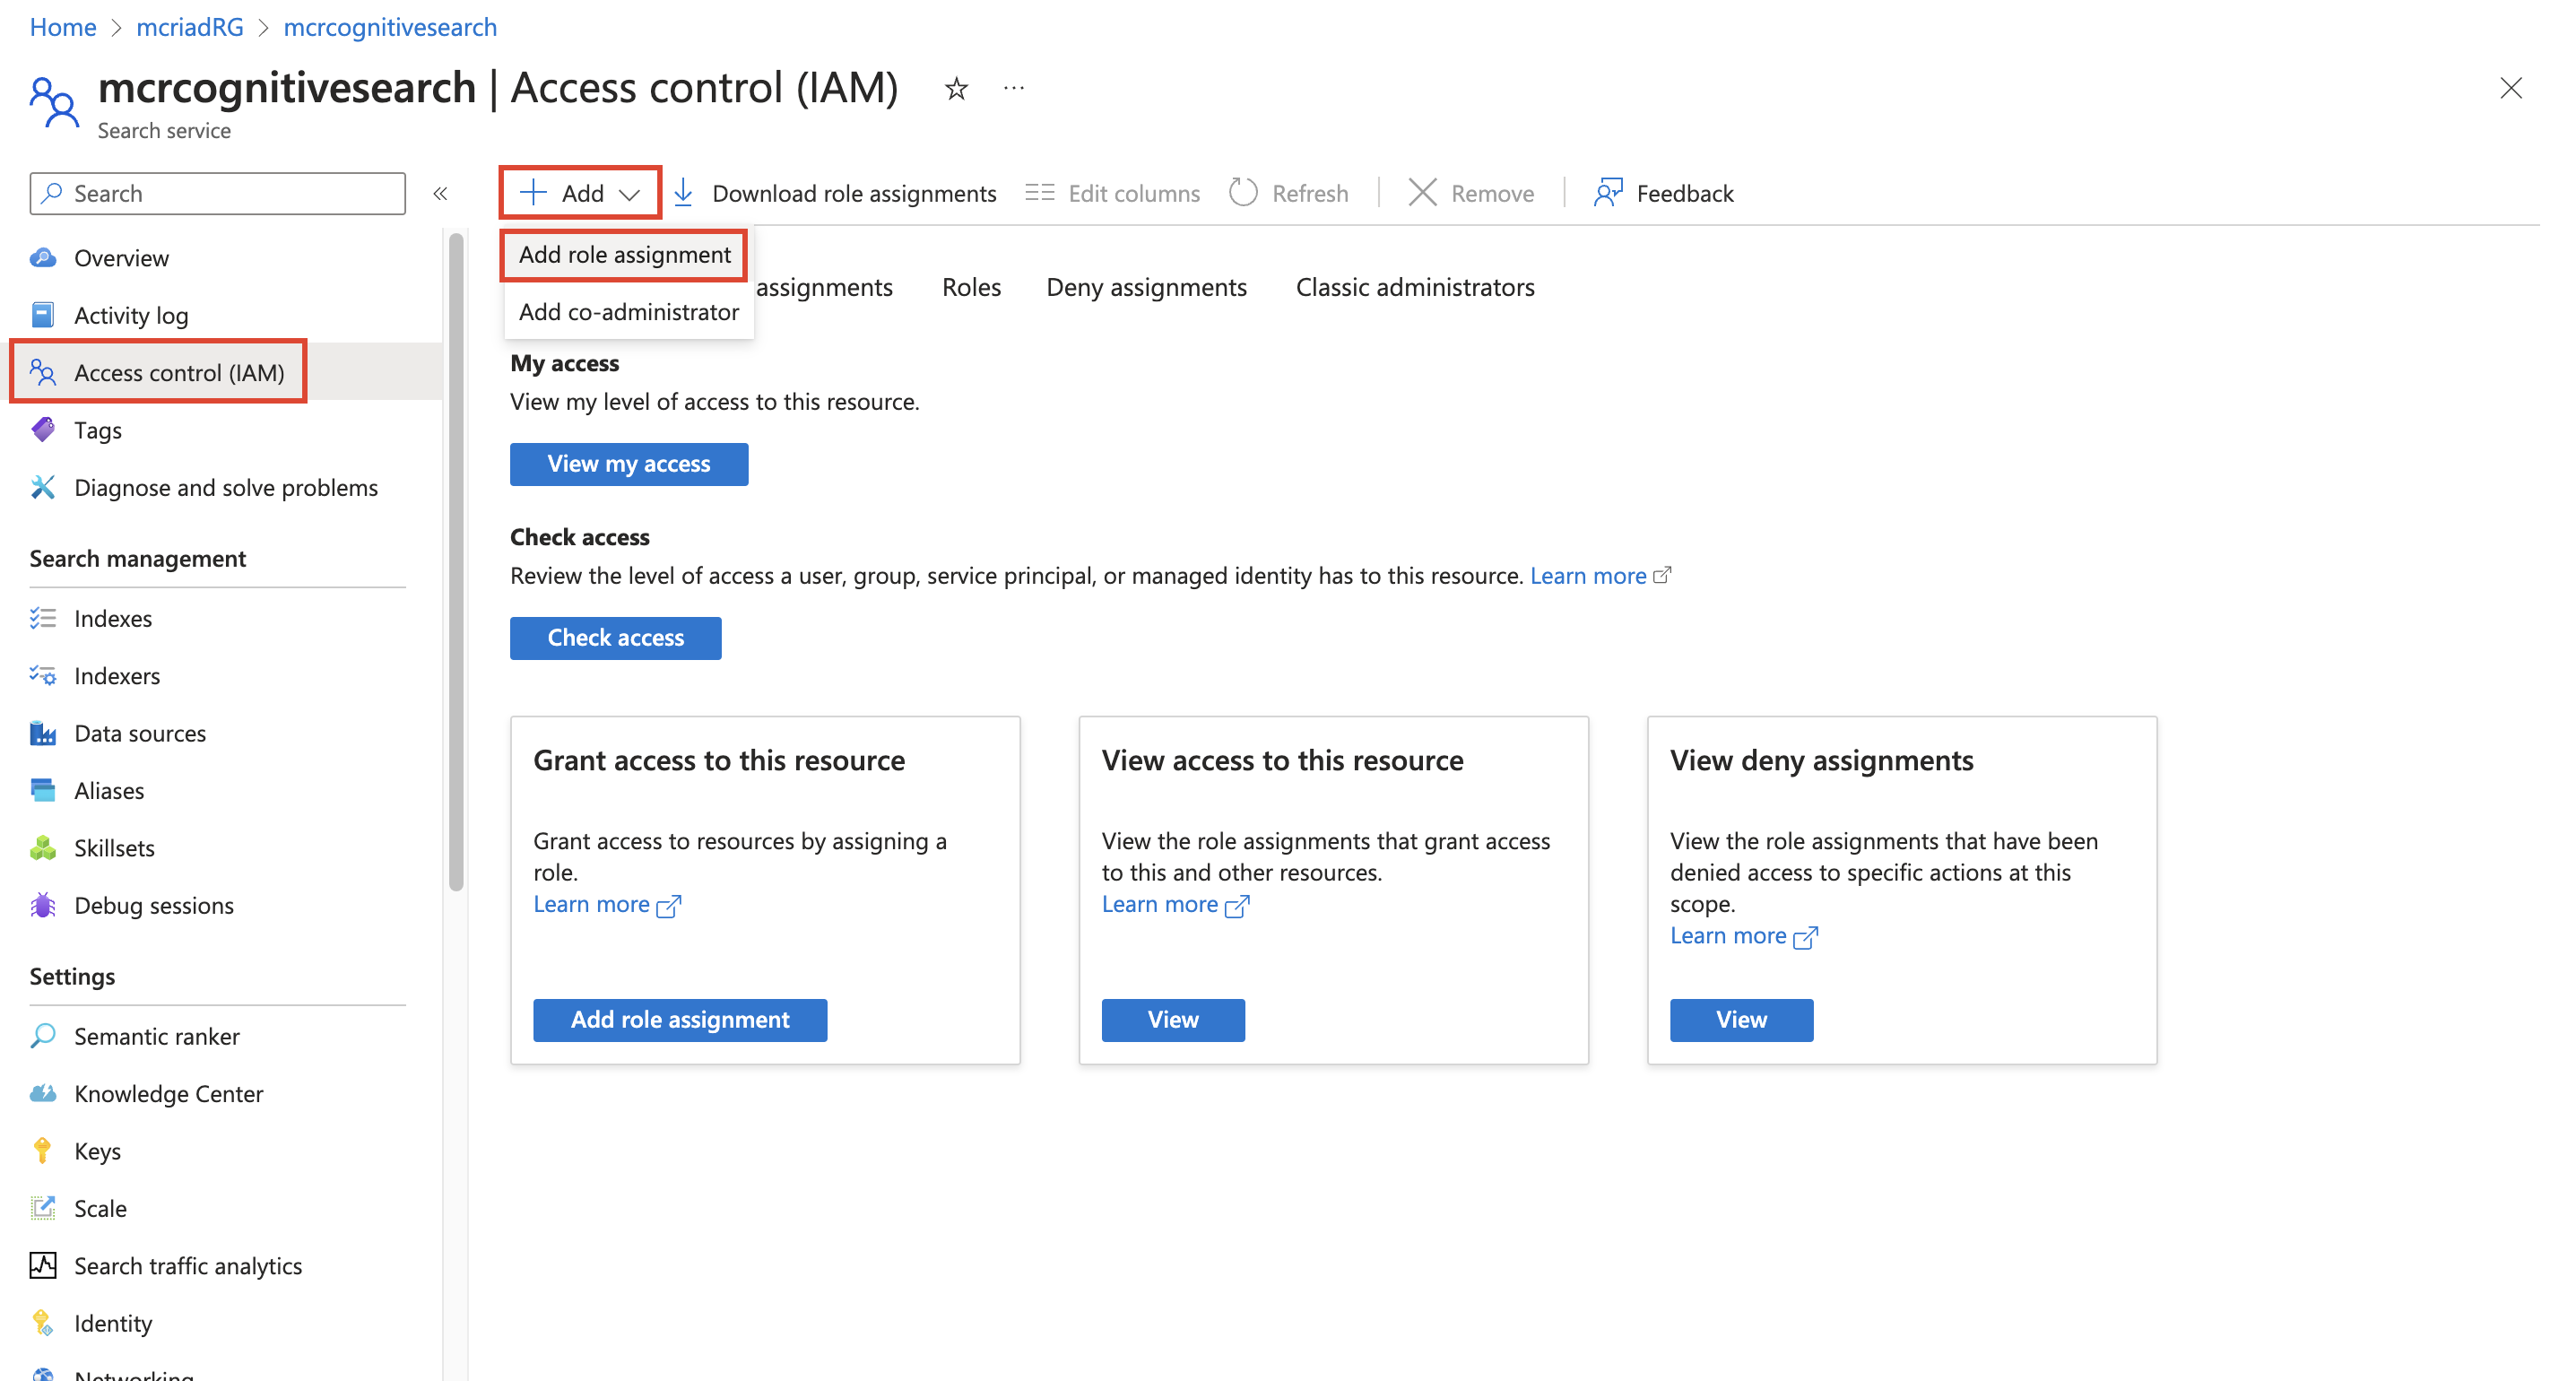
Task - Assign the contributor role to an app registration instance
Acting as Oscar, you need to assign the contributor role to the app registration instance that you previously created. This role is necessary to use the OpenAI and Cognitive Search resources that you established during the deployment process. Follow these steps to assign the appropriate role to OpenAI and Cognitive Search resources:
Sign in to Microsoft Azure portal.
Select the mcriadRG resource group and then select the mcropen-ai OpenAI resource.
Select Access control (IAM). Select Add > Add role assignment.
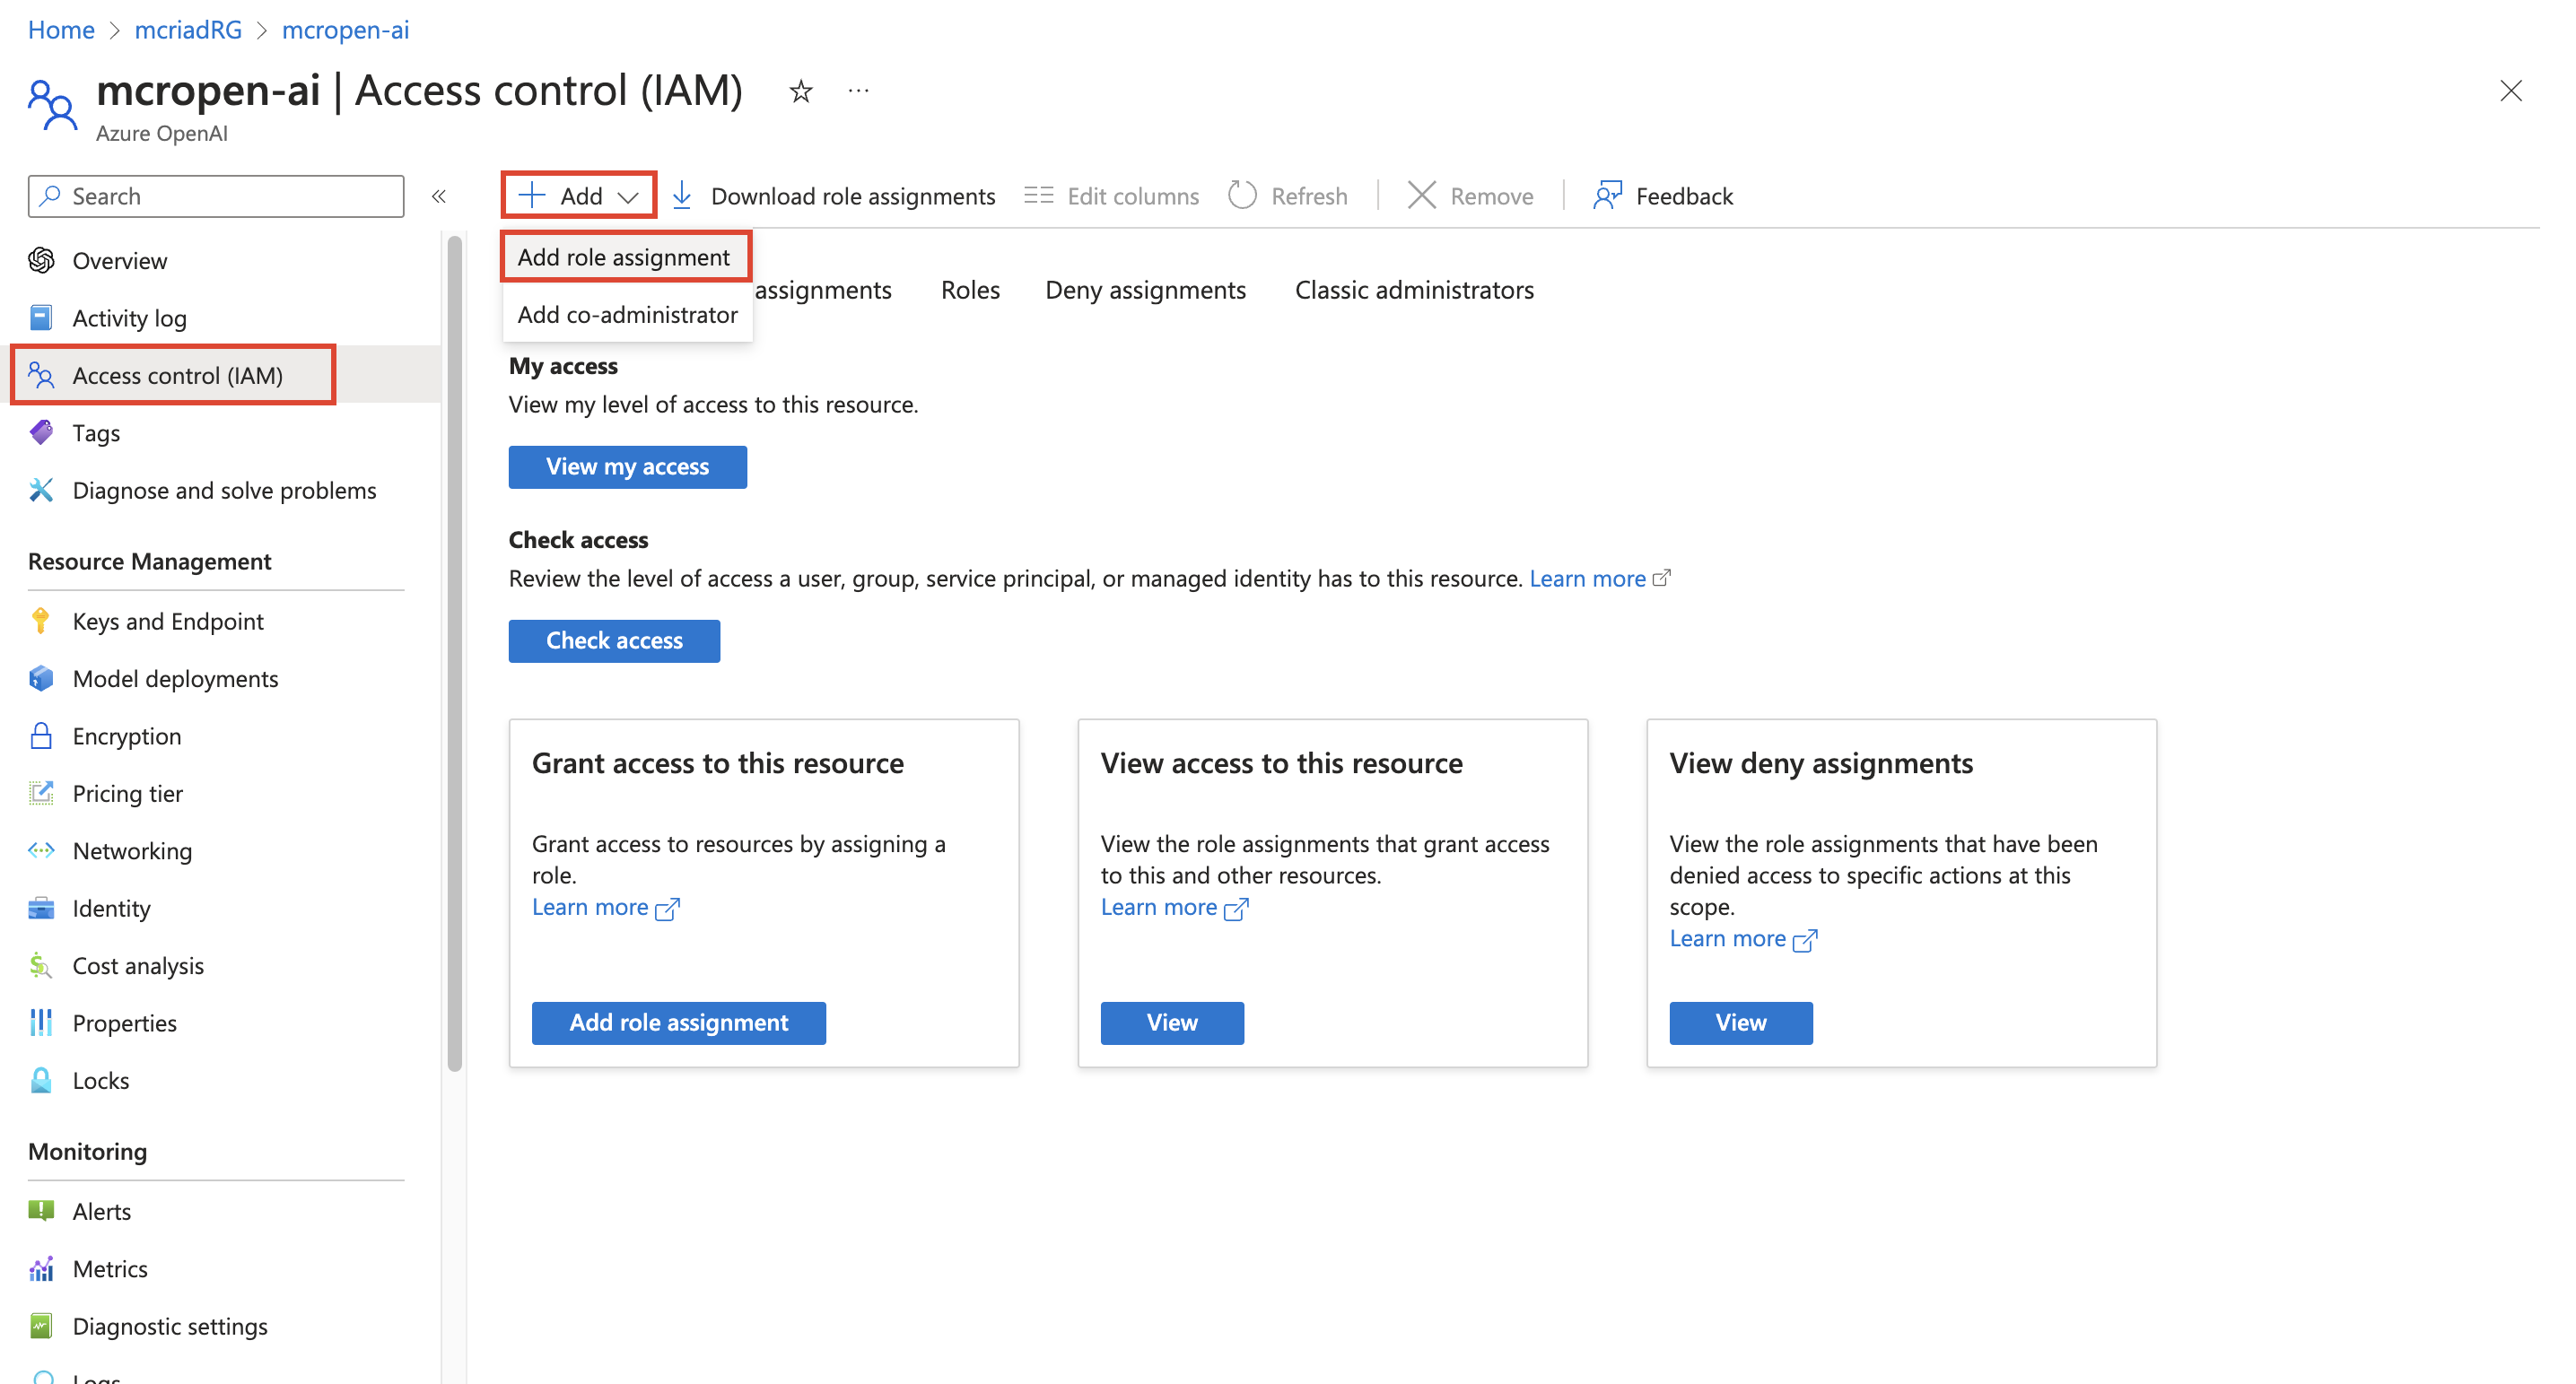
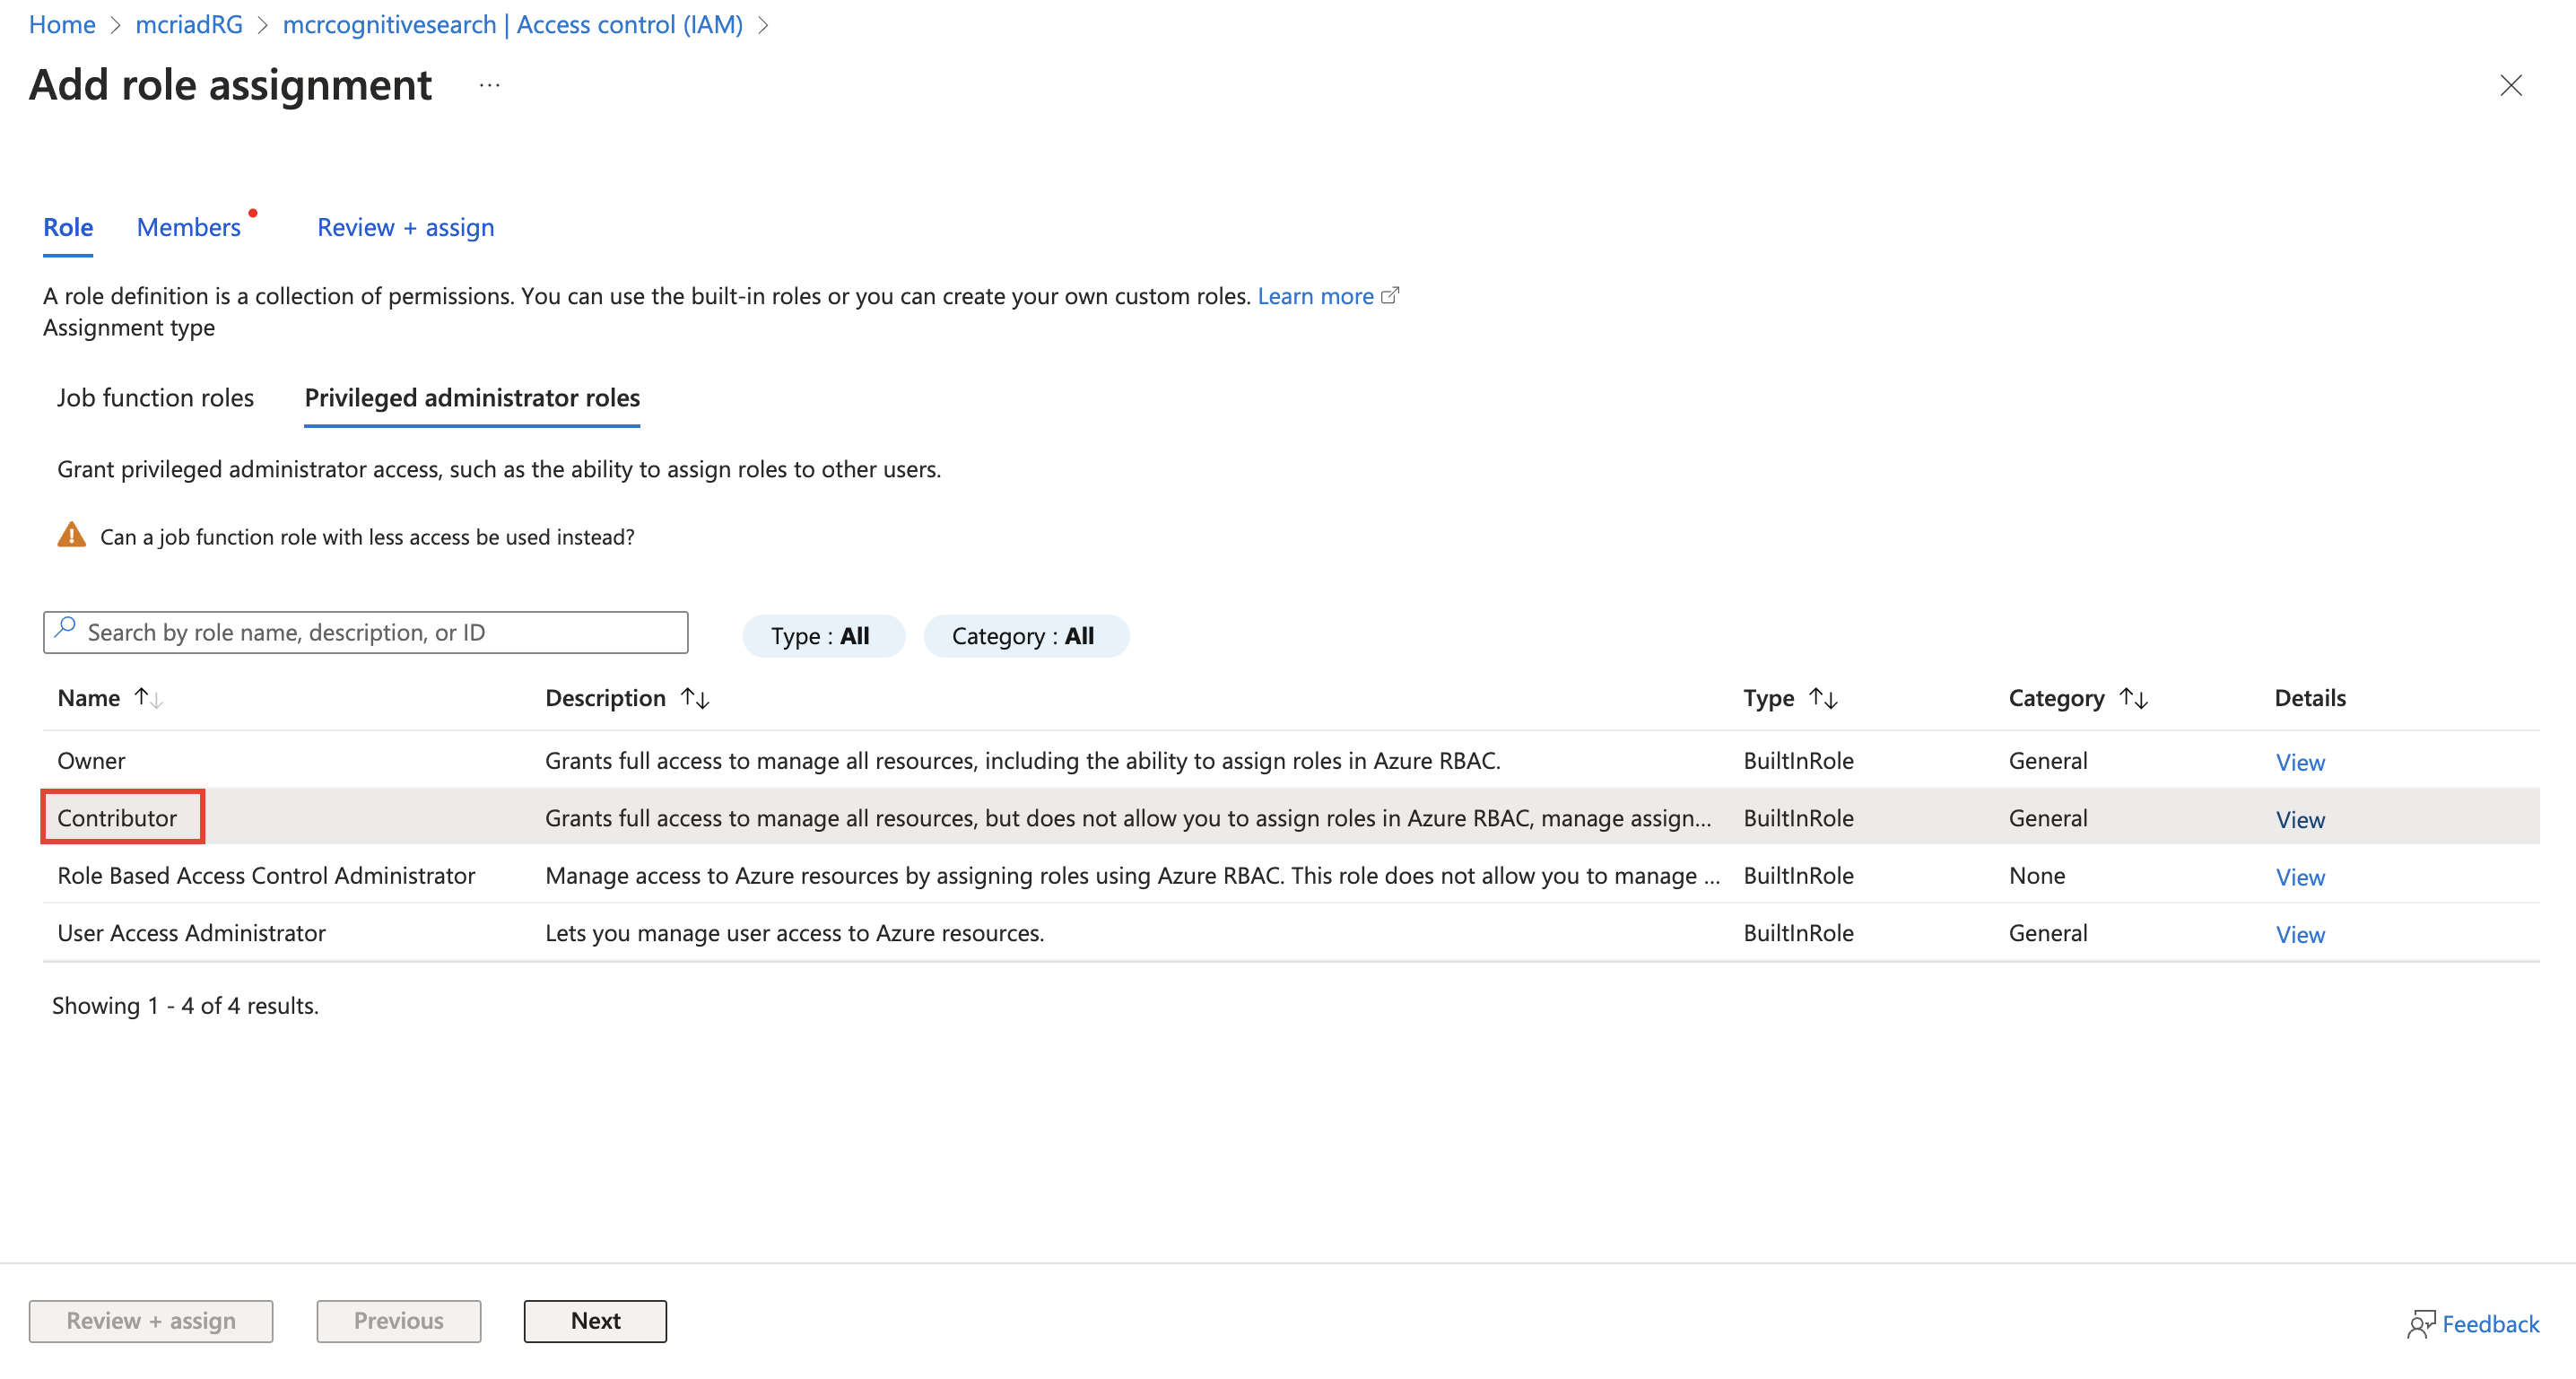
On the Role > Privileged administrator roles tab, select the Contributor role. Select Next.
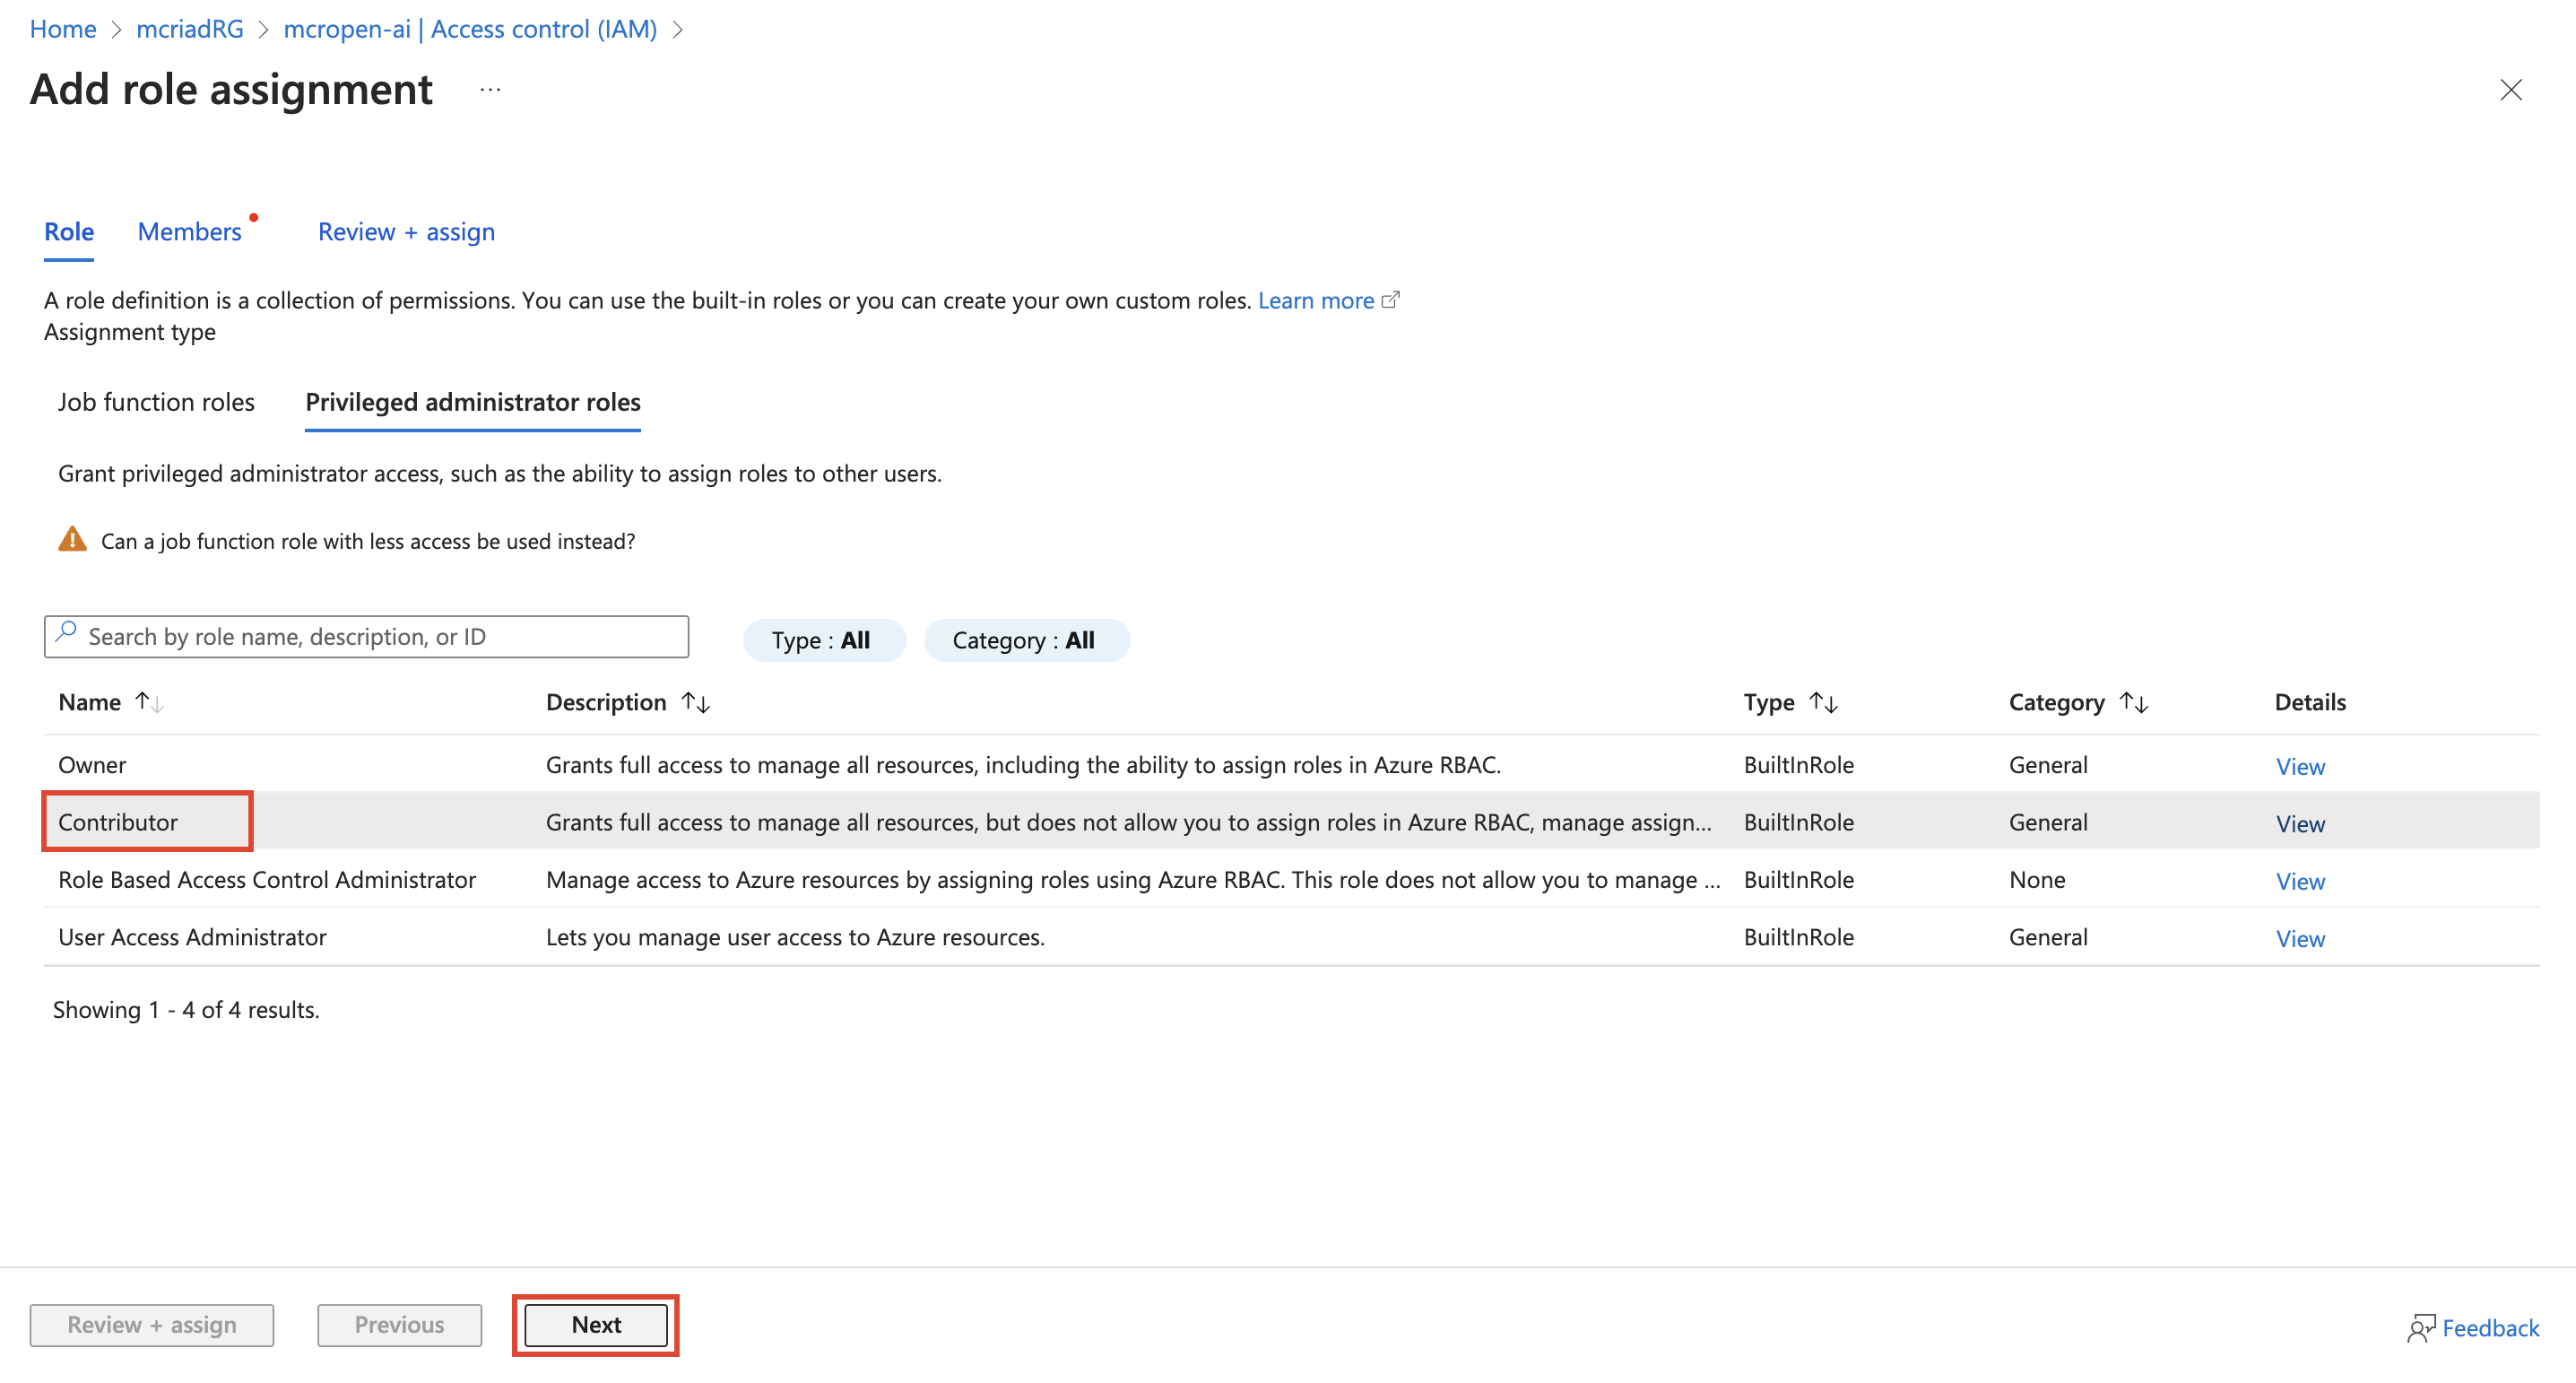
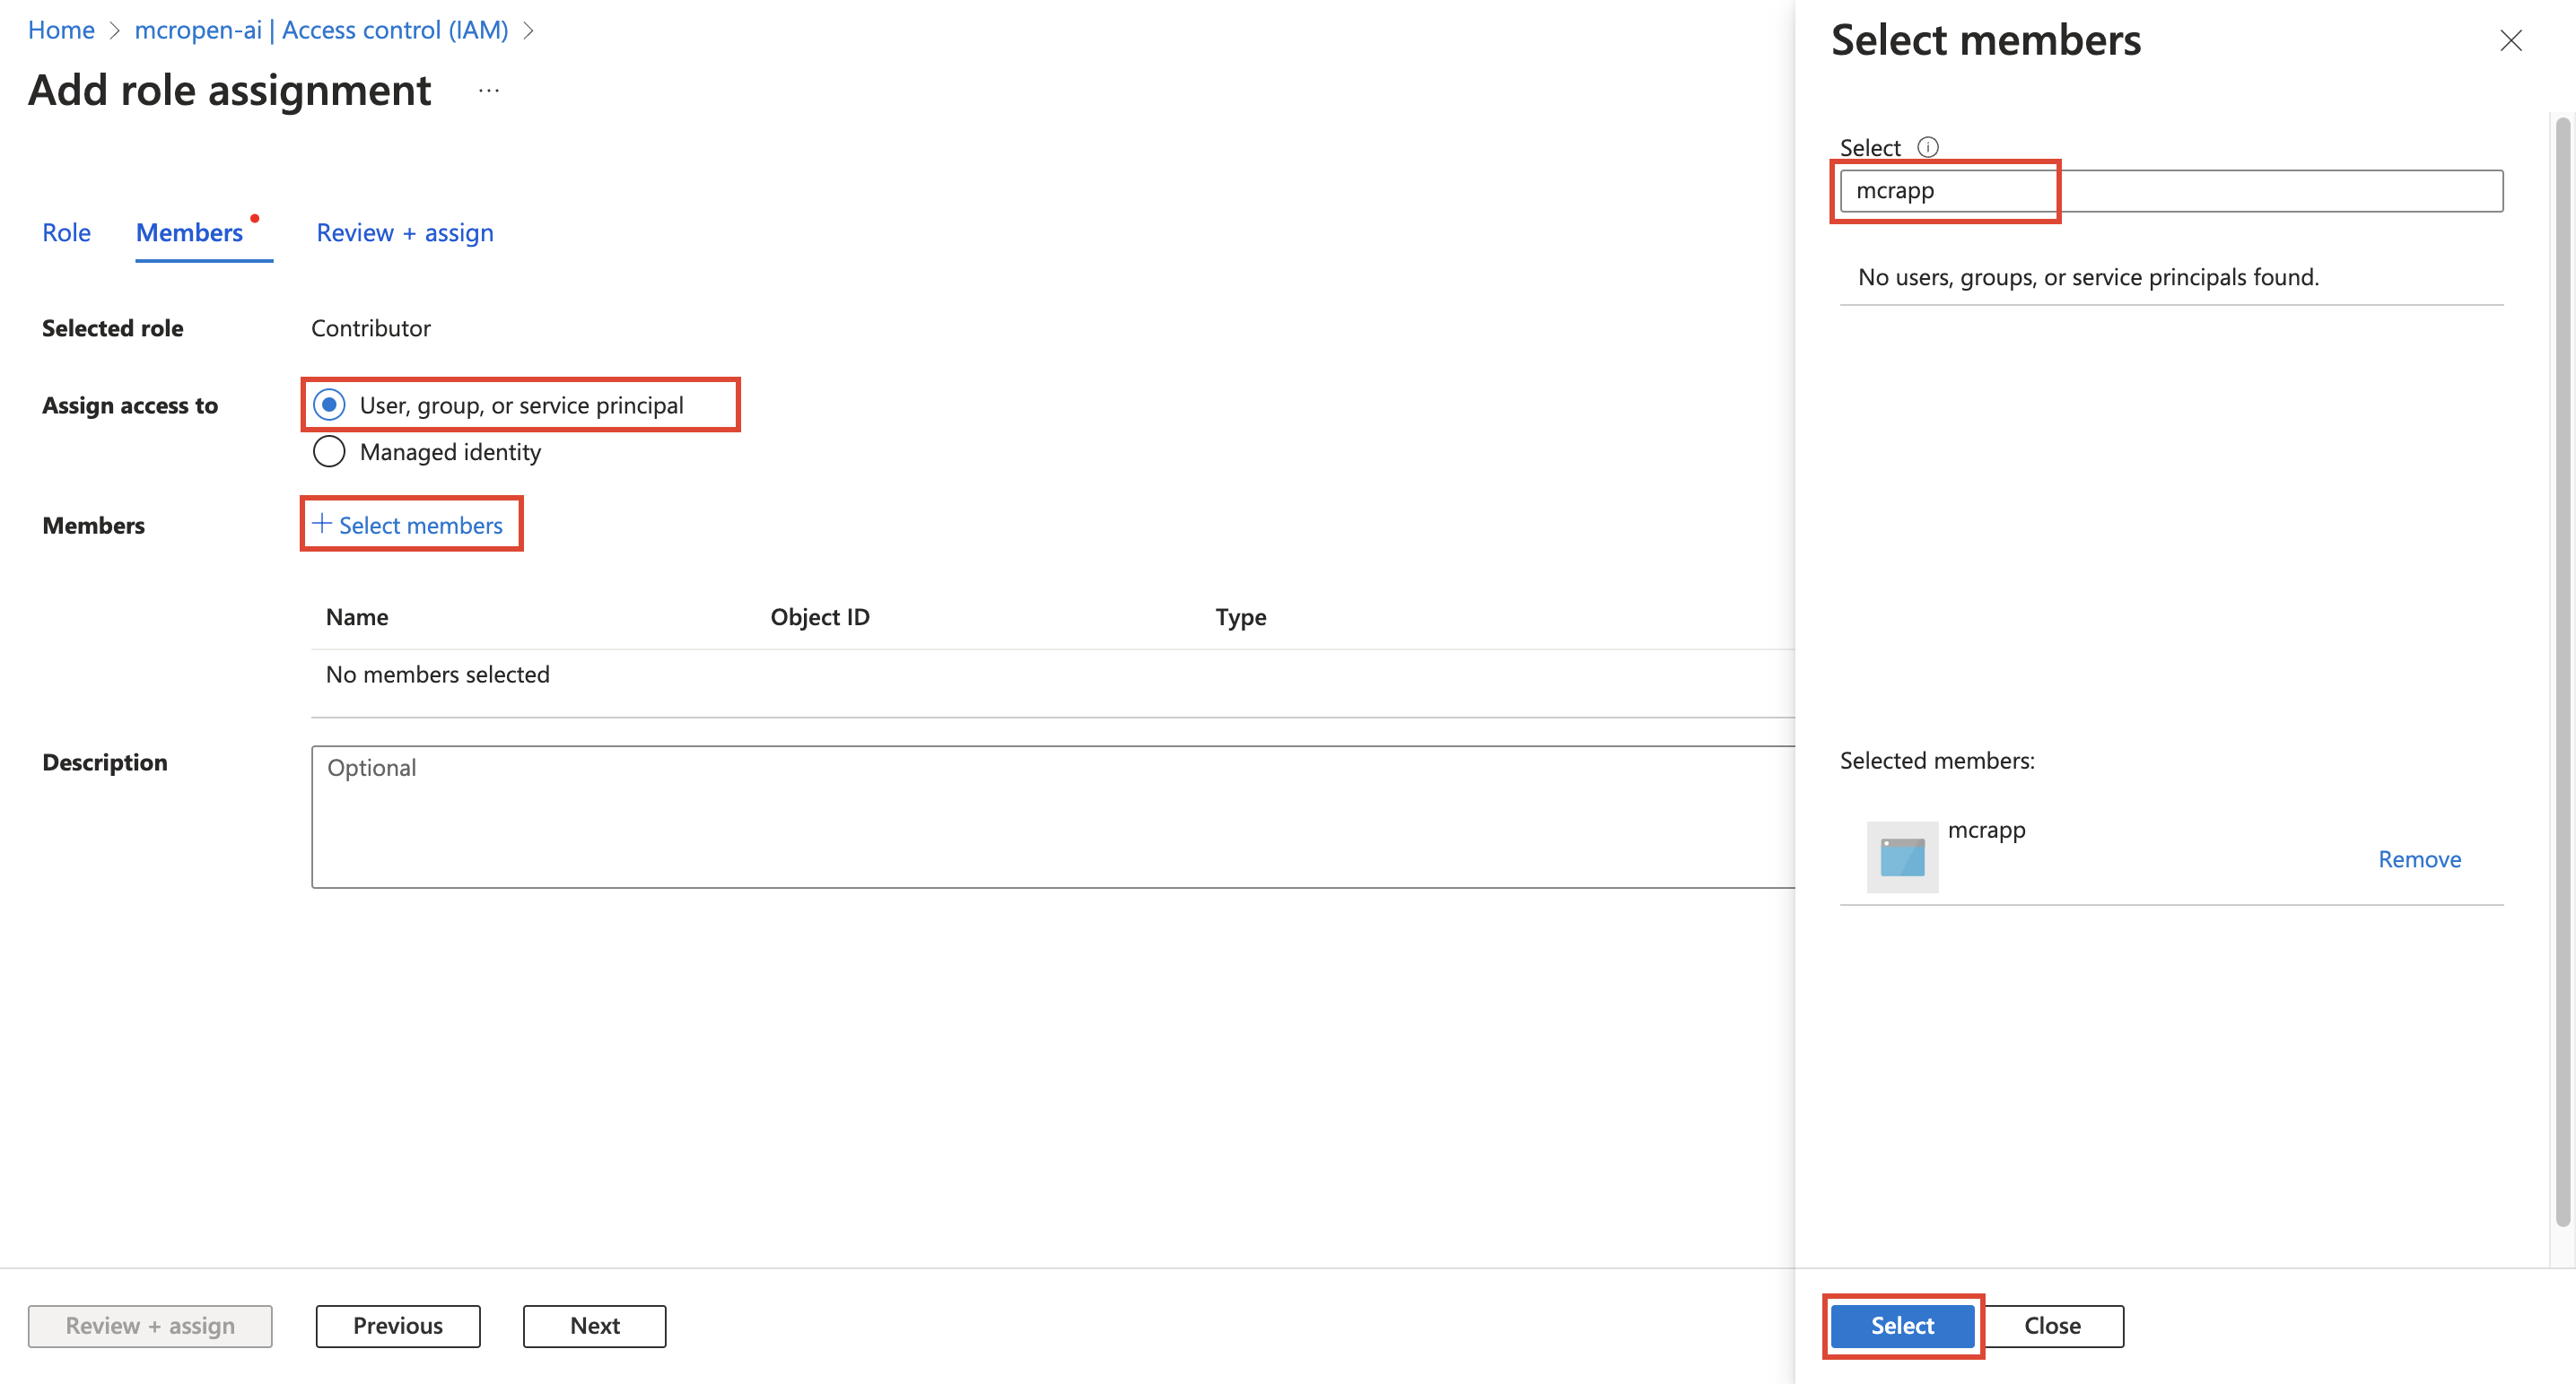
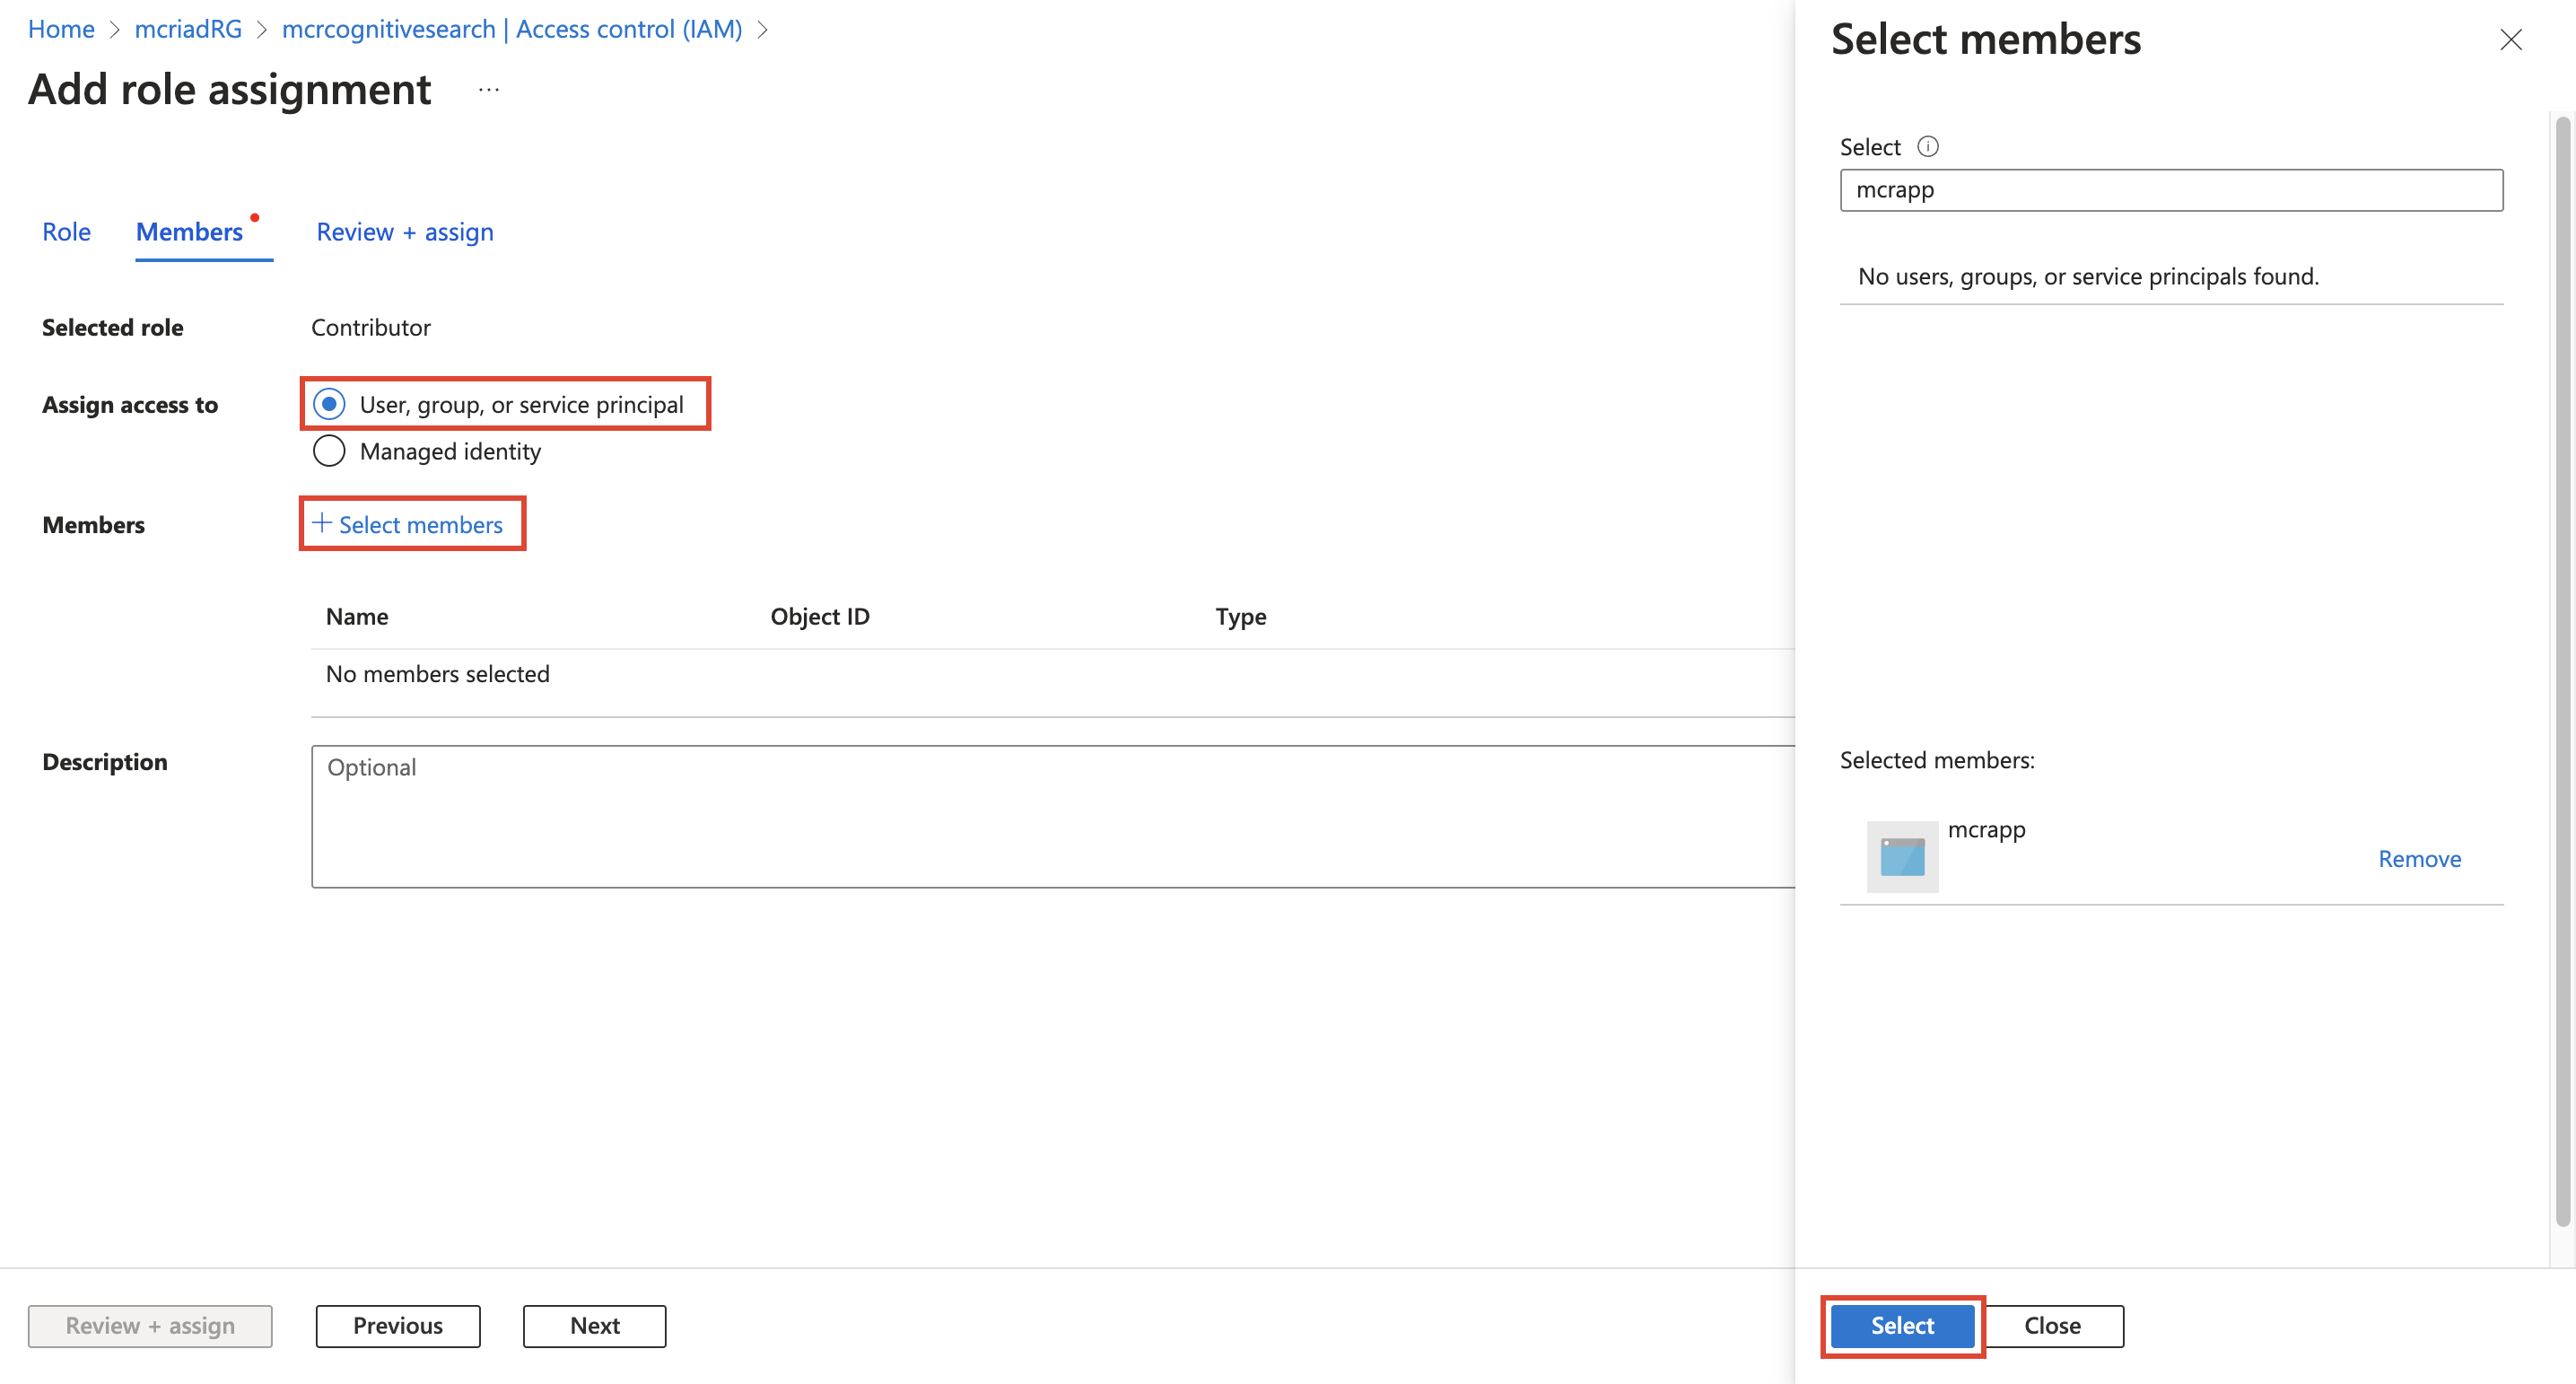
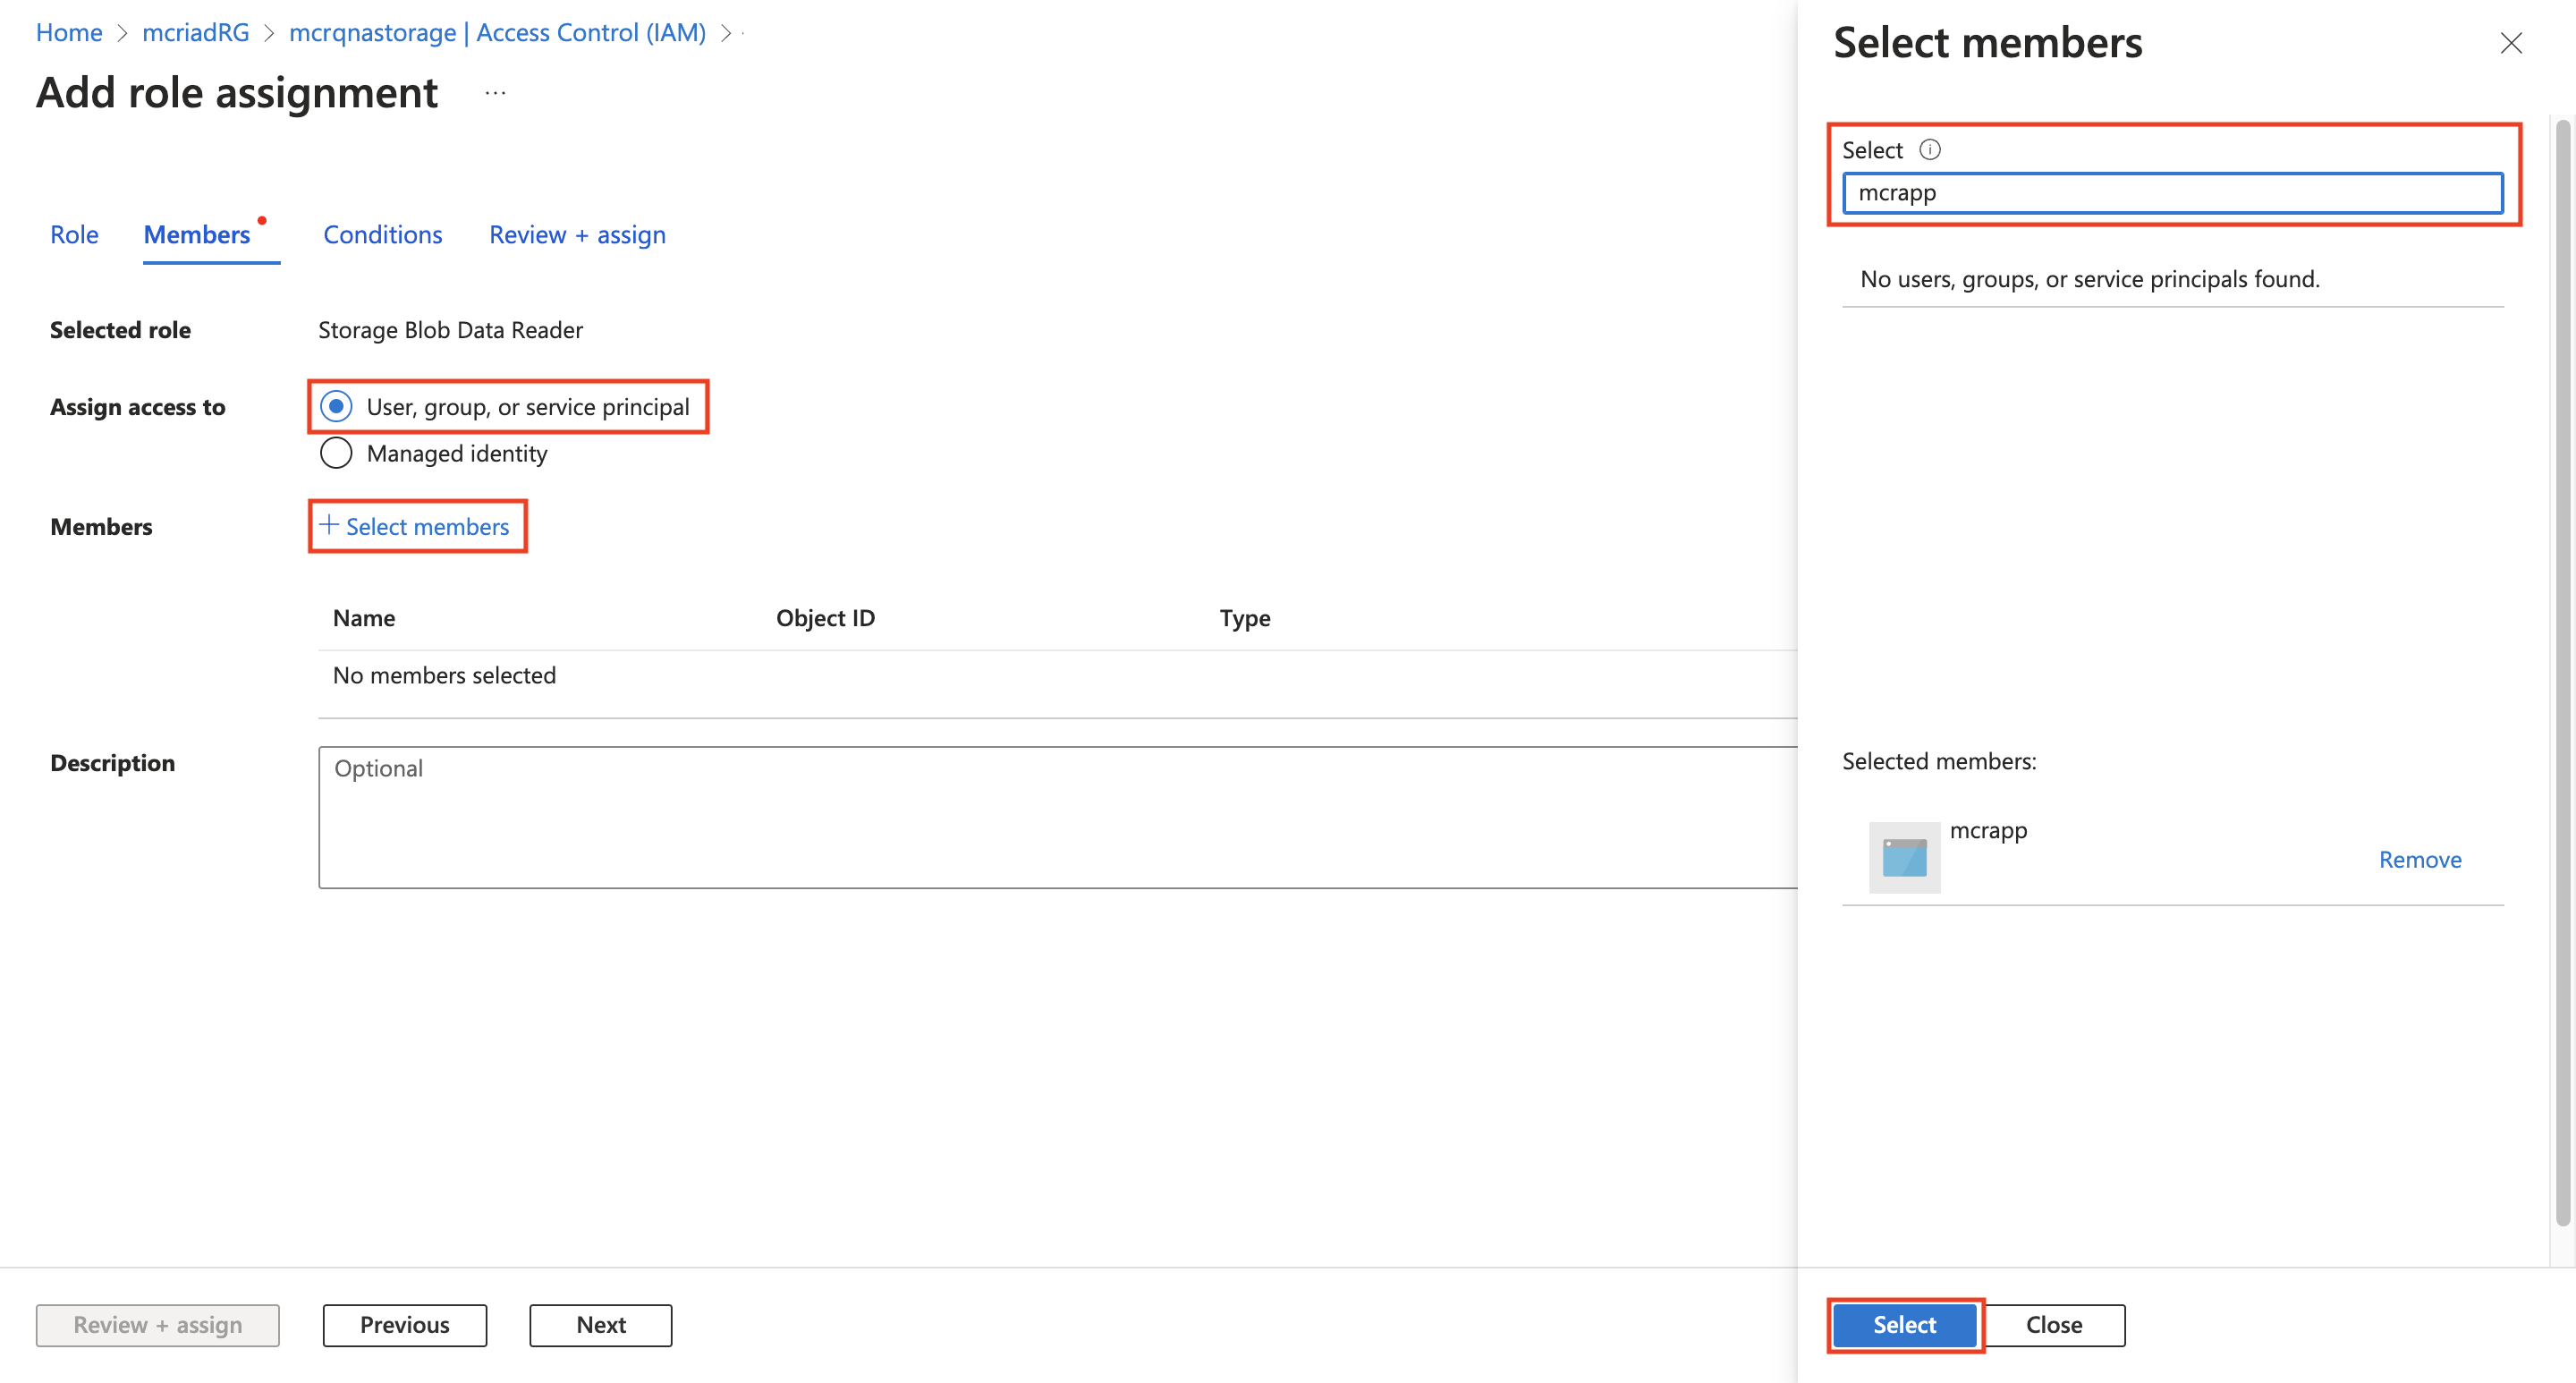
On the Members tab, select User, group, or service principal and + Select members. Select the mcrapp app registration instance that you previously created and then select Select > Next.
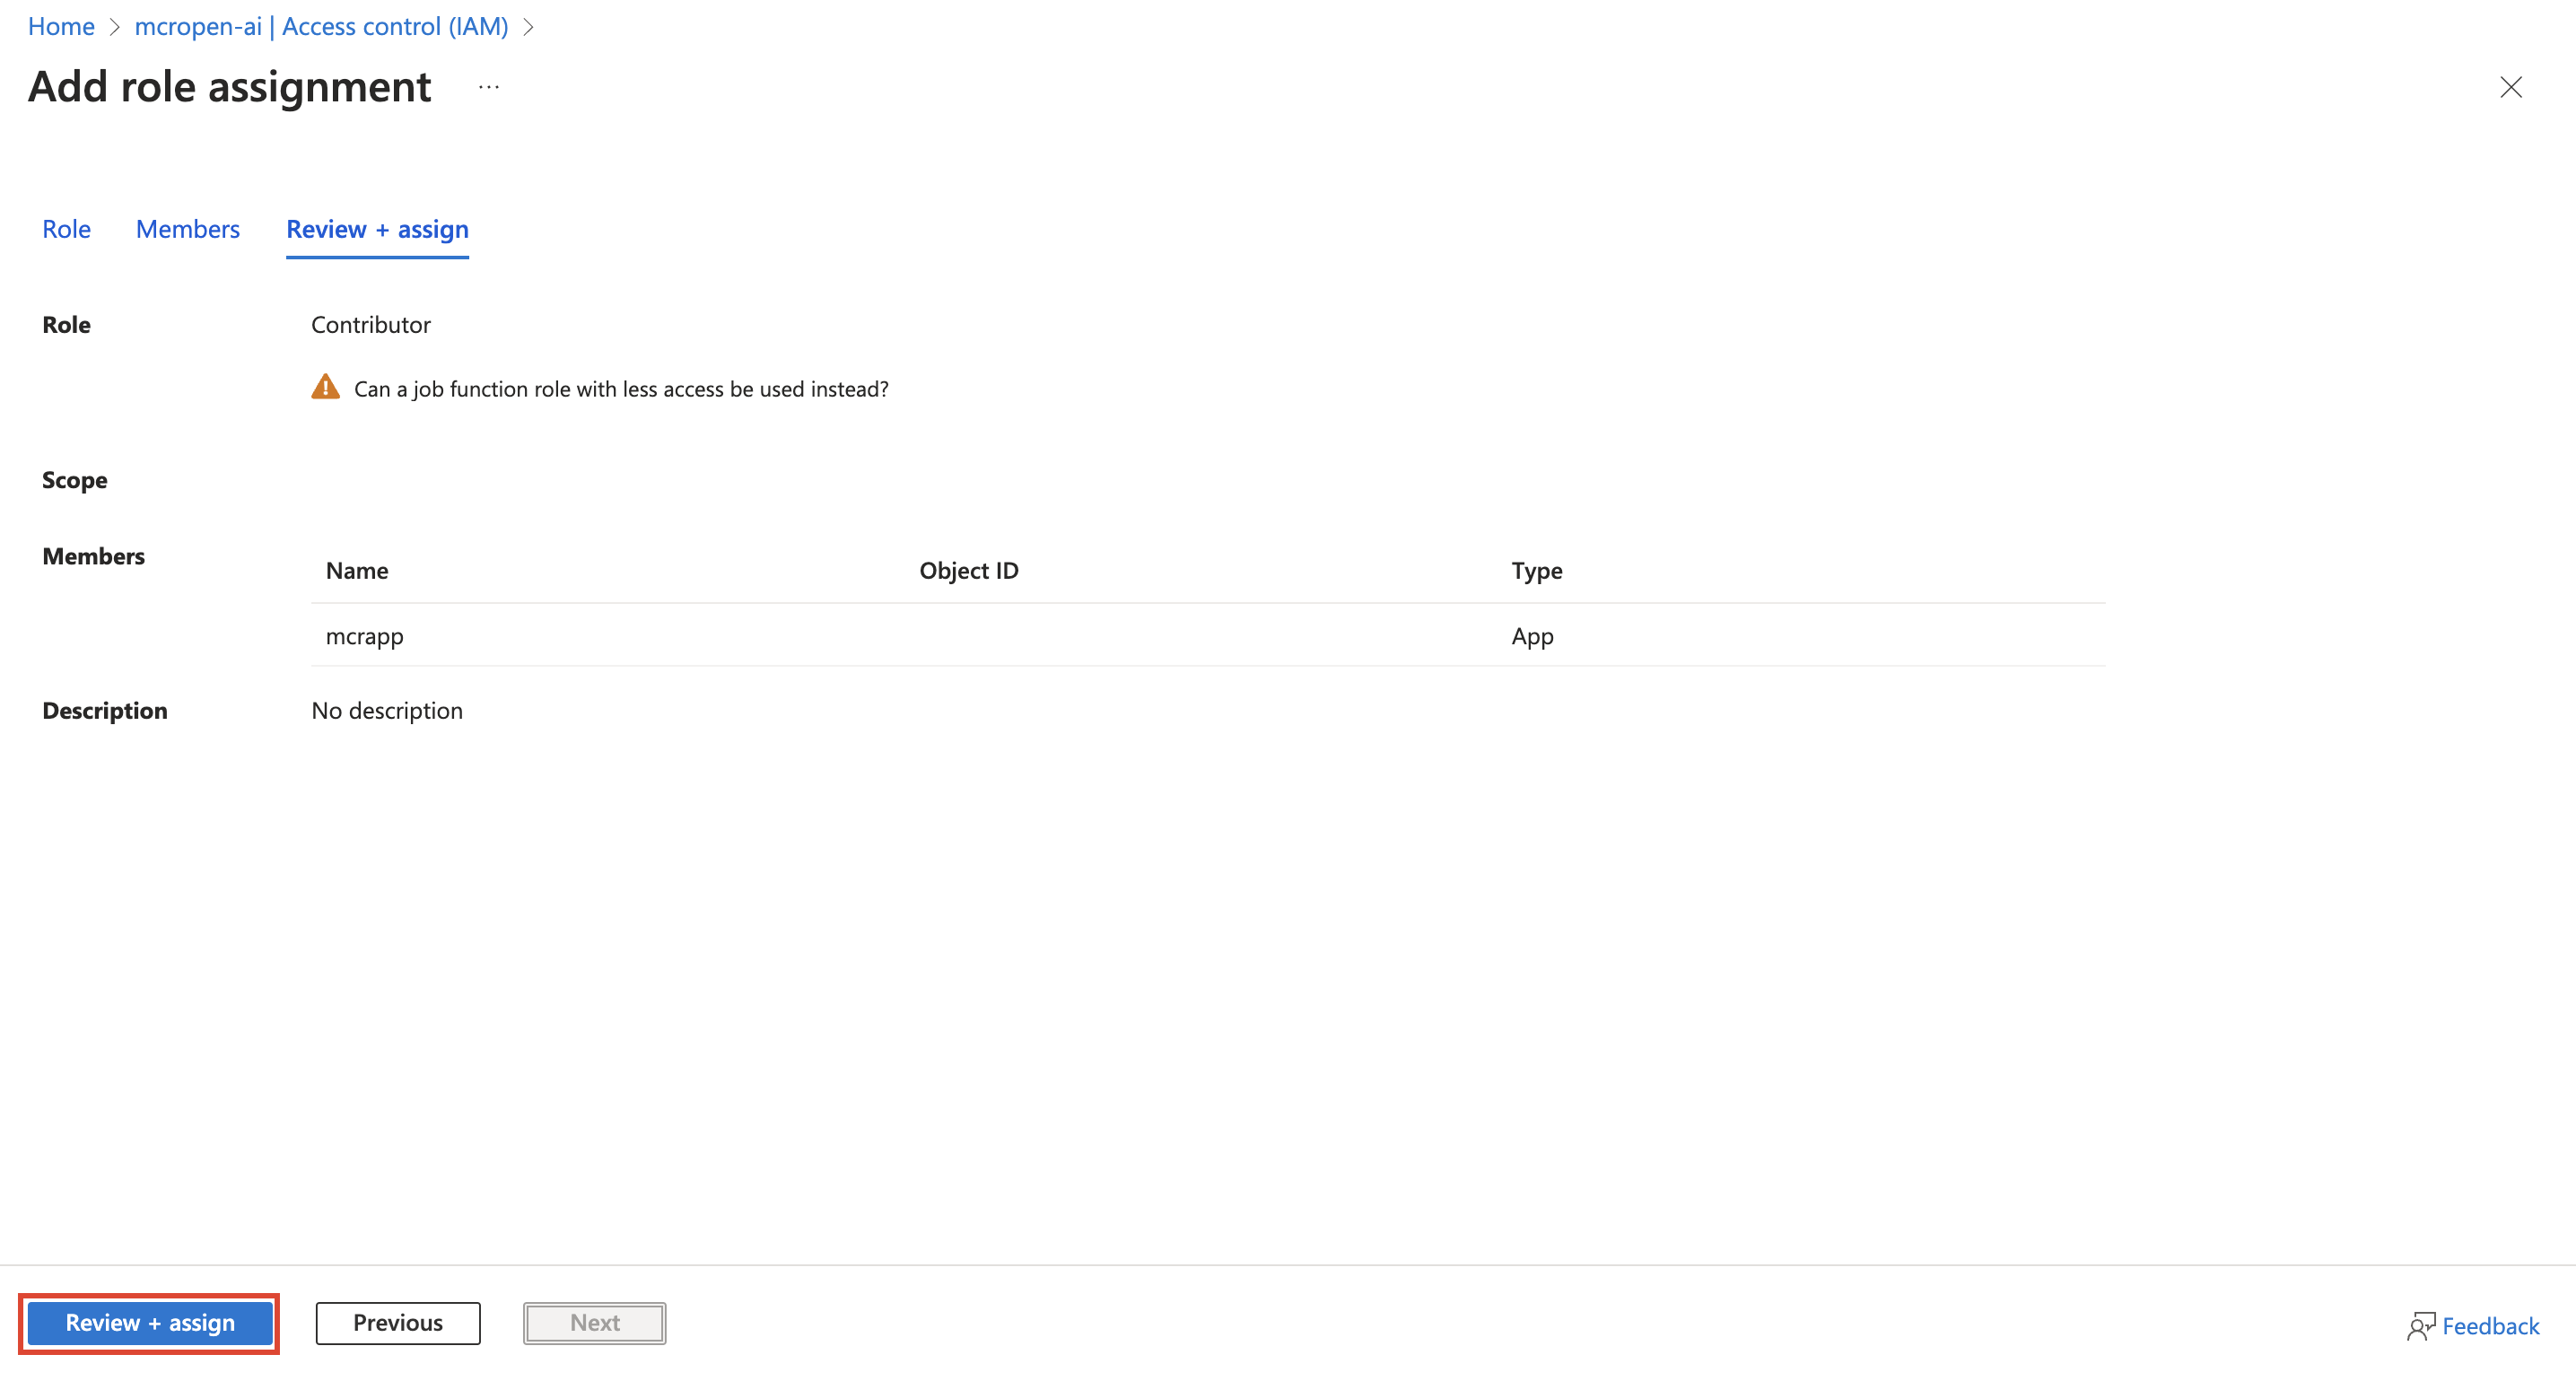
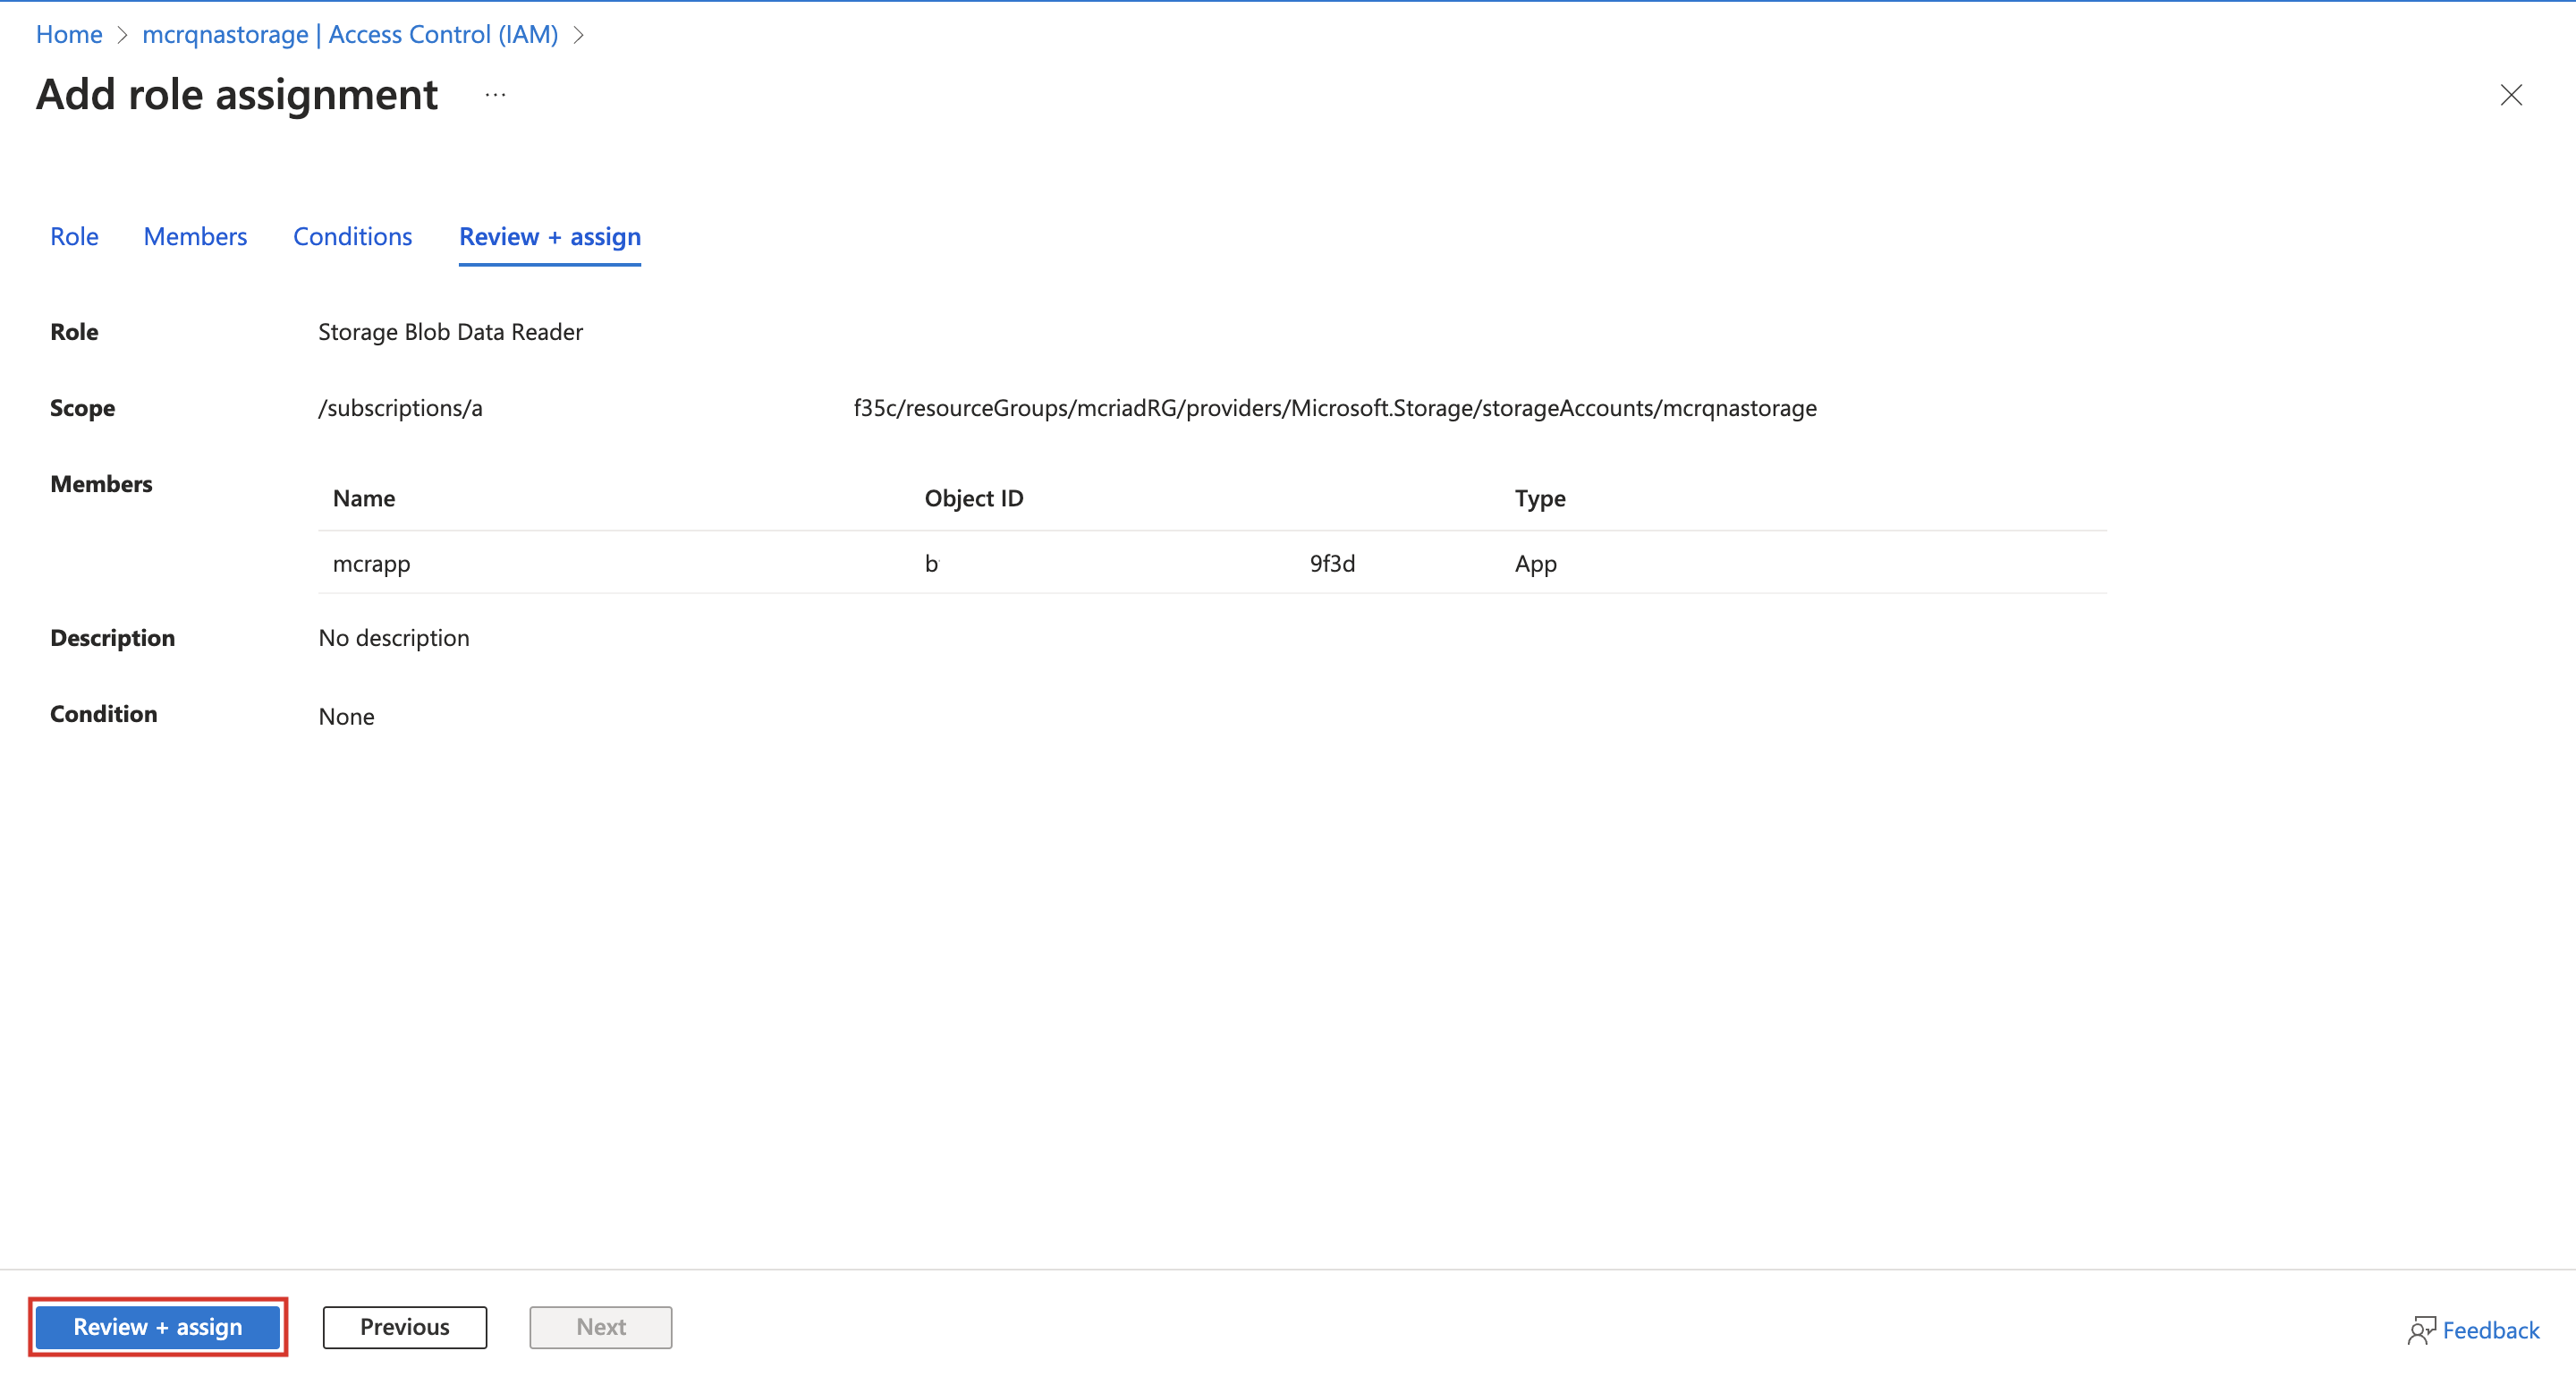
On the Review + assign tab, review the role assignment settings. Select Review + assign to assign the role.
Go to the mcriadRG resource group and select the mcrcognitivesearch Cognitive Search resource.
Select Access control (IAM). Select Add > Add role assignment.
On the Role > Privileged administrator roles tab, select the Contributor role. Select Next.
On the Members tab, select User, group, or service principal and + Select members. Select the mcrapp app registration instance that you previously created and then select Select > Next.
On the Review + assign tab, review the role assignment settings. Select Review + assign to assign the role.


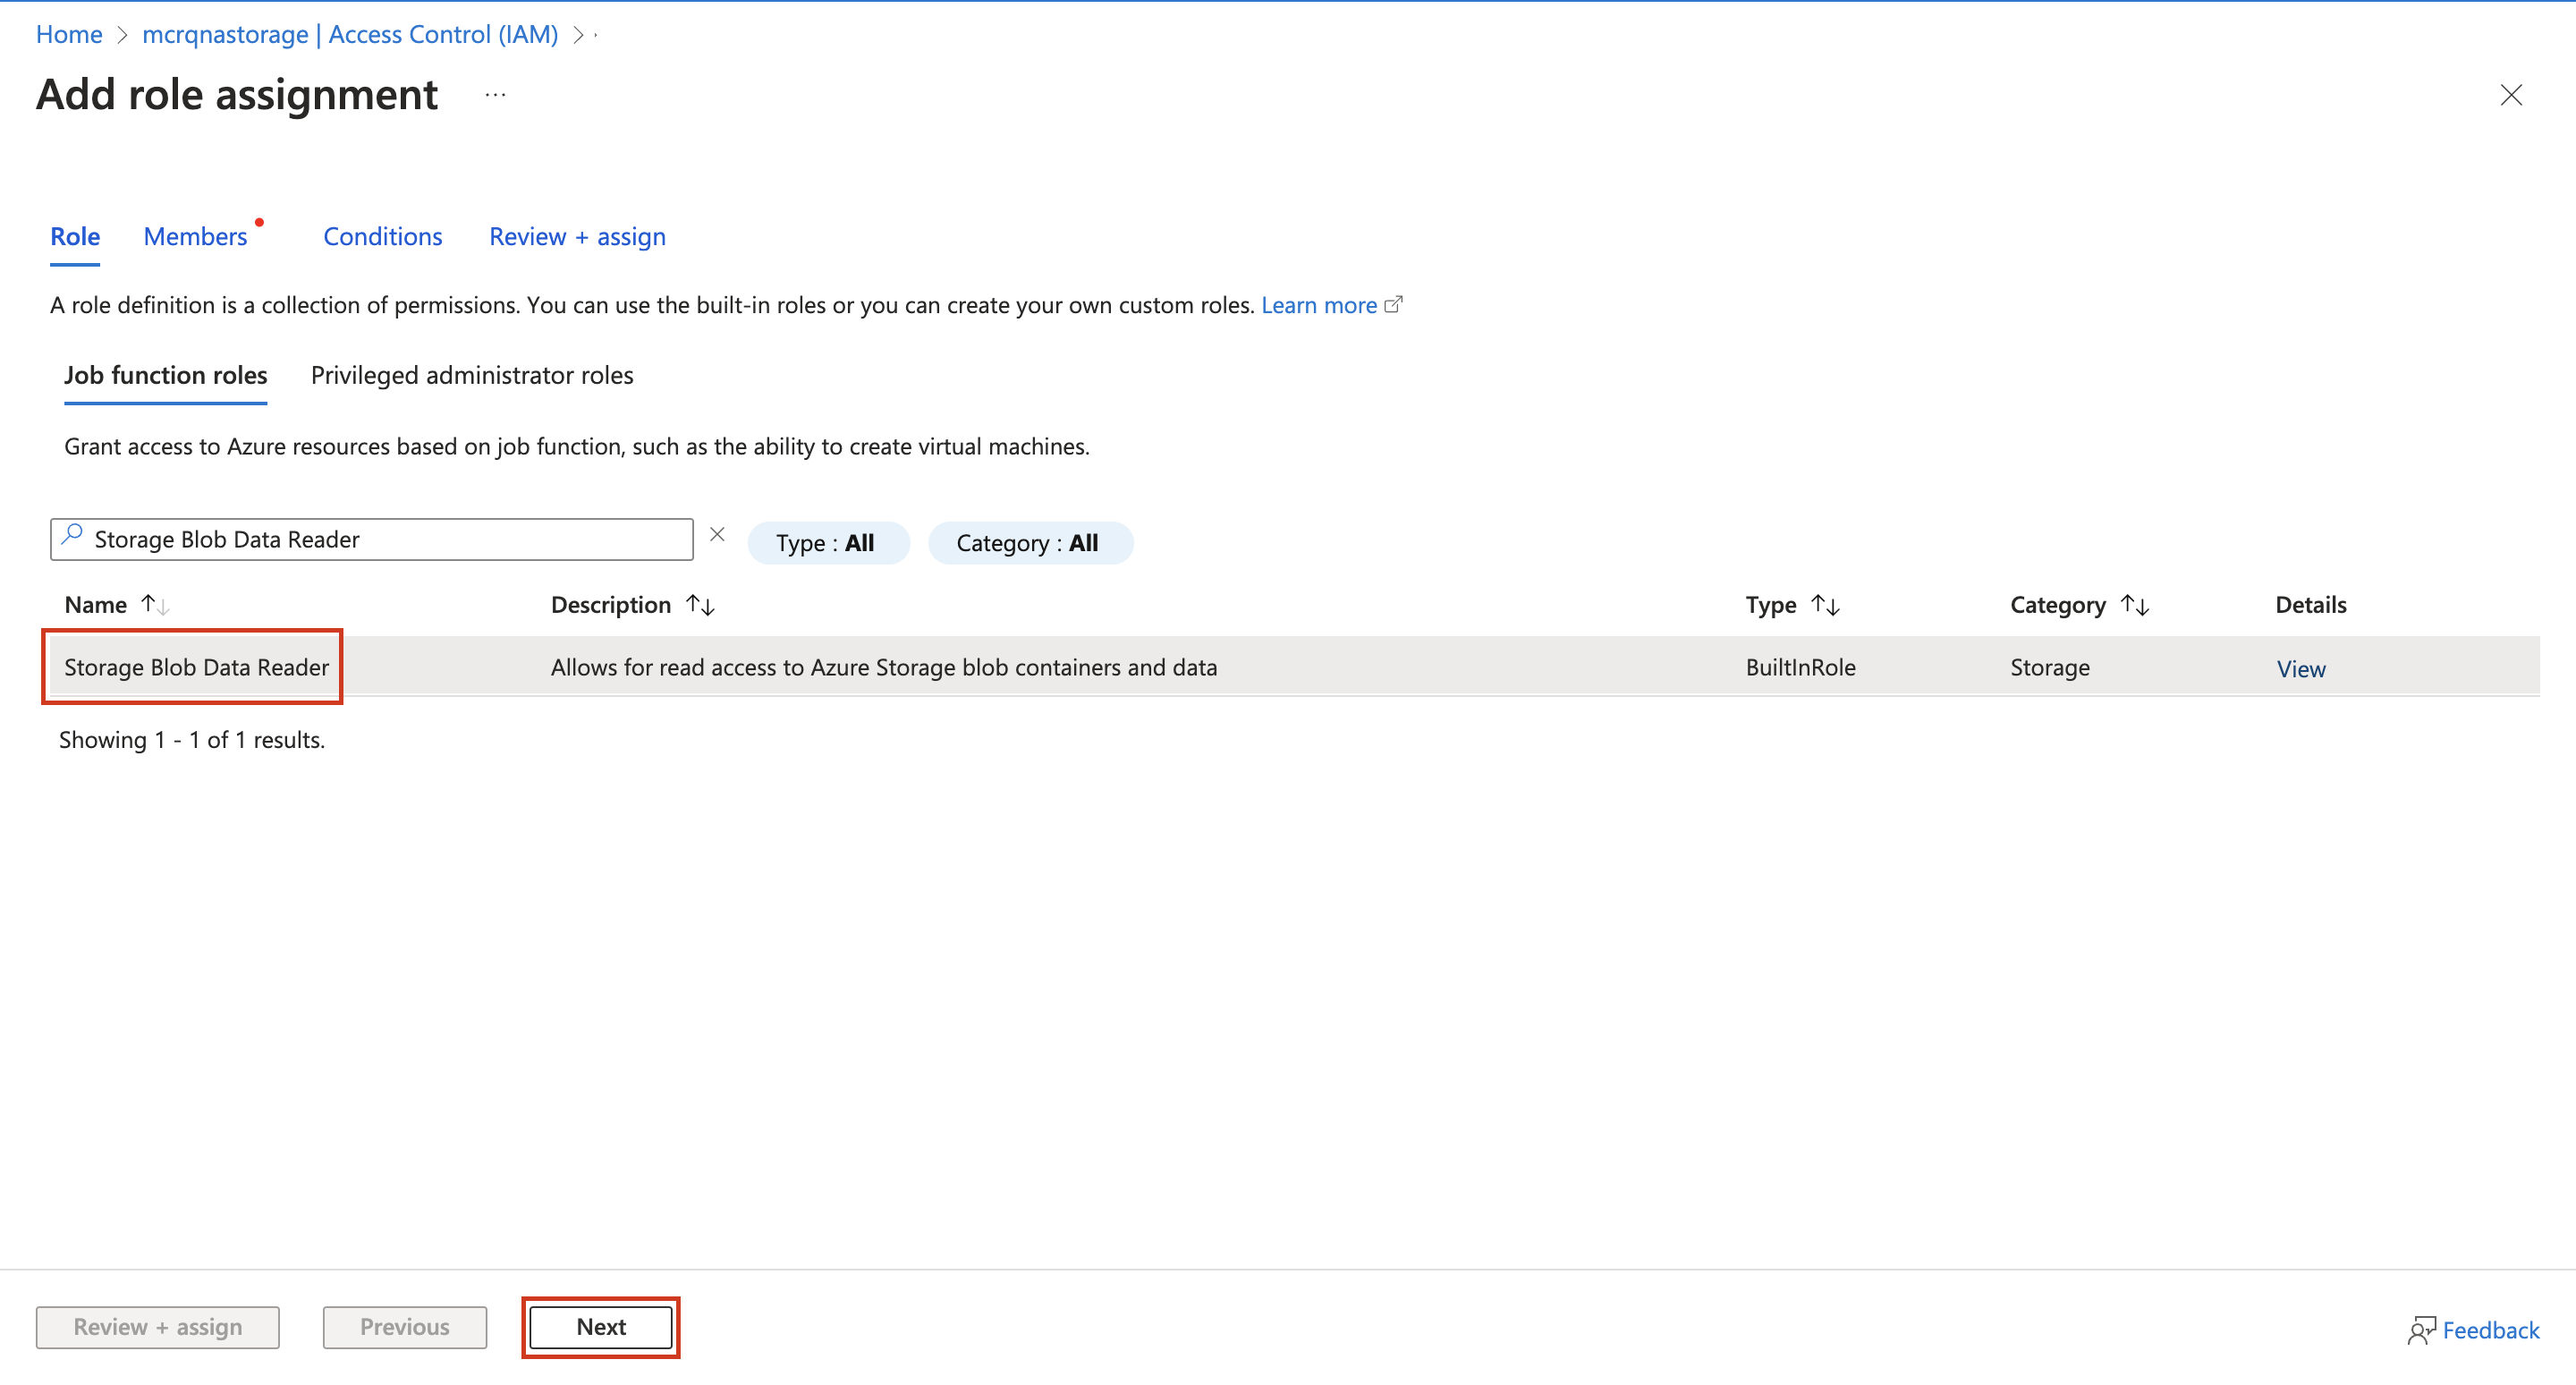
Task - Assign the Storage Blob Data Reader role to the app registration instance
You need to assign the Storage Blob Data Reader role to the app registration instance that you previously created. Then, you can use the storage account that you created during deployment. Follow these steps to assign the appropriate role to the storage account resource:
Sign in to Microsoft Azure portal.
Select the mcriadRG resource group and then select the mcrqnastorage storage account resource.
Select Access control (IAM) and then select Add > Add role assignment.

On the Role > Job function roles tab, select the Storage Blob Data Reader role. Select Next.
On the Members tab, select User, group, or service principal and + Select members. Select the mcrapp app registration instance that you previously created and then select Select > Next.
On the Review + assign tab, review the role assignment settings. Select Review + assign to assign the role.


For detailed steps, see Assign Azure roles using the Azure portal.
Task - Enable AI store operations
As Oscar, you need to enable the AI store operations flag to activate the AI store operations feature. To do so, follow these steps:
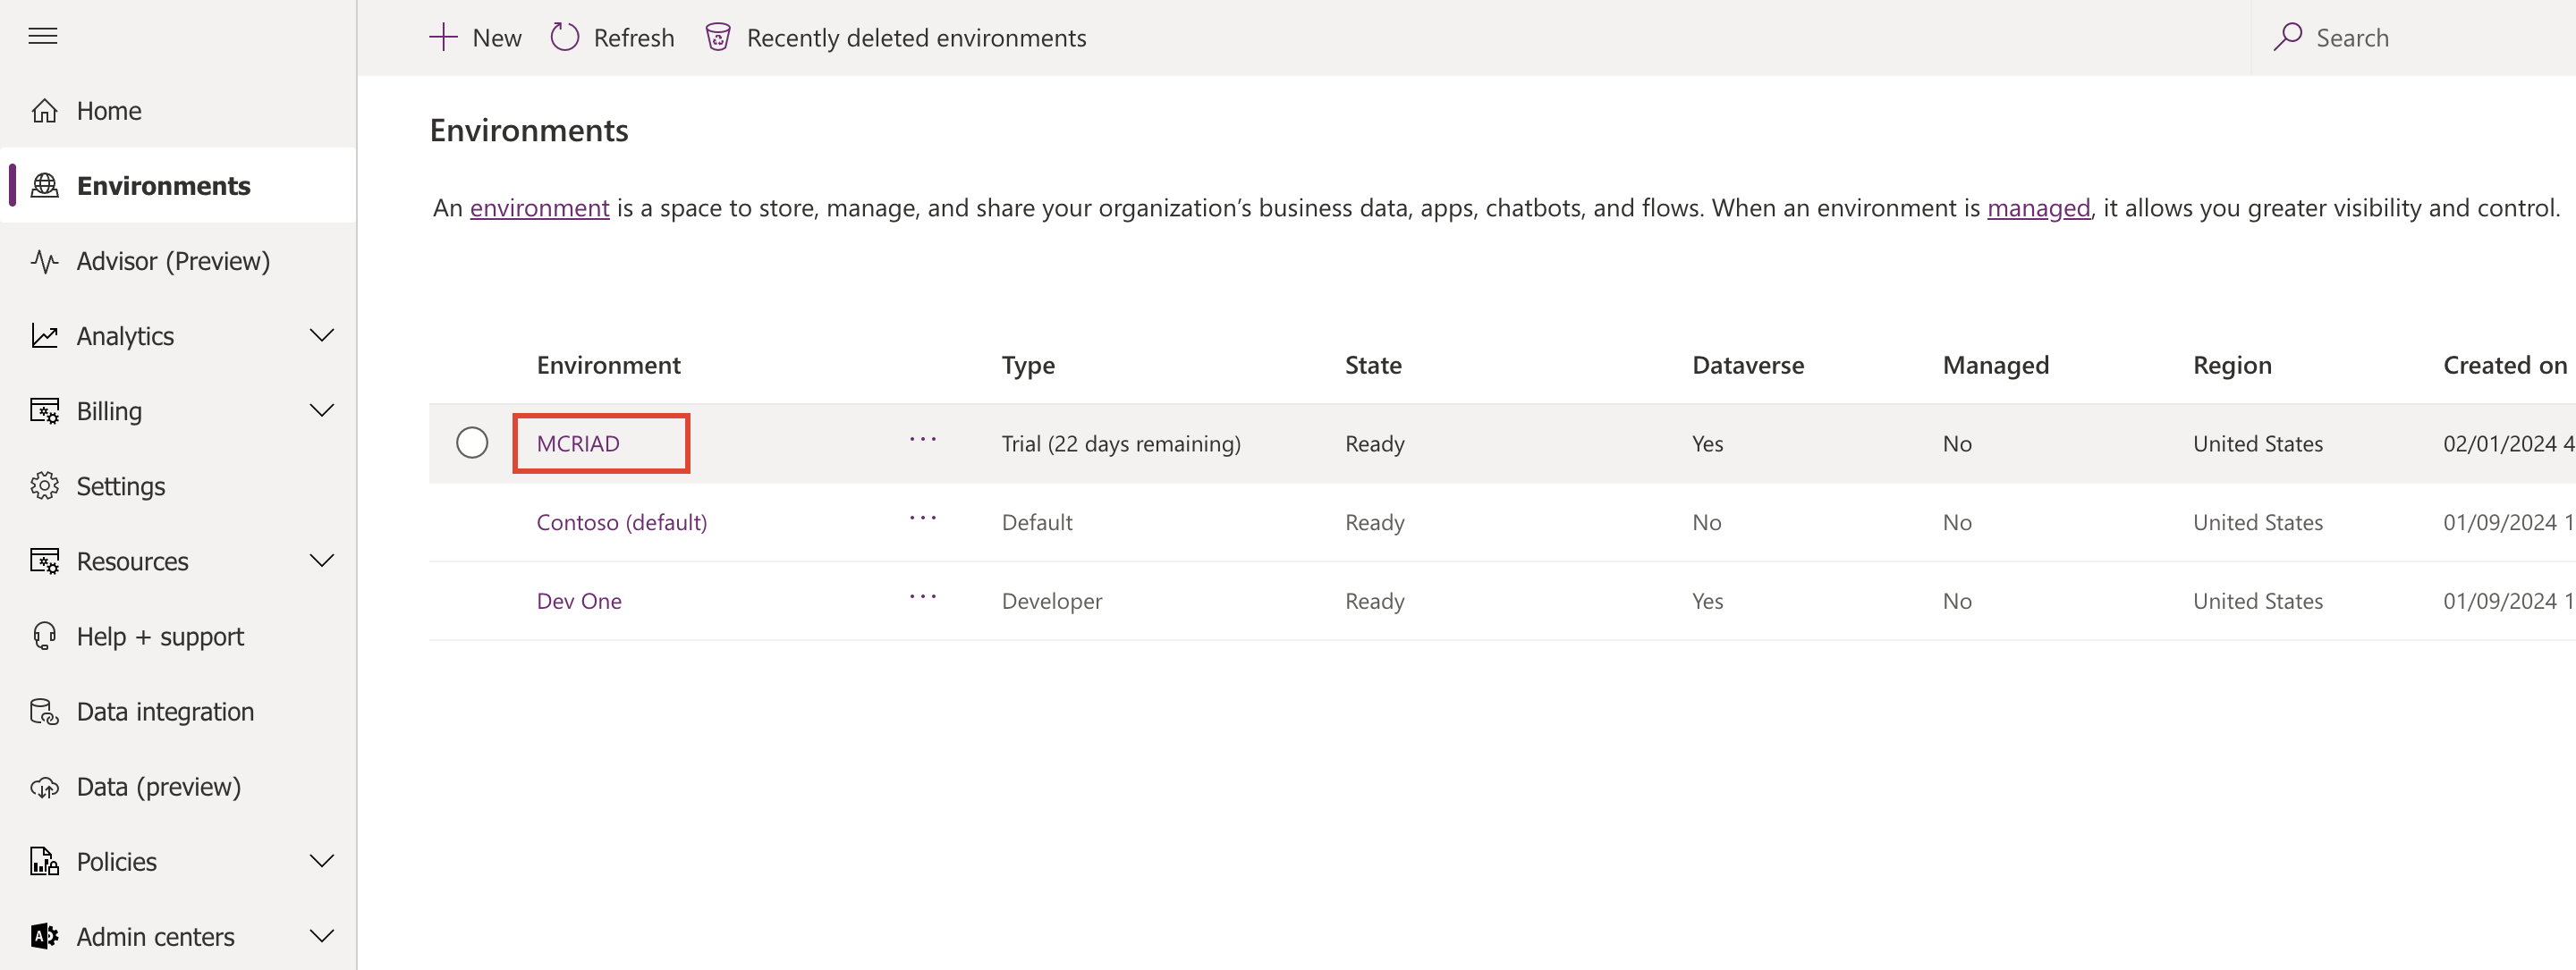
Sign in to Power Apps maker portal and select the MCRIAD environment.
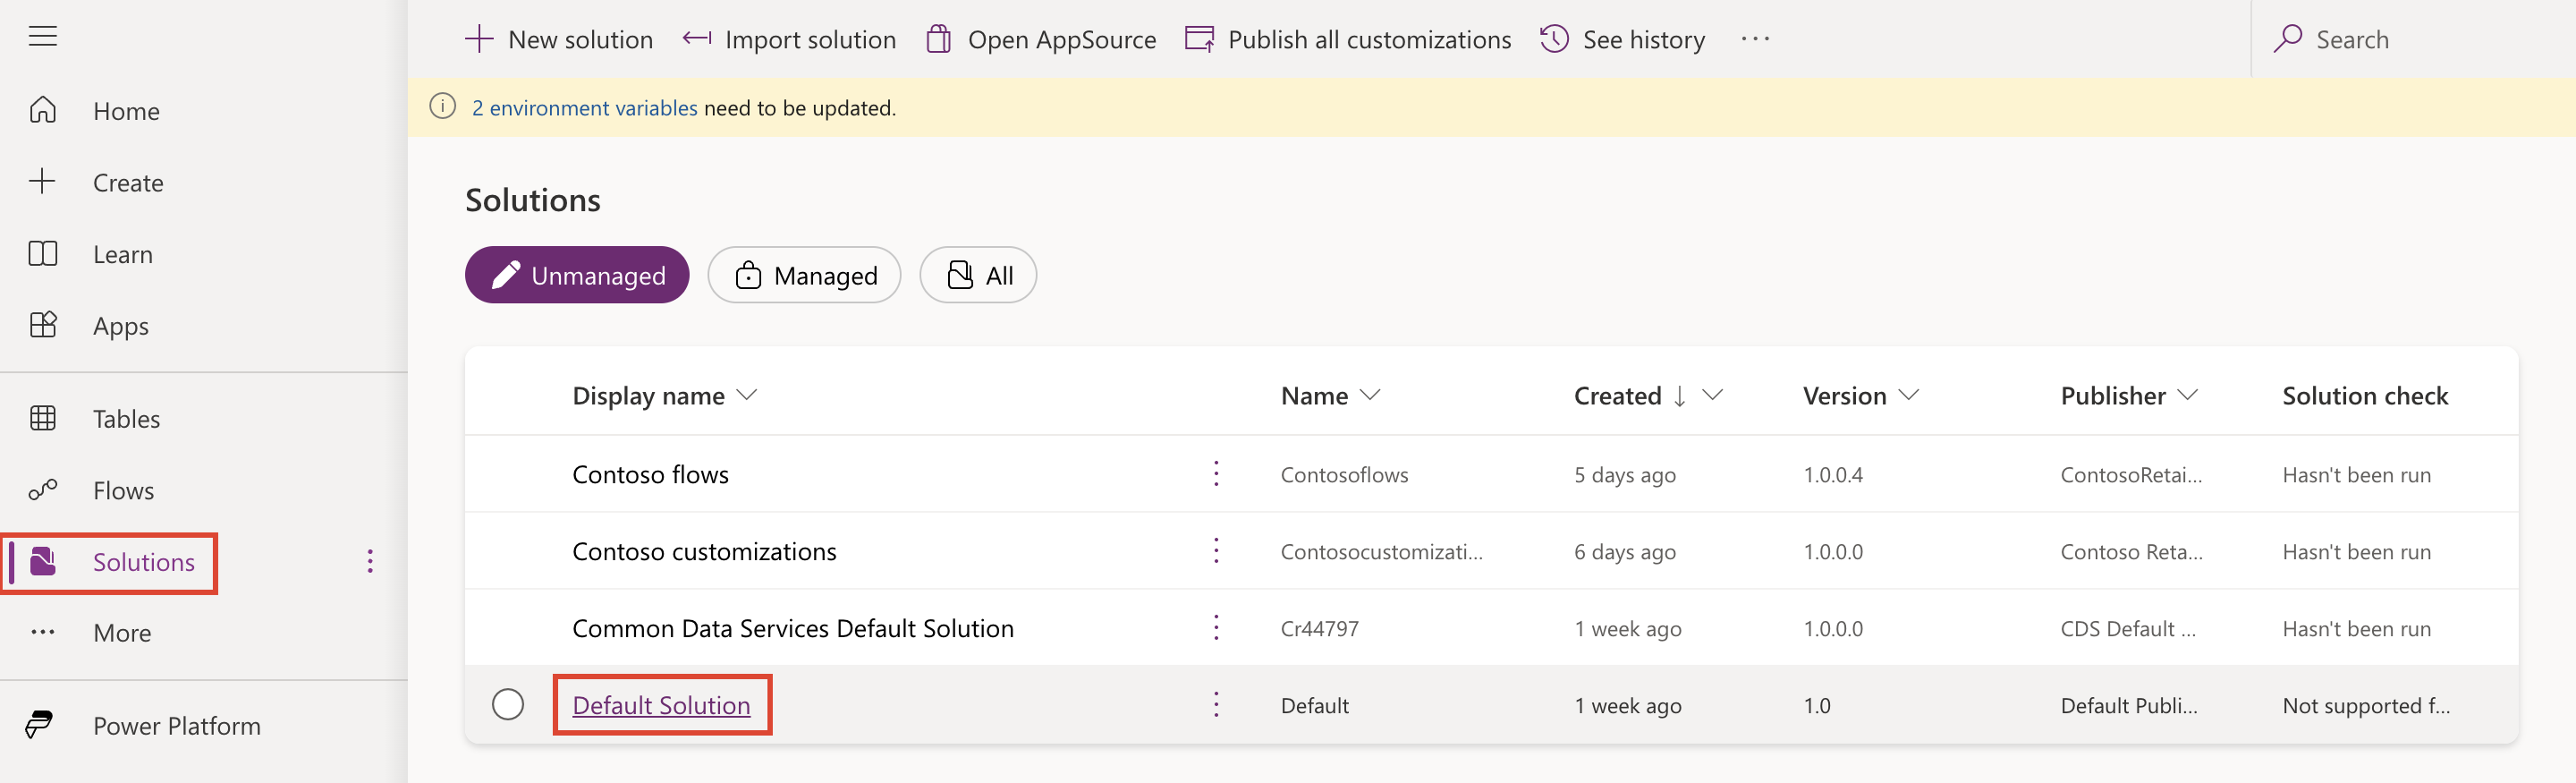
Go to Solutions. Under Unmanaged, select Default Solution.
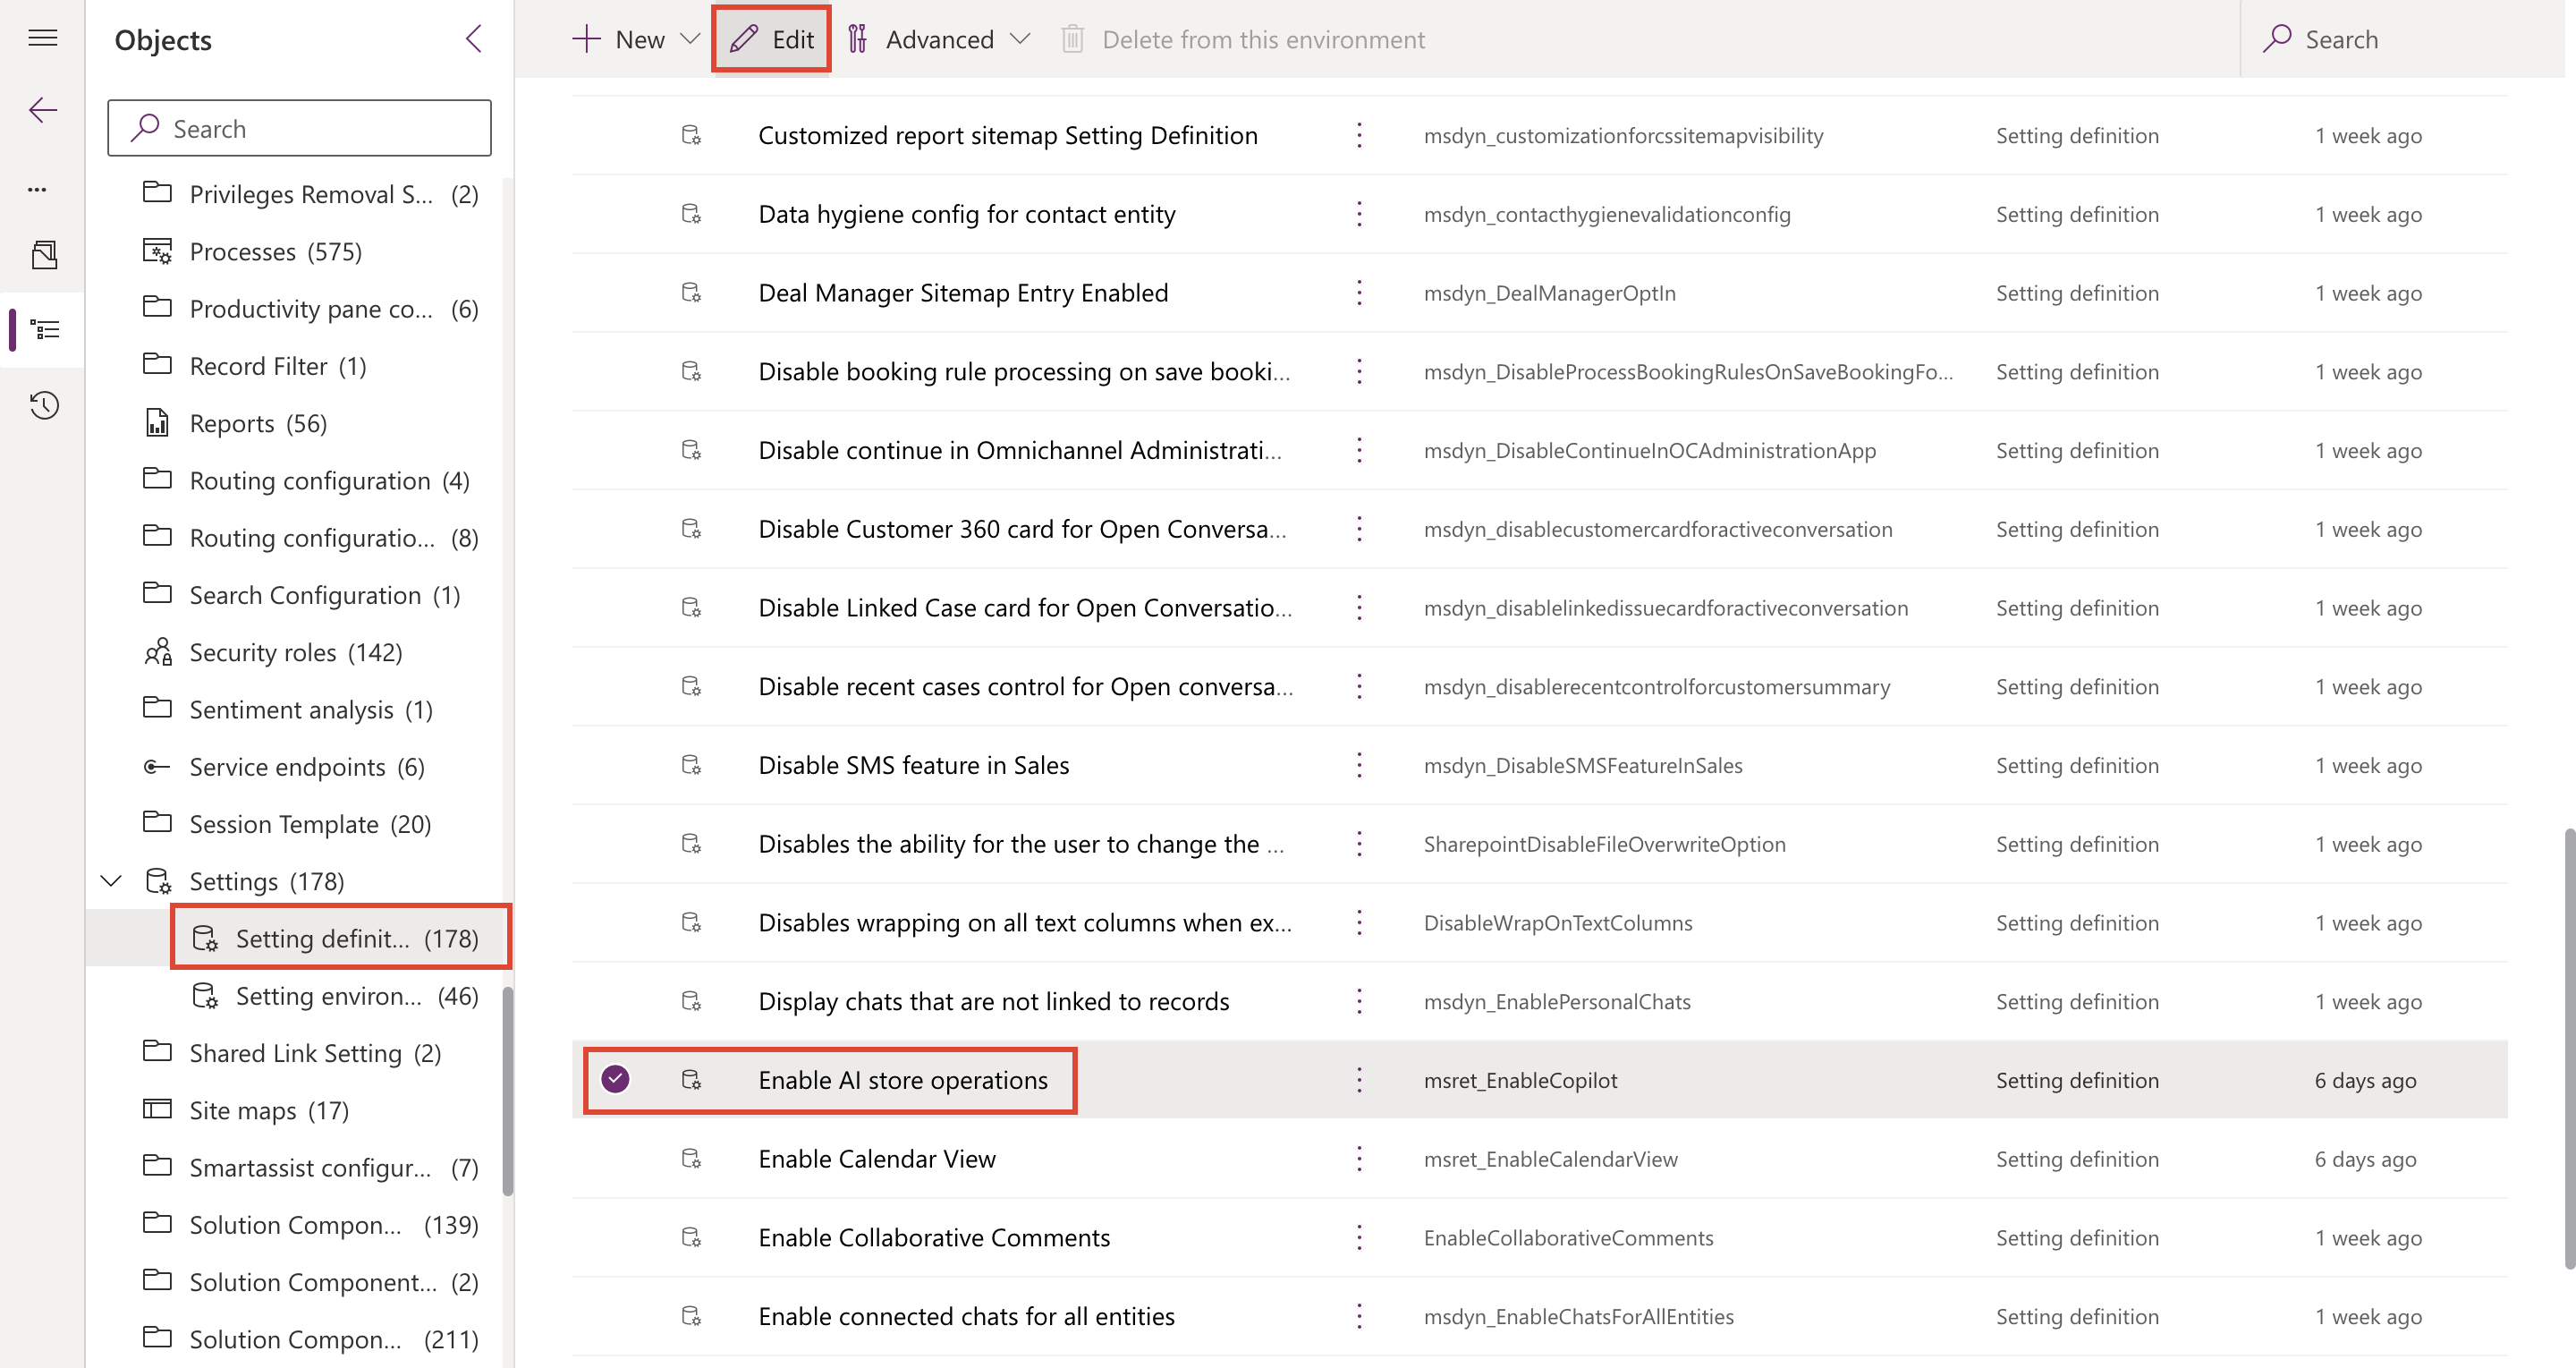
From the left pane, select Settings > Setting definitions.
Select the Enable AI store operations setting definition. Select Edit.
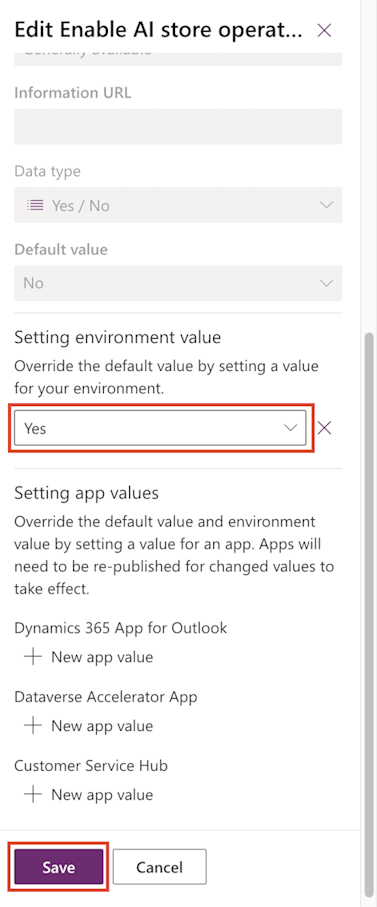
In the Edit properties panel, select + Add existing value.
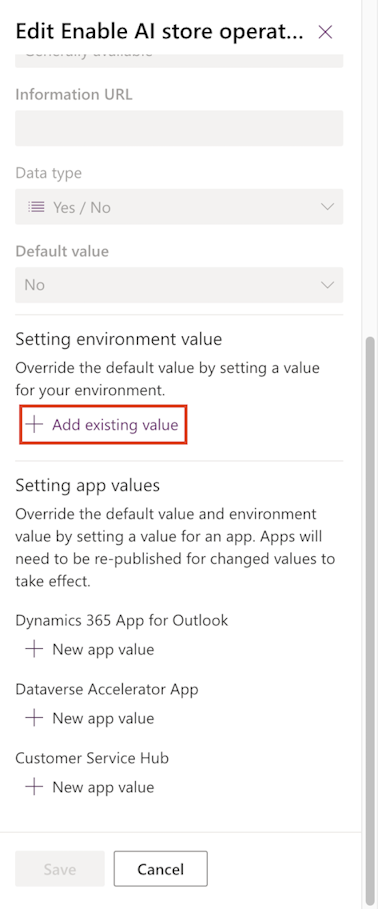
Set the environment value to Yes. Select Save.


Task - Assign user permissions in Power Platform admin center
In this task, you act as Oscar and provide the Retail AI store operations User role to the MCR IAD Manager.
To assign user permissions, follow these steps:
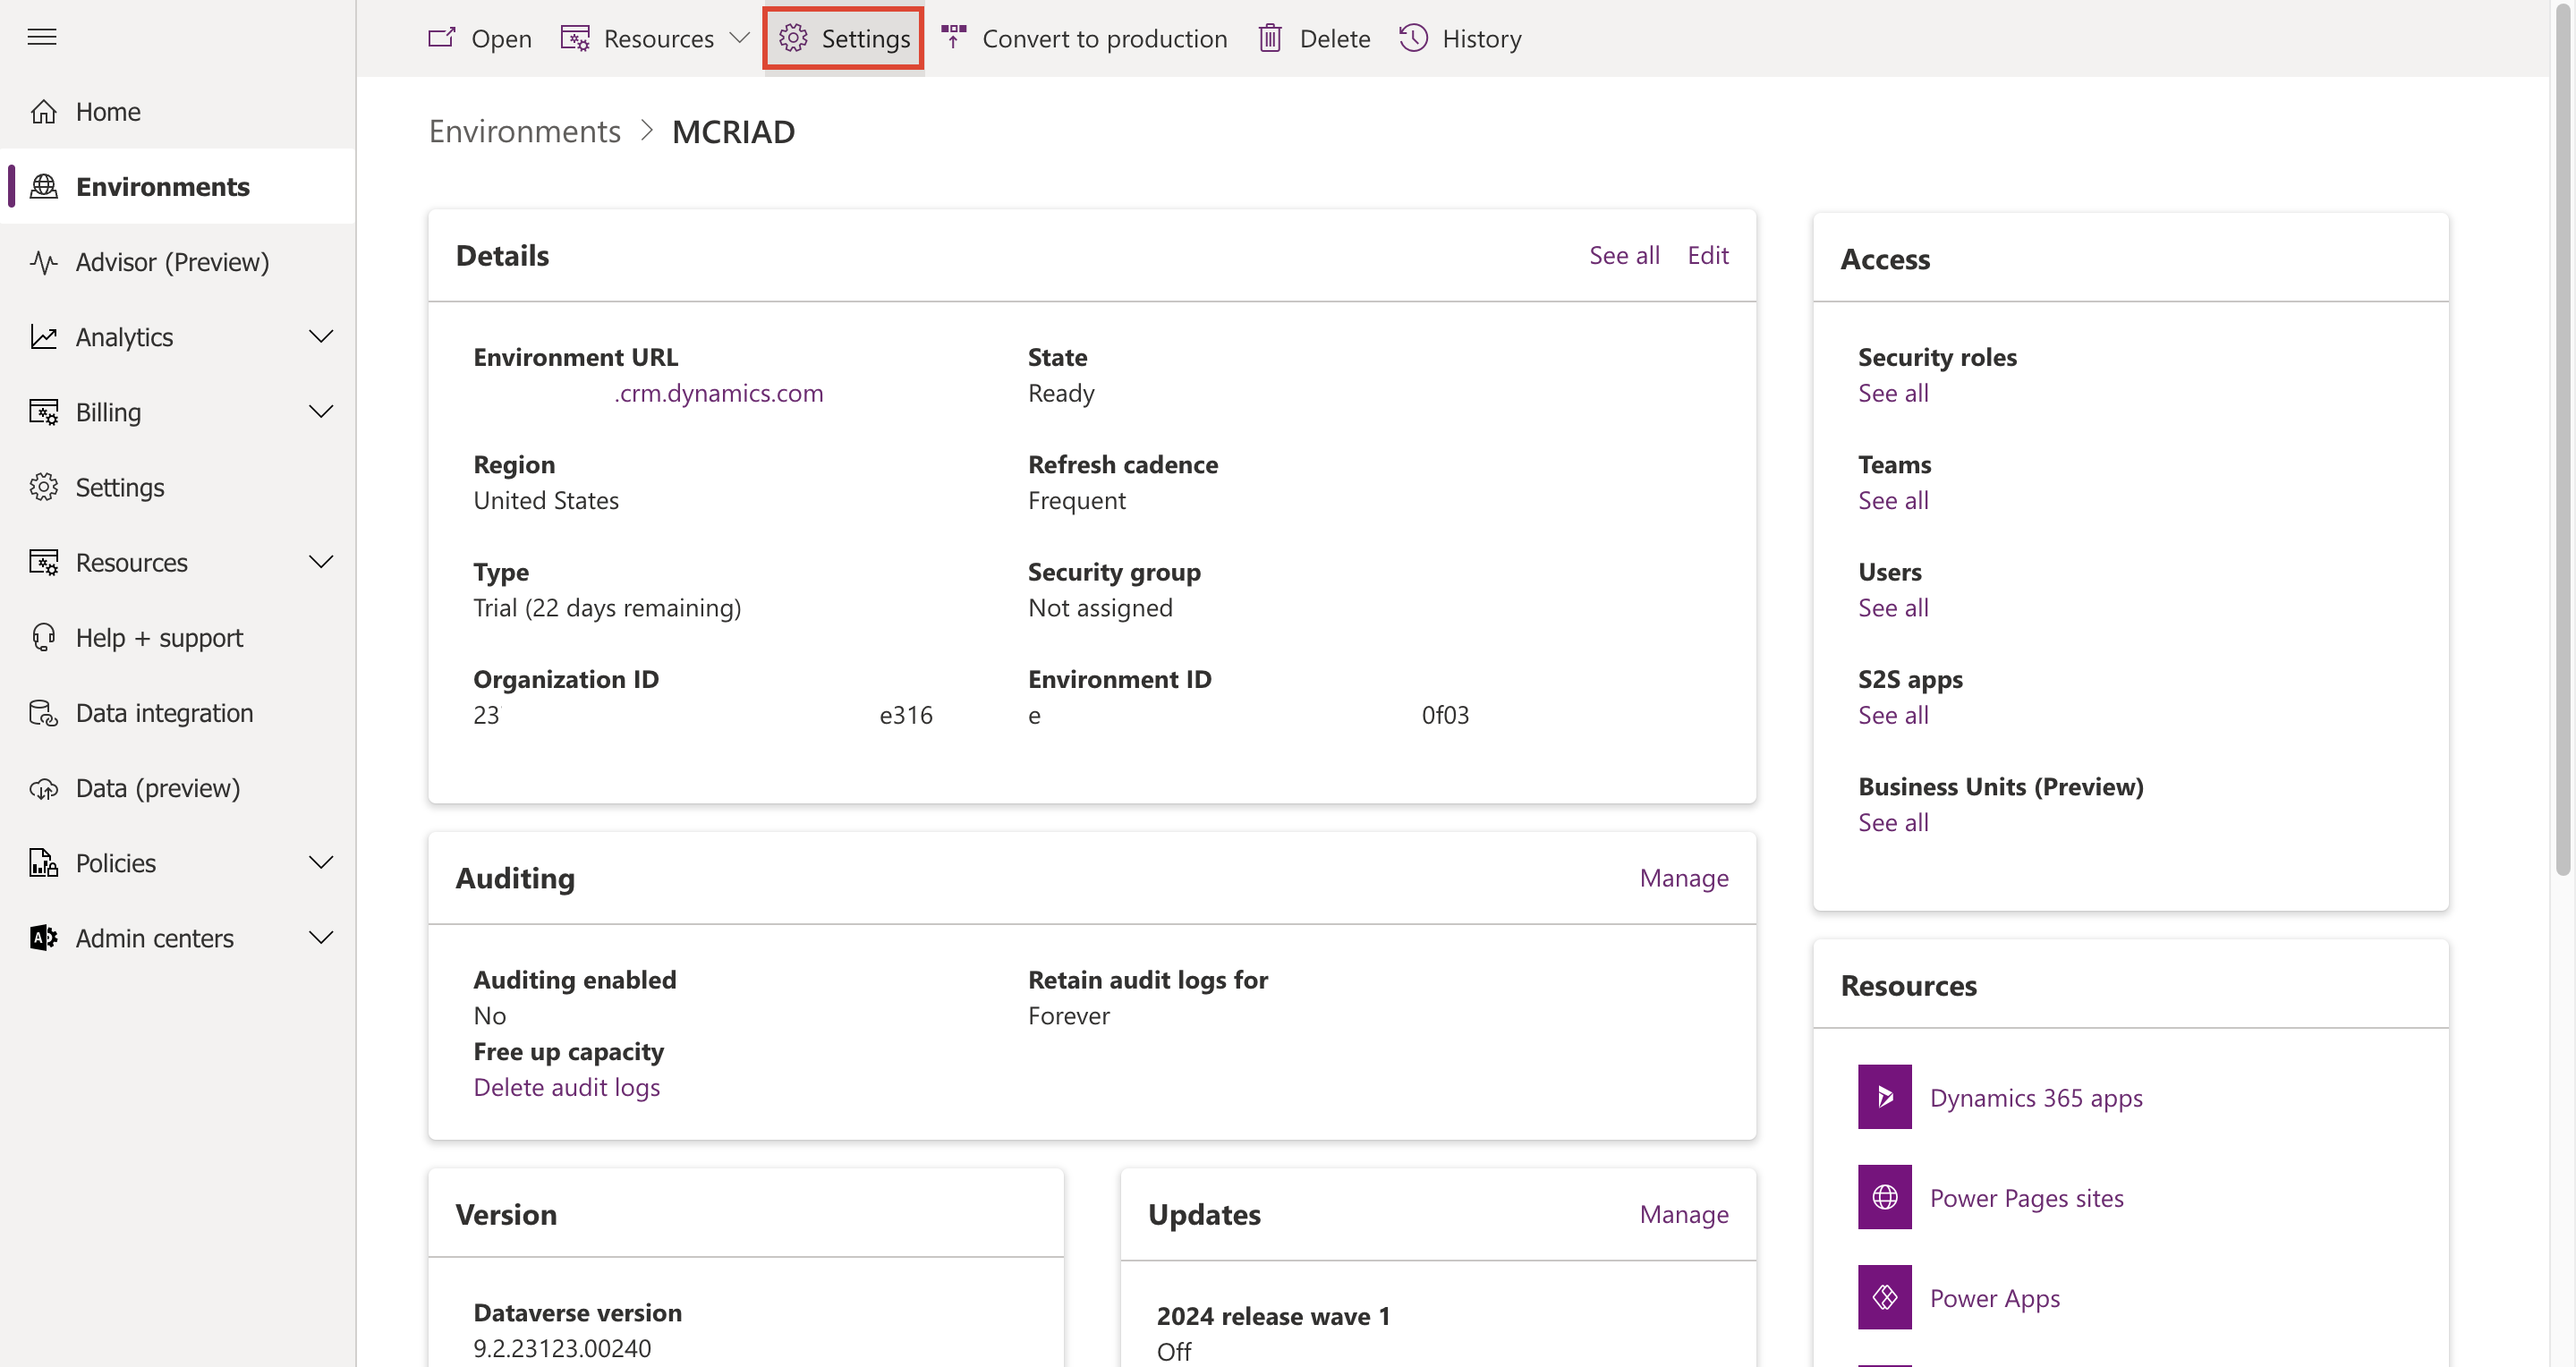
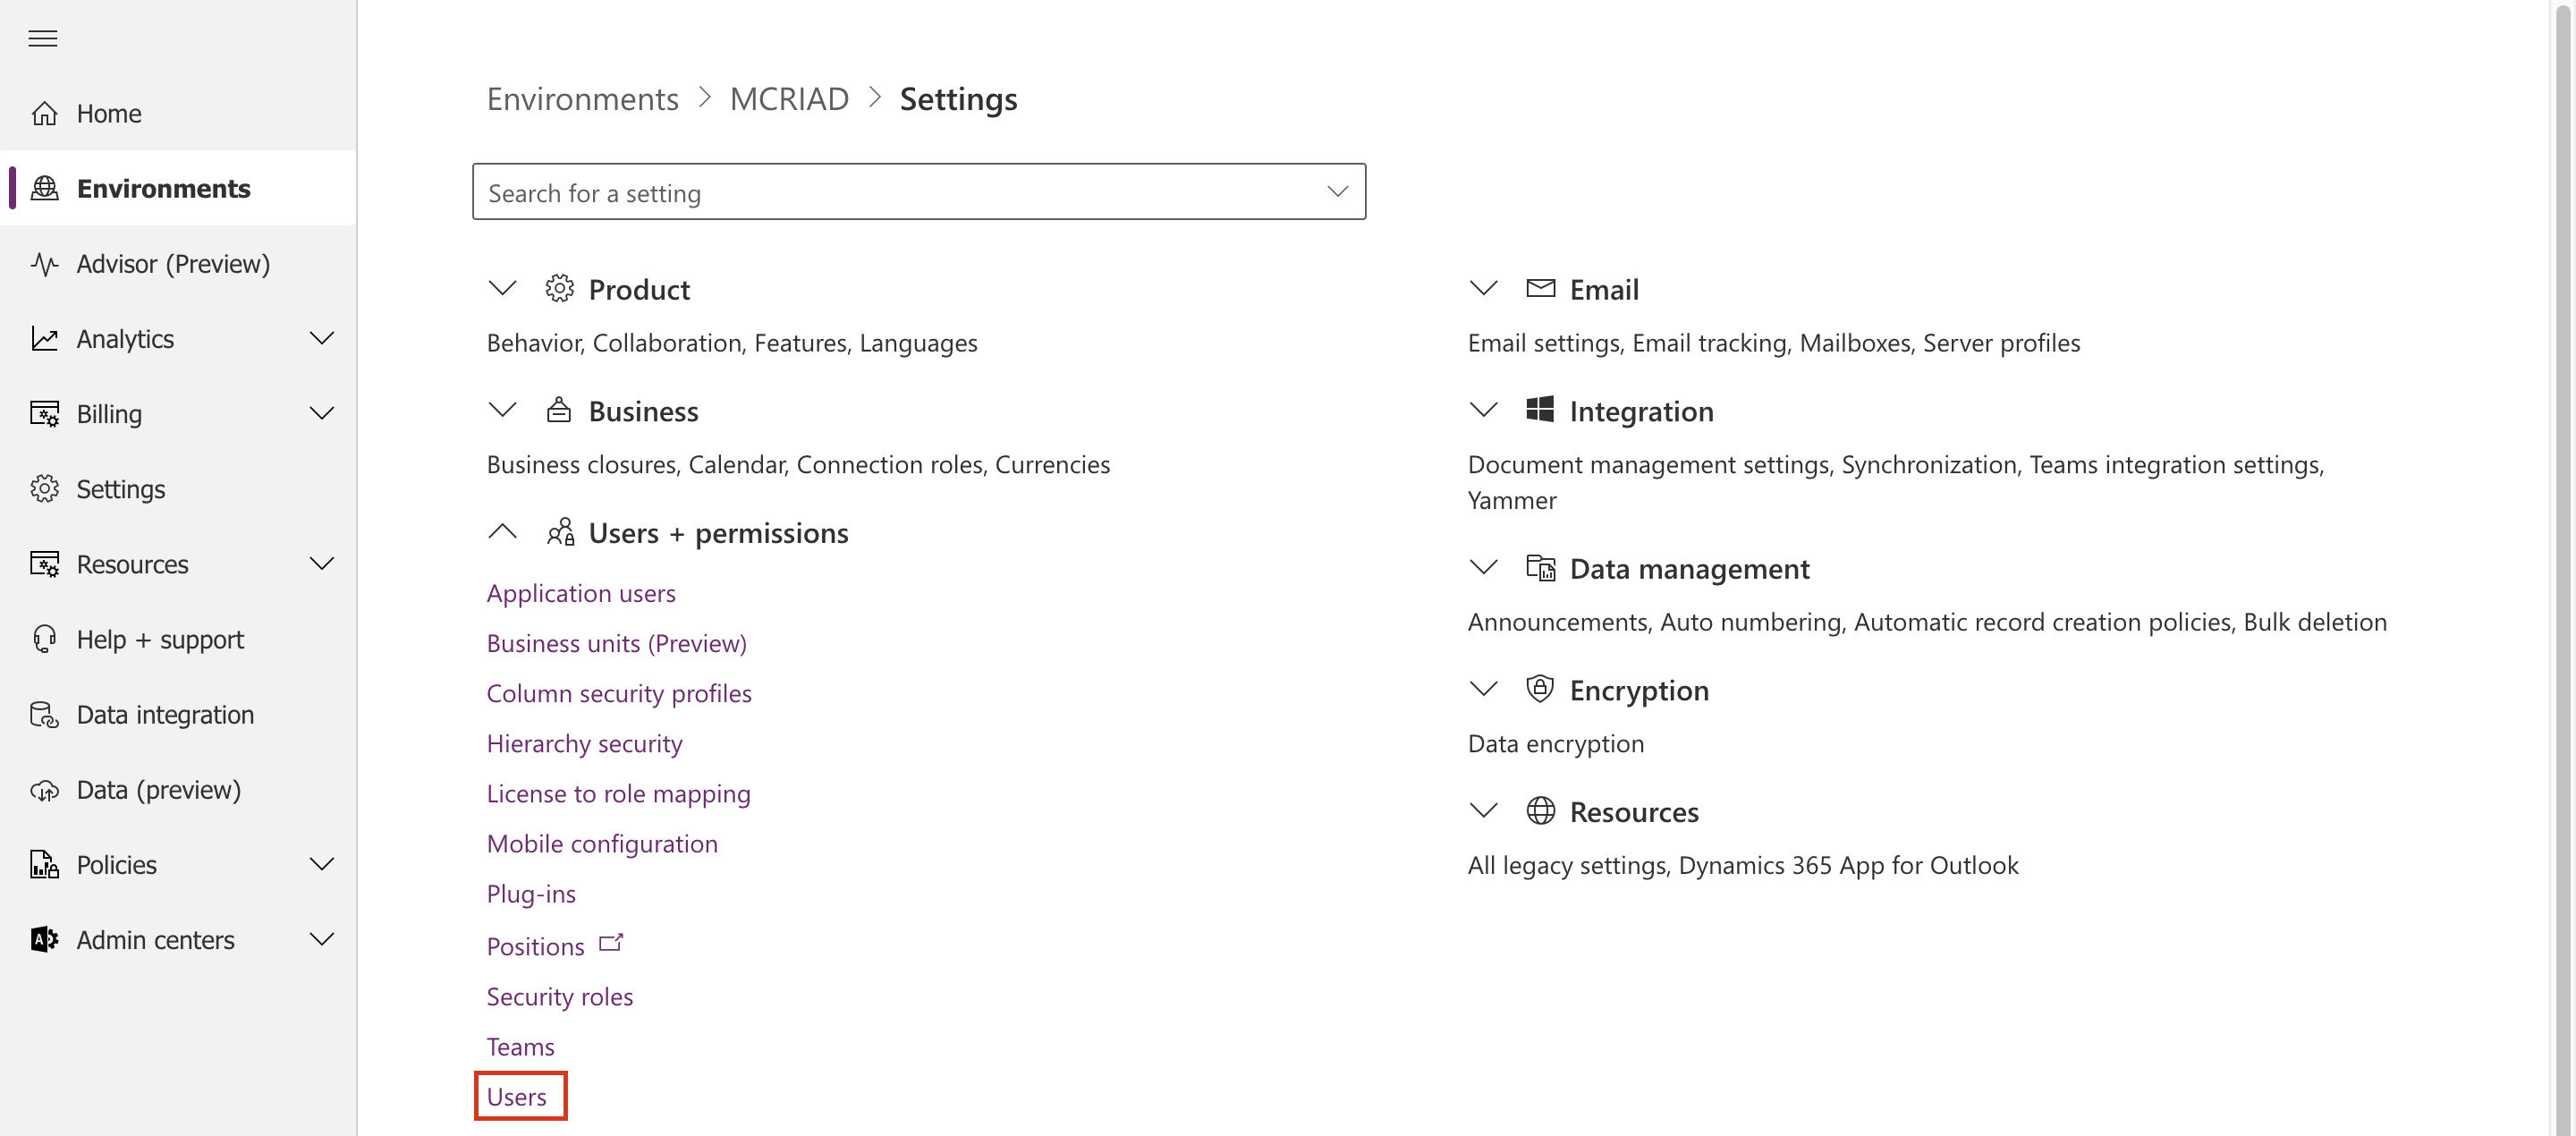
Go to Power Platform admin center and select Environments in the left pane. Select the MCRIAD environment.
Go to Settings in your environment.
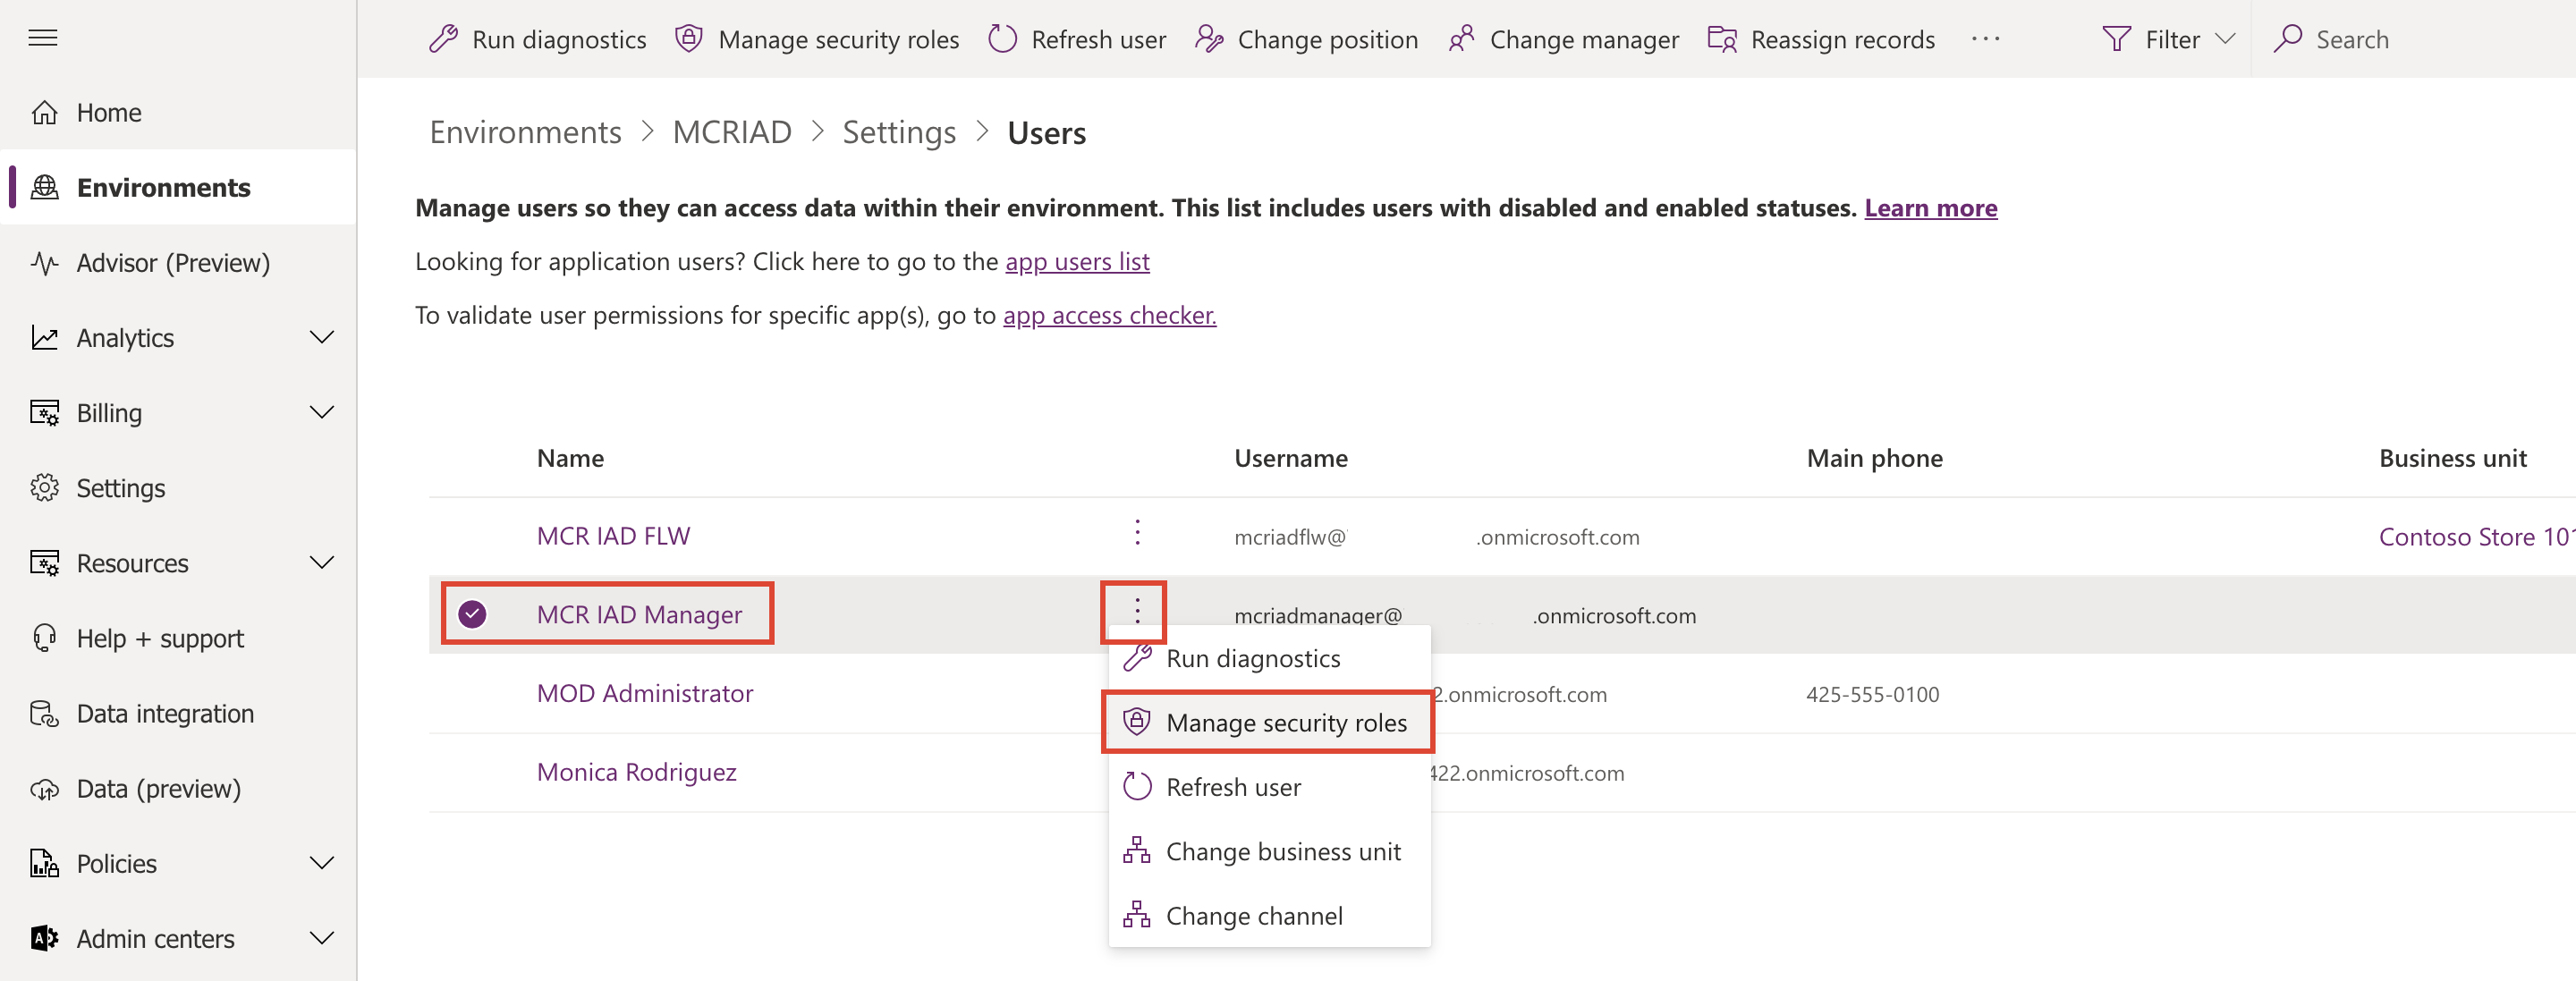
Select Users + permissions > Users.
Select MCR IAD Manager. From the More user actions menu, select Manage security roles.
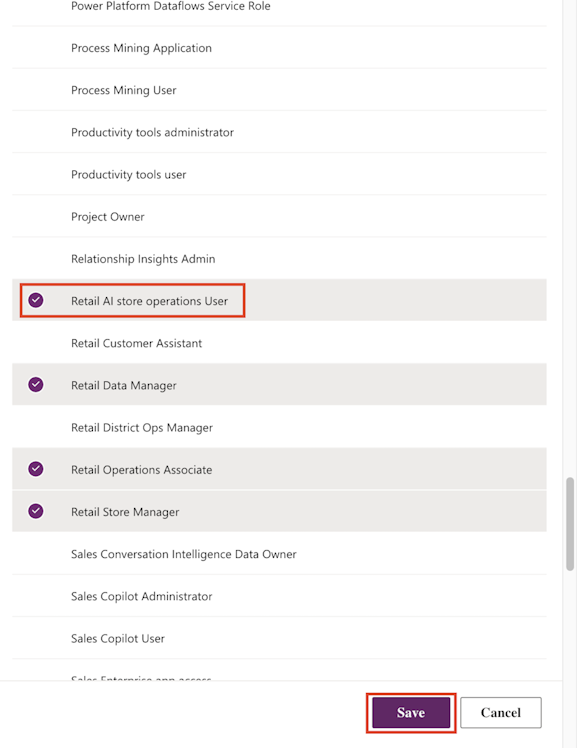
Select the Retail AI store operations User role to assign to the selected user. Select Save.
Repeat steps 4 and 5 to assign the Retail AI store operations User role to Monica Rodríguez and MCR IAD FLW users.
If you sign in to Store Operations Assist Mobile by using MCR IAD Manager and then go to the home page, the AI store operations icon displays in the upper-right corner.


