Knowledge article search filters
As service representatives search for knowledge content, you'll want to make sure that you provide them with the simplest experience possible. Enabling filtering can dramatically enhance this process. For example, service representatives might want to filter the articles to only display articles in a specific language or to only view content that's been updated within the last several days.
In Dynamics 365 Customer Service, you can turn on the search filtering feature to provide service representatives with different filtering options. After you've enabled this feature, you can define the filter configurations that you want to use.
In the Microsoft Dynamics 365 Customer Service admin center, you can enable search filters from the Filters page, which you can access by selecting Knowledge under service representative Experiences. The two options that you can turn on are:
Enable search filters - Turns on the ability to use search filters in the current environment.
Allow service representative to personalize - Turns on the ability for service representatives to personalize filters in the different customer service user interfaces.
You can use fields that are present on the knowledge article table as a search filter out-of-the-box. For example, you could add the Modified On or the Created On fields. Each field has different options that are presented as filter options, such as Last 7 Days, Last 30 Days, Last 6 Months or Last Year, that the service representative can select from when filtering articles.
Additionally, you can define filters on fields that have the following data types:
Options set
Multiselect options set
Lookup
Two choices
Date and time
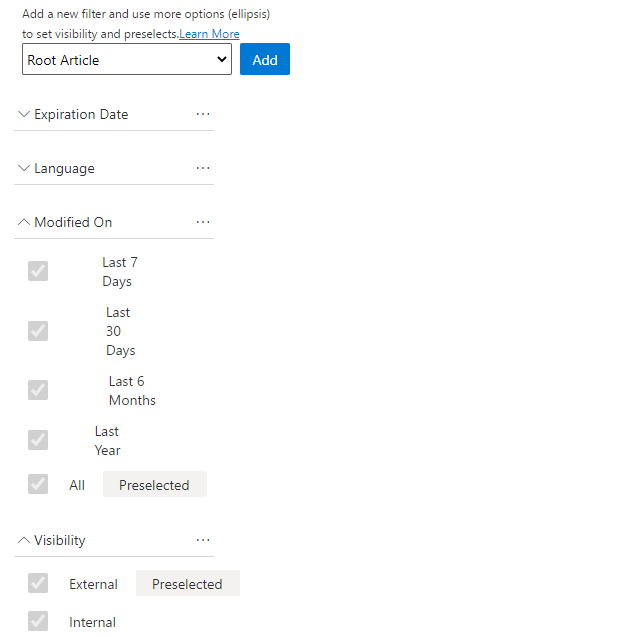
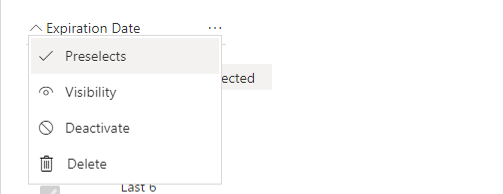
Each filter that you define has options that you can modify. These options impact which filters are available to interact with and which option is selected by default. To access the options for each filter, select the More options button.
Depending on which filter control that you've selected, any of the following options might display:
Preselects - Defines which one of the available options for that filter are selected by default in the service representative experience. You can only have one predefined option for control.
Visibility - Defines which of the available filter options is displayed in the service representative experience.
Deactivate - Deactivates the filter in the service representative experience.
Delete - Removes the filter from the list of available filters.
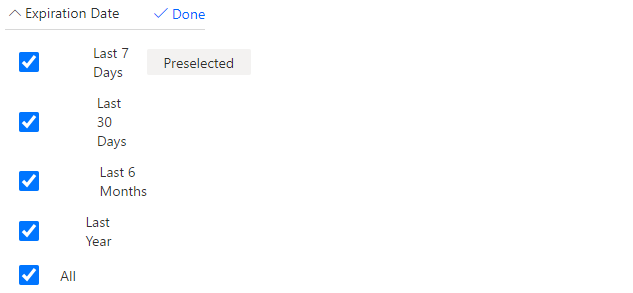
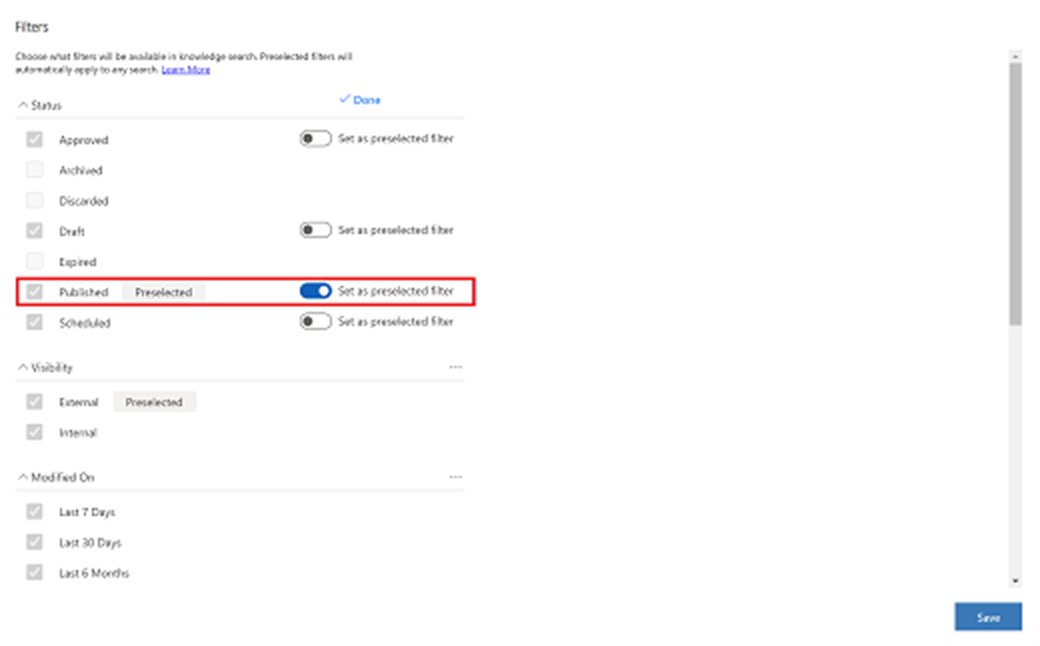
The following image shows an example of the visibility option where you can control which of the data filters are used for an Expiration Date filter that was added to the item.
To make a filter value available by default, select the ellipsis (...) next to the filter item and then select Preselects.
Turn on the Set as preselected filter toggle so that Preselected appears next to the filter name, and then select Done. Values that are set as preselected automatically participate in the filtering without requiring the service representative to manually select them. You can only preselect values that have been made visible.
Enable custom fields as search filters
Frequently, organizations add custom fields to their knowledge articles. These fields might be used to provide more classification options or for numerous other reasons. For example, you might add a field called Article Type to help you group together articles that are related to troubleshooting, as opposed to articles that are instructional. In scenarios where custom fields have been added to articles to support the needs of an organization, you can use those fields as custom search filters.
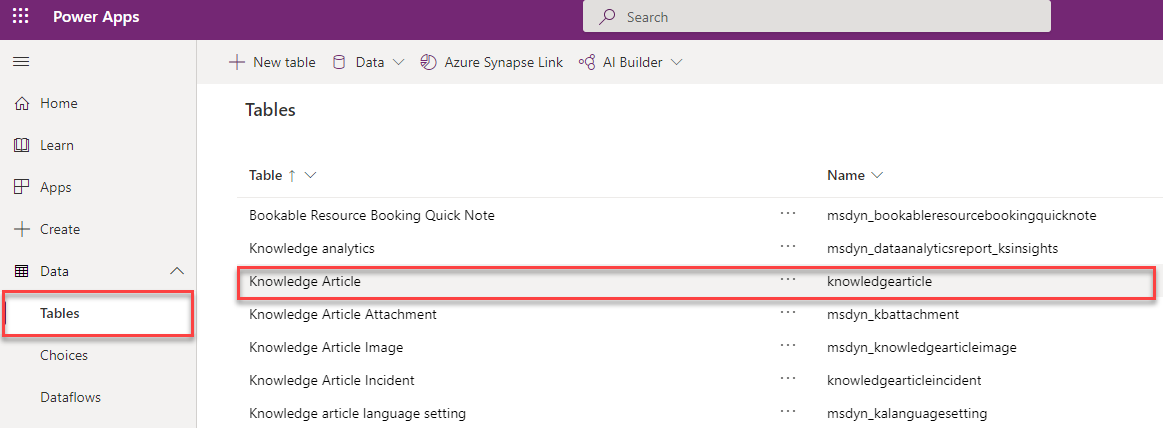
To make a field available as a custom search filter, you'll need to add it to the Quick Find Active Knowledge Articles view. This view helps make searching for records easier. You can modify a Quick Find view from the Microsoft Power Apps maker portal. In the Power Apps maker portal, go to Data (might be Dataverse) > Tables > Knowledge Article.
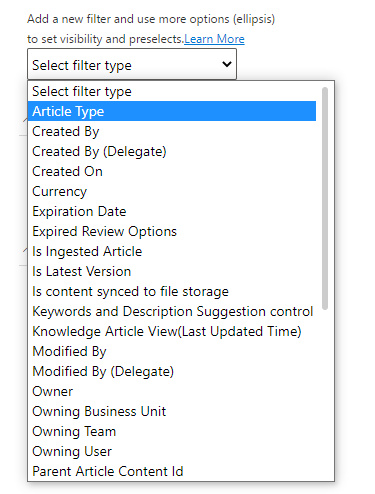
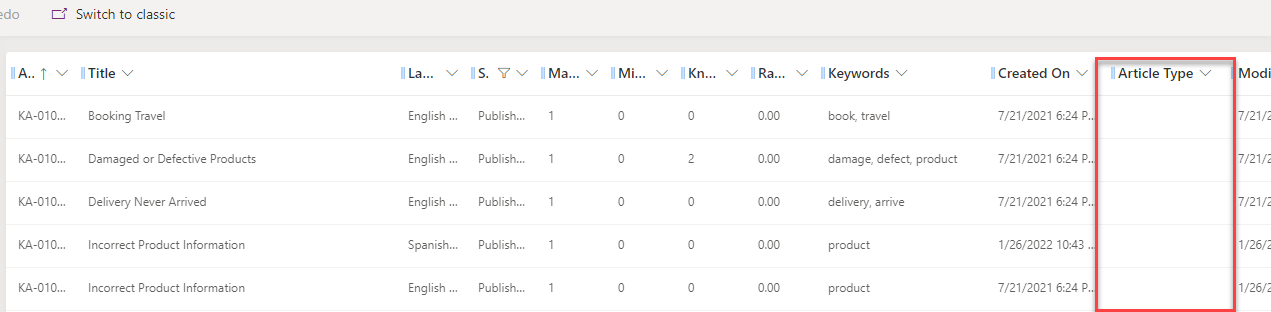
Locate and open the Quick Find Active Knowledge Articles view and then add the field that you want to include in the view. The following image shows that a custom field called Article Type has been added to the view.
After you've added the custom field to the quick find view, it becomes available from the list of filter types when you set up filters.