Set up credit card transaction processing and import credit transactions
Employees often use company credit cards to pay for expenses when they're on business trips. Employees record these charges on an expense report. Make sure that you import the credit card transactions into Project Operations so that they can be matched against entries in the expense reports.
Set up credit card transactions
Perform the following steps to ensure that you can import credit card transactions into Project Operations:
Credit card types - Define the acceptable card types, including Visa, MasterCard, and American Express.
Credit card category codes - For each credit card type, map the categories that are specified in the credit card file to expense categories for the expense report entries. Go to module Expense management > Setup > Calculations and codes > Credit card category codes. The following screenshot shows category code mappings.

Assign credit card numbers to employees - When credit card transactions are imported, the credit card number is used to match the charges against expense lines. Add credit card numbers from the Expense menu of the employee record and then select Credit cards. You can add as many credit cards as you need for each employee.


Import credit card transactions
You can import credit card transactions manually or use a recurring schedule.
To import transactions manually, go to Expense management > Periodic tasks > Credit card transactions. Select the Import transactions menu item to select a file to import.

When you select Import transactions, the Import package definition page will display. This page is an enhanced version of the Data management import page. If a different page appears, you have the Standard view and can select Enhanced view to change to the following view.

Credit card transaction files
The file that you're importing must include the following fields to import successfully:
- Transaction amount
- Card number
- Card type (this field must match one of the card types that are defined in your setup)
- Currency
You can include more fields in the file to provide extra information. The added columns help make it easier for you to match transactions against expense account entries.
The exact format for credit card transaction files depends on individual credit card providers. Common formats include Microsoft Excel, comma-separated values (CSV) files, fixed field files, and XML.
Schedule transaction imports
You can set up a recurring job to import the credit card transaction. For more information, see Set up a data project and recurring data job.
When you've imported the credit card transaction, you can attach transactions to expense account lines.
Reconcile credit card transactions with expense report entries
The credit card number that's found in a credit card transaction file must be linked to an employee. These credit card transactions become available to match against entries in the employee’s expense reports.
Go to an expense report in Expense management > My expenses > Expense report.
Select an expense report that's not yet processed or you can create a new one.
Open the expense report to view the expense lines.
On the Expense lines page, select Add unattached expenses to view a list of credit card transactions that have been imported for you and that haven't yet been linked to an expense line.
Select the transactions that you want to include in an expense report and then select OK.

The transactions will now be added to your expense report.
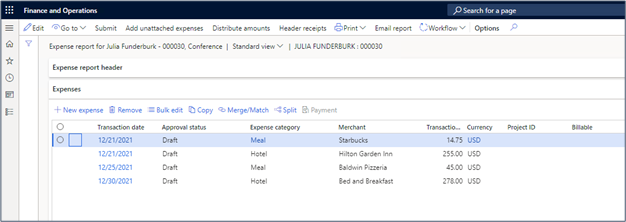
The preceding screenshot shows the standard Expense report page. The Expense report page that will display depends on whether the Expense reports re-imagined feature is enabled in your environment or not.


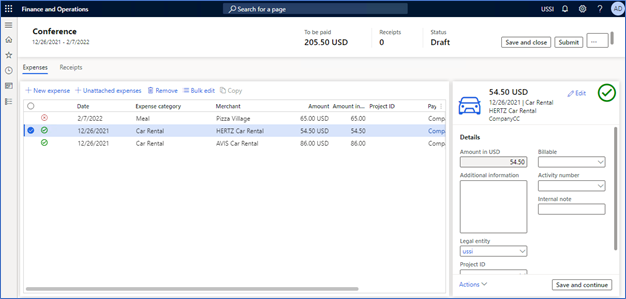
The same expense report is available from the Expense management workspace and resembles the following screenshot when the Expense reports re-imagined feature is enabled. The expense report is listed on the page along with all expense reports for the user.

Select the expense report number to view the expense lines for the report and then select the Unattached expenses menu item.
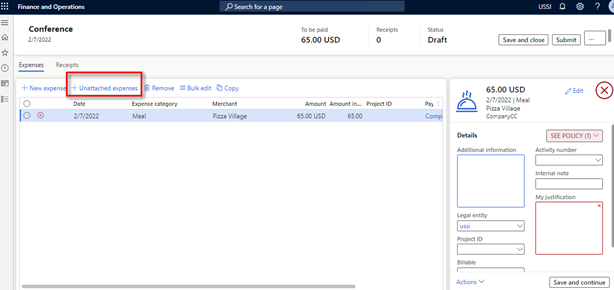
The Unattached expense page will display and will be the same page as shown in the previous image.
After you've selected the unattached expenses to add and have selected OK, they'll be added to the Expenses page.