Integrate with Azure Boards
Work item integration functionality allows you to easily create work items in Azure DevOps with relevant Application Insights data embedded in them.
Configuring this association and creating work items is straightforward (this process should only take a minute or two).
Configuring work item integration
To configure work item integration for an Application Insights resource, navigate to your settings blade for that resource.
You'll note that a new item in the "Configure" section of the settings blade says, "Work Items."
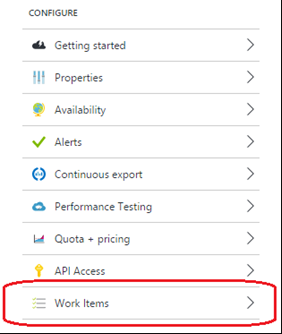
Click on it, and the configuration blade for work items will open.
All you need to do is fill out the information about the Azure DevOps system to which you want to connect, along with the project where you want to write your work items:
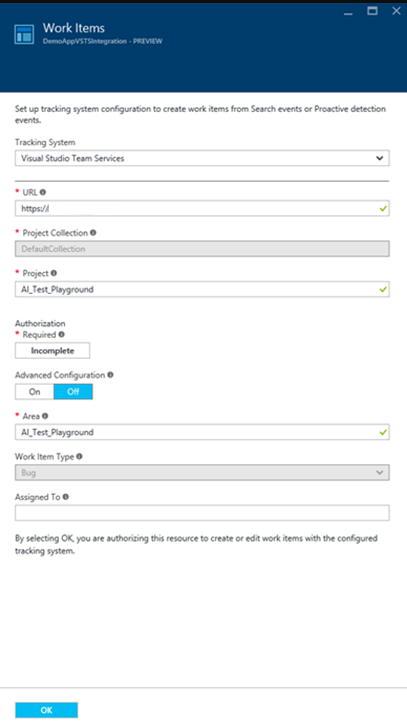
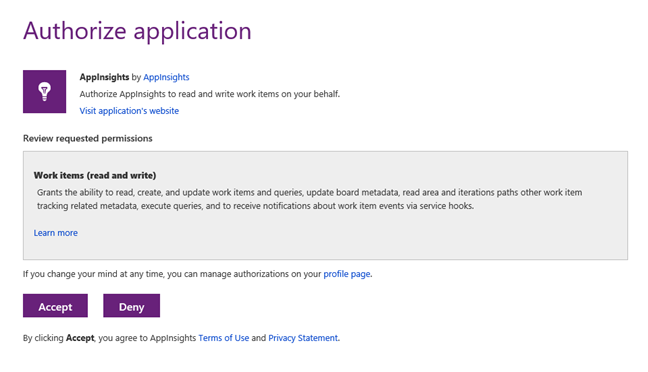
Once that information is in place, you can click on the Authorization button, where you'll be redirected to authorize access in your selected Azure DevOps system so that work items can be written there:
Once you've completed the authorization process, you can set defaults for "area path" and "assigned to."
Only an area path is required (if you have not set up specific area paths in your project, that is ok. Use the project's name, as it's the top-level area path.
Click OK, and assuming you have entered everything correctly; you'll see a message stating "Validation Successful," and the blade will close. You're now ready to start creating work items!
Creating work items
Creating work items from Application Insights is easy.
There are currently two locations where you can create work items: Proactive detection and individual instances of activity (that is, exceptions, failures, requests, and so on.). I'll show you a simple example, but the functionality is identical.
In this example, we're looking at a test web app we published to Azure. We started to drill into the activity for this app by looking at the Failures blade (but we could also get to this same information through the Search button or the Metrics Explorer):
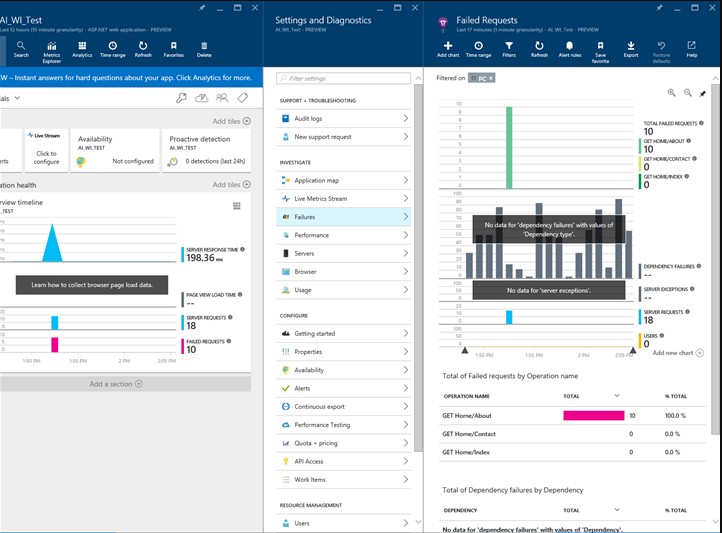
We can see that I have several exceptions that fired when the user clicked on the Home/About tab on this web app. If I drill into this group of exceptions, I can see the list and then choose an individual exception:
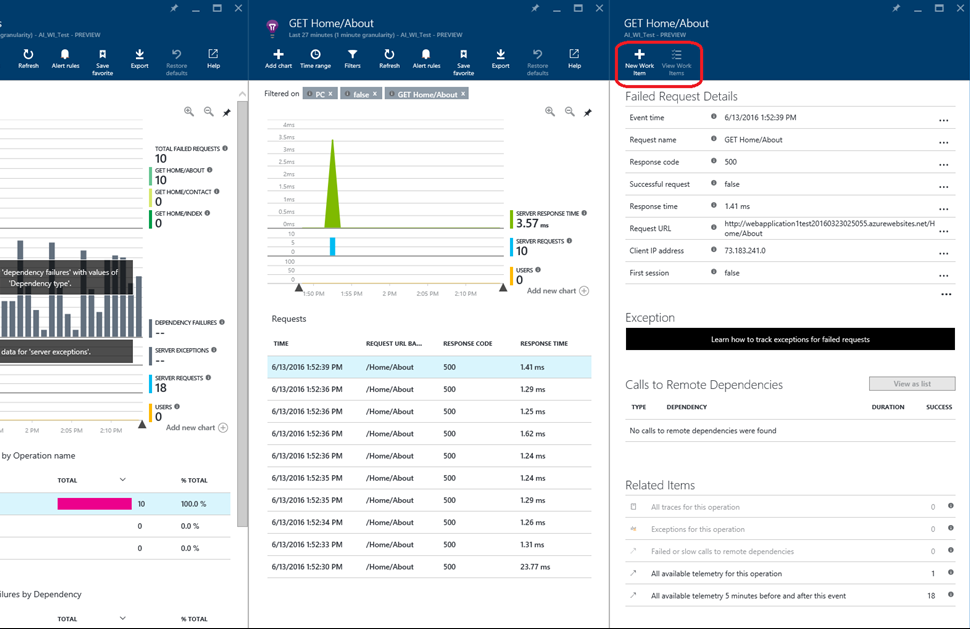
Looking at the detailed blade for this exception, we see that there are now two buttons at the top that read "New Work Item" and "View Work Items."
To create a work item, I click on the first of these buttons, and it opens the new work item blade:
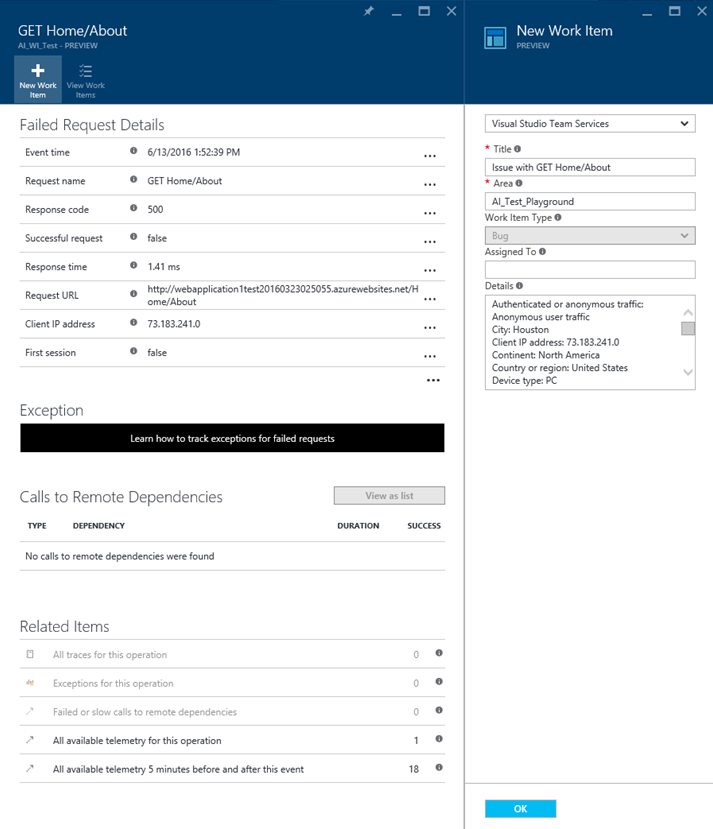
As you can see, almost everything you need in your average scenario has been filled out for you.
The default values for "area path" and "assigned to" that you chose in the initial configuration are set, and all the detailed information we have available for this exception has been added to the details field.
You can override the title and area path and assign them to fields in this blade, or you can add them to the captured details.
When you're ready to create your work item, click on the "OK" button, and your work item will be written to Azure DevOps.
Viewing work items
Once you have created more work items in Application Insights, you can quickly view them in Azure DevOps.
The detailed blade for the event associated with the work item(s) will enable the "View Work Items" button if you are in the Azure portal. To see the list, click the button:
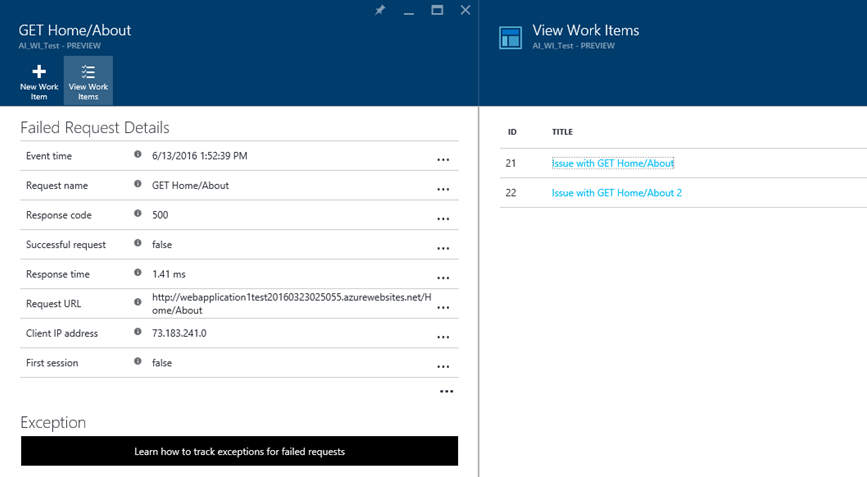
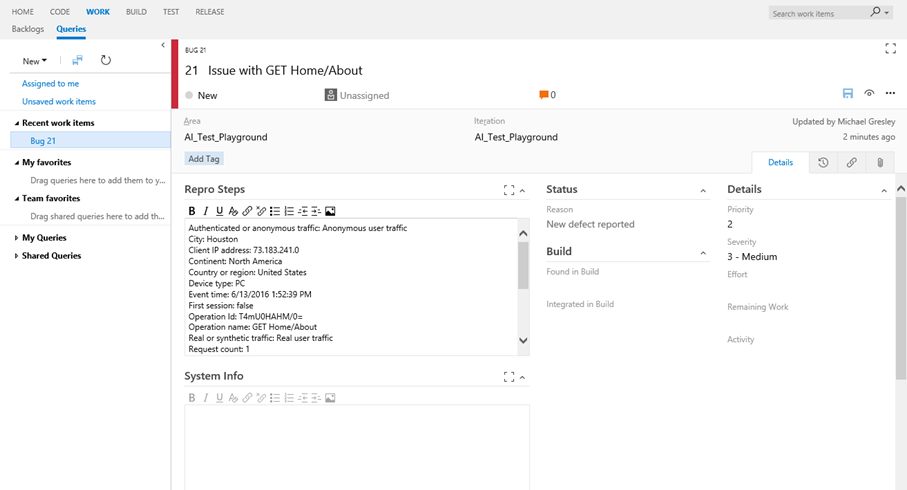
If you click the link for the work item that you want to view, it will open in Azure DevOps:
Advanced Configuration
Some of you may have noticed that there's a switch on the configuration blade that is labeled "Advanced Configuration."
We have provided another functionality to help you configure your ability to write to Azure DevOps in scenarios where you've changed or extended some out-of-the-box settings.
An excellent example of it is choosing more required fields. There's no way to handle this other-required mapping in the standard config, but you can handle it in advanced mode.
If you click on the switch, the controls at the bottom of the blade will change to look like this:
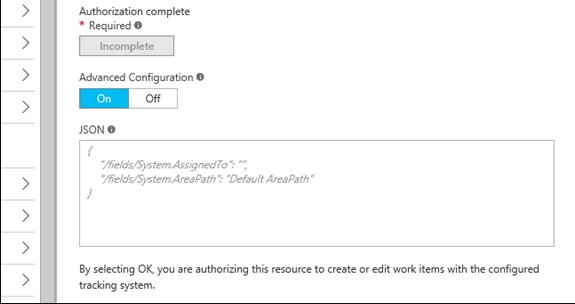
You can see that you're now given a JSON-based editing box where you can specify all the settings/mappings you might need to modify your Azure DevOps project.
Next steps
We think it's an excellent start to integrating work item functionality with Application Insights.
But please remember that it's essentially the 1.0 version of this feature set.
We have much work planned, and you'll see a significant evolution in this space over the upcoming months.
Just for starters, let me outline a few of the things that we already have planned or are investigating:
- Support for all work item types – You probably noticed that the current feature set locks the work item type to just "bug." Logging bugs were our primary ask for this space, so that is where we started, but we certainly don't think that is where things should end. One of the more near-term changes you'll see is handling all work item types for all supported processes in Azure DevOps.
- Links back to Application Insights – It's great to create a work item with App Insights data in it, but what happens when you are in your ALM/DevOps system and looking at that item and want to quickly navigate back to the source of the work item in App Insights? We plan to rapidly add links to the work items to make this as fast and easy as possible.
- More flexible configuration – Our standard configuration only handles scenarios where users haven't modified/extended their project in Azure DevOps. Today, if you have made these changes, you must switch to advanced configuration mode. In the future, we want to handle everyday things that people might change (for example, making more fields require or adding new fields) in the standard configuration wherever possible. It requires some updates from our friends on the Azure DevOps team, but they're already working on some of these for us. Once they're available, we'll make the standard configuration more flexible. In the meantime (and in the future), you can always use the advanced configuration to overcome limitations.
- Multiple profiles – Setting up a single configuration means that in shops where there are several ways users commonly create work items, the people creating work items from Application Insights would have to override values frequently. We plan to allow users to set up 1:n profiles, with common values specified for each, so that when you want to create a work item with that profile, you can choose it from a drop-down list.
- More sources of creation for work items – We'll continue to investigate (and take feedback on) other places in Application Insights where it makes sense to create work items.
- Automatic creation of work items – We can imagine scenarios where we might want a work item to be created for us based upon criteria. It is on the radar, but we're spending some design time to limit the possibilities of super-noisy or runaway work item creation. We believe this is a powerful and convenient feature, but we want to reduce the potential for spamming the ALM/DevOps system as much as possible.
- Support for other ALM/DevOps systems – We think Azure DevOps is an excellent product, but we recognize that many of our users may use some other product for their ALM/DevOps, and we want to meet people where they are. So, we're working on different first-tier integrations of popular ALM/DevOps products. We also plan to provide a pure custom configuration choice (like advanced config for Azure DevOps) so that end users will hook up Application Insights to virtually any ALM/DevOps system.