Exercise - Create an application customizer extension
- 14 minutes
In this exercise, you'll create a SharePoint Framework (SPFx) application customizer extension.
Prerequisites
Important
In most cases, installing the latest version of the following tools is the best option. The versions listed here were used when this module was published and last tested.
- Node.js v22.*
- Gulp-cli v3.*
- Yeoman v5.*
- Yeoman Generator for SharePoint v1.21.1
- Visual Studio Code
Create a new SharePoint Framework project
Open a command prompt and change to the folder where you want to create the project.
Run the SharePoint Yeoman generator by executing the following command:
yo @microsoft/sharepoint
Use the following to complete the prompt that is displayed (if more options are presented, accept the default answer):
- What is your solution name?: SPFxAppCustomizer
- Which type of client-side component to create?: Extension
- What type of client-side extension to create?: Application Customizer
- What is your Application Customizer name?: HelloAppCustomizer
After provisioning the folders required for the project, the generator will install all the dependency packages by running npm install automatically. When npm completes downloading all dependencies, test the default project provisioned by the generator.
Unlike web parts, which can be tested in the hosted workbench, extensions must be tested in a modern SharePoint page. Special query string parameters are included with the request to indicate that the extension should be loaded from the local development web server.
To test the extension, you need to modify the serve.json configuration file. Open the ./config/serve.json file. Locate the serveConfigurations.default.pageUrl property. It's currently configured with a placeholder URL.
"pageUrl": "https://{tenantDomain}/SitePages/myPage.aspx",
The {tenantDomain} string is replaced automatically by the gulp serve task using an environment variable on your workstation. Set the environment variable SPFX_SERVE_TENANT_DOMAIN to the domain of your hosted SharePoint Online site you want to use for testing.
Tip
Learn more how to set environment variables on your development platform of choice:
Windows: set (environment variable) macOS: Use environment variables in Terminal on Mac Setting the SharePoint Framework Hosted Workbench Test Site
Update the remaining part of the URL with a SharePoint page that isn't the SharePoint hosted workbench page. For example, if you have a developer site with the homepage URL of https://contoso.sharepoint.com/sites/DeveloperSite/SitePages/CollabHome.aspx, update all pageUrl properties to include the path to this page like the following:
"pageUrl": "https://{tenantDomain}/sites/DeveloperSite/SitePages/CollabHome.aspx",
Note
The SPFx build process' gulp serve task will launch a browser and navigate to this URL, appending the necessary query string parameters.
Run the project by executing the following command:
gulp serve
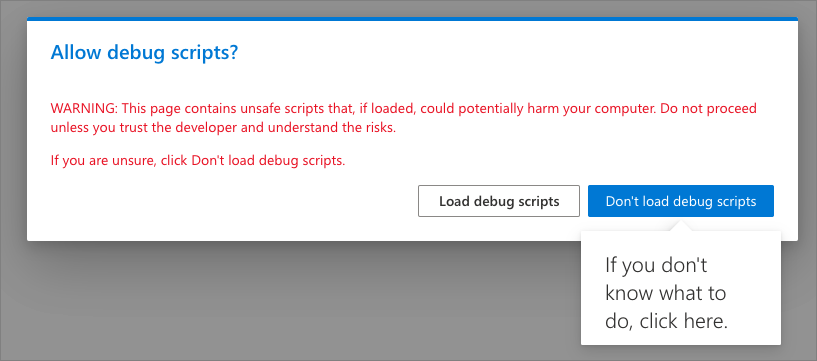
When the SharePoint page loads, SharePoint will prompt you to load the debug scripts. This is a confirmation check to ensure you really want to load scripts from an untrusted source. The untrusted source is your local development web server on https://localhost.
Select the Load debug scripts button.
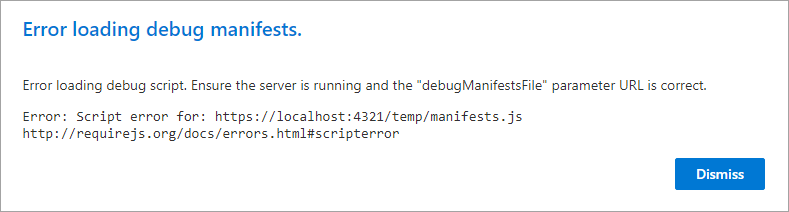
If you see this warning, switch back to the command prompt, wait for the reload subtask to finish executing, and then refresh the page:
Once the page loads, a SharePoint alert dialog will be shown:
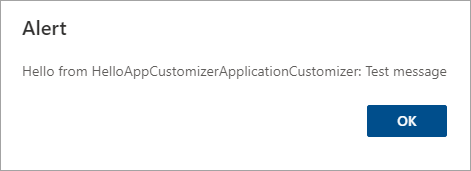
This alert dialog is shown by the application customizer. Open the application customizer file at ./src/extensions/helloAppCustomizer/HelloAppCustomizerApplicationCustomizer.ts and find the onInit() method. Notice the line in the method that triggers the dialog to appear.
Dialog.alert(`Hello from ${strings.Title}:\n\n${message}`).catch(() => {
  /* handle error */
});
Stop the local web server by pressing CTRL+C in the command prompt.
Update application customizer to add placeholders to the page
In this step, you'll modify the application customizer to write some pre-defined text to the top and bottom placeholders on the page.
Update the customizer to have two public settable properties
Locate and open the ./src/extensions/helloAppCustomizer/HelloAppCustomizerApplicationCustomizer.ts file.
Locate the IHelloAppCustomizerApplicationCustomizerProperties interface and edit it to have only two properties:
header: string;
footer: string;
Update the configuration for testing and deployment
To test the changes, modify the serve.json file to include values for these two properties.
Locate and open the ./config/serve.json file. Locate the serveConfigurations.default.properties object and change the value of the properties object to the following:
"properties": {
  "header": "Header area of the page",
  "footer": "Footer area of the page"
}
This change will only update the application customizer when you're testing it. To make sure these properties are set when the component is deployed, you need to change the element manifest file used during deployment.
Locate and open the ./sharepoint/assets/elements.xml file.
Set the ClientSideComponentProperties property to the following HTML encoded JSON string that contains the public property values:
{"header":"Header area of the page","footer":"Footer area of the page"}
Now, make the same changes to the file used when the extension is deployed to all sites in the tenant in SharePoint Online.
Locate and open the ./sharepoint/assets/ClientSideInstance.xml file.
Set the Properties property to the following HTML encoded JSON string that contains the public property values:
{"header":"Header area of the page","footer":"Footer area of the page"}
Add CSS styles to the application customizer
In this next step, we'll modify the CSS to give the header and footer a better user experience than a plain <div> element.
Install the SPFx version of the Office UI Fabric Core CSS files by running this command:
npm install @microsoft/sp-office-ui-fabric-core -PE
Create a new file HelloAppCustomizerApplicationCustomizer.module.scss to the ./src/extensions/helloAppCustomizer folder and add the following SCSS code:
@import '~@microsoft/sp-office-ui-fabric-core/dist/sass/SPFabricCore.scss';

.app {
  .top {
    height:60px;
    text-align:center;
    line-height:2.5;
    font-weight:bold;
    display: flex;
    align-items: center;
    justify-content: center;
    background-color: $ms-color-themePrimary;
    color: $ms-color-white;
  }

  .bottom {
    height:40px;
    text-align:center;
    line-height:2.5;
    font-weight:bold;
    display: flex;
    align-items: center;
    justify-content: center;
    background-color: $ms-color-themePrimary;
    color: $ms-color-white;
  }
}
Locate and open the ./src/extensions/helloAppCustomizer/HelloAppCustomizerApplicationCustomizer.ts file.
Add the following import statements to the top of the file after the existing import statements:
import styles from './HelloAppCustomizerApplicationCustomizer.module.scss';
import { escape } from '@microsoft/sp-lodash-subset';
Update the header and footer placeholders
Locate and open the ./src/extensions/helloAppCustomizer/HelloAppCustomizerApplicationCustomizer.ts file.
Locate the existing import statement for the @microsoft/sp-application-base library. Update the list of imports to add the following references: PlaceholderContent and PlaceholderName:
import {
  BaseApplicationCustomizer,
  PlaceholderContent,
  PlaceholderName
} from '@microsoft/sp-application-base';
In the HelloAppCustomizerApplicationCustomizer class, add the following two private members:
private _topPlaceholder: PlaceholderContent | undefined;
private _bottomPlaceholder: PlaceholderContent | undefined;
Add the following method to the HelloAppCustomizerApplicationCustomizer class. This method is used when the placeholders are disposed.
private _onDispose(): void {
  console.log('[HelloWorldApplicationCustomizer._onDispose] Disposed custom top and bottom placeholders.');
}
Add the following method to the HelloAppCustomizerApplicationCustomizer class. This method will be called when the placeholders are rendered:
private _renderPlaceHolders(): void {
  console.log('Available application customizer placeholders: ',
    this.context.placeholderProvider.placeholderNames
      .map((name) => PlaceholderName[name])
      .join(', ')
  );
}
Add the following code to the _renderPlaceHolders() method. This code will obtain a handle to the top placeholder on the page. It will then add some markup to the placeholder using the message defined in the public property:
if (!this._topPlaceholder) {
  this._topPlaceholder = this.context.placeholderProvider.tryCreateContent(
    PlaceholderName.Top,
    { onDispose: this._onDispose }
  );

  if (!this._topPlaceholder) {
    console.error('The expected placeholder (Top) was not found.');
    return;
  }

  if (this.properties) {
    let headerMessage: string = this.properties.header;
    if (!headerMessage) {
      headerMessage = '(header property was not defined.)';
    }

    if (this._topPlaceholder.domElement) {
      this._topPlaceholder.domElement.innerHTML = `
        <div class="${styles.app}">
          <div class="${styles.top}">
            <i class="ms-Icon ms-Icon--Info" aria-hidden="true"></i> ${escape(headerMessage)}
          </div>
        </div>`;
    }
  }
}
Add the following code to the _renderPlaceHolders() to update the bottom placeholder:
if (!this._bottomPlaceholder) {
  this._bottomPlaceholder = this.context.placeholderProvider.tryCreateContent(
    PlaceholderName.Bottom,
    { onDispose: this._onDispose }
  );

  if (!this._bottomPlaceholder) {
    console.error('The expected placeholder (Bottom) was not found.');
    return;
  }

  if (this.properties) {
    let footerMessage: string = this.properties.footer;
    if (!footerMessage) {
      footerMessage = '(footer property was not defined.)';
    }

    if (this._bottomPlaceholder.domElement) {
      this._bottomPlaceholder.domElement.innerHTML = `
        <div class="${styles.app}">
          <div class="${styles.bottom}">
            <i class="ms-Icon ms-Icon--Info" aria-hidden="true"></i> ${escape(footerMessage)}
          </div>
        </div>`;
    }
  }
}
Replace all the code in the onInit() method with the following code:
Log.info(LOG_SOURCE, `Initialized ${strings.Title}`);

this.context.placeholderProvider.changedEvent.add(this, this._renderPlaceHolders);

return Promise.resolve();
Finally, because we're no longer using the Dialog import, remove the following line from the file:
import { Dialog } from '@microsoft/sp-dialog';
Test the Application Customizer
Run the project by executing the following command:
gulp serve
When prompted, select the Load debug scripts button.
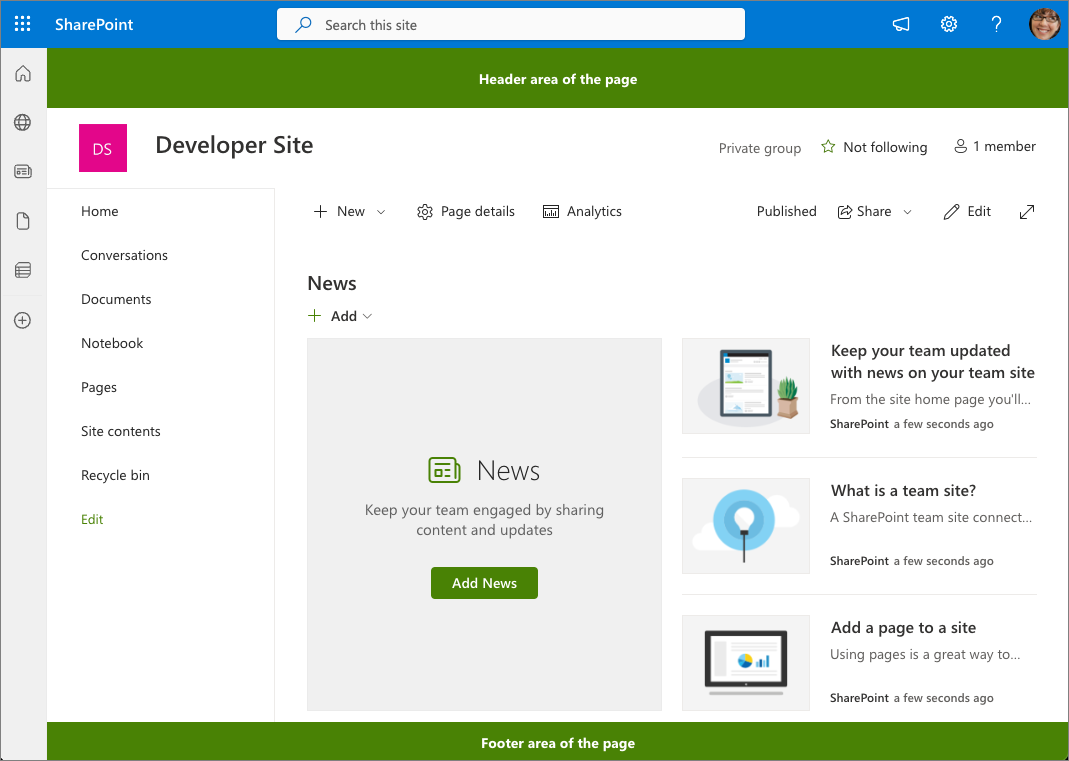
When the page loads, you'll see the text in the header and footer. If they don't show, go back to the command prompt, wait for the reload to finish, and then refresh.
Stop the local web server by pressing CTRL+C in the command prompt.
Deploy the Application Customizer to all Sites in the SharePoint Online Tenant
In this step, you'll deploy the application customizer to your entire SharePoint tenant.
Locate and open the ./config/package-solution.json file. Verify the solution object has a property named skipFeatureDeployment and ensure that the value of this property is set to true.
Locate and open the ./sharepoint/assets/ClientSideInstance.xml file. This file contains the values that will be automatically set on the Tenant-Wide Extensions list in your SharePoint Online tenant's App Catalog site when the package is deployed.
Build and package the solution by running the following commands one at a time:
gulp build
gulp bundle --ship
gulp package-solution --ship
In the browser, navigate to your SharePoint Online's tenant App Catalog site.
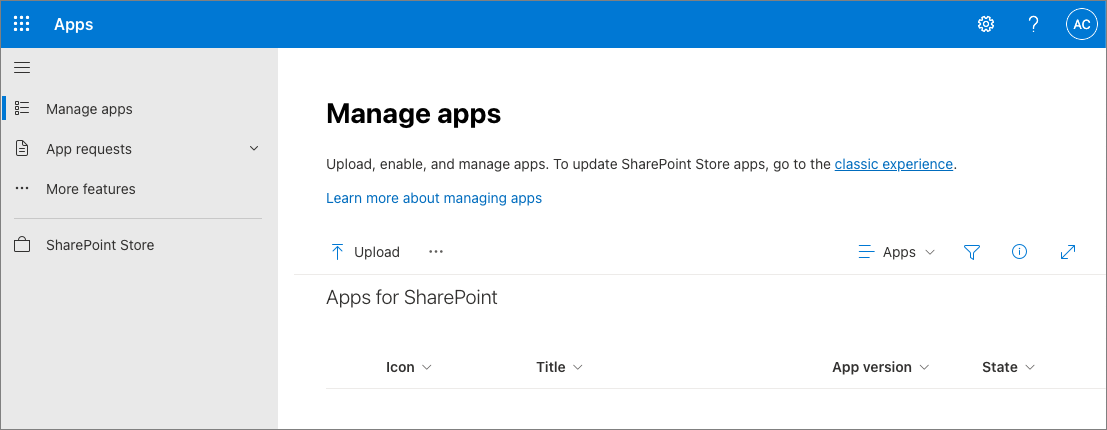
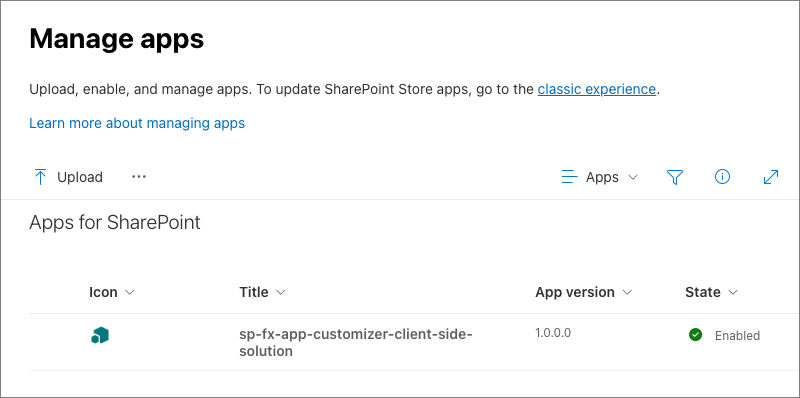
Drag the generated ./sharepoint/solution/sp-fx-app-customizer.sppkg file into the Apps for SharePoint list.
In the Enable app panel, select the Enable this app and add it to all sites radio button and then select Enable app.
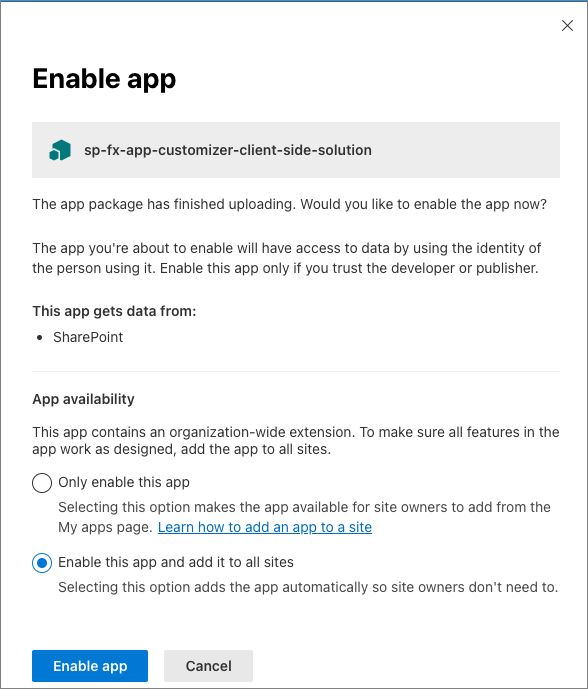
In the This app has been enabled panel, select Close.
Select More features in the left-hand navigation and then select the Open button under Tenant wide extensions.
Notice the application customizer is present, with the specified properties, in the list:
In a separate browser window, navigate to any modern page in any modern site within your SharePoint Online tenant. You should see the extension appear in the tenant.
Summary
In this exercise, you created a SharePoint Framework (SPFx) application customizer extension.