Exercise - Update configuration settings
In this exercise, you'll update the configuration settings for the SharePoint Framework application and the configuration details of the Microsoft Teams application.
Add a new custom property
Locate and open the file ./src/webparts/spFxTeamsTogether/SpFxTeamsTogetherWebPart.ts.
Locate the interface ISpFxTeamsTogetherWebPartProps.
Add a new property to the interface:
customSetting: string;
Locate the render() method within the SpFxTeamsTogetherWebPart class.
Locate the following line in the render() method:
<div>Web part property value: <strong>${escape(this.properties.description)}</strong></div>
Delete this line and add the following two lines in its place:
<div>Description property value: <strong>${escape(this.properties.description)}</strong></div>
<div>Custom setting property value: <strong>${escape(this.properties.customSetting)}</strong></div>
Scroll down to the getPropertyPaneConfiguration() method in the SpFxTeamsTogetherWebPart class.
Locate the property pane field control for the existing description property:
PropertyPaneTextField('description', {
  label: strings.DescriptionFieldLabel
}),
Add a comma after the existing PropertyPaneTextField() and the following code to give users a way to edit the setting:
PropertyPaneTextField('customSetting', {
  label: 'Custom Setting'
})
Add a default value for the new property
Locate and open the file ./src/webparts/spFxTeamsTogether/SpFxTeamsTogetherWebPart.manifest.json
Locate the preconfiguredEntries[0].properties object.
Add the following property and value to the properties object:
"customSetting": "Default custom setting"
Package and deploy the web part
Build the project by opening a command prompt and changing to the root folder of the project. Then execute the following command:
gulp build
Next, create a production bundle of the project by running the following command on the command line from the root of the project:
gulp bundle --ship
Finally, create a deployment package of the project by running the following command on the command line from the root of the project:
gulp package-solution --ship
Navigate to the modern tenant App Catalog (the Manage Apps page).
Locate the file created by the gulp task, found in the ./sharepoint/solution folder with the name *.sppkg.
Drag this file into the Apps for SharePoint library in the browser. When prompted, select Replace.
In the Enable app panel, ensure the Enable this app and add it to all sites radio button is selected and then select Enable app.
In the This app has been enabled panel, select Close.
Test the changes
Navigate back to the SharePoint page where you added the web part in the previous exercise and refresh the page. The value of the custom property will start out blank even though you set a default value for it in the manifest file. The default value only gets set for new web parts.
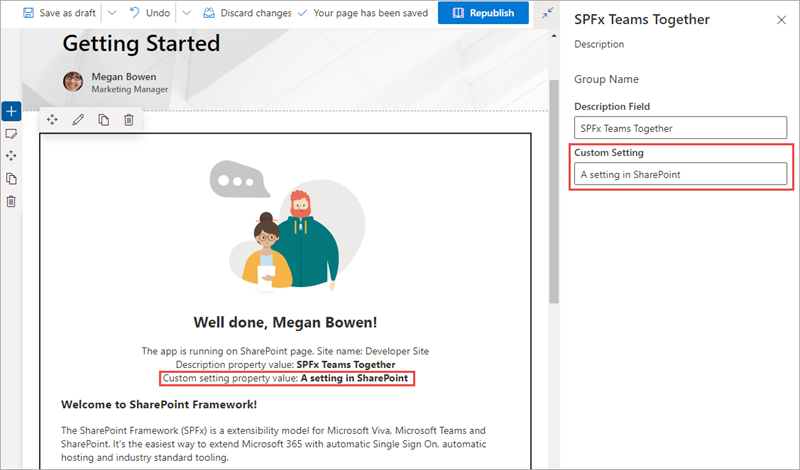
Edit the page and add a value to the Custom Setting property in the property pane. Notice how the page shows the property value:
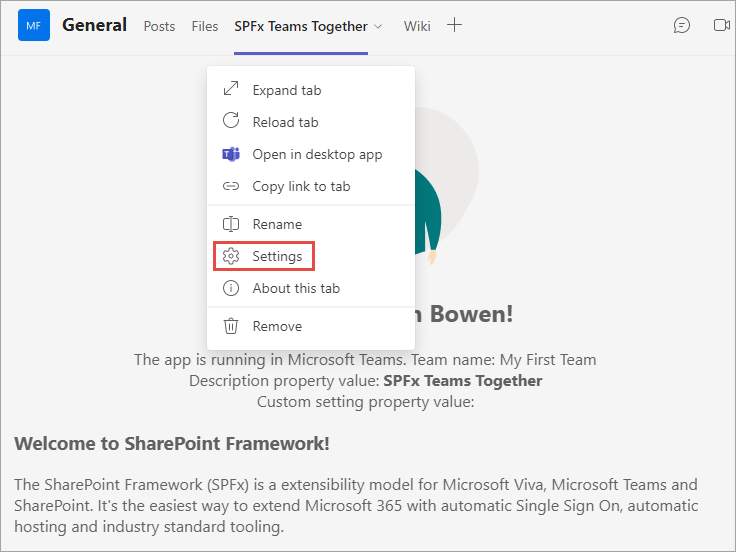
Now go back into the Microsoft Teams team. Refresh the page if you have Teams open in a web browser. Select the down arrow to the right of the SPFx Teams Together tab and select Settings.
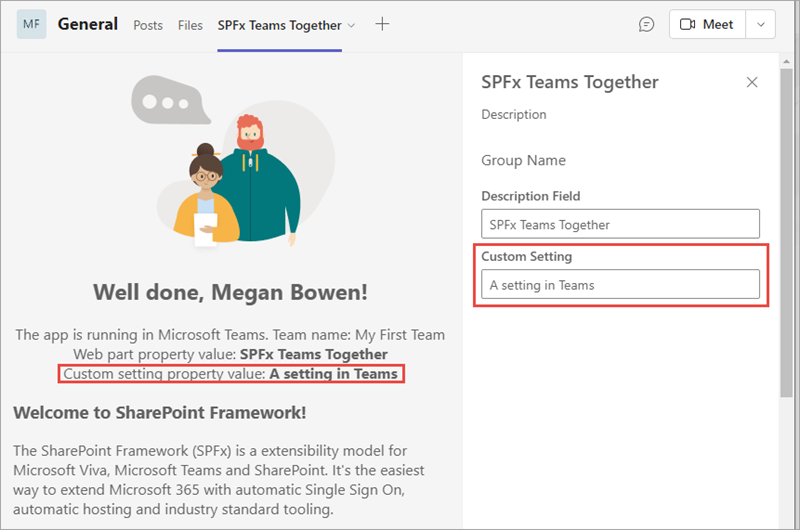
Add a value to the Custom Setting property in the property pane. Notice how the tab shows the property value:
Disable updates to tab's configuration
Locate and open the following file in the project: teams/manifest.json.
Set the value of the property version to 0.2.
Locate the property configurableTabs[0].canUpdateConfiguration.
Set the value of this property to false and save the file.
Locate the ./teams folder in the project.
Delete the existing Teams app package, TeamsSPFxApp.zip.
Recreate the Teams app package by making a new ZIP archive containing the three files in the folder: the two images and manifest.json.
Important
ZIP the contents of the folder, not the folder itself.
Name the ZIP archive TeamsSPFxApp.zip and save it in the teams folder.
Delete the previous Microsoft Teams tab
Within the Microsoft Teams client, go to the General tab within the My First Team.
Select the down-arrow to the right of the SPFx Teams Together tab and select Remove.
When prompted, select Remove.
Update the previously installed Microsoft Teams app
Navigate to the Microsoft Teams Admin Center located at https://admin.teams.microsoft.com/.
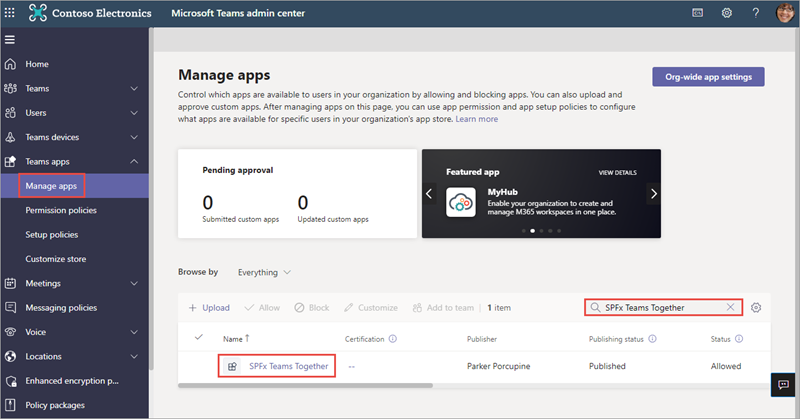
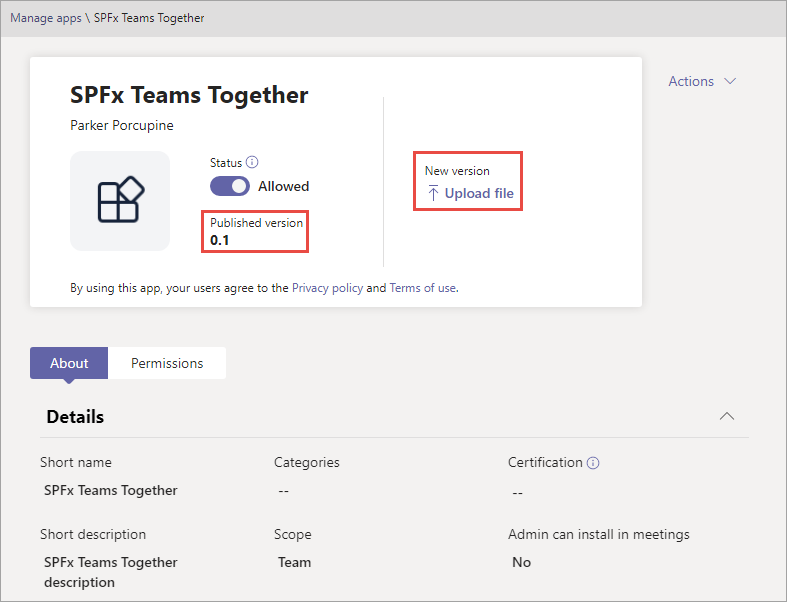
In the navigation, select Teams apps > Manage apps, search for SPFx Teams Together, and then select the SPFx Teams Together app:
In the Manage apps \ SPFx Teams Together pane, note that the Published version is 0.1. Select the Upload file link to upload the updated Teams app package:
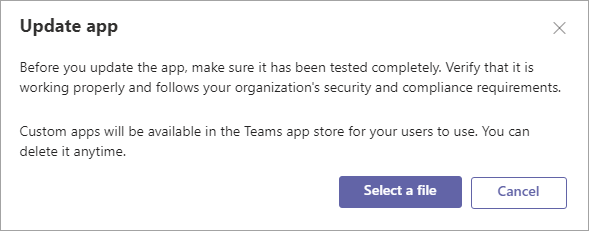
In the Update app dialog, select Select a file, and select the new Microsoft Teams app manifest you created a moment ago:
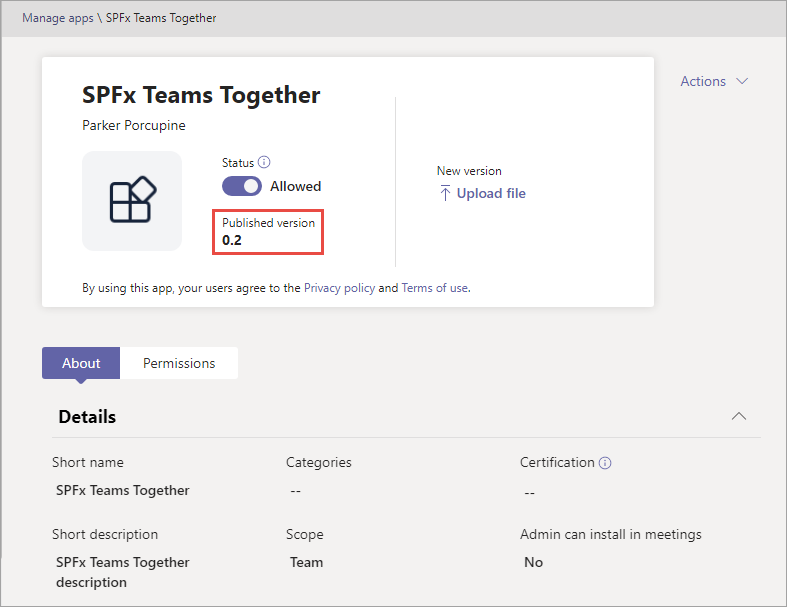
Go back to the Manage apps \ SPFx Teams Together pane to ensure that the Published version is now 0.2:
Within the Microsoft Teams client, select Apps in the lower right corner, select Built for your org from the sidebar menu, and then select the SPFx Teams Together app.
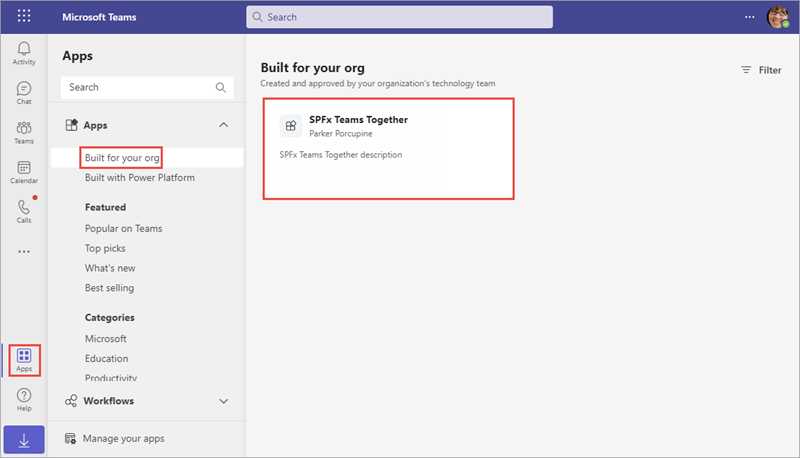
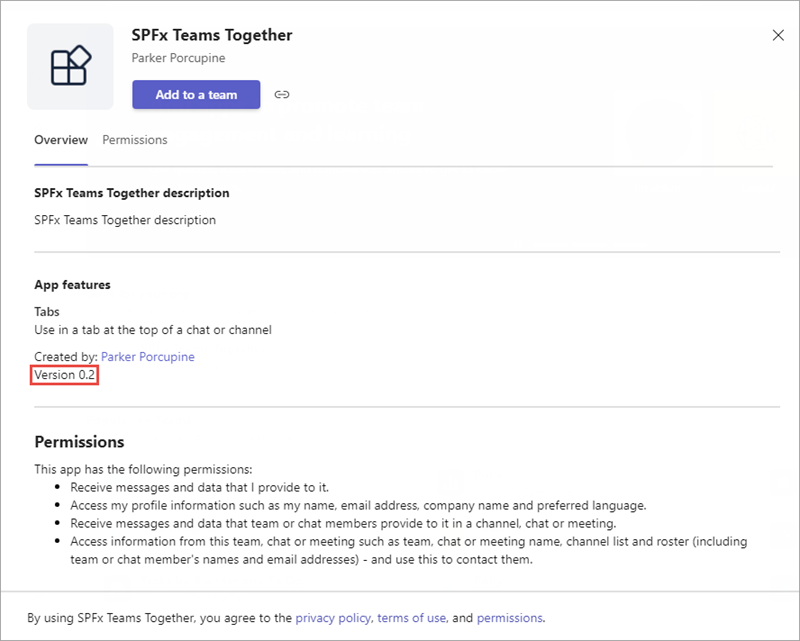
In the SPFx Teams Together dialog, ensure the Version is 0.2. If it's not, wait a couple minutes and try again:
Test the new Microsoft Teams app
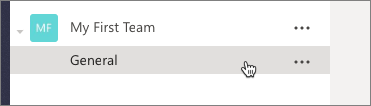
Select the My First Team team previously created.
Select the General channel.
Add the SPFx web part as a tab
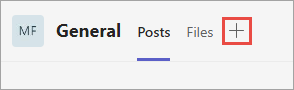
At the top of the page, select the + icon in the horizontal navigation:
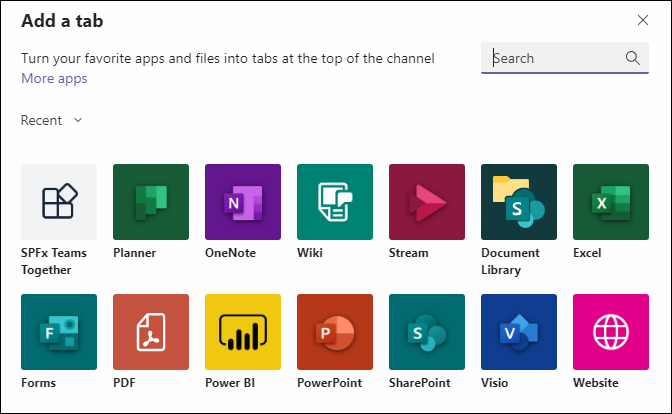
In the Add a tab dialog, locate, and select the SPFx Teams Together app:
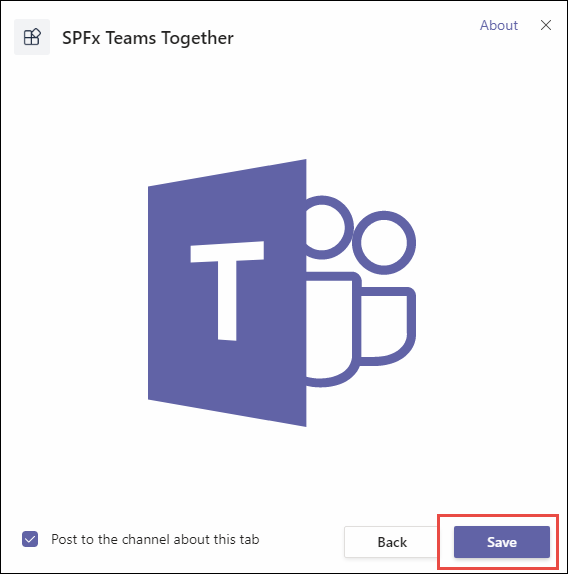
The next dialog will confirm the installation of the app. Select Save.
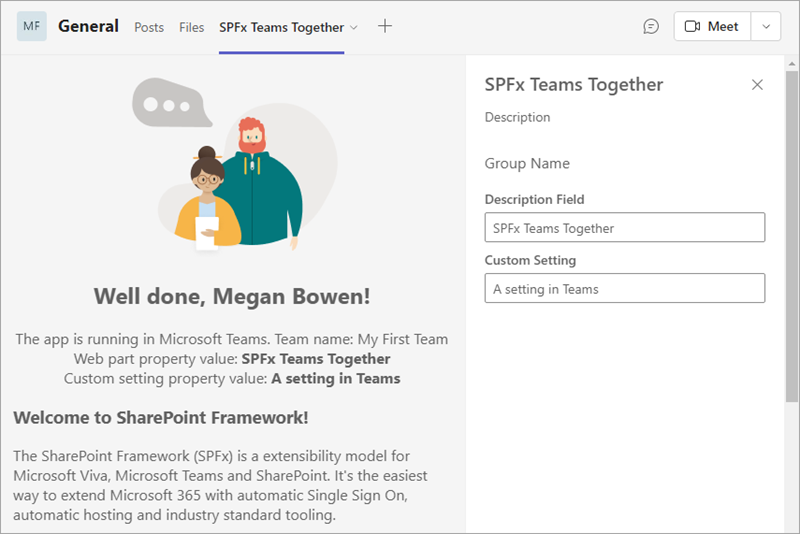
The application should now load in Microsoft Teams within the General channel under the tab SPFx Teams Together.
Notice how the web part's property pane opens by default. Edit the values of the public properties on the web part and then select the X in the upper-right corner of the property pane to close the initial configuration:
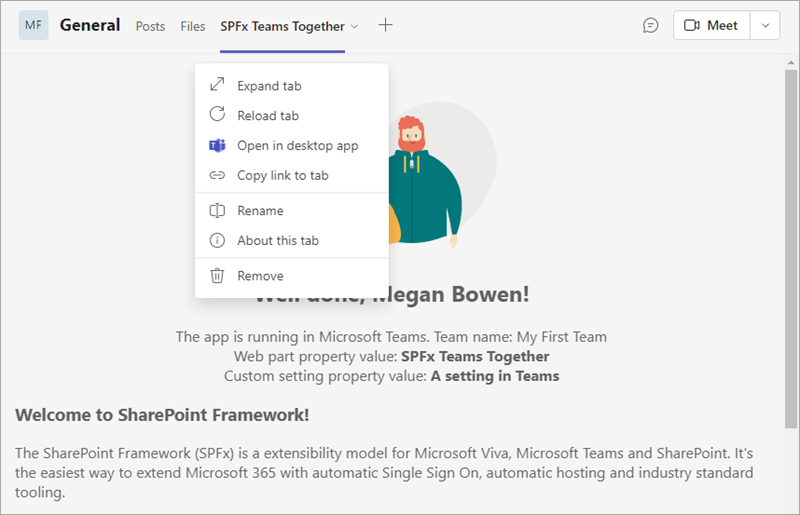
Now go back into the Microsoft Teams team. Select the down arrow to the right of the SPFx Teams Together tab. Notice the Settings option is no longer present. This is because the setting in the Microsoft Teams app manifest specified the configuration can't be updated once it's installed into Microsoft Teams.
Summary
In this exercise, you updated the configuration settings for the SharePoint Framework application and the configuration details of the Microsoft Teams application.