Exercise - Create a business process flow
We'll create a business process flow that requires the user to select whether or not a contact (client) consents to receive emails. If the client doesn't consent to receive emails, the business process flow asks the user to get the client's phone number. If the client consents to receive emails, then the business process flow asks the user to get the client's email address.
Prerequisites
Power Apps or Power Automate per user license, or a Dynamics 365 license plan that includes business process flow use rights.
Familiarity with solutions is helpful.
The example creates the business process flow on the Account table in Dataverse.
System administrator privileges
Important
As of August 2022, you can no longer create or manage business process flows from Power Automate outside of the solution explorer. Business process flows and instances continue to be supported through the solution explorer, Power Apps, and Dataverse table views.
Create a business process flow
From the Power Apps home page, select Solutions in the left navigation.
If you already have a solution created, open it. If you don't have a solution, create a solution following these steps.
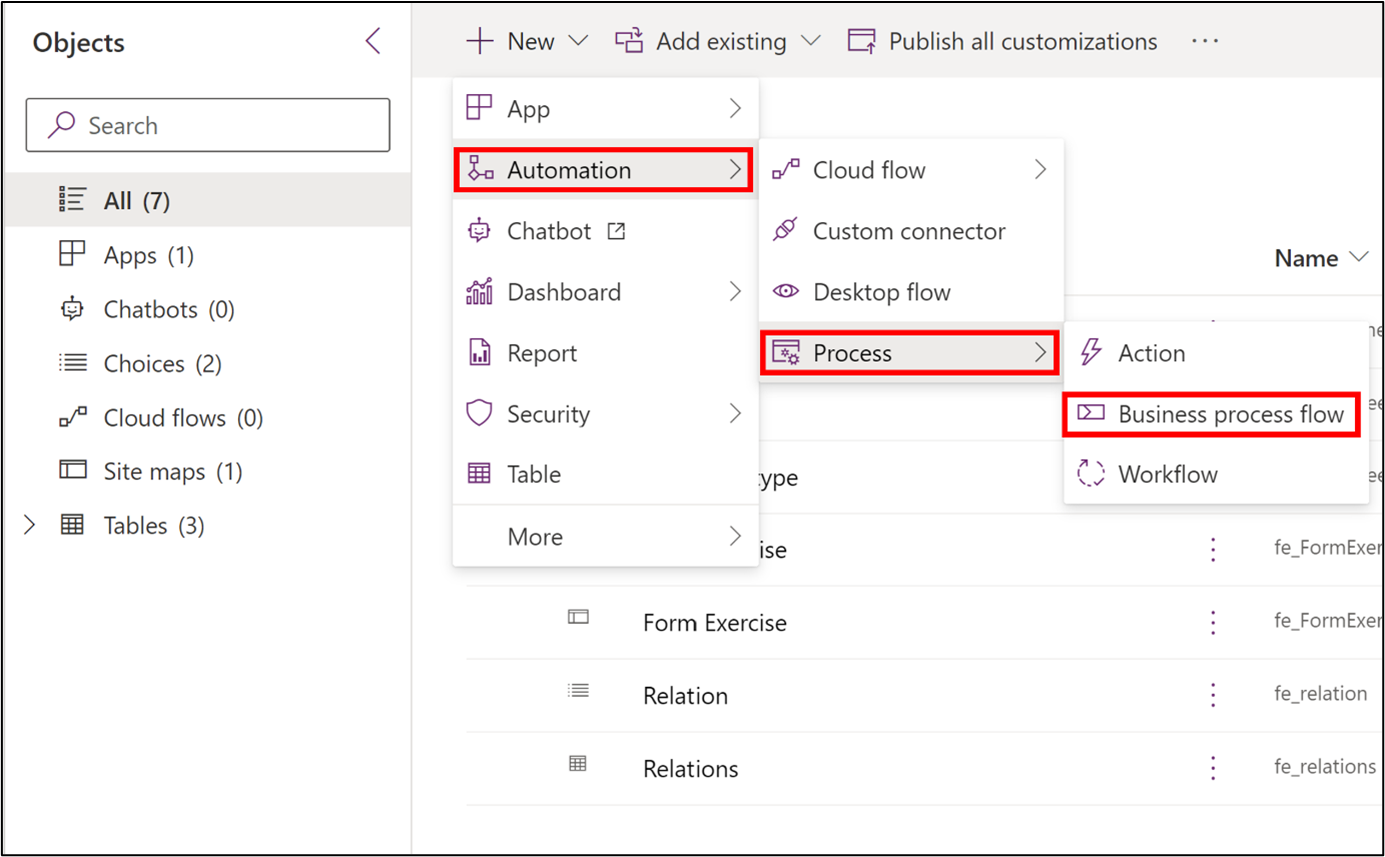
Once the solution is opened, select New > Automation > Process > Business process flow.
For the display name and name, type Client Contact Types and select the Account table, select Create. The business process flow designer should now open.
Tip
You may need to disable pop-up blockers for the business process flow designer to open. If the designer doesn't open, disable ad blockers, go back to the solution, and select Processes. Then select the Business Process Flow that was created.
Inside the Business Process flow designer, the first stage is created with a data step in it by default. Select the stage.
In the Account stage property on the right hand side panel, type Get Account Number for the display name.
For the Entity, select Account and then Apply.
Note
The display name is what the user sees as the stage name.
You can also select the category of the stage. A category lets you group stages by a type of action; it's useful for reports that group rows by the stage that they're in. The options for the stage category come from the Stage Category global choice. You can add more options to this global choice and change the labels of existing options as needed. The default category global choices are:
- Qualify
- Develop
- Propose
- Close
- Identify
- Research
- Resolve
- Approval
Select the Account stage's Details to open the stage and select Data Step #1.
In the property panel for the data step on the right hand side, type Account Number for the Step Name and select Account Number for the Data Field. Select Apply in the bottom right hand corner.

Add another stage with a related table
Note
You must select a base table to create a business process flow. The default table for all stages is the base table. However, from the second stage onward, you can change the table.
Select Add from the action pane in the top left, followed by the Add Stage under Flow. Similar to data steps, a + icon appears in the flow staging area. Select the + icon next to Account to add a stage.

Select the stage, and for the Display Name type Contact.
For the Entity, select Contact.
A relationship box appears. Select Company Name for the relationship.
Select Apply in the bottom right hand corner.

Note
If a relationship between two tables exists, the relationship block appears in the property pane. You need to enter a relationship when the preceding stage in the process is based on a different table. Relationships define the column mapping between two tables, which will automatically carry over data between rows, minimizing data entry.
On the Contact stage, select Details to open the stage and then select Data Step #1.
In the properties panel on the right hand side, type Do not allow Emails? for the Display Name and select the Do not allow Emails for the Data Field.
Select Apply in the lower right hand corner.


Tip
Business process flows can have up to 30 stages.
Branching
To design a simple business scenario, you can create a linear business process flow. To manage a more complex business process flow, you'll need to use branching. The branching condition consists of multiple logical expressions that use a combination of AND/OR operators.
From the action pane in the top right select Add, then select Add condition. Select the + icon to the right of the Contact stage to add the condition after the Contact stage.
Select the condition. For the Display Name, type Do not allow Emails eq to Do not allow.
For the Field, select Do not allow Emails
Select Equals for the Operator.
Select Do Not Allow for the Value.
Select Apply in the lower right hand corner.
Here's what the condition looks like:

Select Add from the action pane in the top left, followed by the Add Stage, then select the + icon next to the green check mark to the right of the condition.
For the Display Name, type Get Client Phone.
Select Contact for the Entity.
Select Apply in the lower right hand corner.
Select Details in the Contact stage and the select Data Step #1. for the Step Name type Mobile Phone.
For the Data Field, select Mobile Phone.
Select Apply in the lower right hand corner.
Select Add from the action pane in the top left, followed by the Add Stage, then select the + icon under the red x.

For the Display Name type, Get Client Email.
For the Entity, select Contact.
Select Apply in the lower right hand corner.
Select the Details of the Get Client Email stage and select Data Step #1.
For the Step Name, type Email.
Select Email for the Data Field.
Select Apply in the lower right hand corner.
In the top right hand corner, select Validate. A Validation Successful message appears.
Select Activate in the top right hand corner.

We successfully created our business process flow. Next we add it to a model-driven app.
Add the business process flow to a model-driven app
Return to your solution and select New -> App -> Model-driven app.
For the name, type BPF App.
Select Add a Page.
Select Dataverse table
Select an Existing table is already selected,
Select the Account table.
Select Publish in the top right hand corner.
Select Play.
Review business process flow
Select Accounts from the left hand navigation.
Note
If you can't see your Business Process Flow in the form, verify with your administrator that the user has the necessary security roles to view and run the BPF. Without correct permissions, the BPF won't be visible.
Create a new account.
From the command bar, select Process -> Switch Process
The business process bar appears.
Enter an Account number and select Next Stage.
The business process forces you to either select a contact or create a new one.
Once the contact is created and selected, the business process flow moves to the Contact stage and the user must select Allow or Do not allow. Depending on what is selected, the next stage updates.
Important
Each business process flow is represented as a custom table. It comes with its own set of privileges that you can edit within a security role. You can specify the privileges in the Business Process Flows tab for a security role. If you have lower privileges than system administrator, you need to add privileges to the security role for the business process flow table that was created.
Other enhancements
The following are more details for adding data fields, connecting the business process back to a linear process, and how security roles work with business processes.
Add more data steps
You can add more data steps to any of the stages. To add another data step:
Select Add from the action pane in the top left, followed by the Add Data Step.
+ icons appear in the designer and you can add the data step above or below other data steps.

Connect back to a linear process
We created a process that branched, but didn't come back to a linear process. Follow these steps to bring the process back to a linear process.
Add a stage to the right of the Get Client Phone stage.
Select the Get Client Email stage.
In the top right hand corner, select Connector -> Connect.
Select the new stage to make the connection.
Order data steps
There are two ways to order the data steps:
Select and drag the steps to the order you want.
From the data step's properties pane on the right hand side, change the Sequence value to the order you want the step to appear.
Security features
Different users in an organization might follow different processes to run the same operation. That is, different conditions might be applied for different users to perform the same function. Because of this, you can have up to 10 active business process flows for each table (entity) to provide appropriate processes for different users and situations. You can associate business process flows with security roles so that only people who have a certain security role can view or use the related BPF. You can also set the order of the business process flows to control which business process flow is set by default. To set business process flow order, open a business process flow in the designer, and then select Order Process Flow on the command bar.
In the next unit, you learn how to embed a canvas app in a model-driven app form using the canvas app component.
For more information about business process flows, see the business process flows overview documentation.