Exercise: Store data locally with SQLite
In this exercise, you use SQLite to store information locally with an application. In the sample scenario, you decided to cache data for the social-media app to improve responsiveness. This exercise creates and uses a local SQLite database for storing information about people. You save the physical database file in local storage.
This module uses the .NET 9.0 SDK. Ensure that you have .NET 9.0 installed by running the following command in your preferred command terminal:
dotnet --list-sdks
Output similar to the following example appears:
8.0.100 [C:\Program Files\dotnet\sdk]
9.0.100 [C:\Program Files\dotnet\sdk]
Ensure that a version that starts with 9 is listed. If none is listed or the command isn't found, install the most recent .NET 9.0 SDK.
Open the starter solution
Clone or download the exercise repo.
Note
It's best to clone the exercise content to a short folder path, such as C:\dev, to avoid build-generated files exceeding the maximum path length.
Use Visual Studio to open the People.sln solution, which you find in mslearn-dotnetmaui-store-local-data > People, or the starter folder in Visual Studio Code.
Note
Don't try run the application just yet, the code is incomplete and will throw exceptions until you add the missing elements later in this exercise.
Define a SQLite entity
Open the Person.cs file in the Models folder.
Add an
intproperty calledIdto thePersonclass.Add a
stringproperty calledName. The class should look like this:namespace People.Models; public class Person { public int Id { get; set; } public string Name { get; set; } }Save the Person.cs file.
Add the SQLite library
Right-click on the People project node from the Solution Explorer in Visual Studio.
In the context menu that appears, select Manage NuGet Packages.
Search for and select sqlite-net-pcl, then select Install.

If using Visual Studio Code, open the terminal and these packages with the following commands:
dotnet add package sqlite-net-pcl
Add SQLite attributes
In the Person.cs file, add a
usingdirective for theSQLitenamespace to the file for thePersonclass. This directive lets you use the SQLite attributes.using SQLite; namespace People.Models; public class Person { ... }Annotate the
Personclass with the[Table]attribute, and specify the table name aspeople.Specify the
Idproperty as the primary key. Annotate it with the[PrimaryKey]and[AutoIncrement]attributes.Add annotations to the
Nameproperty. Specify itsMaxLengthas 250. Specify that each value in the column should beUnique.The completed class should look like this:
using SQLite;

namespace People.Models;

[Table("people")]
public class Person
{
    [PrimaryKey, AutoIncrement]
    public int Id { get; set; }

    [MaxLength(250), Unique]
    public string Name { get; set; }
}
Save the Person.cs file.
Connect to the database
Open the PersonRepository.cs file.
Examine the
PersonRepositoryclass. This class contains incomplete skeleton code withTODOmarkers where you add the functionality to access the database.Add a
usingdirective for theSQLiteandPeople.Modelsnamespaces to the file for thePersonRepository.csclass.Add a private
SQLiteConnectionfield namedconnto the class, above theInitfunction.In the
Initfunction, check to see ifconnisn't equal tonull. If so, return immediately.if (conn != null) return;This way, the initialization code for the SQLite database only runs once.
Initialize the
connfield to connect to the database using the_dbPathvariable.Use the
conn.CreateTablemethod to create a table to storePersondata. The completedInitfunction should look like this:using SQLite; using People.Models; ... private SQLiteConnection conn; ... private void Init() { if (conn != null) return; conn = new SQLiteConnection(_dbPath); conn.CreateTable<Person>(); }
Insert a row into the database
In
PersonRepositoryclass, find theAddNewPersonmethod.To insert a new
Personobject, replace theTODOcomment in this method with code. The code first callsInitto verify the database is initialized, then uses theSQLiteConnectionobject'sInsertmethod. Set theresultvariable to the value theInsertmethod returns, as shown in the following code:public void AddNewPerson(string name) { int result = 0; try { // enter this line Init(); // basic validation to ensure a name was entered if (string.IsNullOrEmpty(name)) throw new Exception("Valid name required"); // enter this line result = conn.Insert(new Person { Name = name }); ... } ... }
Retrieve rows from the database
In the
PersonRepositoryclass, find theGetAllPeoplemethod.Call
Initto verify that the database is initialized.Use the generic
Table\<T>method to retrieve all of the rows in the table. SpecifyPersonas the type parameter.Use the
ToList()extension method to turn the result into aList\<Person>collection and return this collection.Add error handling by wrapping your code in a
try-catchblock. If there's an error, set theStatusMessageproperty to the exception'sMessageproperty and return an empty collection. The completed method should look like this:public List<Person> GetAllPeople() { try { Init(); return conn.Table<Person>().ToList(); } catch (Exception ex) { StatusMessage = string.Format("Failed to retrieve data. {0}", ex.Message); } return new List<Person>(); }Save the PersonRepository.cs file.
Integrate the repository into the UI
Open the MauiProgram.cs file.
In the
CreateMauiAppfunction, after the statements that add theMainPagepage as a singleton service to the app, add code to perform the following tasks:Create a string variable named
dbPath. Initialize this string with the expressionFileAccessHelper.GetLocalFilePath("people.db3"). The database file the app uses is called people.db3, and the app saves this file in local storage on the device.Use dependency injection to add the
PersonRepositoryclass as a singleton service to the app. ThePersonRepositoryclass exposes a constructor that takes the path to the database file as a string parameter.
The completed code for the
CreateMauiAppfunction should look like this:public static MauiApp CreateMauiApp() { var builder = MauiApp.CreateBuilder(); builder .UseMauiApp<App>() .ConfigureFonts(fonts => { fonts.AddFont("OpenSans-Regular.ttf", "OpenSansRegular"); fonts.AddFont("OpenSans-Semibold.ttf", "OpenSansSemibold"); }); // Add this code string dbPath = FileAccessHelper.GetLocalFilePath("people.db3"); builder.Services.AddSingleton<PersonRepository>(s => ActivatorUtilities.CreateInstance<PersonRepository>(s, dbPath)); return builder.Build(); }Save the MauiProgram.cs file.
Expand App.xaml in the Solution Explorer, then open the App.xaml.cs file.
Add a
public,staticproperty calledPersonRepo. This property holds aPersonRepositoryobject to theAppclass.Initialize the
PersonRepoproperty in the constructor by adding aPersonRepositoryparameter to the constructor and setting the 'PersonRepo' property to the value in this parameter. The completedAppclass should look like this:public partial class App : Application { public static PersonRepository PersonRepo { get; private set; } public App(PersonRepository repo) { InitializeComponent(); PersonRepo = repo; } }
Note
The dependency injection process automatically populates the repo parameter to the constructor.
Test the application
Build the solution by using CTRL+Shift+B.
Once the build completes, start debugging by using F5. When the UI appears, enter your name and select Add Person.
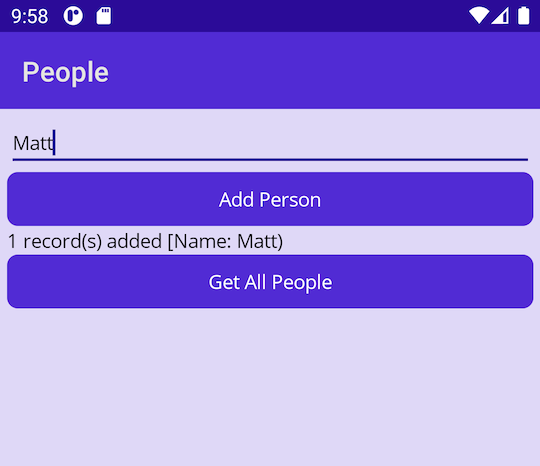
Select Get All People and verify that your name appears.
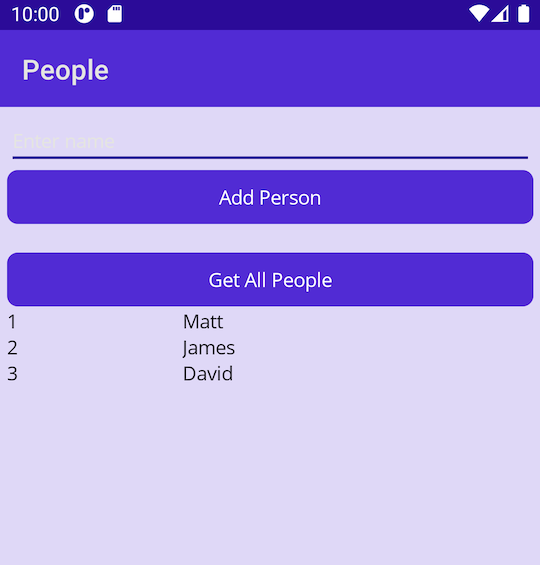
Experiment by adding more names and retrieving the list of stored people.
Return to Visual Studio or Visual Studio Code and stop debugging by using Shift+F5.
Restart the app and select Get All People. Verify that the names you stored previously are still stored in the database. Close the app when you're finished.