Exercise - Add a test job to your workflow
Your toy company's security team wants you to verify that your website is accessible only through HTTPS. In this exercise, you configure your workflow to run a smoke test that checks the security team's requirement.
During the process, you'll do the following tasks:
- Add a test script to your repository.
- Update your workflow definition to add a test job.
- Run the workflow and observe the test fail.
- Fix the Bicep file and observe the workflow run successfully.
Add a test script
Here, you add a test script to verify that the website is accessible when HTTPS is used and not accessible when the nonsecure HTTP protocol is used.
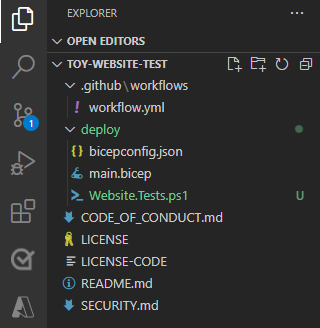
In Visual Studio Code, create a new file in the deploy folder named Website.Tests.ps1.
Copy and paste the following test code into the file:
param(
  [Parameter(Mandatory)]
  [ValidateNotNullOrEmpty()]
  [string] $HostName
)

Describe 'Toy Website' {

    It 'Serves pages over HTTPS' {
      $request = [System.Net.WebRequest]::Create("https://$HostName/")
      $request.AllowAutoRedirect = $false
      $request.GetResponse().StatusCode |
        Should -Be 200 -Because "the website requires HTTPS"
    }

    It 'Does not serves pages over HTTP' {
      $request = [System.Net.WebRequest]::Create("http://$HostName/")
      $request.AllowAutoRedirect = $false
      $request.GetResponse().StatusCode |
        Should -BeGreaterOrEqual 300 -Because "HTTP is not secure"
    }

}
The result is a Pester test file. It requires a parameter named
$HostName. It runs two tests against the host name:- Tries to connect to the website over HTTPS. The test passes if the server responds with an HTTP response status code between 200 and 299, which indicates a successful connection.
- Tries to connect to the website over HTTP. The test passes if the server responds with an HTTP response status code of 300 or higher.
For the purposes of this exercise, it's not important that you understand the details of the test file and how it works. We provide links in the summary so you can learn more if you're interested.
Publish your Bicep file's output as a job output
The test script that you created in the preceding steps requires a host name to test. Your Bicep file already includes an output, but before you can use it in your smoke tests, you need to publish it as a job output.
In Visual Studio Code, open the workflow.yml file in the .github/workflows folder.
In the deploy job, add an
idto theDeploy websitestep so that you can refer to the step. Also, add a job output that copies theappServiceAppHostNameoutput from the deployment step:deploy: runs-on: ubuntu-latest environment: Website needs: preview outputs: appServiceAppHostName: ${{ steps.deploy.outputs.appServiceAppHostName }} steps: - uses: actions/checkout@v3 - uses: azure/login@v1 name: Sign in to Azure with: client-id: ${{ secrets.AZURE_CLIENT_ID }} tenant-id: ${{ secrets.AZURE_TENANT_ID }} subscription-id: ${{ secrets.AZURE_SUBSCRIPTION_ID }} - uses: azure/arm-deploy@v1 id: deploy name: Deploy website with: failOnStdErr: false deploymentName: ${{ github.run_number }} resourceGroupName: ${{ env.AZURE_RESOURCEGROUP_NAME }} template: ./deploy/main.bicep parameters: environmentType=${{ env.ENVIRONMENT_TYPE }}Save the file.
Add a smoke test job to your workflow
Now, you can add a smoke test job that runs your tests.
At the bottom of the file, add the following definition for the smoke-test job:
smoke-test:
  runs-on: ubuntu-latest
  needs: deploy
  steps:
  - uses: actions/checkout@v3
  - run: |
      $container = New-PesterContainer `
        -Path 'deploy/Website.Tests.ps1' `
        -Data @{ HostName = '${{needs.deploy.outputs.appServiceAppHostName}}' }
      Invoke-Pester `
        -Container $container `
        -CI
    name: Run smoke tests
    shell: pwsh
This code defines the job. The job contains a step to check out the code, and a step to run tests by using Pester.
The job definition uses the
needsproperty to define a dependency on the deploy job. This dependency ensures that the jobs run in the sequence you want. It also enables you to use the outputs of the deploy job when you run the smoke tests.Note
PowerShell and Pester are both preinstalled on GitHub-hosted runners. You don't need to do anything special to use them in a script step.
Save the file.
Verify and commit your workflow definition
Verify that your workflow.yml file looks like the following code:
name: deploy-toy-website-test
concurrency: toy-company

on:
  push:
    branches:
      - main

permissions:
  id-token: write
  contents: read

env:
  AZURE_RESOURCEGROUP_NAME: ToyWebsiteTest
  ENVIRONMENT_TYPE: Test

jobs:
  lint:
    runs-on: ubuntu-latest
    steps:
    - uses: actions/checkout@v3
    - name: Run Bicep linter
      run: az bicep build --file deploy/main.bicep

  validate:
    runs-on: ubuntu-latest
    steps:
    - uses: actions/checkout@v3
    - uses: azure/login@v1
      name: Sign in to Azure
      with:
        client-id: ${{ secrets.AZURE_CLIENT_ID }}
        tenant-id: ${{ secrets.AZURE_TENANT_ID }}
        subscription-id: ${{ secrets.AZURE_SUBSCRIPTION_ID }}
    - uses: azure/arm-deploy@v1
      name: Run preflight validation
      with:
        deploymentName: ${{ github.run_number }}
        resourceGroupName: ${{ env.AZURE_RESOURCEGROUP_NAME }}
        template: ./deploy/main.bicep
        parameters: environmentType=${{ env.ENVIRONMENT_TYPE }}
        deploymentMode: Validate

  preview:
    runs-on: ubuntu-latest
    needs: [lint, validate]
    steps:
    - uses: actions/checkout@v3
    - uses: azure/login@v1
      name: Sign in to Azure
      with:
        client-id: ${{ secrets.AZURE_CLIENT_ID }}
        tenant-id: ${{ secrets.AZURE_TENANT_ID }}
        subscription-id: ${{ secrets.AZURE_SUBSCRIPTION_ID }}
    - uses: azure/arm-deploy@v1
      name: Run what-if
      with:
        failOnStdErr: false
        resourceGroupName: ${{ env.AZURE_RESOURCEGROUP_NAME }}
        template: deploy/main.bicep
        parameters: >
          environmentType=${{ env.ENVIRONMENT_TYPE }}
        additionalArguments: --what-if

  deploy:
    runs-on: ubuntu-latest
    environment: Website
    needs: preview
    outputs:
      appServiceAppHostName: ${{ steps.deploy.outputs.appServiceAppHostName }}
    steps:
    - uses: actions/checkout@v3
    - uses: azure/login@v1
      name: Sign in to Azure
      with:
        client-id: ${{ secrets.AZURE_CLIENT_ID }}
        tenant-id: ${{ secrets.AZURE_TENANT_ID }}
        subscription-id: ${{ secrets.AZURE_SUBSCRIPTION_ID }}
    - uses: azure/arm-deploy@v1
      id: deploy
      name: Deploy website
      with:
        failOnStdErr: false
        deploymentName: ${{ github.run_number }}
        resourceGroupName: ${{ env.AZURE_RESOURCEGROUP_NAME }}
        template: ./deploy/main.bicep
        parameters: environmentType=${{ env.ENVIRONMENT_TYPE }}

  smoke-test:
    runs-on: ubuntu-latest
    needs: deploy
    steps:
    - uses: actions/checkout@v3
    - run: |
        $container = New-PesterContainer `
          -Path 'deploy/Website.Tests.ps1' `
          -Data @{ HostName = '${{needs.deploy.outputs.appServiceAppHostName}}' }
        Invoke-Pester `
          -Container $container `
          -CI
      name: Run smoke tests
      shell: pwsh
If your file looks different, update it to match this example, and then save it.
Commit and push your changes to your Git repository by running the following commands in the Visual Studio Code terminal:
git add .
git commit -m "Add test job"
git push
Run the workflow and review the test result
In your browser, go to your workflow.
Select the most recent run of your workflow.
Wait until the workflow completes the lint, validate, and preview jobs. Although GitHub Actions automatically updates the page with the latest status, it's a good idea to refresh your page occasionally.
Select the Review deployments button, select the Website environment, then select Approve and deploy.
Wait for the workflow run to finish.
Notice that the deploy job finishes successfully. The smoke-test job finishes with an error.
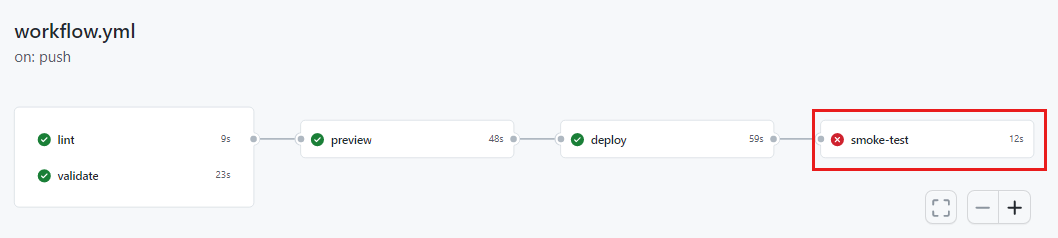
Select the smoke-test job to see its details.
Notice that the smoke-test output shows that two tests ran. One passed and one failed. The test that failed is listed as Toy Website.Does not serve pages over HTTP.

This text indicates that the website wasn't correctly configured to meet your security team's requirement.
Update the Bicep file
Now that you identified that your Bicep definition doesn't meet your security team's requirement, you can fix it.
In Visual Studio Code, open the main.bicep file in the deploy folder.
Find the definition for the Azure App Service app, and update it to include the
httpsOnlyproperty in itspropertiesarea:resource appServiceApp 'Microsoft.Web/sites@2022-03-01' = { name: appServiceAppName location: location properties: { serverFarmId: appServicePlan.id httpsOnly: true siteConfig: { appSettings: [ { name: 'APPINSIGHTS_INSTRUMENTATIONKEY' value: applicationInsights.properties.InstrumentationKey } { name: 'APPLICATIONINSIGHTS_CONNECTION_STRING' value: applicationInsights.properties.ConnectionString } ] } } }Save the file.
Commit and push your changes to your Git repository by running the following commands in the Visual Studio Code terminal:
git add .
git commit -m "Configure HTTPS on website"
git push
Run the workflow again
In your browser, go to your workflow runs.
Select the most recent run.
Wait until the workflow completes the lint, validate, and preview jobs. Although GitHub automatically updates the page with the latest status, it's a good idea to refresh your page occasionally.
Select the preview job, and review the what-if results again.
Notice that the what-if command detected the change in the
httpsOnlyproperty's value:Resource and property changes are indicated with these symbols: - Delete + Create ~ Modify = Nochange * Ignore The deployment will update the following scope: Scope: /subscriptions/***/resourceGroups/ToyWebsiteTest ~ Microsoft.OperationalInsights/workspaces/workspace-abcdefghijklm [2022-10-01] - properties.retentionInDays: 30 - properties.sku: name: "pergb2018" - properties.workspaceCapping: dailyQuotaGb: -1.0 ~ Microsoft.Web/sites/toy-website-abcdefghijklm [2022-03-01] + properties.siteConfig.localMySqlEnabled: false + properties.siteConfig.netFrameworkVersion: "v4.6" ~ properties.httpsOnly: false => true = Microsoft.Insights/components/toywebsite [2020-02-02] = Microsoft.Storage/storageAccounts/mystorageabcdefghijklm [2022-09-01] = Microsoft.Web/serverfarms/toy-website [2022-03-01] * microsoft.alertsmanagement/smartDetectorAlertRules/Failure Anomalies - toywebsite Resource changes: 2 to modify, 3 no change, 1 to ignore.Go back to the workflow run.
Select the Review deployments button, select the Website environment, then select Approve and deploy.
Wait for the workflow run to finish.
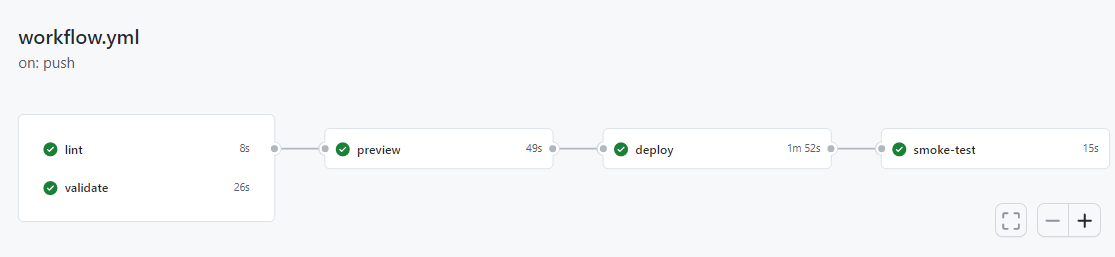
Notice that the entire workflow finishes successfully, including the smoke-test job. This success indicates that both tests passed.
Clean up the resources
After you complete the exercise, you can remove the resources so you aren't billed for them.
In the Visual Studio Code terminal, run the following command:
az group delete --resource-group ToyWebsiteTest --yes --no-wait
The resource group is deleted in the background.
Remove-AzResourceGroup -Name ToyWebsiteTest -Force