Configure environment
In this exercise, you learn about several configurations that are required to successfully deploy and use Microsoft Cloud for Healthcare. You can make all major configuration changes by using the following four tools:
Microsoft Azure portal
Microsoft Power Platform admin center
Microsoft Power Apps portals
Microsoft Cloud Solution Center
Note
Setting up Omnichannel for Customer Service and Power Apps portals will take several hours to complete (estimated at 3-4 hours to complete for each). We recommend that you set up both applications concurrently. You'll need to complete all configuration steps before deploying Microsoft Cloud for Healthcare.
Note
To perform these tasks, you must make sure that you’re signed in with the system administrator user account that you created in the Create a Microsoft 365 tenant.
Task: Register an app in Microsoft Entra ID
In this task, you learn how to register a new application in Microsoft Entra ID, grant delegated and application permissions, and create a client secret.
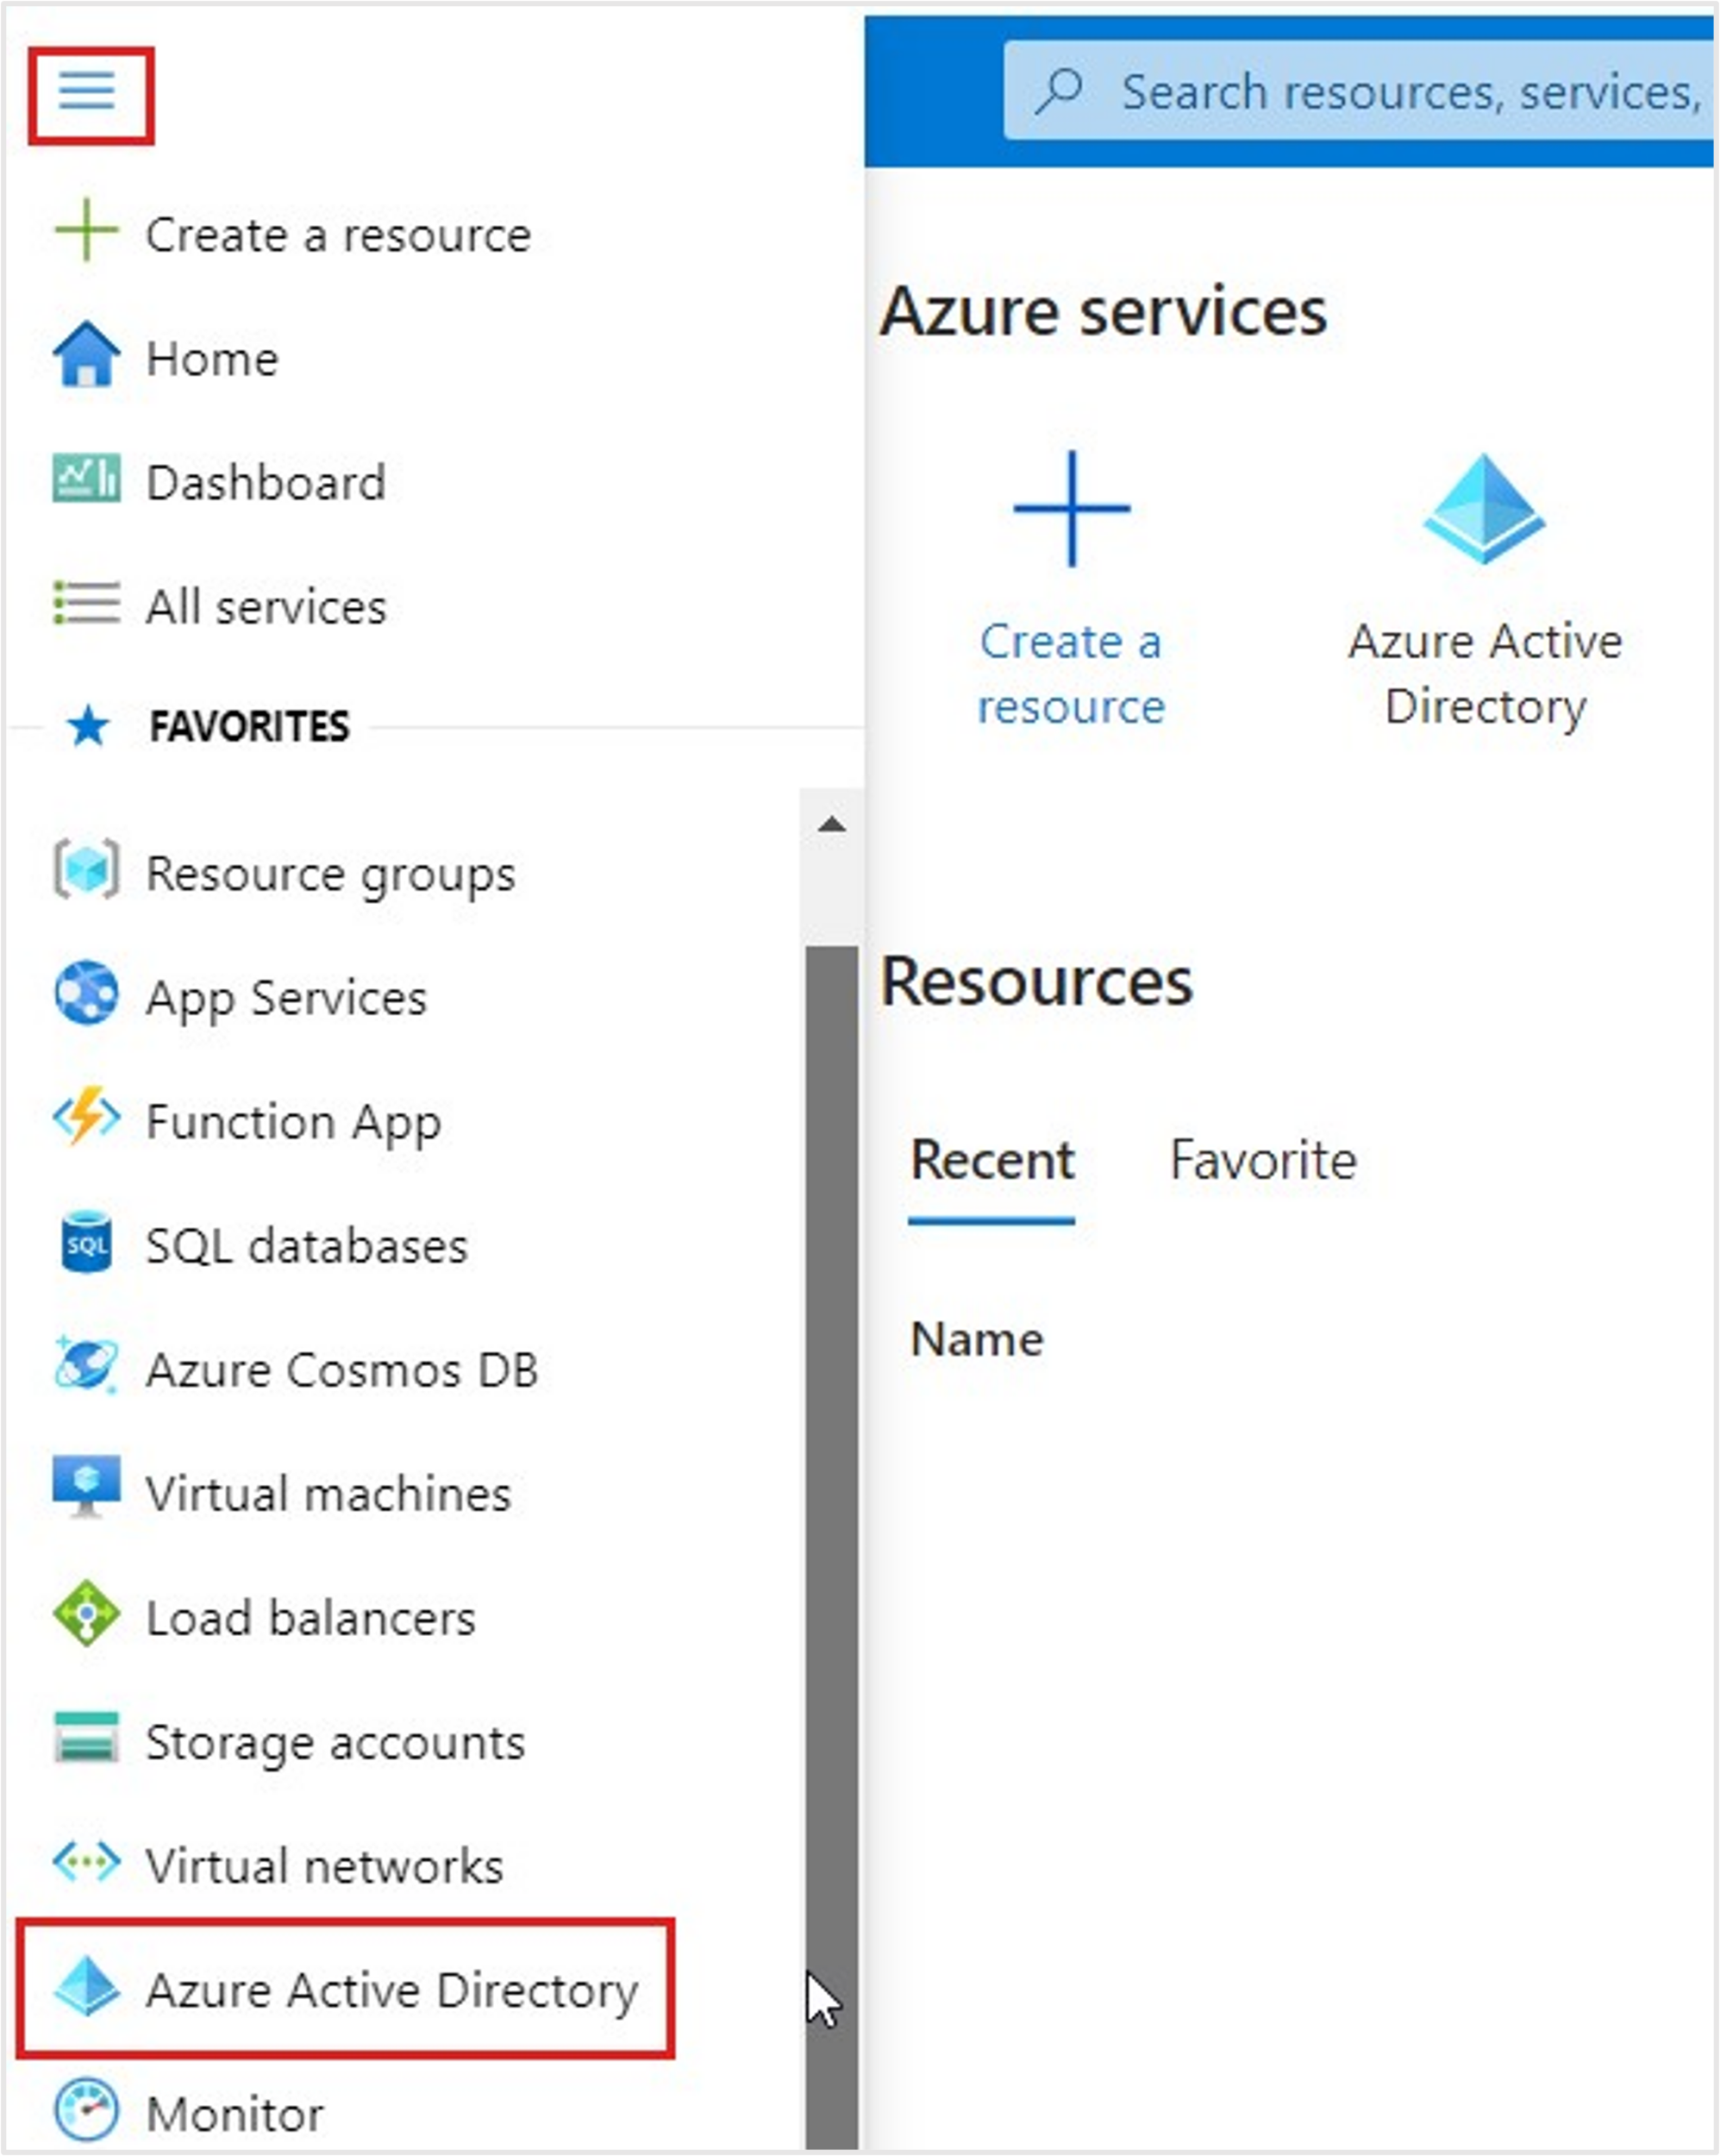
While signed in to your Microsoft 365 tenant as system administrator, open a new browser tab, and then go to the Azure portal. In the upper-left corner of the page, select the hamburger icon (three horizontal lines) and then select Microsoft Entra ID.
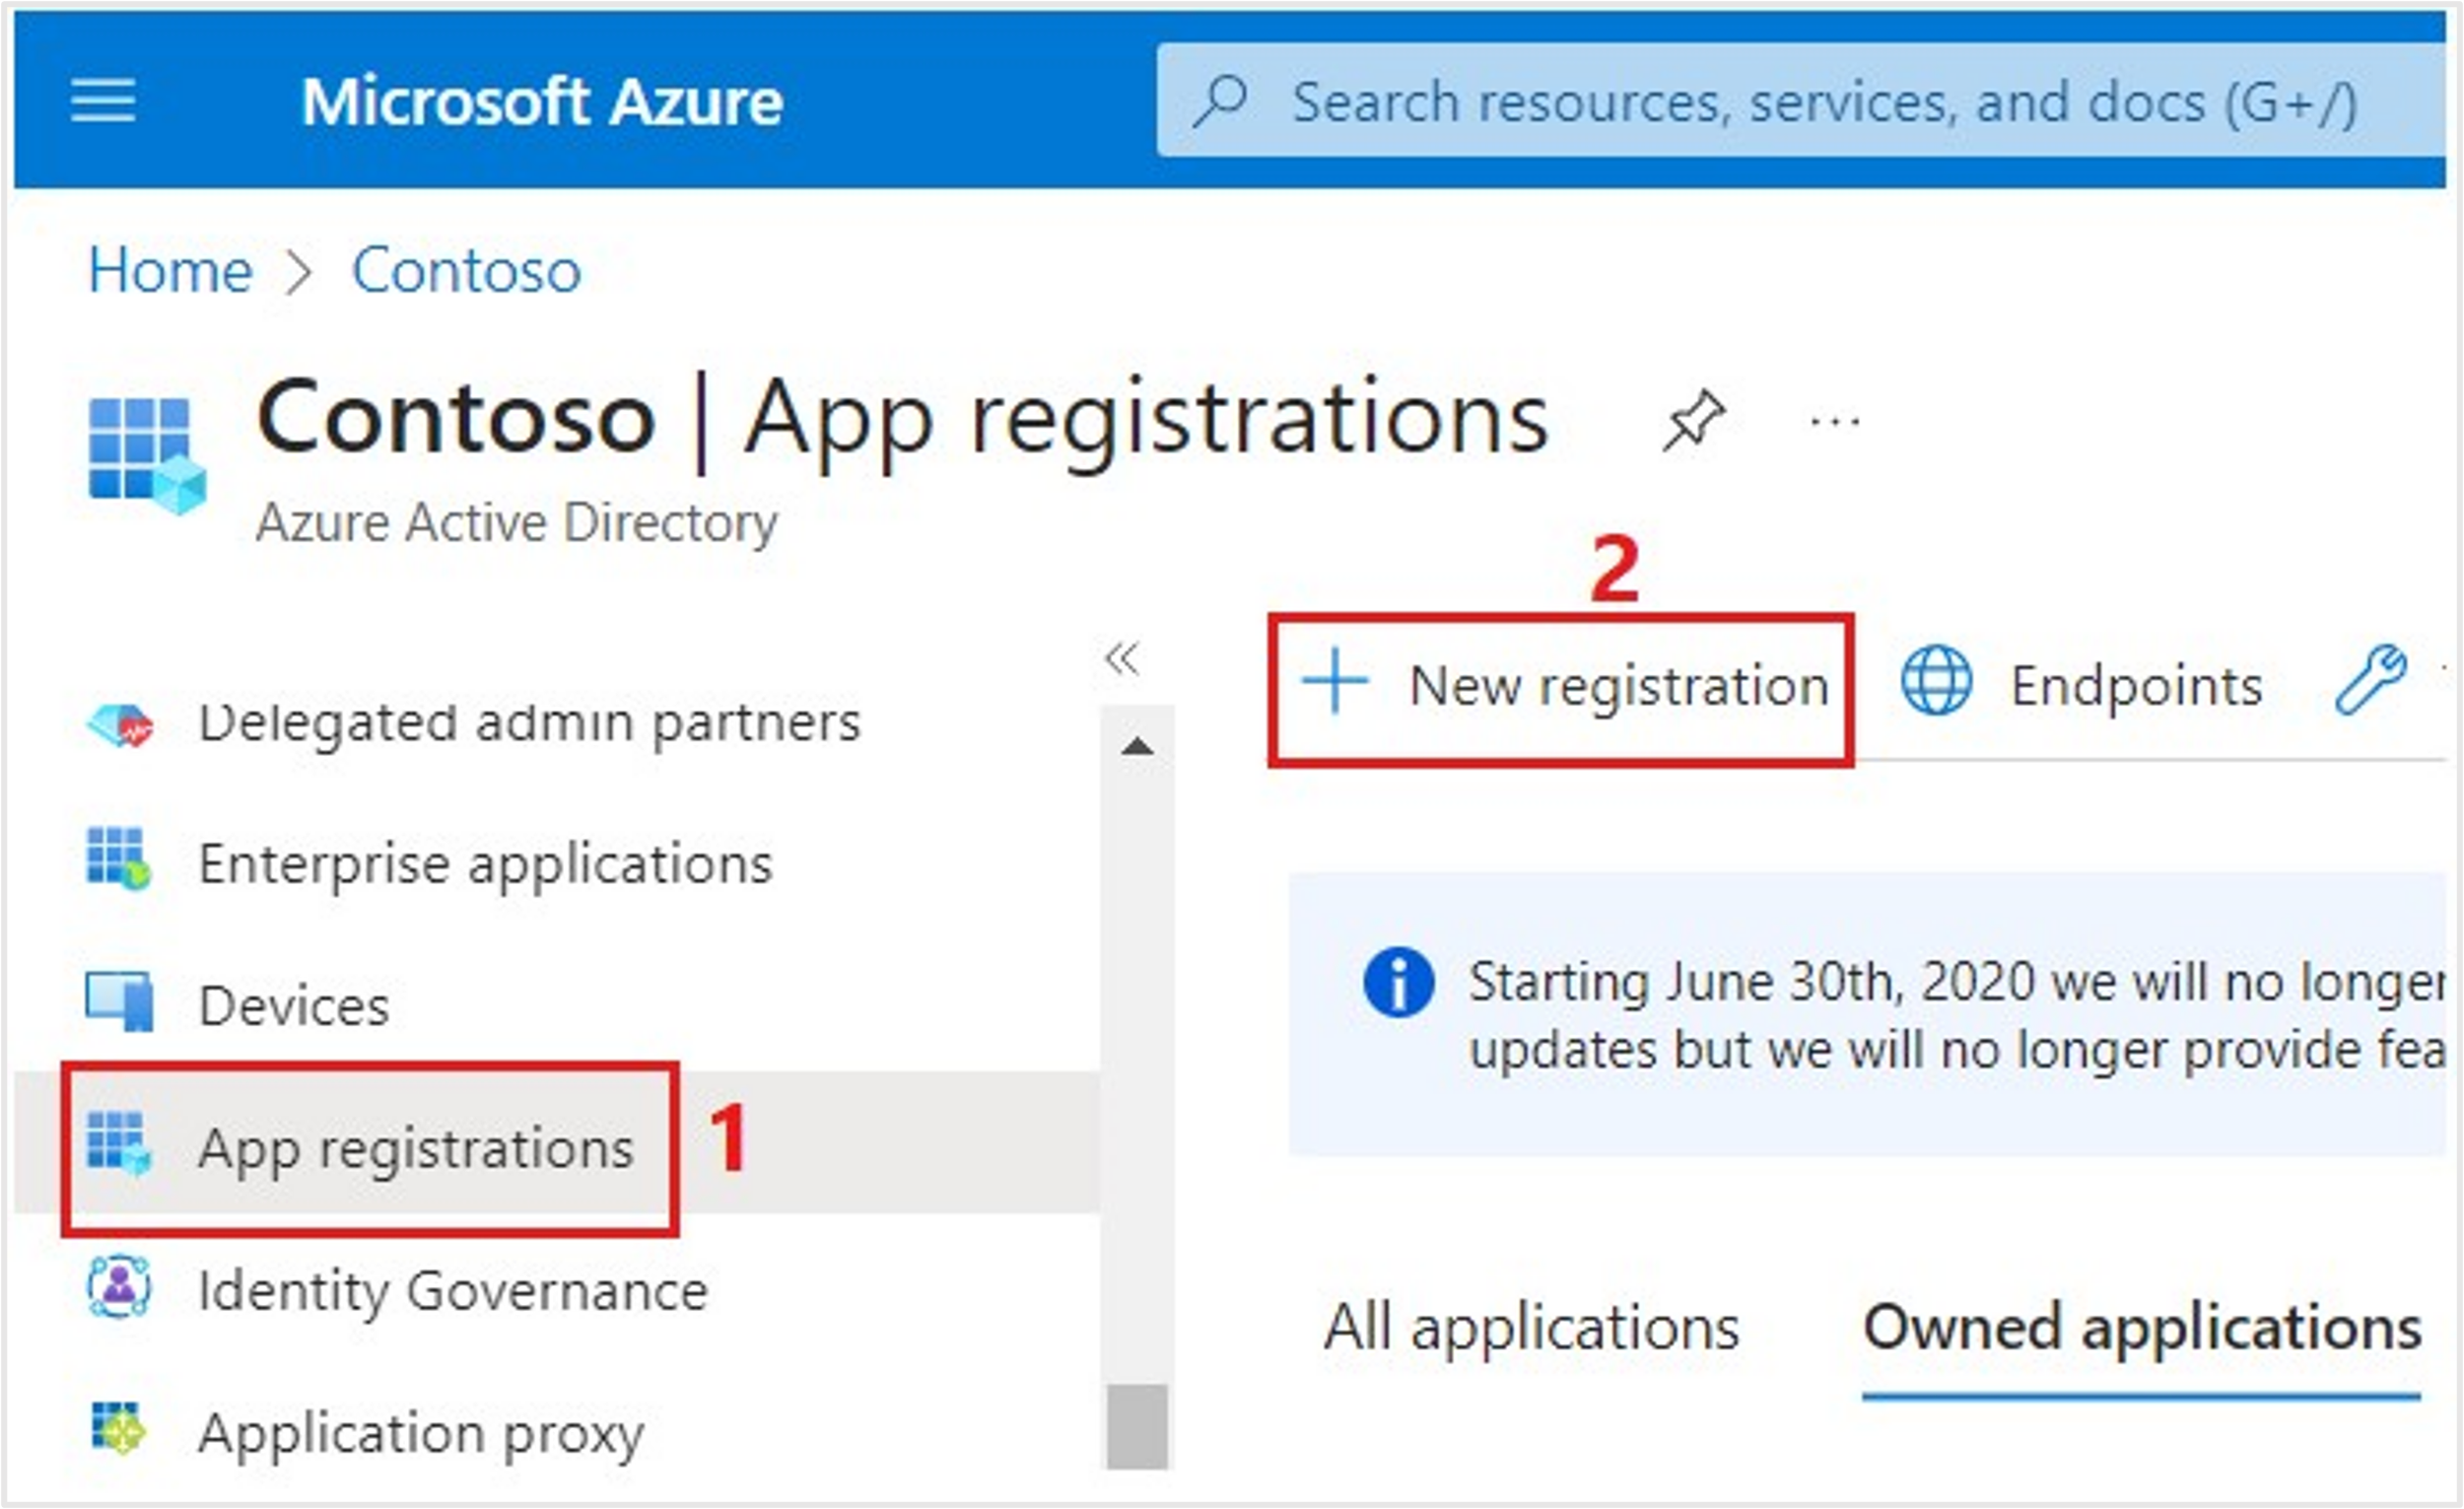
On the left navigation pane, select App registrations and then select + New registration in the right pane.
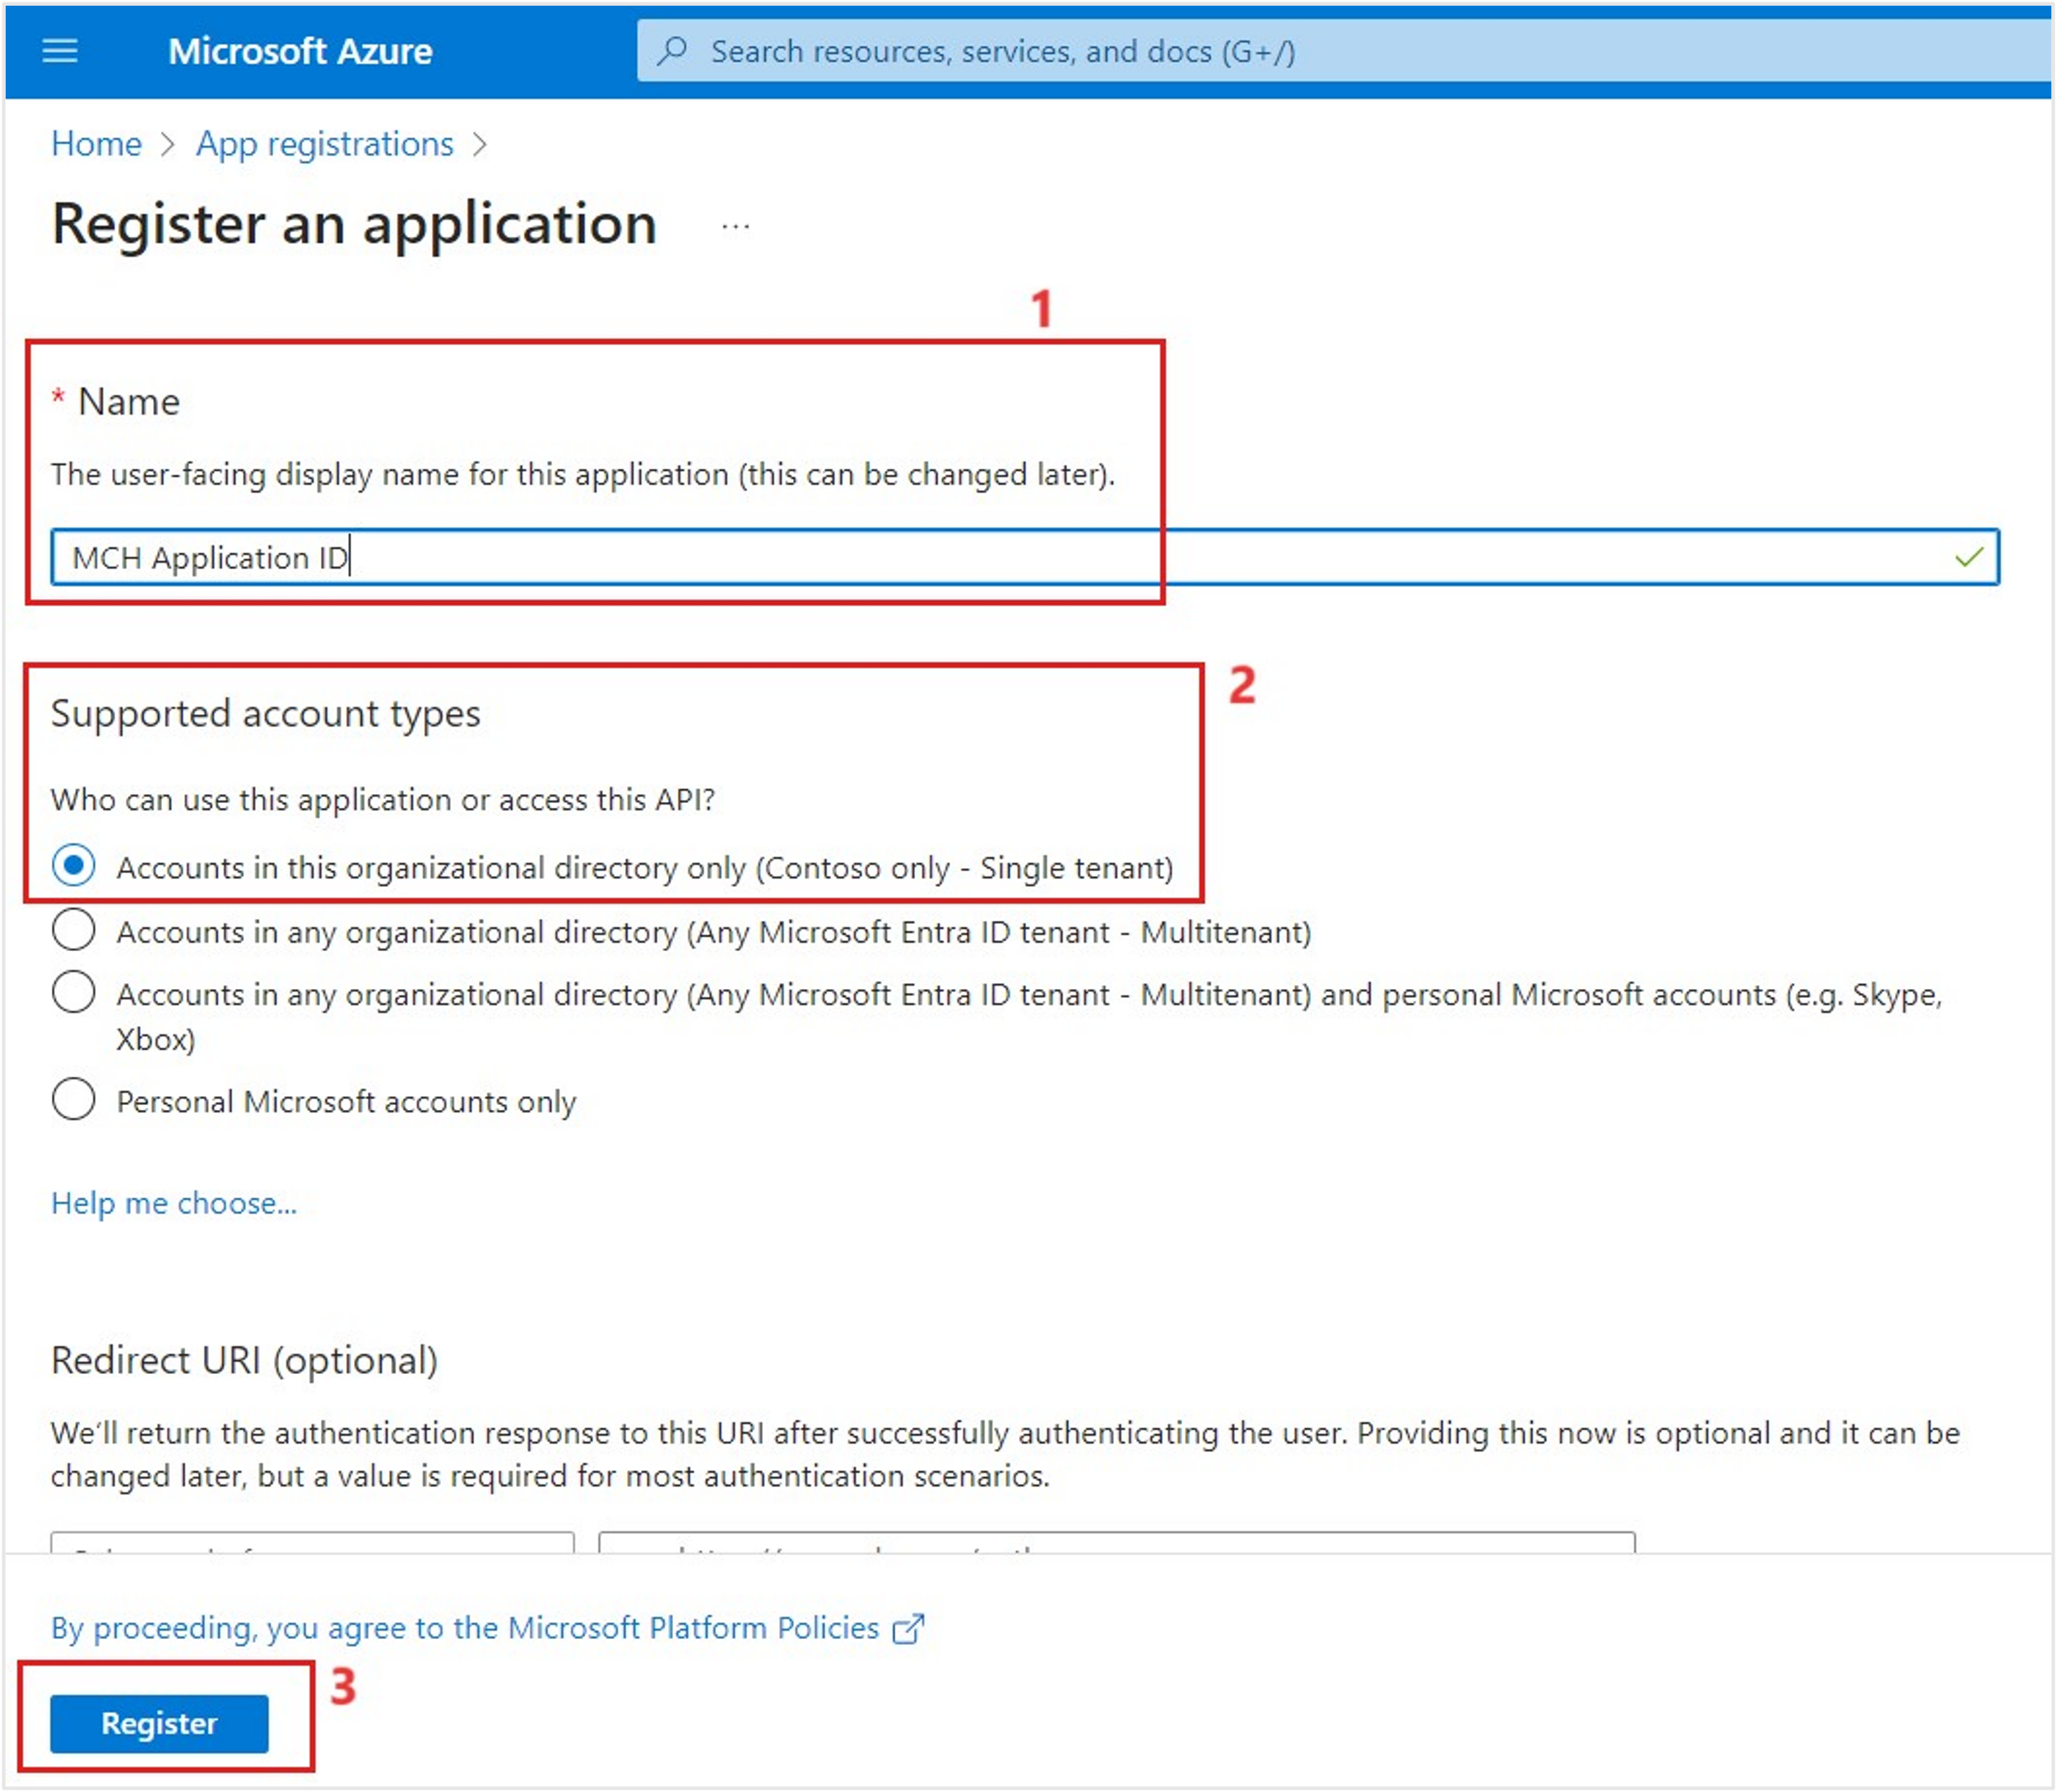
On the Register an application page, set the name for the bot to MCH Application ID and then select the Accounts in any organizational directory (Any Microsoft Entra ID directory - Multitenant) option under the Supported account types section. Then, select Register.
Note
You'll need to register the application as multitenant because it enables Microsoft Azure Bot Service (in the botframework.com tenant) to authenticate requests that are coming from the bot that's registered in your tenant. This requirement is part of the service-to-service authentication protocol that's used by Azure Bot Service. Single tenant application registration is also supported by Azure bot created using Bot Framework version 4.15 or later. However, for this learning path, you'll register the application as multitenant.
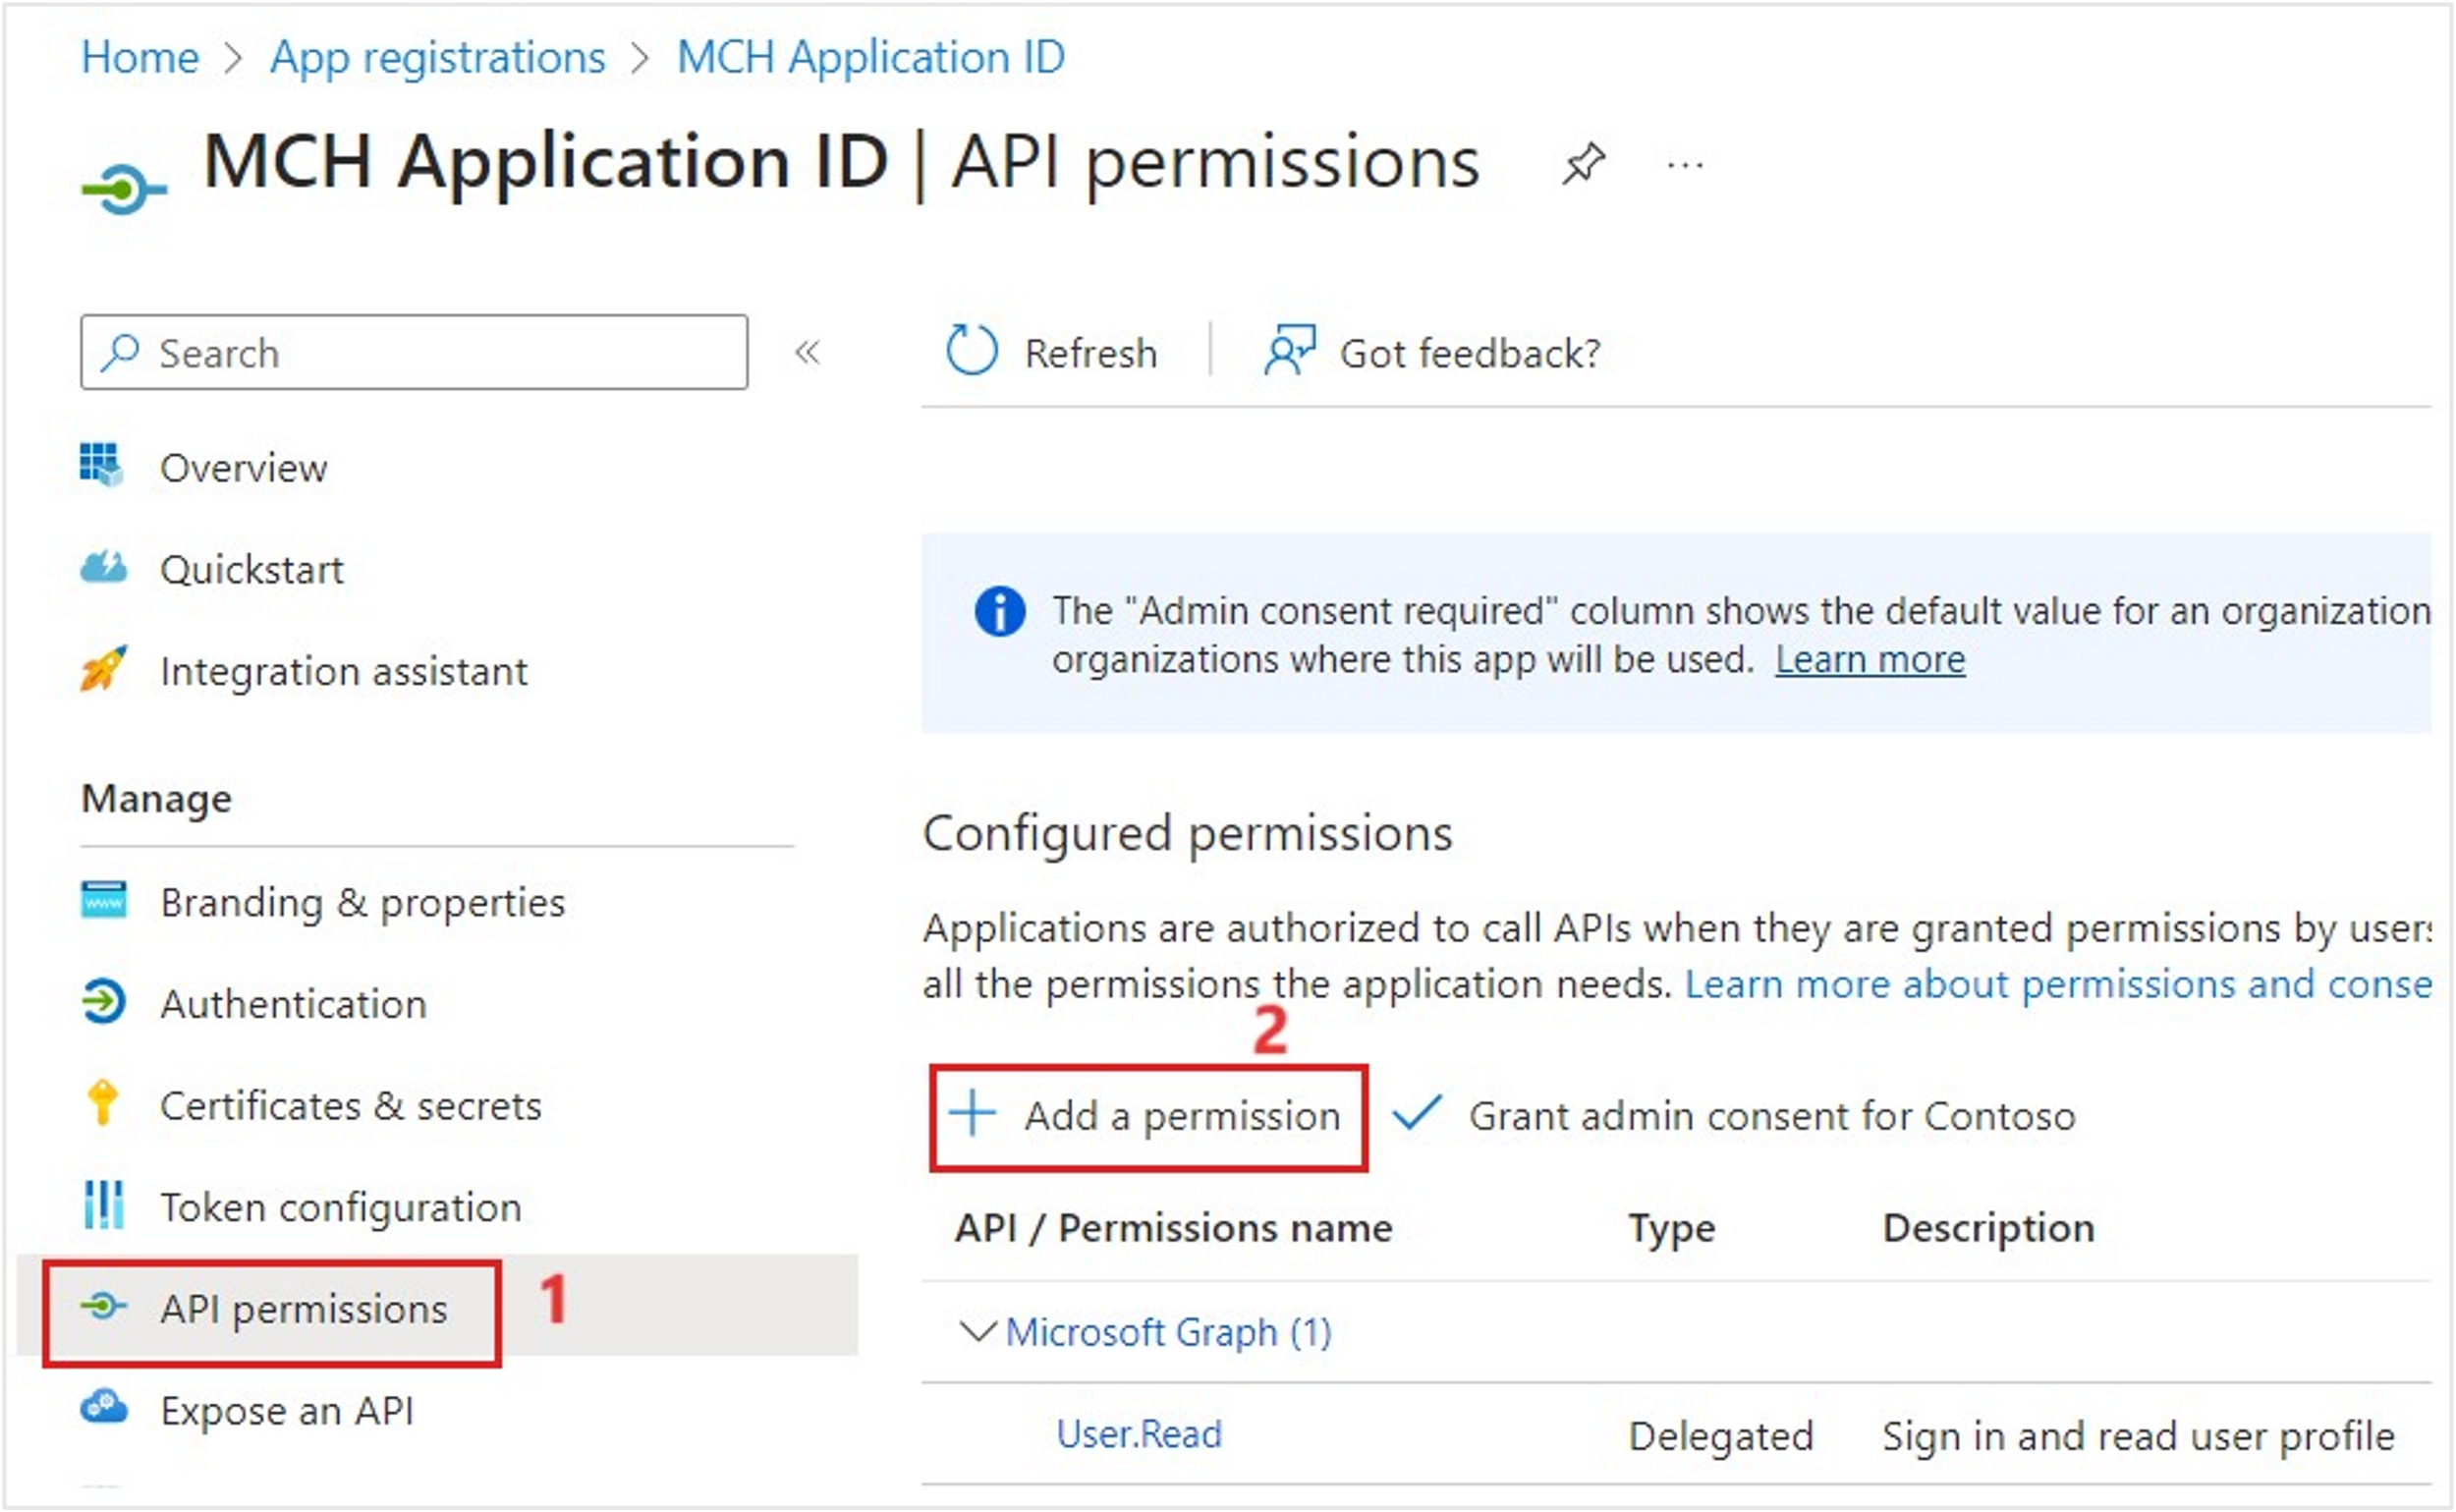
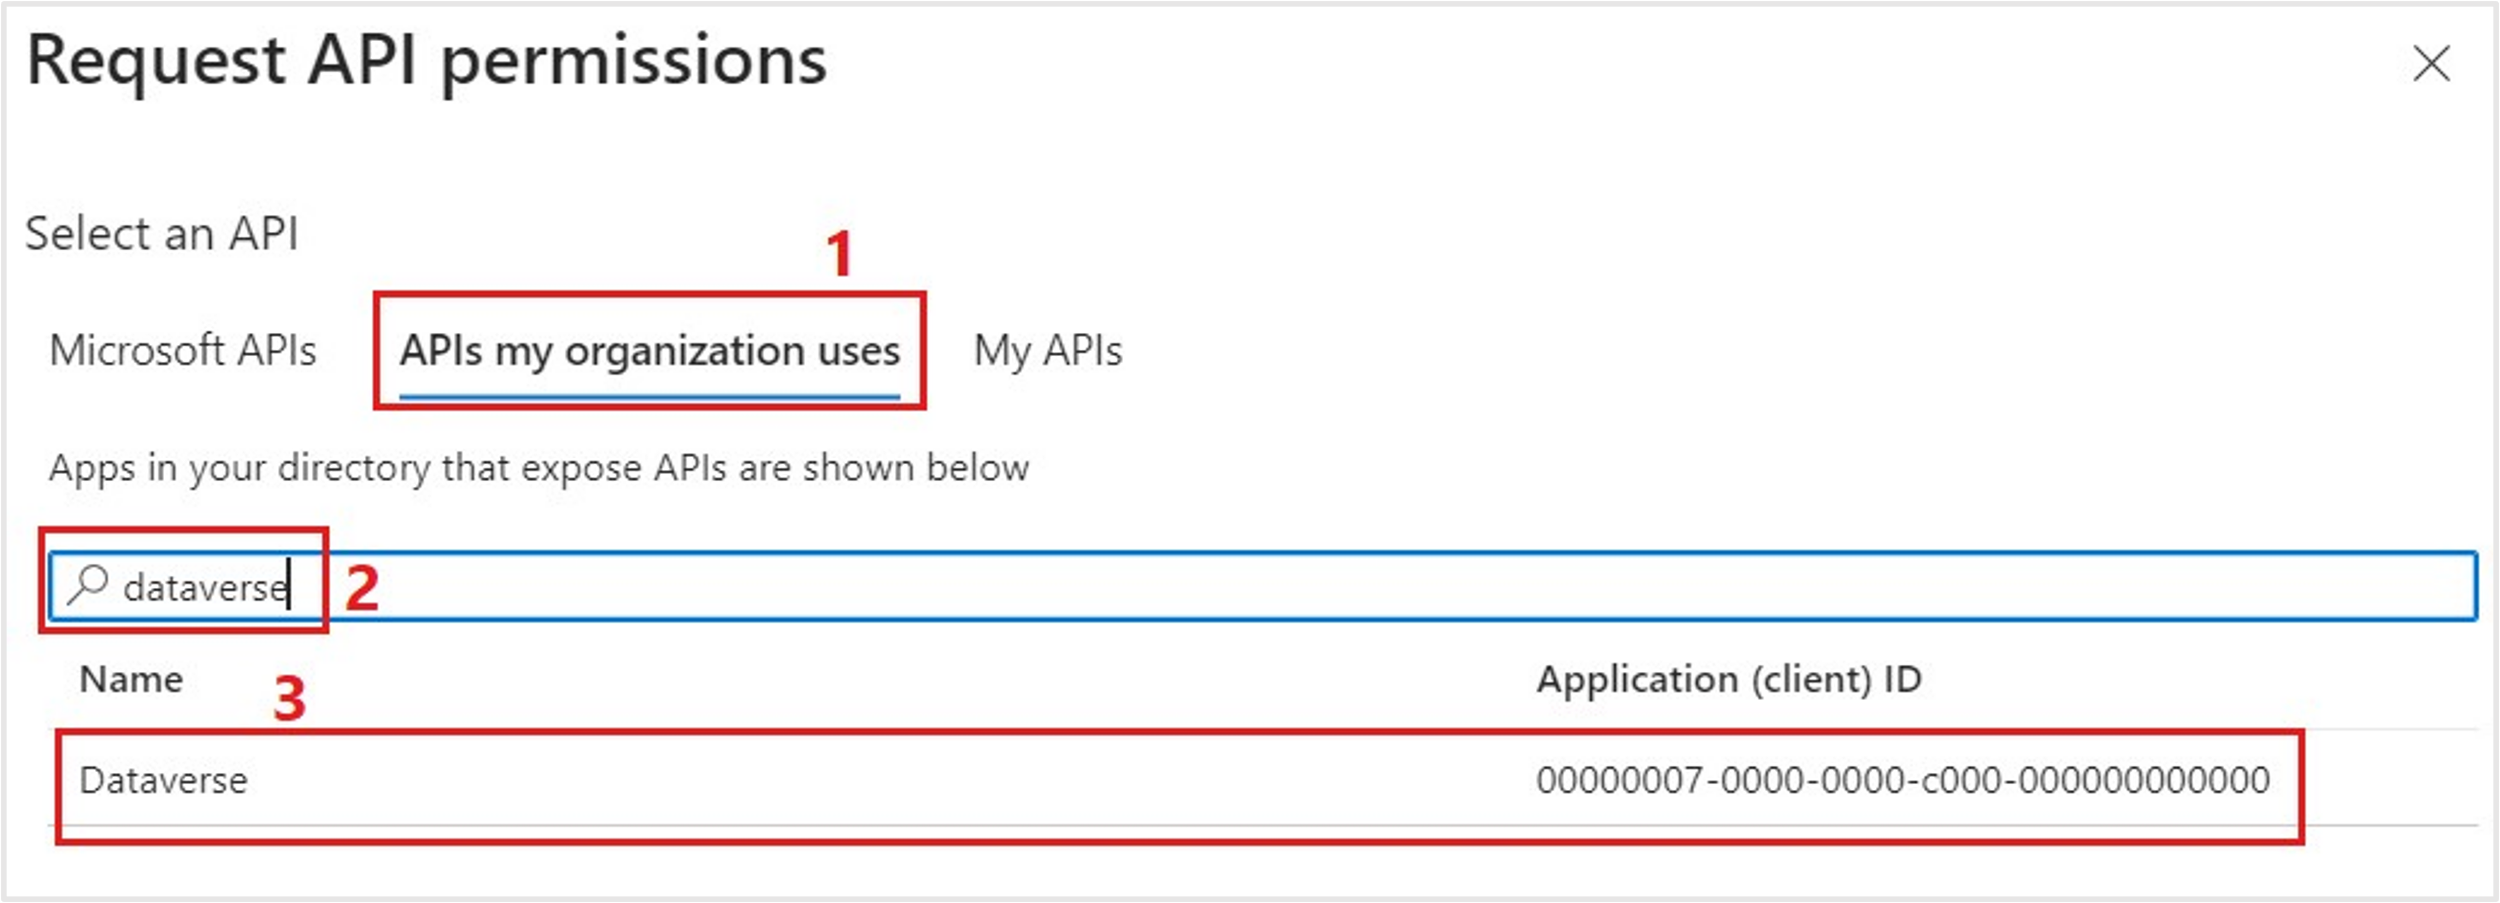
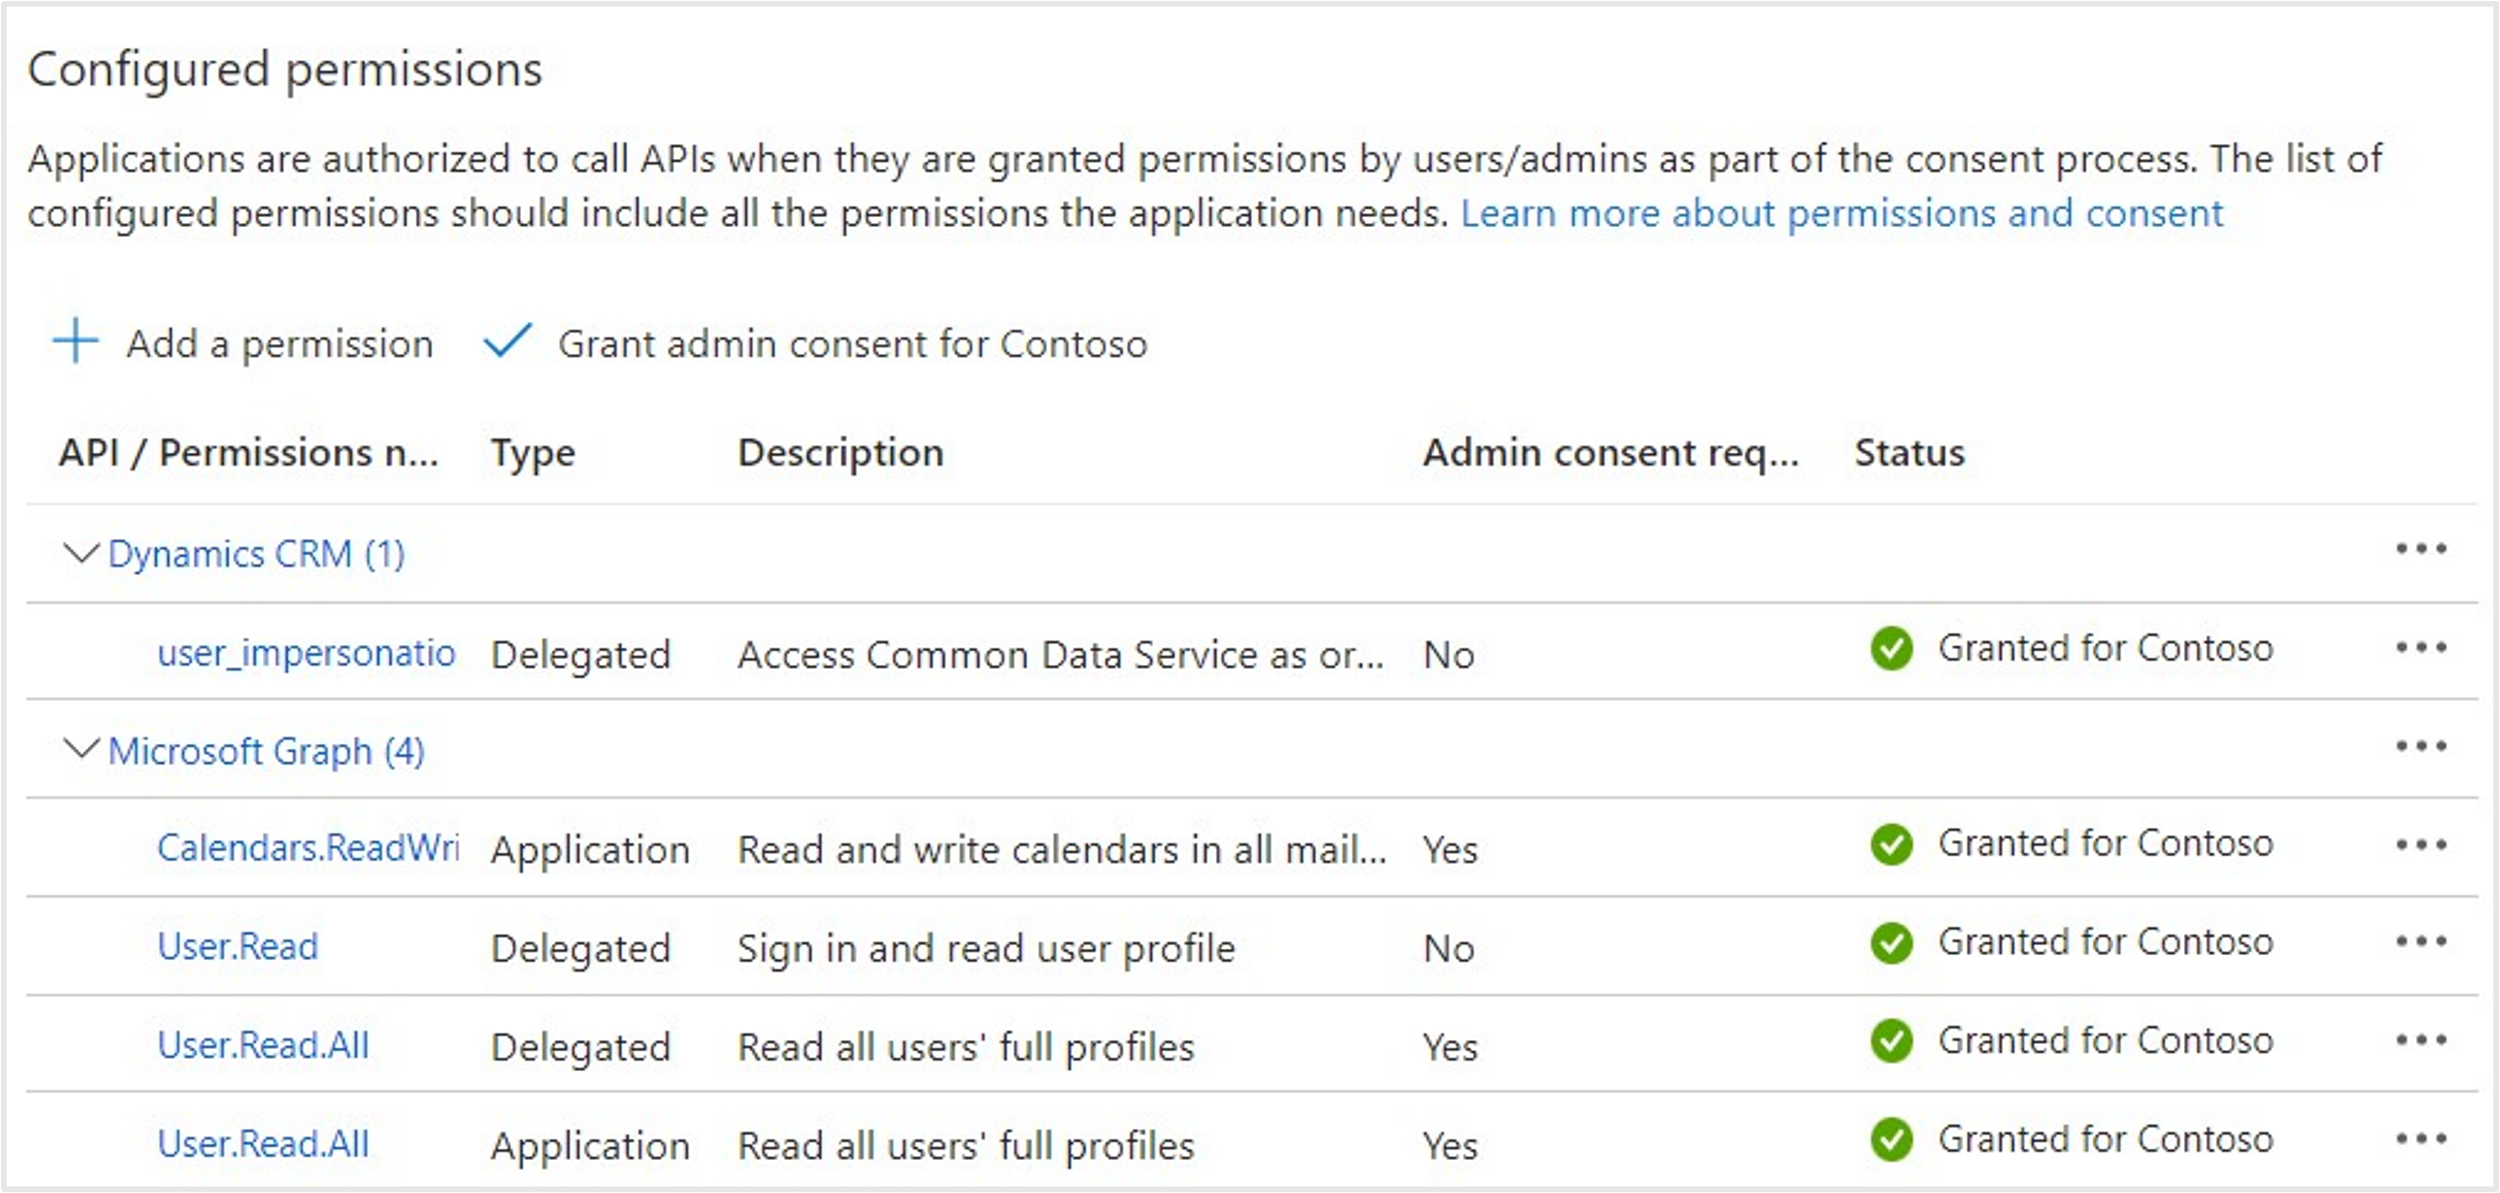
Select API permissions on the left navigation pane. On the right pane, select + Add a permission.
On the Request API permissions page, select APIs my organization uses. Use the search box to search for the string Dataverse. From the search result, select Dataverse.
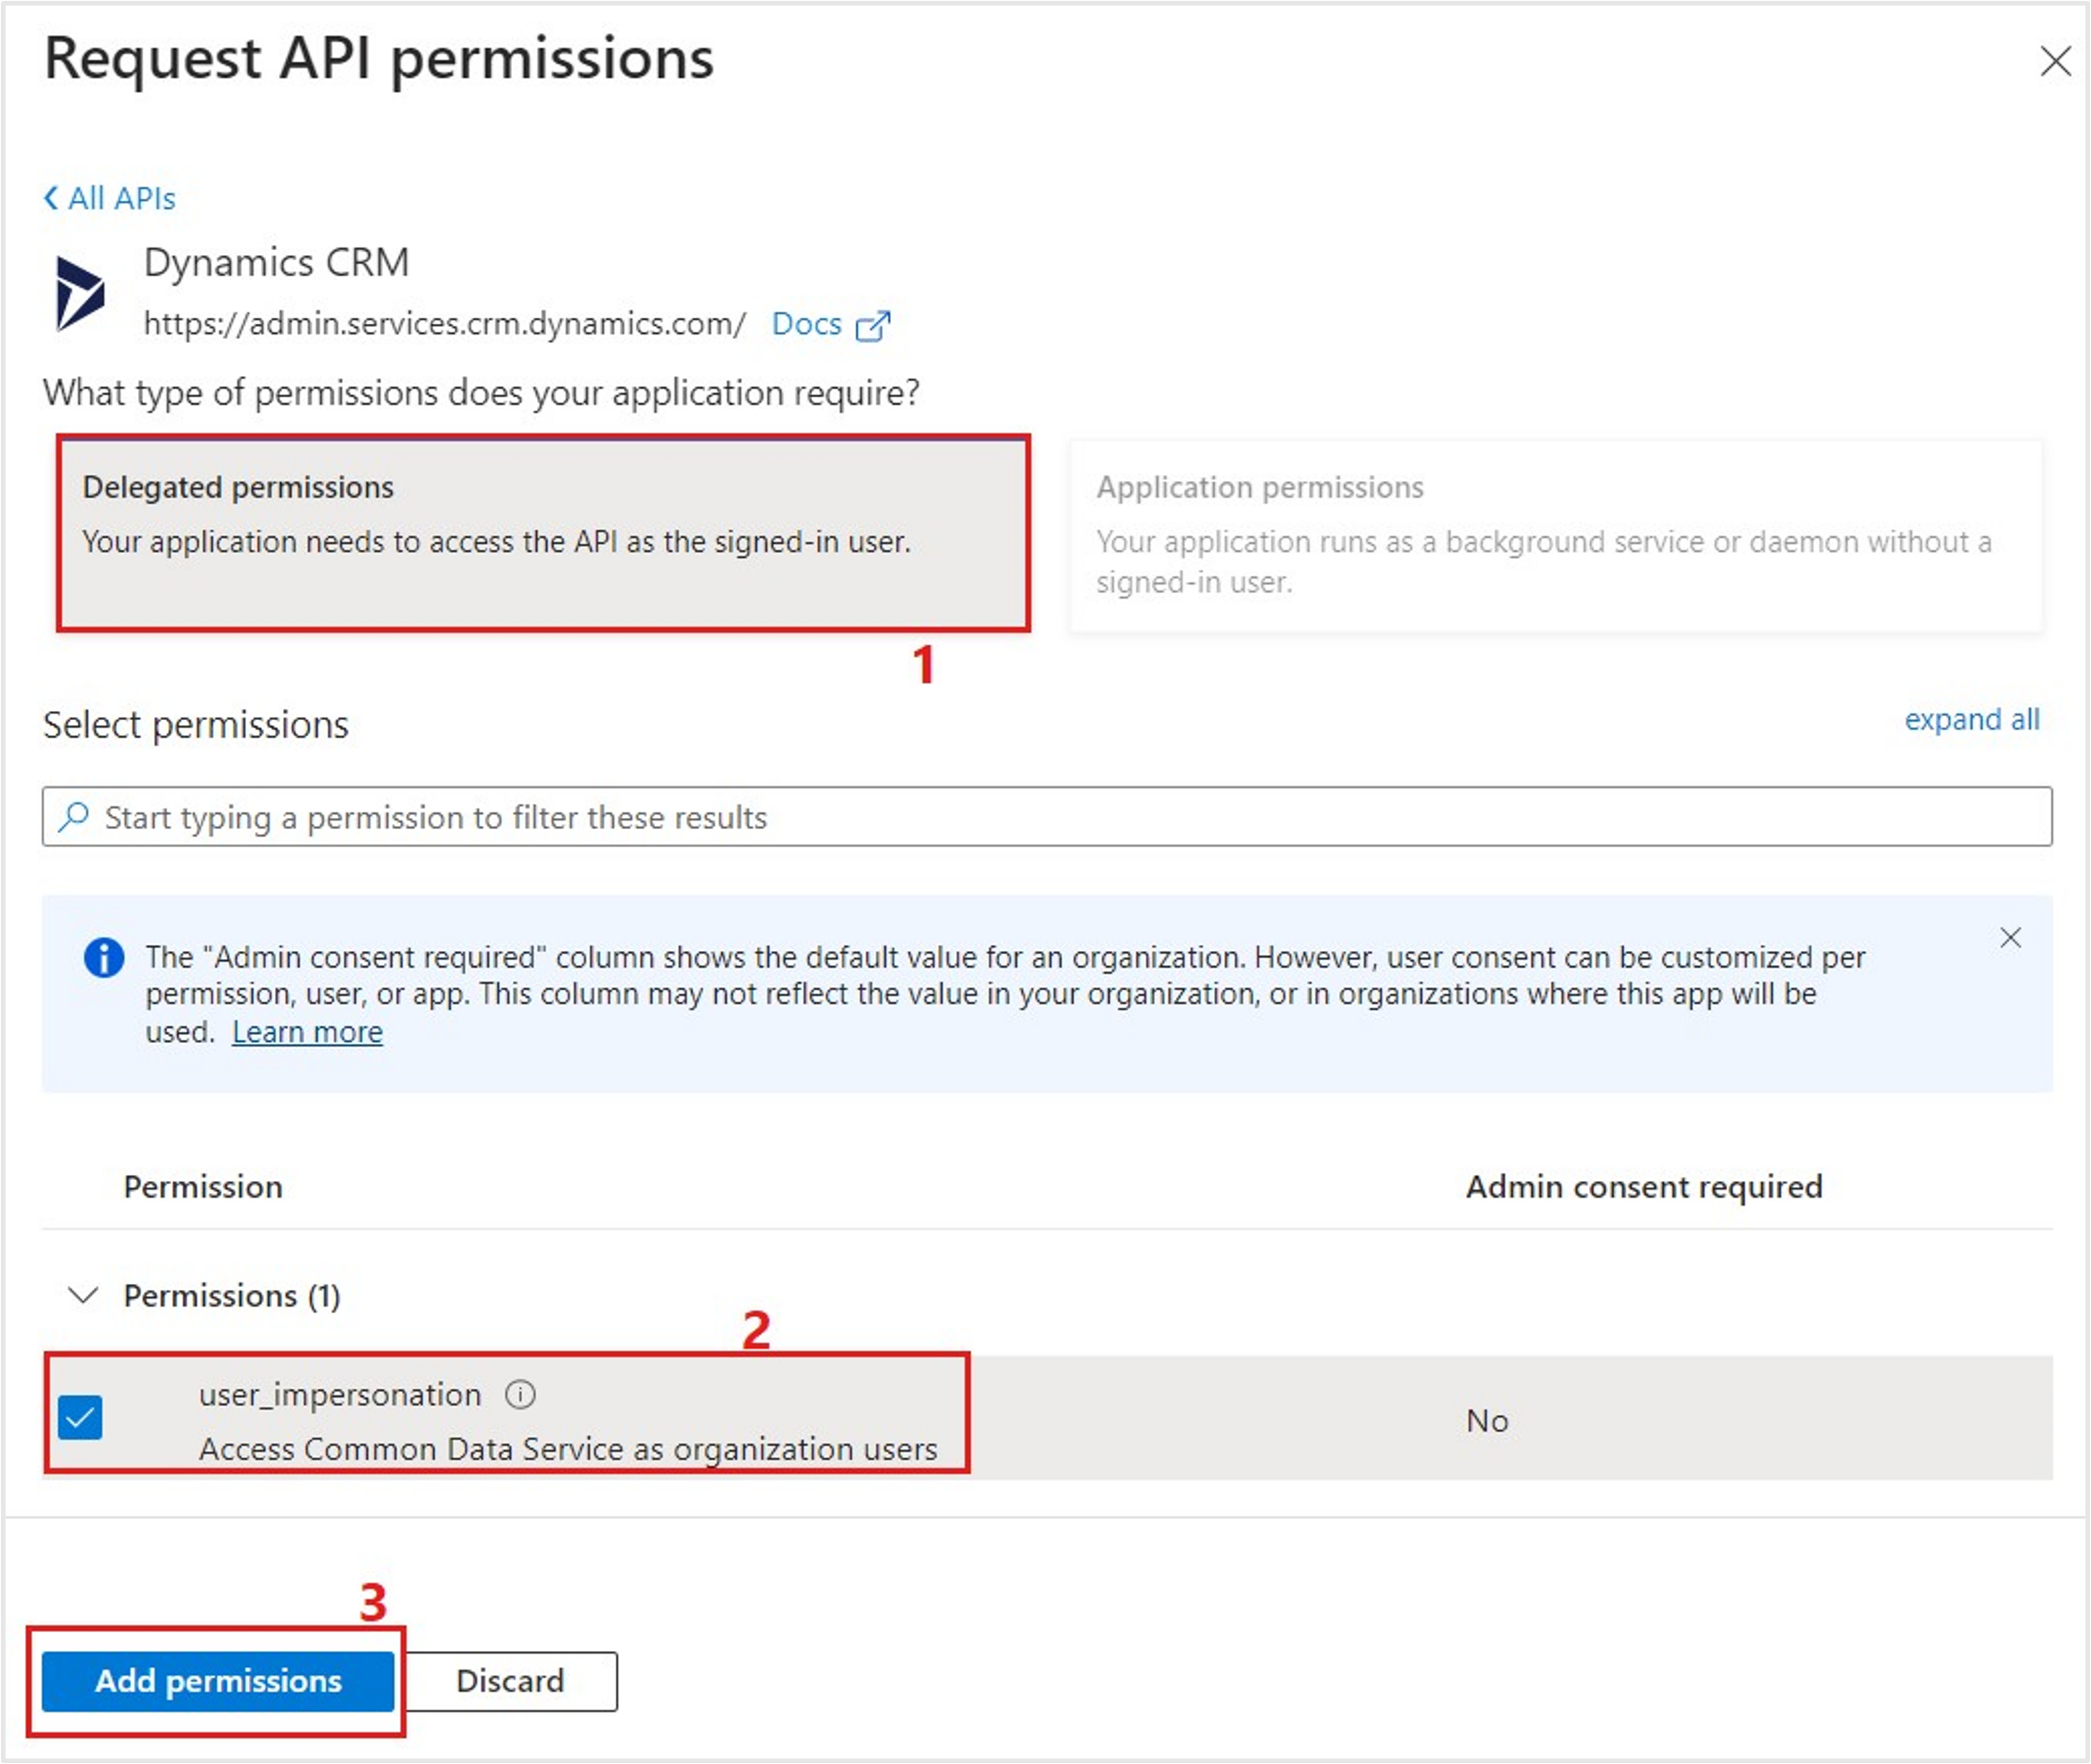
Select Delegated permissions. Under the Select permissions section, select the checkbox beside user_impersonation. Then, select Add permissions.
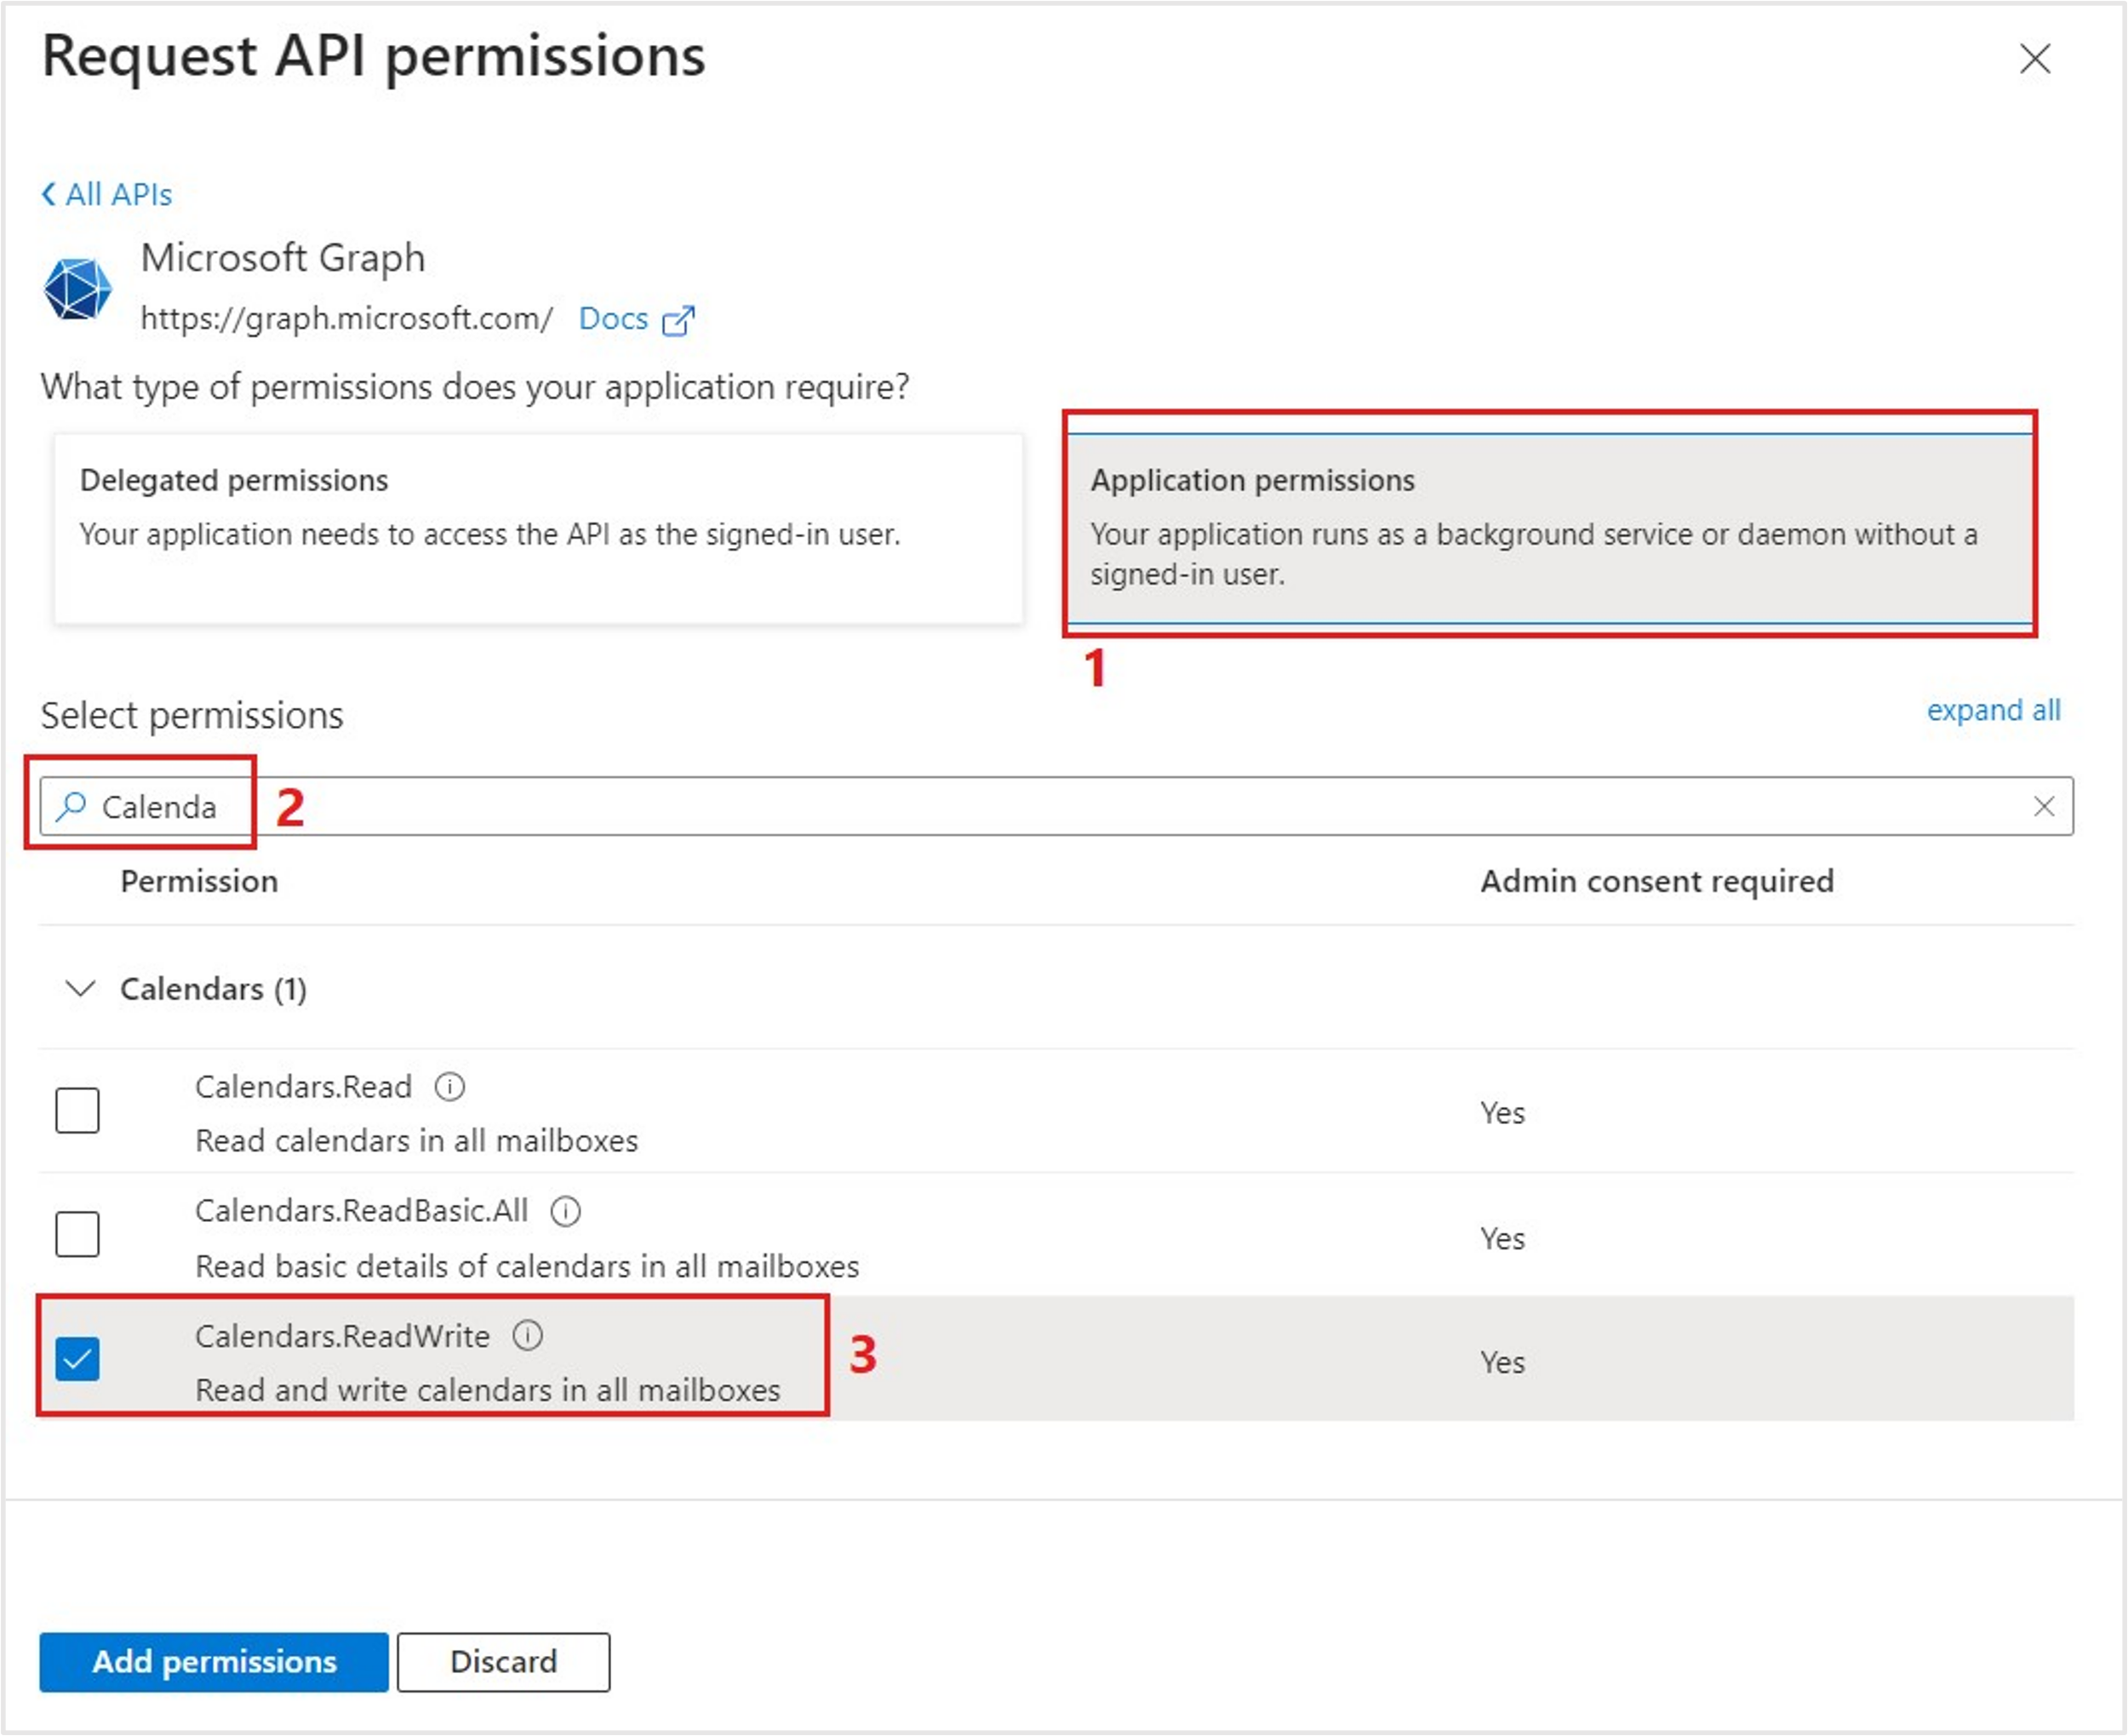
Select API permissions on the left navigation pane. On the right pane, select + Add a permission. Select Microsoft APIs and then select Microsoft Graph.

On the Request API permissions page, select Application permissions. Use the search box to search for the string calendars. Select the checkbox beside Calendars.ReadWrite.
On the Request API permissions page, select Application permissions. Use the search box to search for the string user.read. Select the checkbox beside User.Read.All.
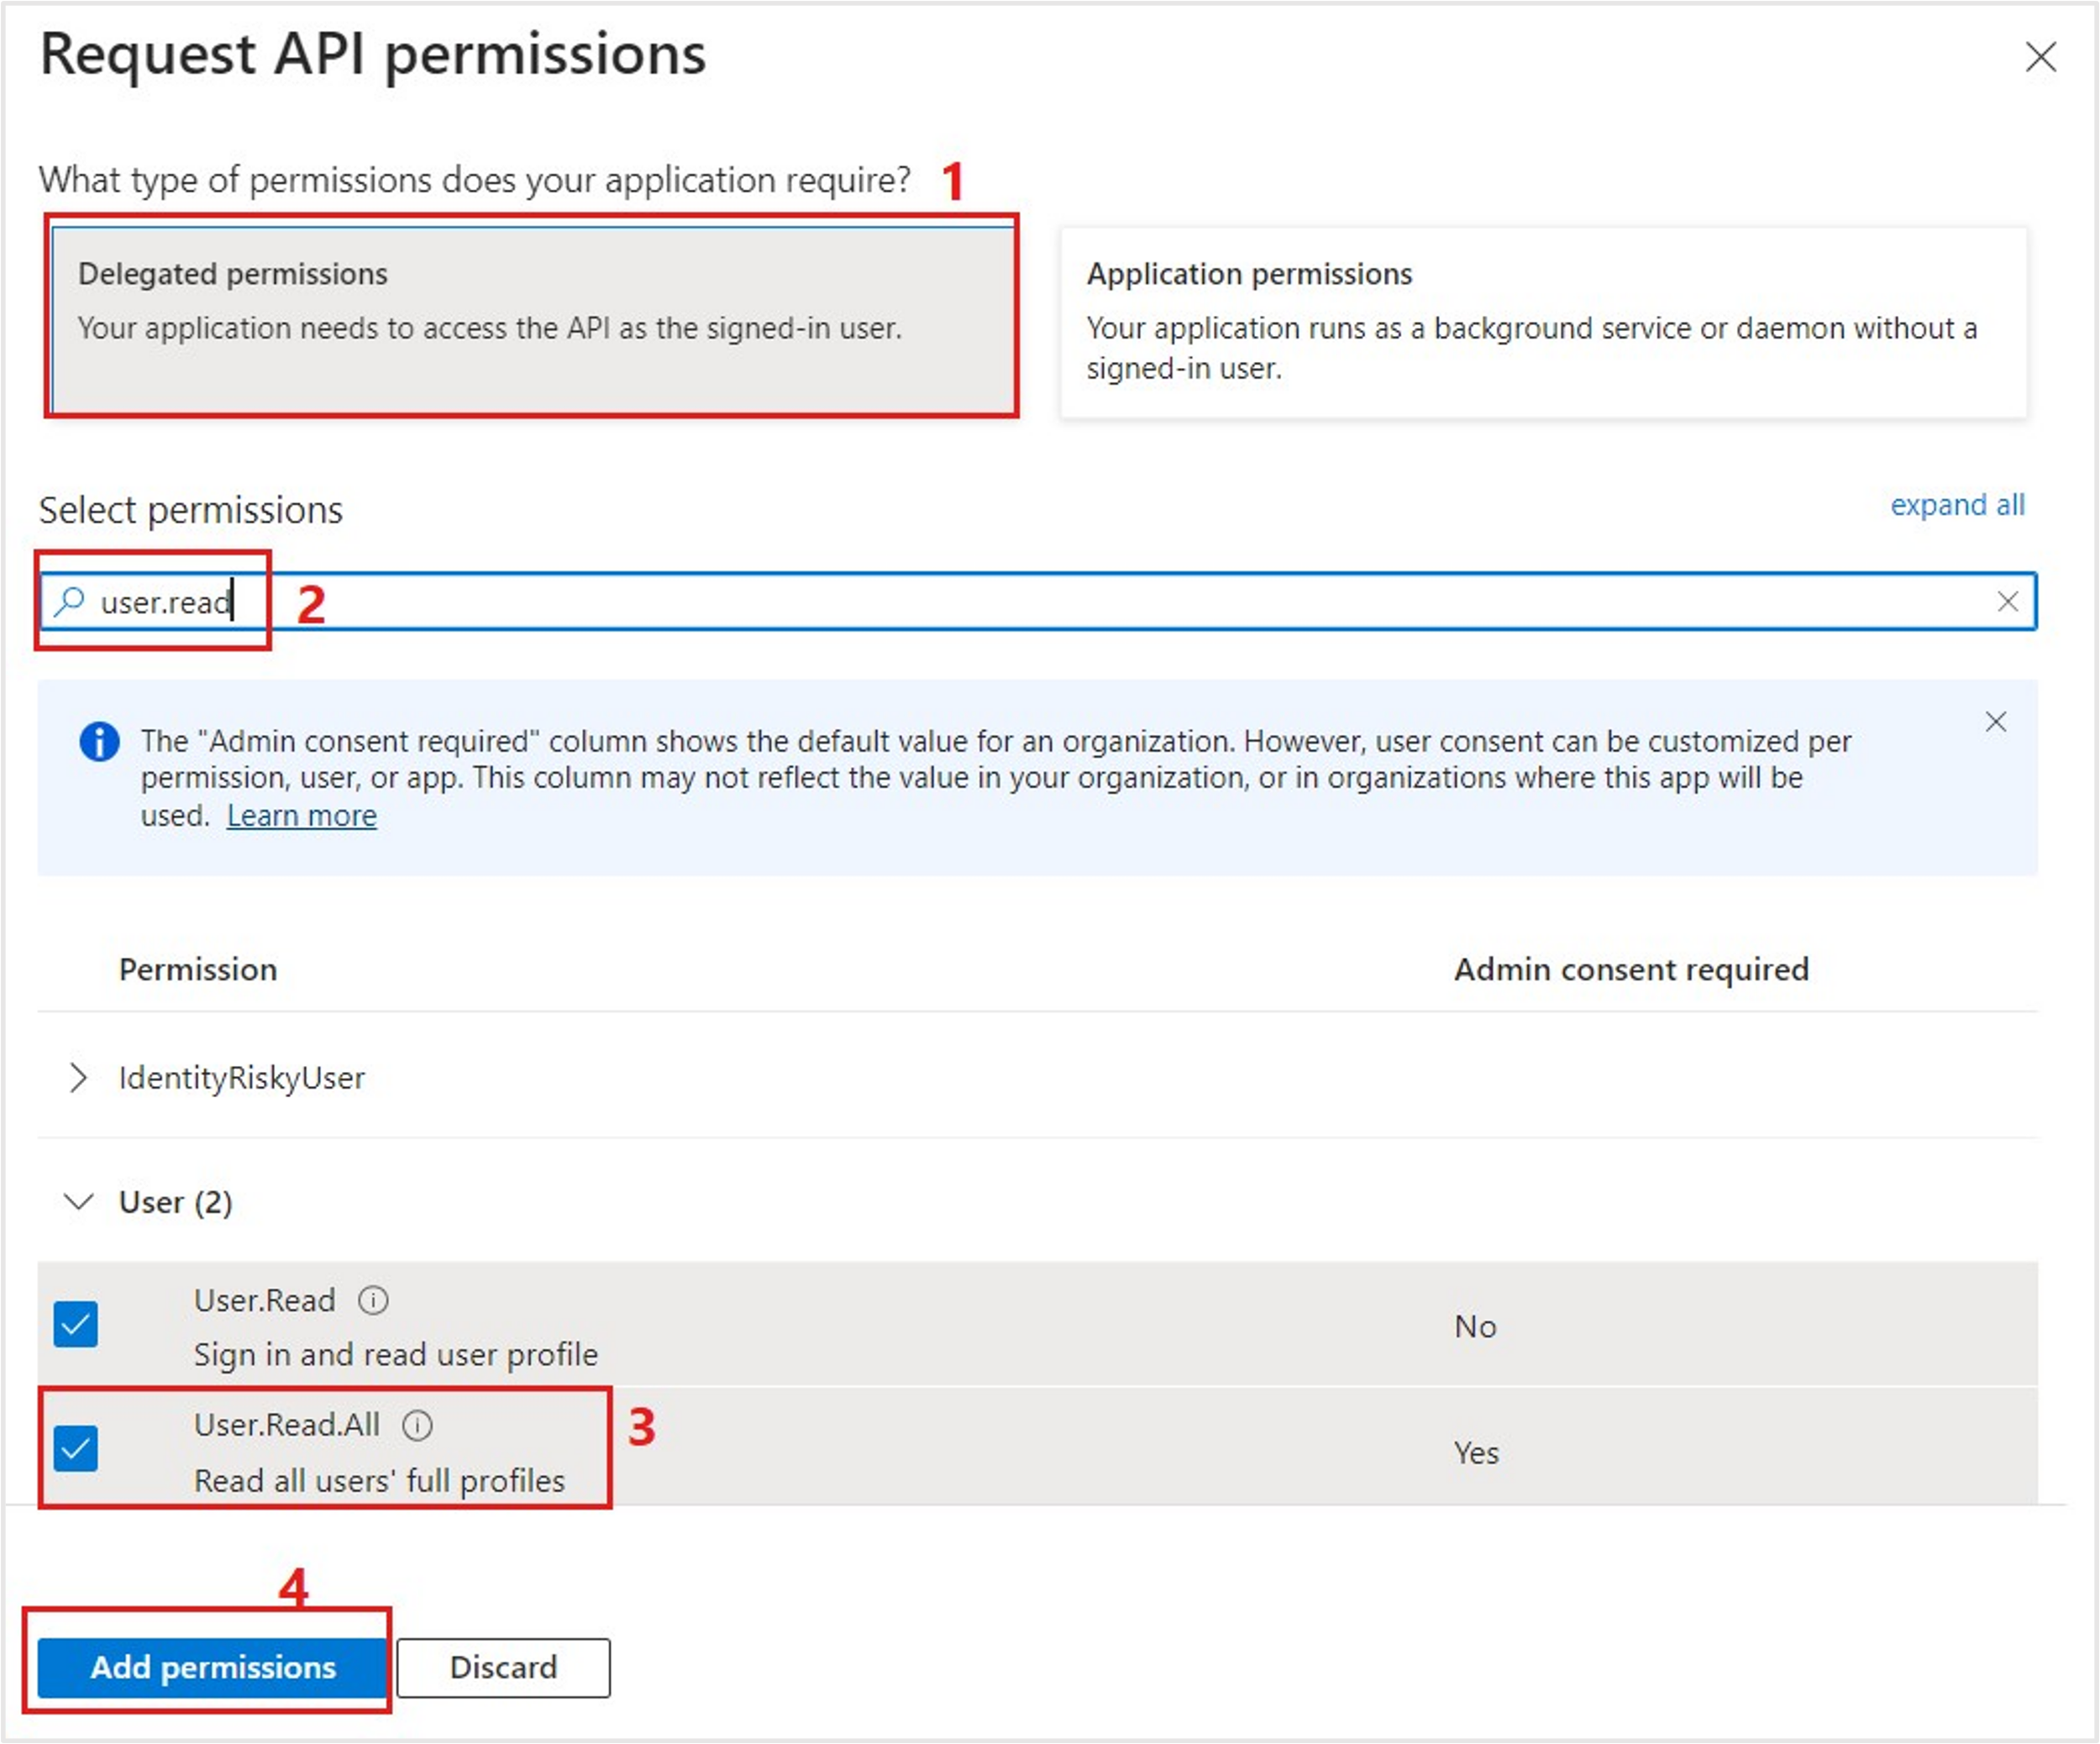
On the Request API permissions page, select Delegate permissions. Use the search box to search for the string user.read. Select the checkbox beside User.Read.All and then select Add permissions.
Select Grant admin consent, as shown in the following screenshot.

On the Grant admin consent confirmation pop-up window, select Yes.

The status for each added permission changes to Granted, as shown in the following screenshot.
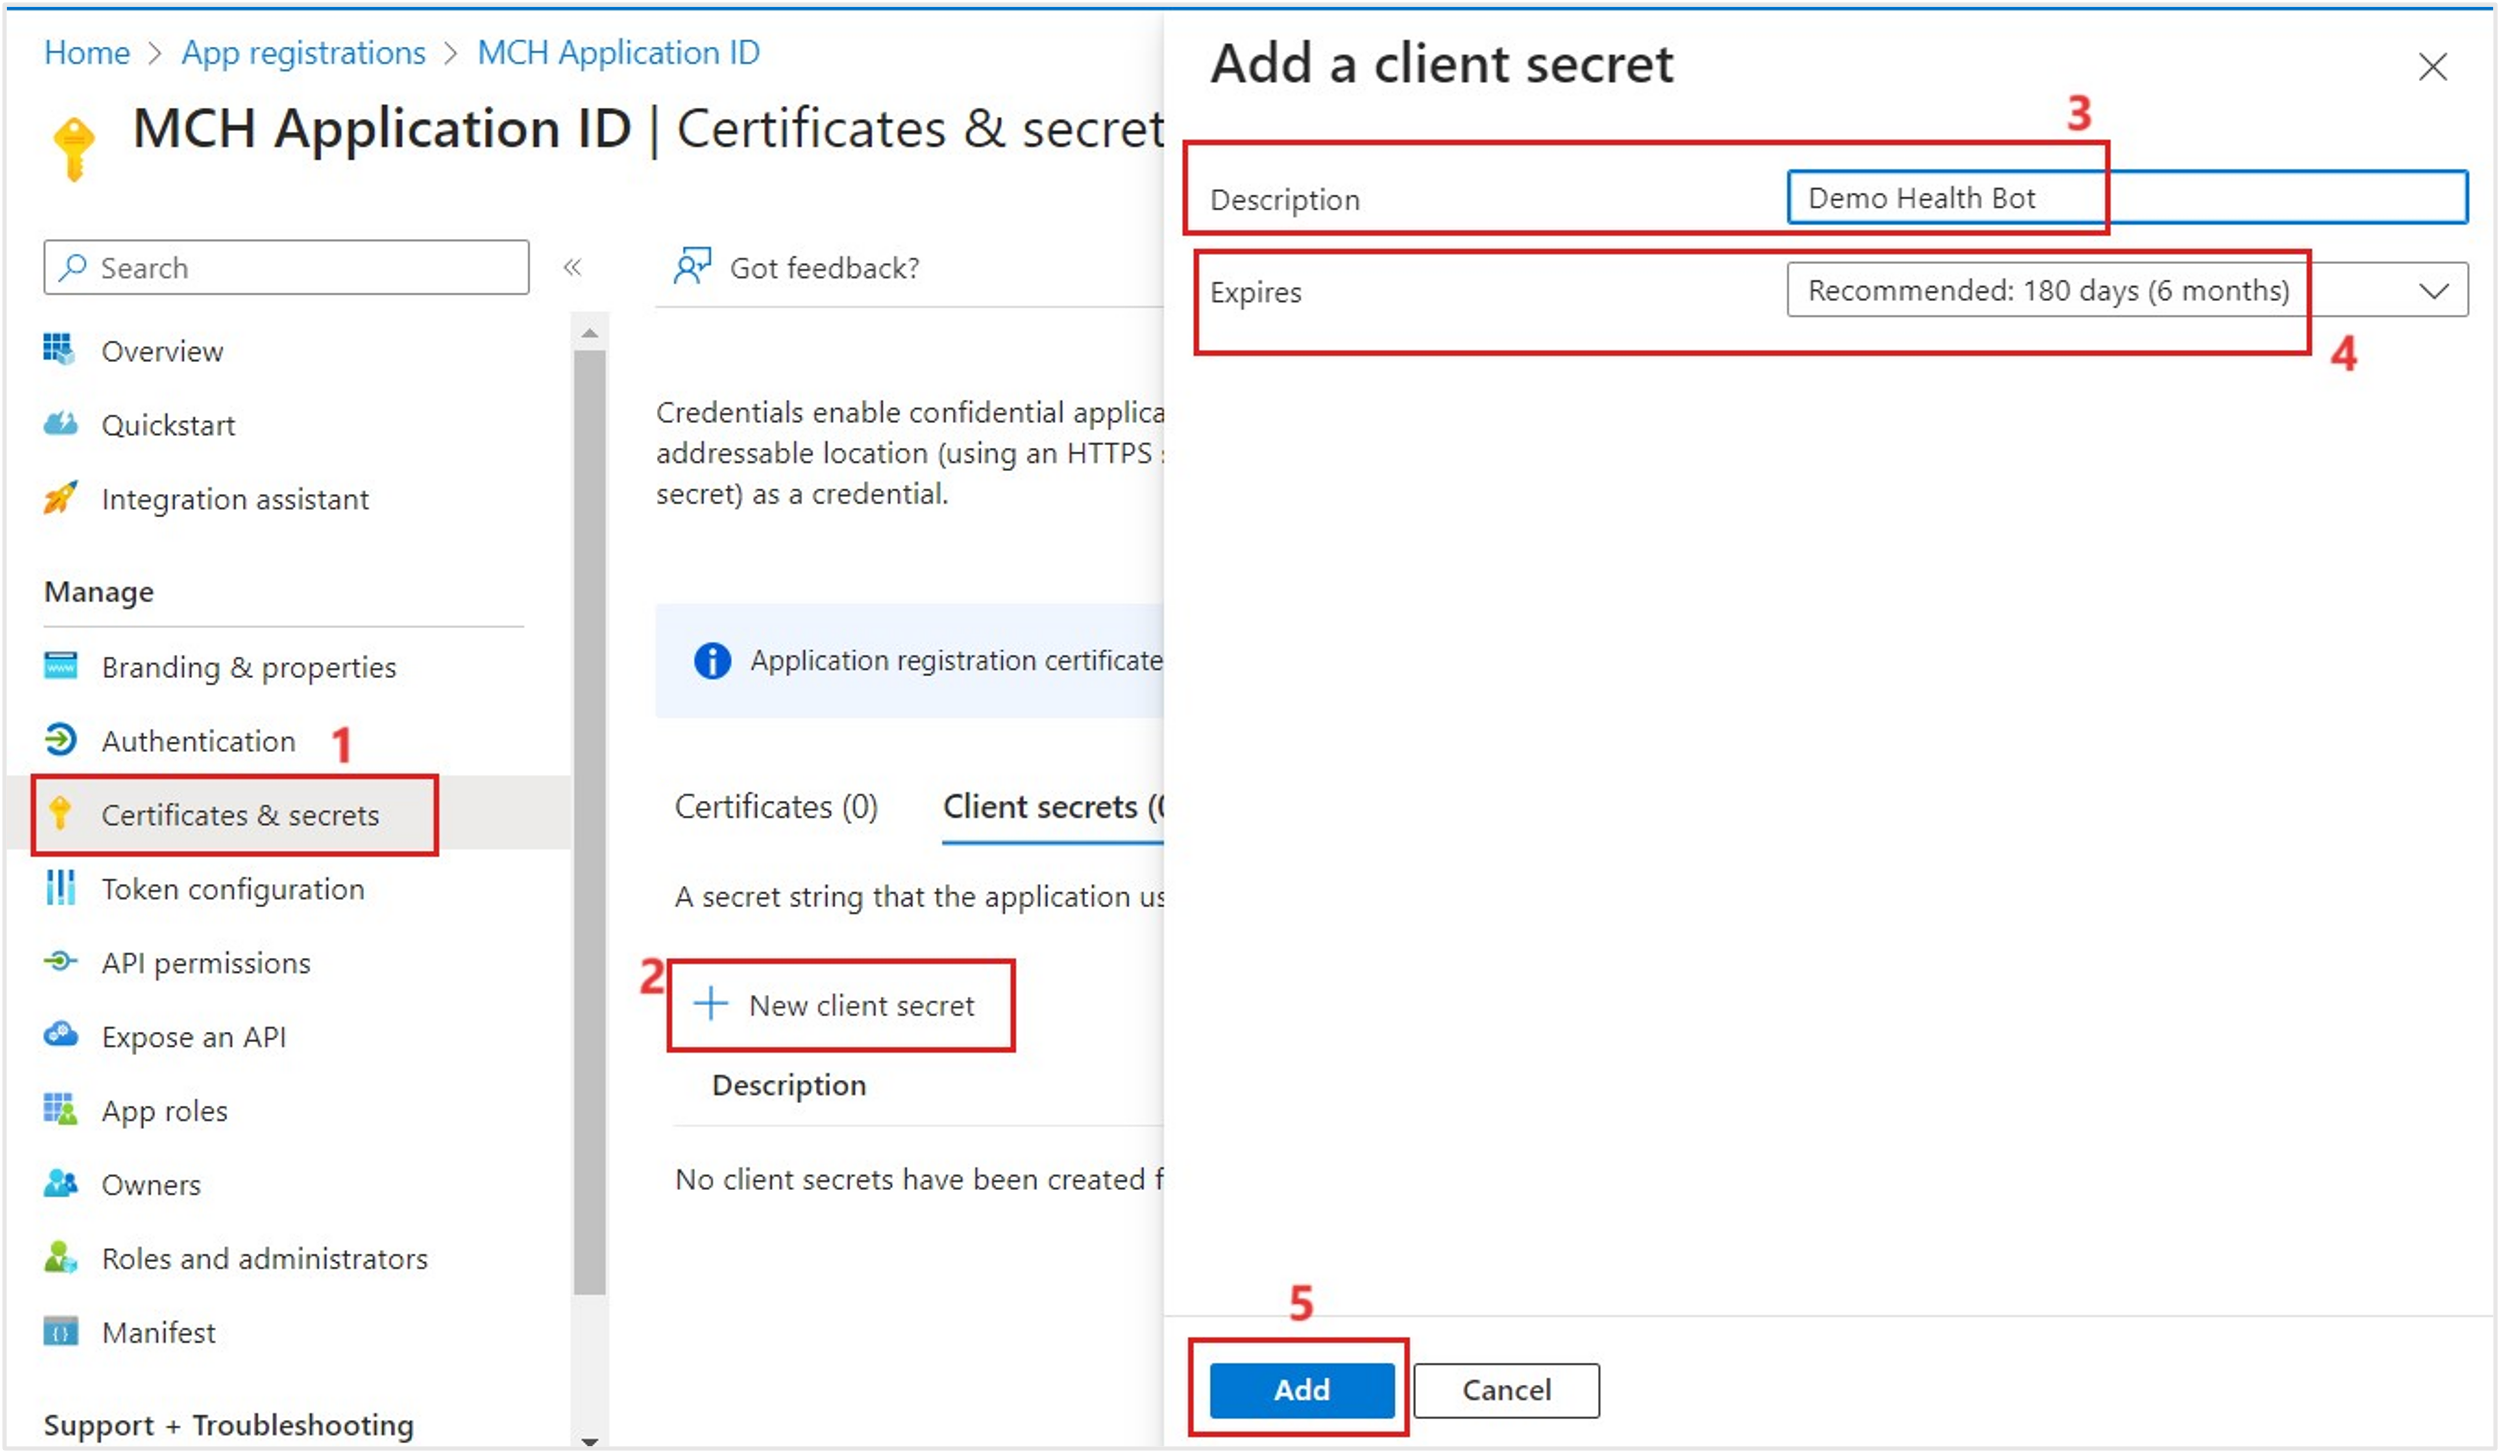
On the left navigation pane, select Certificates & secrets, and then in the right pane, select + New client secret. In Add a client secret, set the Description to Demo Health Bot, leave the Expires value at its default setting, and then select Add.
Note
You'll need to create an application secret so that you can use it along with this application ID to authenticate the bot.
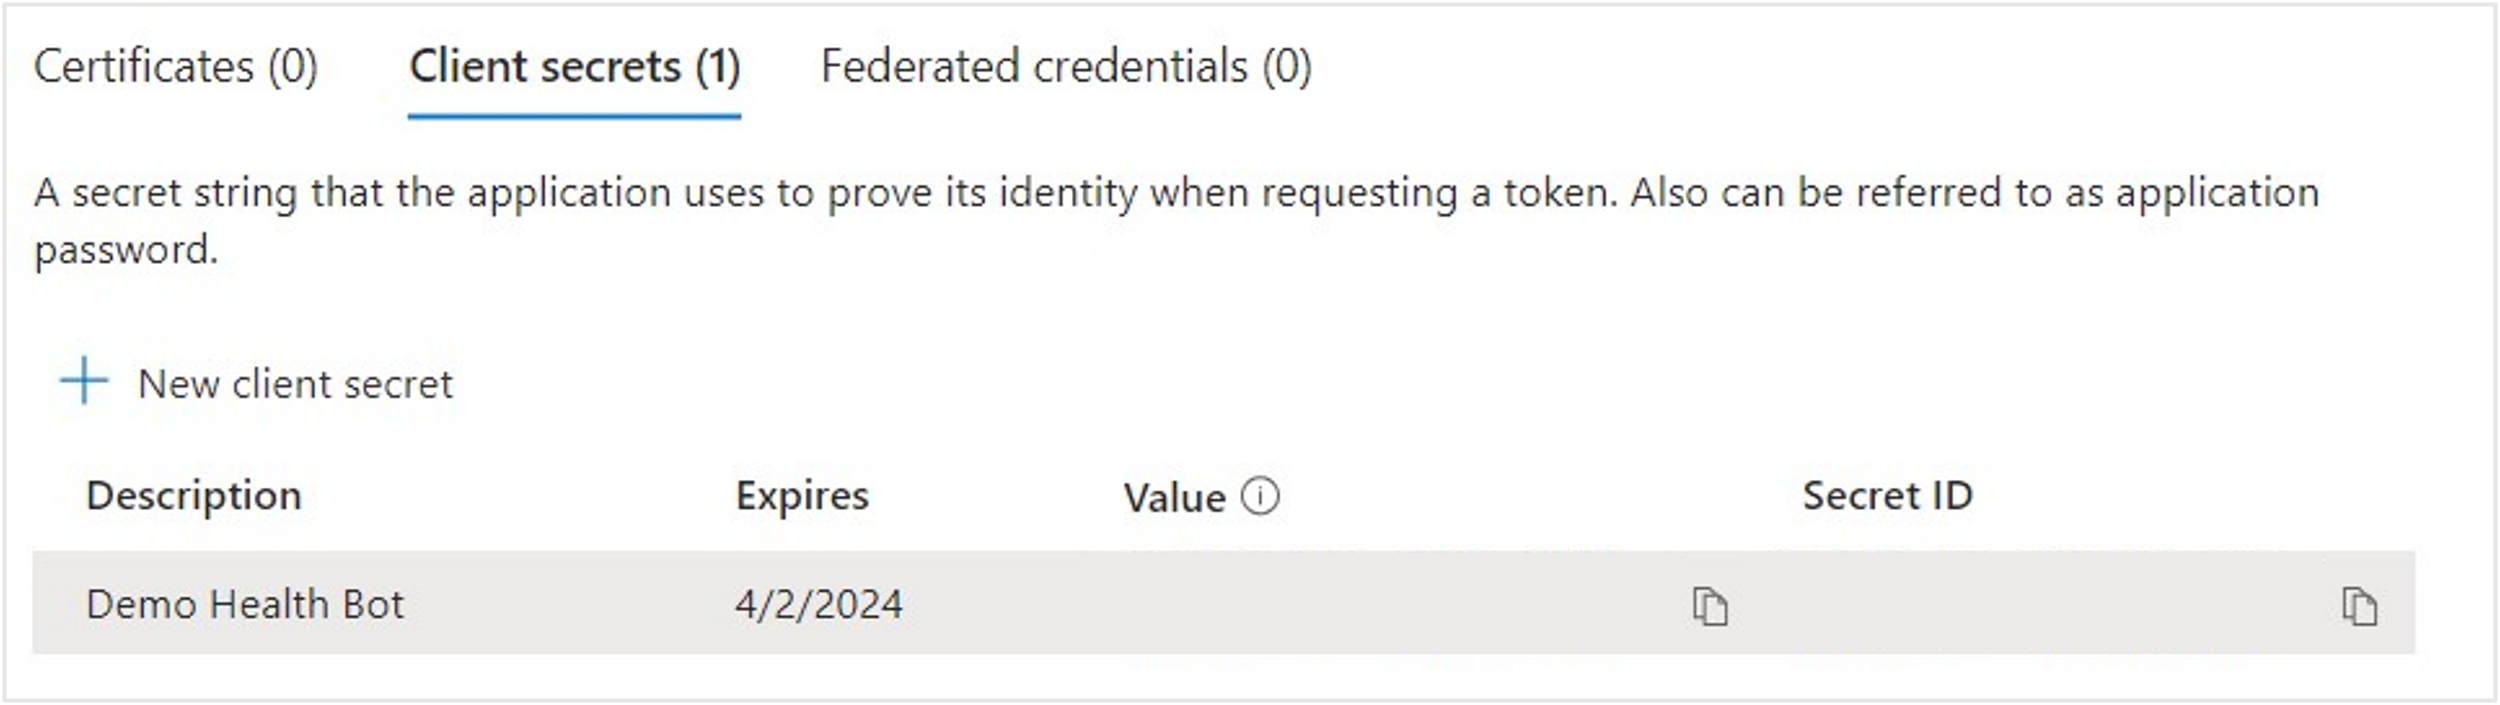
Copy the secret value and then save it in a notepad so that you can use it later in this learning path.
Note
After you've created the secret and the page has refreshed, the secret value will no longer be available to copy.
On the left navigation pane, select the Overview tab. From the right pane, copy the Application (client) ID and then save it in a notepad so that you can use it later in this learning path.


Task: Create the Healthcare Patient Portal app
In this task, you create a Microsoft Power Apps portal in the Microsoft Cloud for Healthcare environment. This portal app becomes the patient access portal that is used by Lamna Healthcare Company.
Open a new tab and sign in to Power pages portal with your system administrator credentials. Change the Environment on the top-right corner of the home page to Lamna Healthcare Company.
Select Get started.
Select Skip.
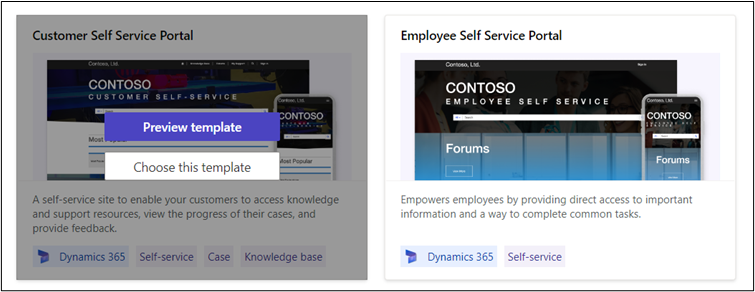
Select the Dynamics 365 template from the list of templates.
Select the Customer Self Service Portal.
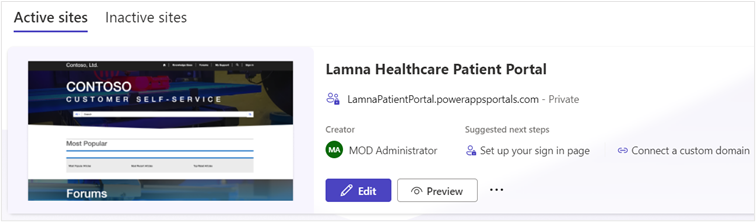
Enter the Name of the site as Lamna Healthcare patient portal and the Web address as LamnaPatientPortal. You can provide the name and address of your choice. Once provided, select Done.

The portal takes some time to configure.
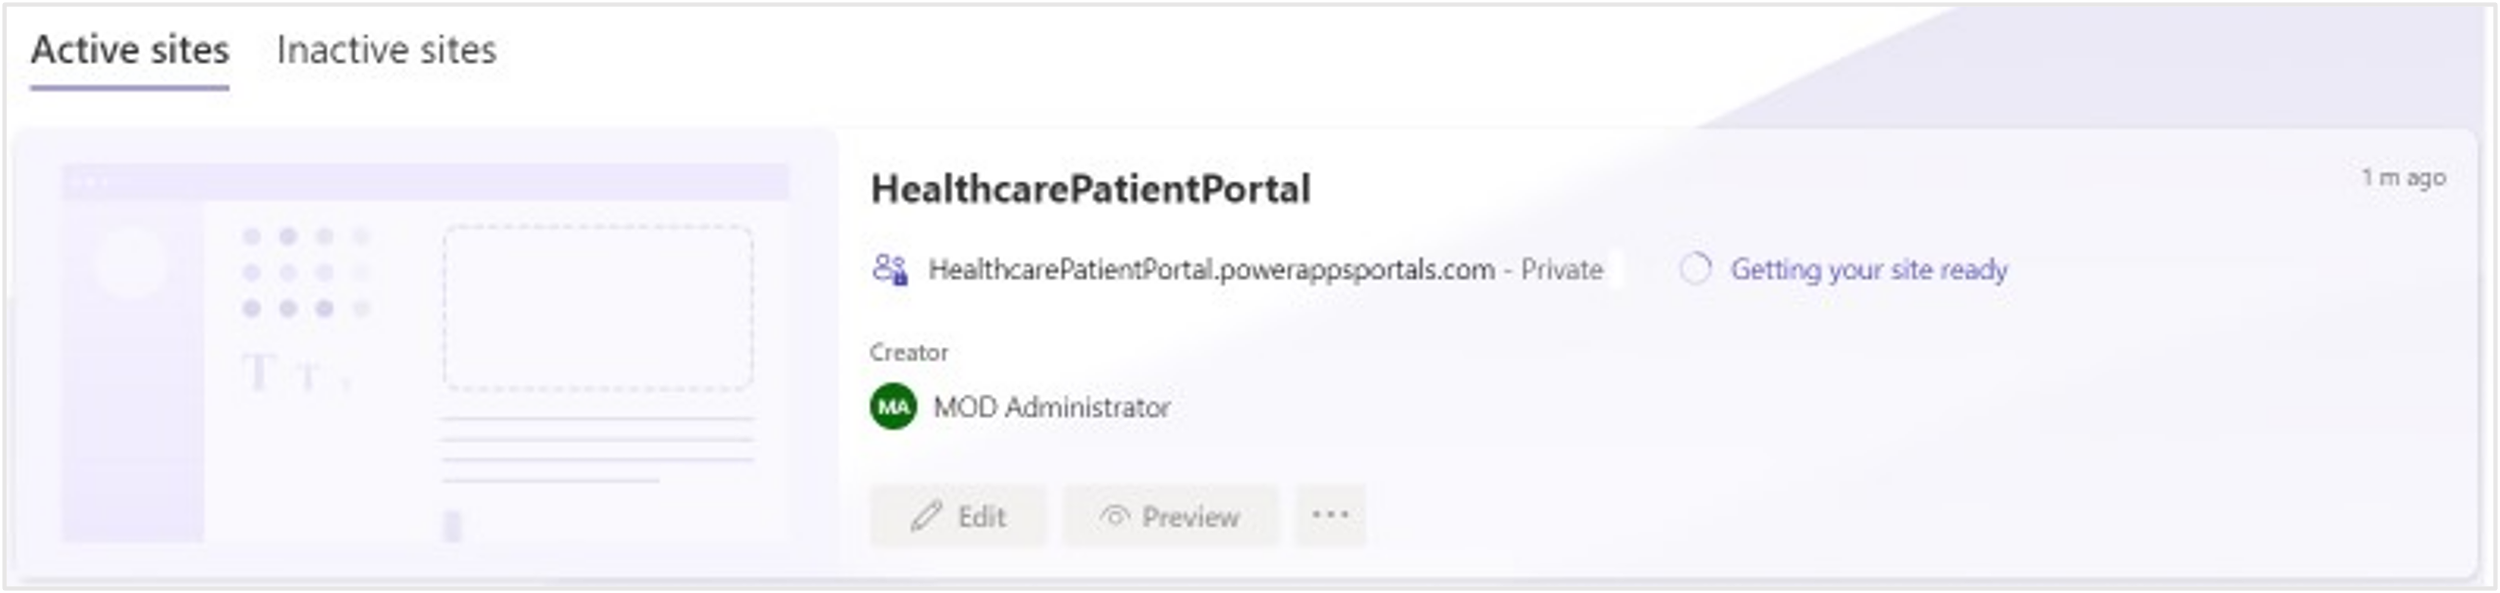
The site is ready in 5-10 minutes.


Task: Update environment variables in Power Apps portal
In this task, you go through the steps to update the environment variables that are used by the virtual visit feature in Microsoft Cloud for Healthcare.
While signed in to your Microsoft 365 tenant as system administrator, open a new tab and go to Power Apps portal.
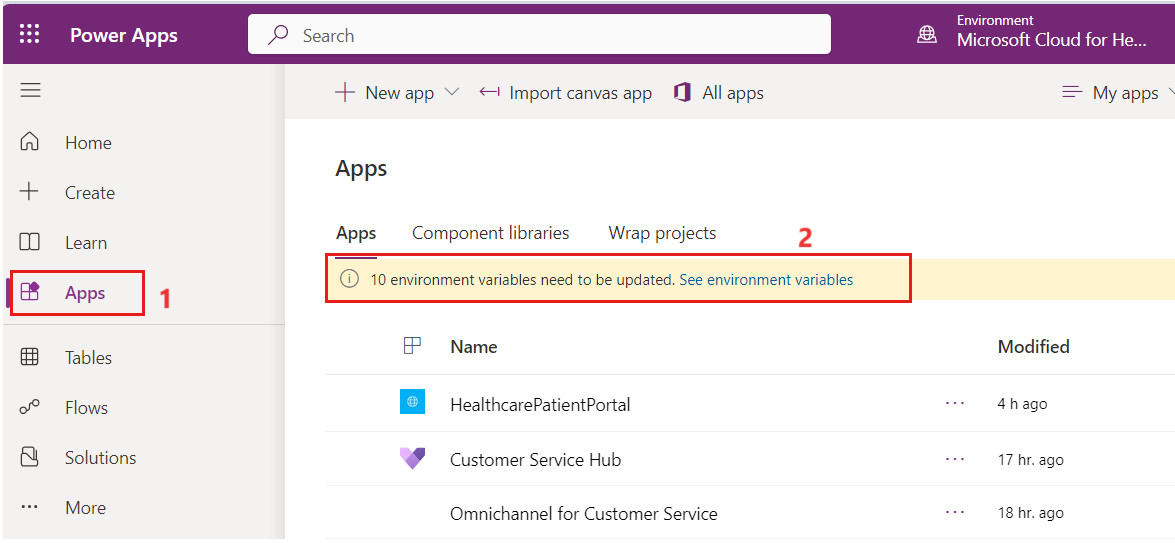
On the left navigation pane, select Apps. In the right pane, select the See environment variables option, as shown in the following screenshot.
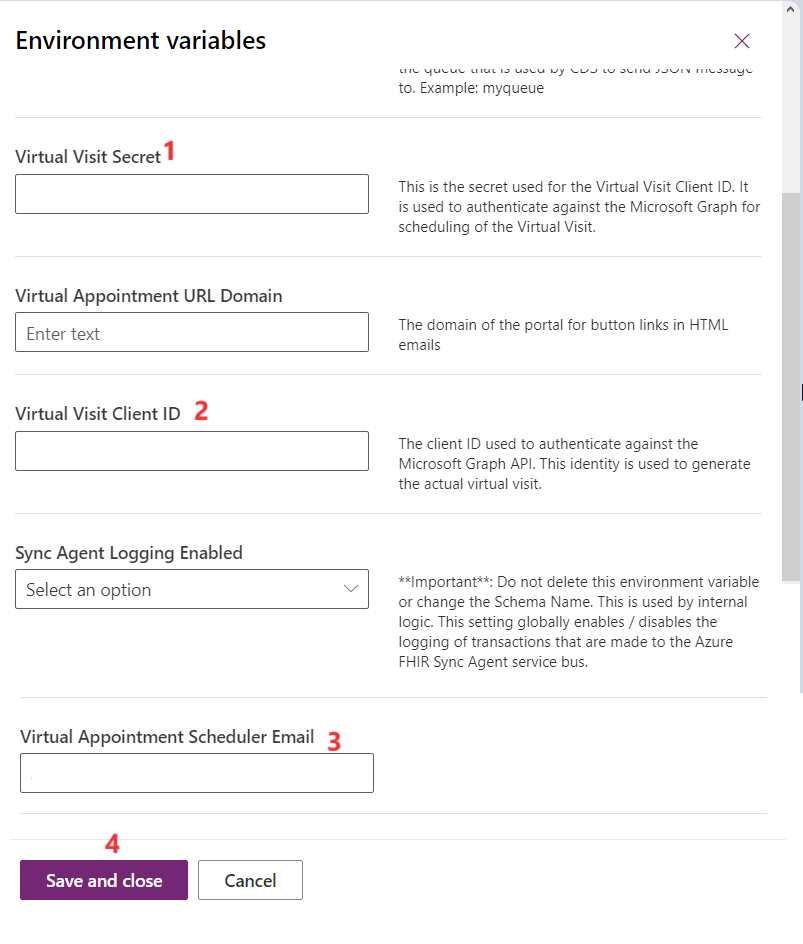
On the Environment variables form, populate the Virtual Visit Secret and Virtual Visit Client ID boxes with the client secret and client ID respectively that you copied in the previous task of this exercise. Specify the currently signed-in user account as the value for the Virtual Appointment Scheduler Email variable.
Note
The Virtual Visit Secret, Virtual Visit Client ID, and Virtual Appointment Scheduler Email environment variables are used to set up the virtual appointments in the subsequent modules.


You successfully created the Healthcare Patient Portal app and set the environment variables.