Exercise - Configure the Azure Stream Analytics job input
An Azure Stream Analytics job supports three input types:
| Input type | Use case |
|---|---|
| Azure Event Hubs | Azure Event Hubs consumes live streaming data from applications with low latency and high throughput. |
| Azure IoT Hub | Azure IoT Hub consumes live streaming events from IoT devices. This service enables bi-directional communication scenarios where commands can be sent back to IoT devices to trigger specific actions based on analyzing streams they send to the service. |
| Azure Blob Storage | Azure Blob Storage is used as the input source to consume files persisted in blob storage. |
Create the input source
Let's use an Azure Blob store as the input. Recall that Azure Blob Storage has three aspects to it:
- A storage account to provide the globally unique namespace in Azure
- A container that acts like a folder
- The blob itself, which is similar to a file in a file system
Let's start by creating an Azure Blob Storage account.
Switch back to the Azure portal.
Select All services in the top left corner.
Enter "storage" in the search field, and select Storage accounts from the results.
Select + Create to create a new Azure Storage account.
On the Basics tab, from the Resource group dropdown, select the new mslearn-streamanalytics resource group.
Set the Storage account name to a unique name. Enter the prefix streamsrc with your initials or a numeric value. This value has to be unique across all Azure storage accounts, so you might have to try a few combinations to find one that works for you. The portal will place a green checkmark next to the name if it's valid.
Check the Region. Set it to the same location as the job to avoid having to pay to transfer data between regions.
Leave the rest of the fields as default values.
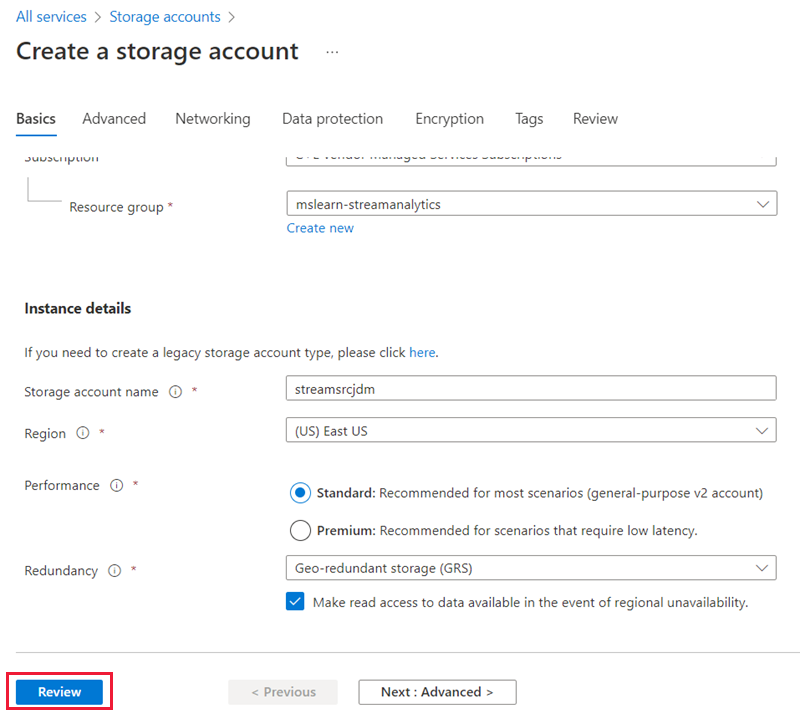
Select Review.
After the request has been validated, select Create to submit the deployment request.
Wait a few moments for the deployment to complete. After the message "Your deployment is complete" appears, go to the next step.
Connect the input source to the Stream Analytics job
Next, let's connect our Stream Analytics job to our new Blob Storage account.
In the Azure portal, select All services in the left sidebar.
In the search box, enter Stream Analytics. Select the Stream Analytics jobs from the results.
In the list of jobs, select the Stream Analytics job you created earlier (SimpleTransformer). The overview page for your job displays.
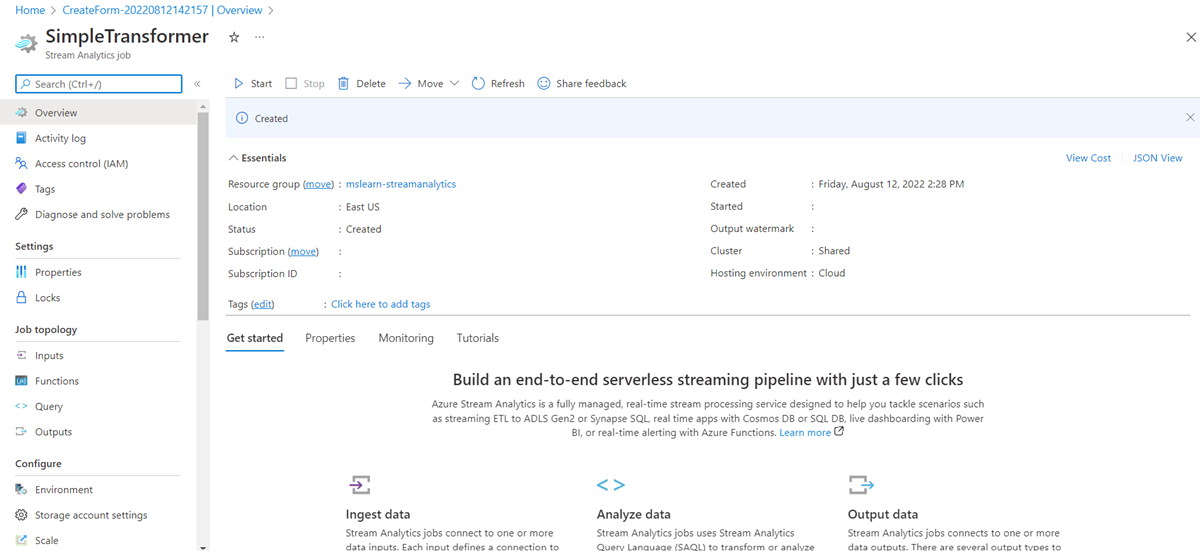
Under Job topology, select Inputs.
Select Add stream input, and select Blob storage from the dropdown. The Blob storage/ADLS Gen2 panel displays.
Enter streaminput in Input alias. You'll use this name to identify the input.
Select the Storage account you created previously from the dropdown. Recall it starts with streamsrc.
Select Create New for the Container field, and give it a unique name, such as learncontainer.
Select Connection string from the dropdown for Authentication mode.
Enter input/ for Path pattern.
Leave the rest of the fields with the current default values.
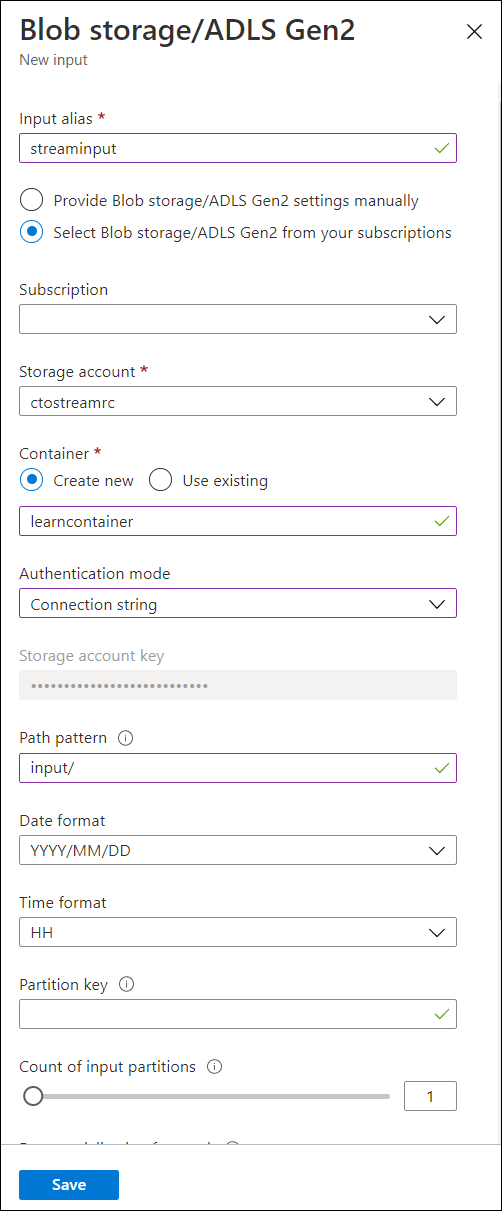
Select Save to associate the input.