Optimize live events
Live events are extremely popular as a way of engaging with larger audiences than is feasible using a meeting. The first step in optimizing live events is to properly plan them. This starts with determining who can create, schedule, and attend live events.
Determine who can create, schedule, and attend live events
To create or schedule a live event, the users must meet the following requirements:
The organizer requires one of the following
- A Microsoft or Office 365 Enterprise E1, E3, or E5 license
- A Microsoft or Office 365 Education A3 or A5 license
The producer or presenter requires one of the following:
- A Microsoft or Office 365 Enterprise E1, E3 or E5 license
- A Microsoft or Office 365 Education A1, A3 or A5 license.
Important
The exception to these requirements is that guest users can present without a license if the other criteria for guest users is met.
A Microsoft Teams license, which is included in the licenses listed above.
A Microsoft Stream license, which is required if you plan to share the content to an external app or device.
After you’ve verified who can create, schedule, and attend live events, you can configure the related settings.
Note
If a guest user is part of another organization, they must ensure that they change switch organizations to avoid joining the live event as an attendee and not as presenter. It’s recommended that you create a private team and channel to add the guest users that will attend the meeting.
Configure live event policies and settings
In the Microsoft Teams admin center, you can use the following to control access and functionality of your live events:
- Live events policies
- Live events settings
Manage Live events policies
By default, a single Global (Org-wide default) policy exists. You can create and configure more as your needs dictate.
Navigate to Live events policies in the Microsoft Teams admin center and then open the appropriate policy. The Global policy is displayed below, with default settings.
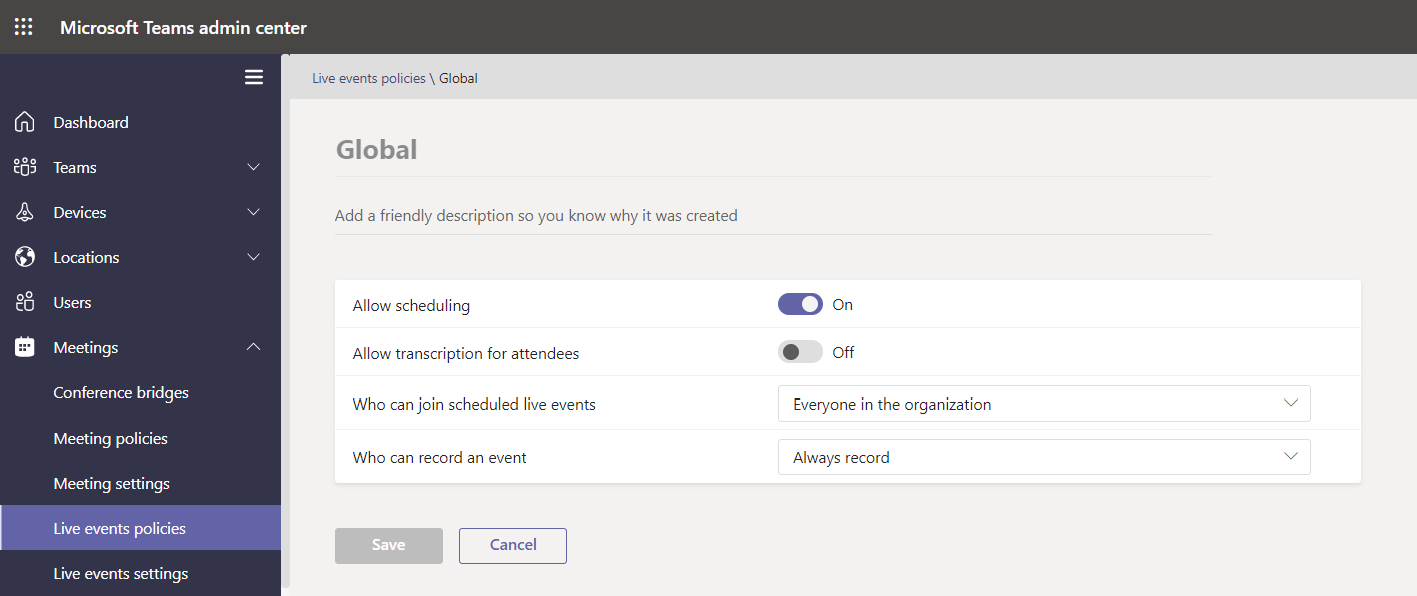
The following table describes the available options.
| Setting | Description |
|---|---|
| Allow scheduling | Enables users to schedule live events. |
| Allow transcription for attendees | Enables users to see live captions during an event. |
| Who can join scheduled live events | Choose between: Everyone, Everyone in the organization, and Specific users or groups. The default is Everyone in the organization. |
| Who can record an event | Choose between: Always record, Never record, and Organizer can record. Always record is the default. |
Note
Users don’t need a license to attend a live event.
Remember to assign your policy to your users. All users will be assigned to the Global policy unless you assign a different policy. To assign a newly created policy:
- In the Live events policies page, select the Group policy assignment tab.
- Select Add group.
- On the Assign policy to group blade, enter the group name, choose the rank, and then select your policy.
- Select Apply.
Manage Live events settings
You can use Teams live events settings to configure settings for live events within your organization. You can define:
- A support URL. This provides a link for users to access during an event when they have experienced a problem.
- A third-party video distribution provider. Enables you to define a software defined network solution or enterprise content delivery network solution through a Microsoft video delivery partner.
Note
These settings apply to all live events that are created in your organization
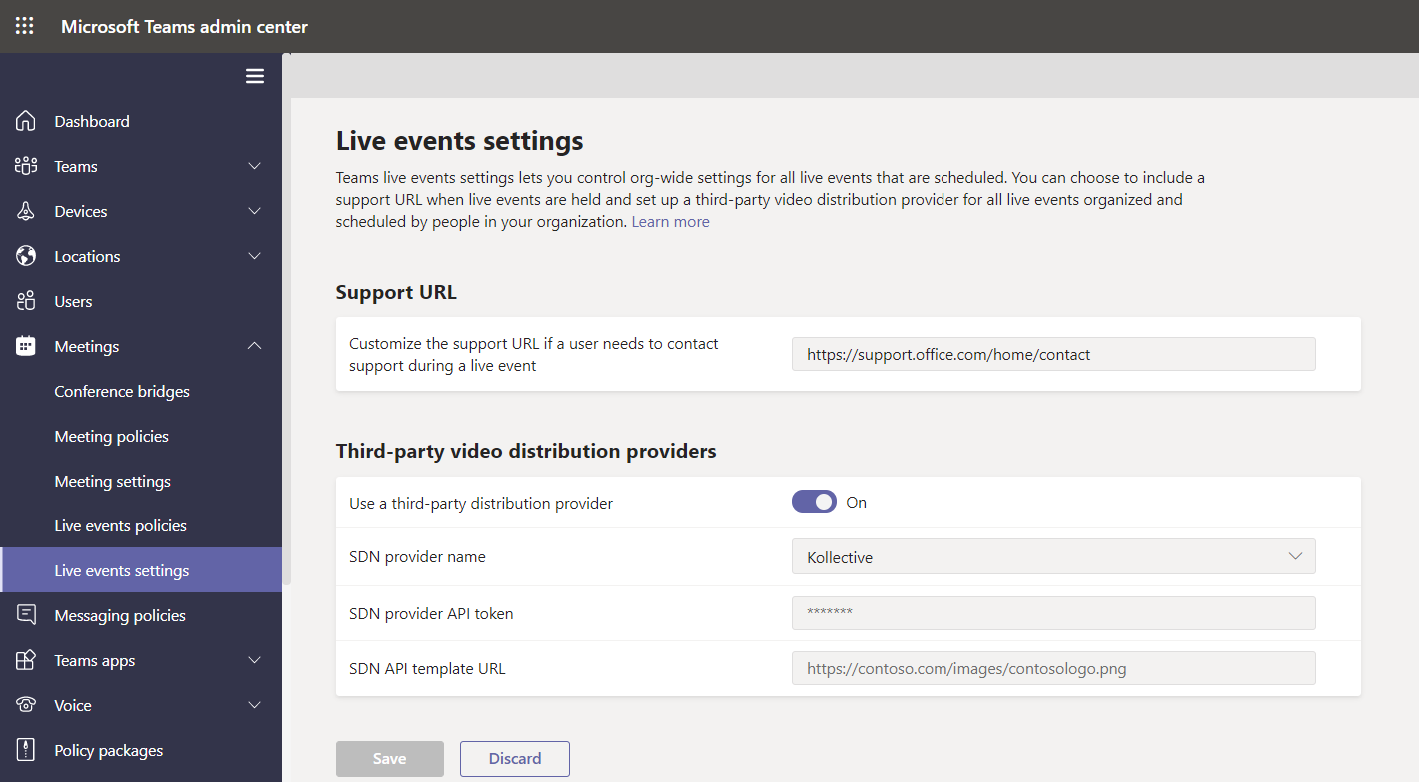
If you opt to use a third-party video distribution partner, you must define the following settings.
- Use a third-party distribution provider. Enable this setting to use a third-party video distribution provider.
- SDN provider name. Select the provider you're using.
- Provider license key. Enter the license ID from your provider.
- SDN API template URL. Enter the API template URL from your provider.