Exercise - Create Your First Power Apps app as a Traditional Developer
In this unit, you create a mobile app to help which people in the field use to check inventory and order parts if necessary. We're using Excel as a data source to stand in as "dev data" to build the app without having to connect to existing systems like Microsoft SQL Server or Salesforce yet.
There are hundreds of data connectors that Power Apps can connect to out of the box, for lots of Microsoft products and services and for third party services too. If there's no connector for what you need, a developer can build a custom connector to make that connection.
Note
Power Apps requires either an Microsoft 365 license or a free trial. Learn more about your licensing options. Microsoft products include Microsoft Power Apps and Power Automate.
Connect to a data source
To connect to a data source, use the following procedure:
Download the Flooring Inventory workbook and save it to OneDrive.
Go to https://make.powerapps.com and sign in with your organizational account.
From the home screen, select the + Create button from the left side navigation panel.
Select Excel under the "Start from" options.
You might be prompted to select an existing connection or create a new connection. Ensure you select/create a OneDrive connection.
On the right side of the screen, you'll be prompted to Choose an Excel file. Find/select FlooringInventory.xlsx.
Under Choose a table select FlooringEstimates and select the Connect button on the bottom right of the screen.
Power Apps generates the app by inspecting your data and matching it with Power Apps capabilities so that you get a working 3-screen app as a starting point.
Preview the generated app
Your new three-screen app now opens in Power Apps Studio.

To preview the app, select your F5 key or select the Play icon in the upper-right corner of the command bar. Notice that it includes all the data from the table and provides a good default experience. You can use the search field at the top, you can select an item to see details, etc.
All apps that are generated from data in this manner have the same set of screens that you can view from the Tree view panel:
- Browse screen - This screen appears by default. In it, you can browse, sort, filter, and refresh the data from the data source. In the browse screen, you can add items to the data source by selecting the plus icon (+).
- Details screen - The details screen shows all information about a single item. In this screen, you can open an item to edit or delete it.
- Edit/create screen - In this screen, you can edit an existing item or create a new one.
Explore the generated app
Select the (X) icon in the upper-right corner of the preview to return the app to edit mode. Notice that the app, even while in edit mode, is actively running, as if in watch mode for a traditional application. As you make changes to control properties and Power fx formulas, the app will automatically respond to those changes, even in edit mode.
Tip
To temporarily switch to preview mode while in edit mode, hold down the Alt key on your keyboard. Note that when you're holding down that key, if you select the app, it will act as it is in preview mode. When you release the key it will automatically spring back to edit mode and you can select your app to select controls normally.
Add the inventory request screen
The generated app includes a screen for adding rows of data by repurposing the data edit screen, but our app will instead use the (+) icon in the app to give the user a way to request more inventory be added to the warehouse by the home office.
Select the EditScreen1 screen from the Tree View panel on the left side of your screen.
Select the ... on the right side of where EditScreen1 is now highlighted, and select Duplicate screen.
Right-click EditScreen1_1 on the tree view, and select Rename. Type in InventoryRequest for a new name for the screen, and select Enter to save it.
Select BrowseScreen1 in the tree view to go back to the first screen, and select the (+) icon at the top right of the app screen to edit it.
Let's adjust the OnSelect property. By default it should show in the formula bar, but if not, you can find/select this property from the dropdown list to the left of the formula bar, replace the contents of the formula bar with this:
Navigate(InventoryRequest, ScreenTransition.None)Hold down the ALT key and select the (+) icon to test the Navigate function you just wrote; the app should load the InventoryRequest screen you created a moment ago.
Now select EditForm1_1 in the tree view, and press the Delete key to delete the control.
Add controls to the new screen
Select the Insert button from the command bar to bring up the Insert panel.
Select Text Label, and select Text Input to add one of each type of control to the screen.
Drag the two controls on the screen so they are below the header, and are aligned with the center of the screen. Note how Power Apps will help guide you to line things up with each other as you drag around the controls.
Select the label on the app screen to select it and in the right-side Properties panel, change the Text property value to say Request Reason.
Select the textbox on the app screen to select it and in the right-side Properties panel, change the Default property to say Need inventory to cover customer needs.
Use Insert to add another Text label to the screen.
Select Insert again and use the search box to search for a drop-down control. Enter "drop" and select Drop down to add a drop-down control to the screen.
Select and drag both controls to line up with the other controls and each other, and change the text on the new label to say Inventory item.
Select the drop-down control to select it, and in the right-side properties panel, select the Items property's dropdown and select FlooringEstimates. Then, select the Value property's dropdown and select Name.
Select the Items property label, and note that the cursor focus is now in the formula bar, with the Items property selected.
Sort the items by name by entering the following formula:
Sort(FlooringEstimates, Name, SortOrder.Ascending)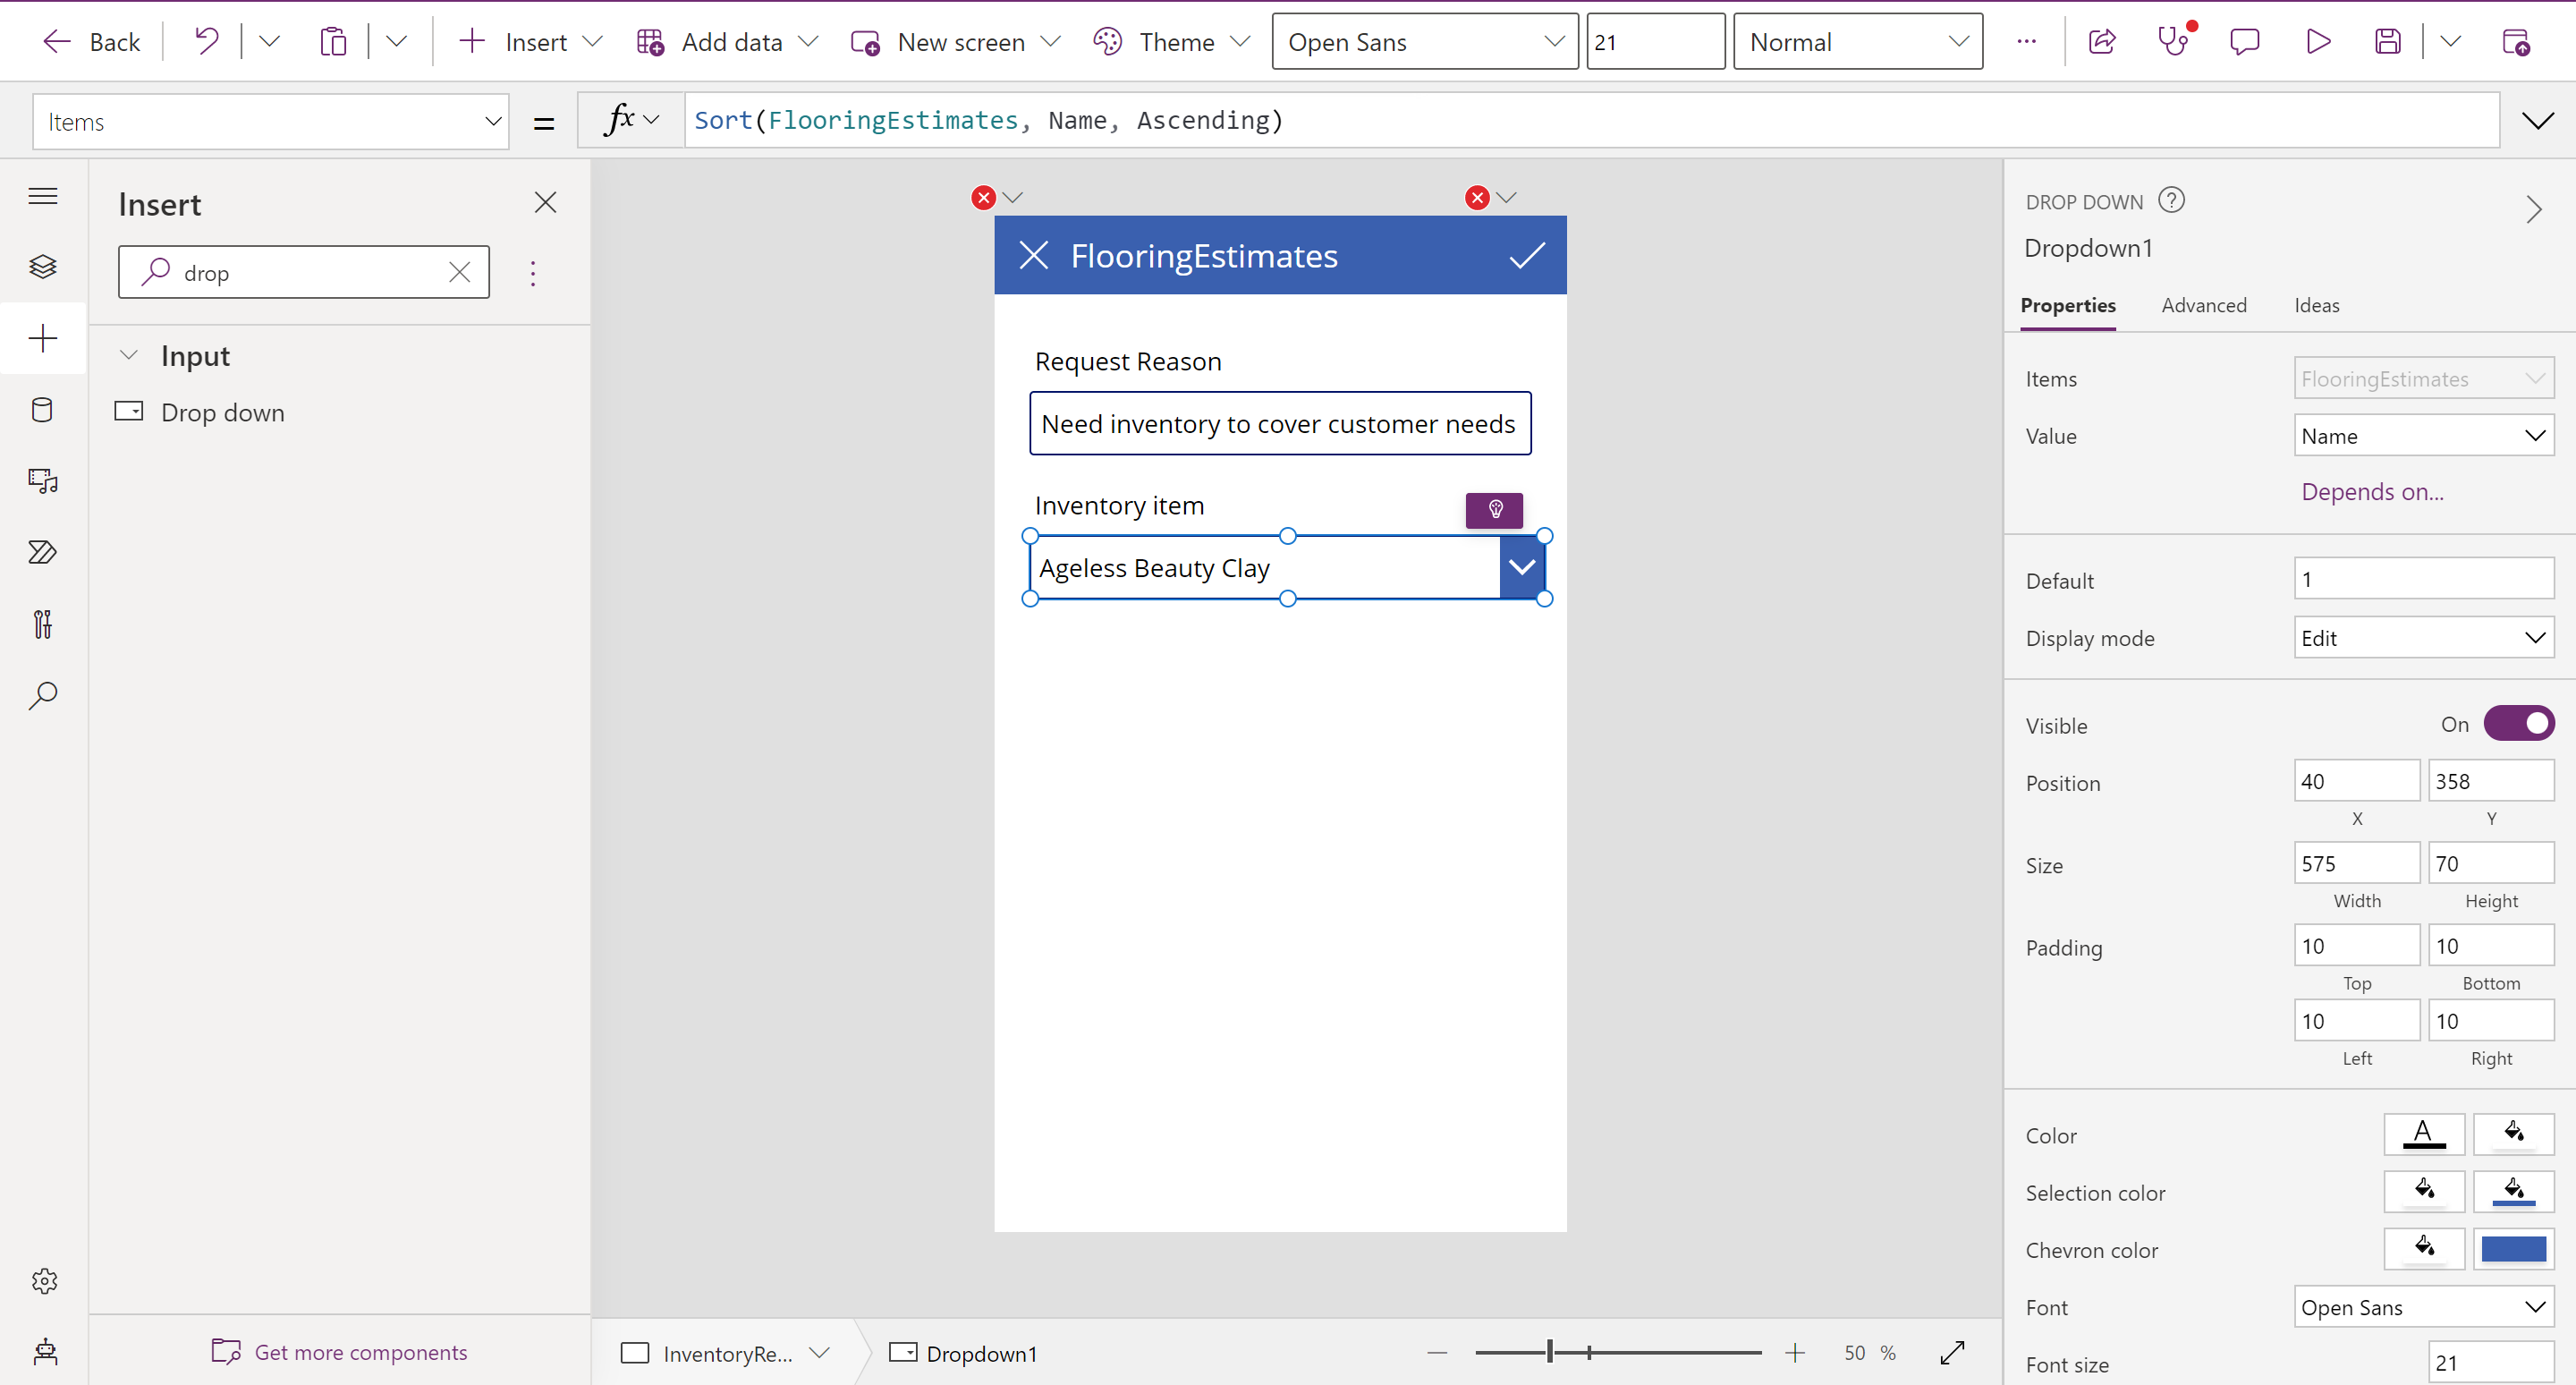

Fix the errors and add a data connection
Select the ✖ icon in the top right of the app screen. The icon's OnSelect property is shown in the formula bar. Change the formula to just say
Back(). That will make the error go away.Select the data icon
 on the left side of the screen to bring up the Data panel. The OneDrive connection that we started the app with is listed there.
Select ➕ Add data to open the connection search panel and search for Office 365 Outlook.
If you already have a connection defined, select that to add it. If no connection is listed, select Add a connection; and when the panel for the new connection pops open on the right side, select Connect to add the connection.
Select the ✔ icon in the header of your app. The OnSelect property for the icon has been selected for the formula bar.
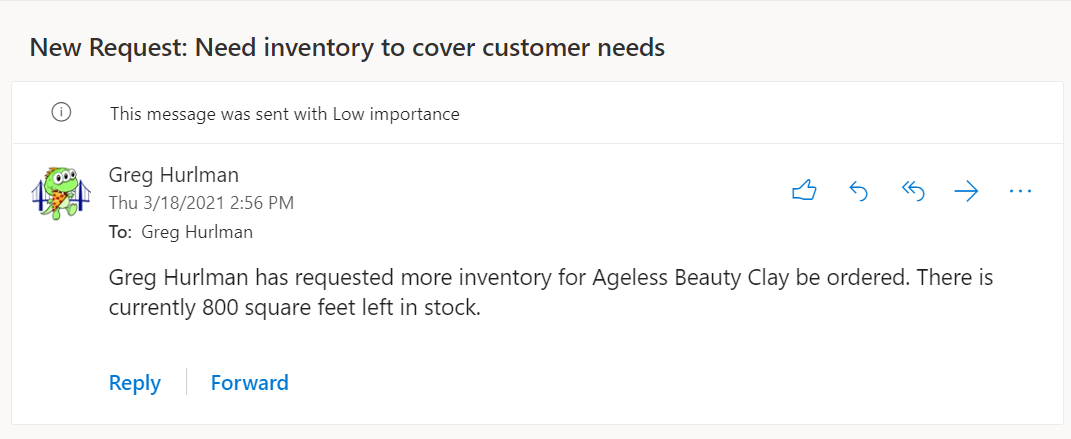
Change the icon's OnSelect formula to the formula below. This formula sends an email to yourself (or the app user), asking for more inventory to be ordered.
Office365Outlook.SendEmailV2(
    User().Email,
    "New Request: " & TextInput1.Text,
    User().FullName & " has requested more inventory for " &
        Dropdown1.Selected.Name & " be ordered. There is currently " &
        Dropdown1.Selected.InventoryInSquareFeet & " square feet left in stock."
);
Back()
Note
To add more than one statement in an event, use a semicolon (;) to separate them.
Save and publish your app
To make your app visible on the phone, it needs to be saved and published. On the ribbon, in the upper right, select the dropdown arrow next to the Save icon and select Save as. Replace the current title "App" with Flooring Inventory, and then select Save. Now select the Publish icon from your ribbon and after a few minutes, you'll be able to access and use the app on your phone.
The first time you save a new app, you're prompted to publish your app, making this version "live". After that first save, additional saves don't automatically go live, but are saved as new versions. In the future, you'll need to select the Publish button that shows up on the save screen after you've clicked Save.
Install the app on your device
To see how the app runs on mobile, install the Power Apps Mobile app on your phone. When building an app, you should test it in the same form factor as your users.
Download Power Apps Mobile from the app store for the platform that you want to use.
Sign in by using your Office 365 username and password.
On your phone or tablet, run the Flooring Inventory app in Power Apps Mobile. If you don't want to install the app, you can run it in a browser.
If you don't see the Flooring Inventory app, then in your Power Apps Mobile app, select the hamburger menu in the top left of the screen and toggle on Show non-production apps.
You've seen now how simple it's to create and modify an app from an Excel table. It didn't take complex coding on your part, and you were able to make some quick low code changes to better suit your needs.