Configure Windows Update for Business
There are a number of steps required to configure Windows Update for Business. The following high-level process describes these steps.
Group your devices. Start by grouping your devices by defining your deployment rings, as described earlier in this module. These deployment rings might include:
- Preview
- Targeted
- Broad
- Critical
Select the appropriate servicing option. You can choose from:
- Windows Insider Program
- Semi-Annual Channel
Configure when devices receive Feature and Quality Updates. You can defer the application of both Feature and Quality updates. For Feature Updates, you can configure the deferral for up to 365 days. For Quality Updates, it’s a maximum of 35 days.
Configure Windows Insider builds. Finally, you can determine whether and when your devices receive Windows Insider preview builds.
Use Microsoft Intune to configure Windows Update for Business
You can configure Windows Update for Business settings by using Microsoft Intune.
Using Intune, you can configure the following settings:
- Windows Servicing Channel
- Deferral settings
- Pausing
- Maintenance window
- Update type
- Installation behavior
- Peer downloading
To configure these settings, use the following procedure:
Sign in to the Microsoft Endpoint Manager admin center.
Select Devices > Windows > Windows 10 and later Update Rings > Create.
Under Basics tab, specify a name and description (optional).
Under Update ring settings, configure settings for your business needs. Configure the following settings:
- Servicing channel
- Allowing Microsoft product updates and Windows drivers
- Automatic update behavior and frequency
- Automatic behavior frequency
- Restart checks
- Quality & Feature update deferral period (days)
- Delivery optimization download mode
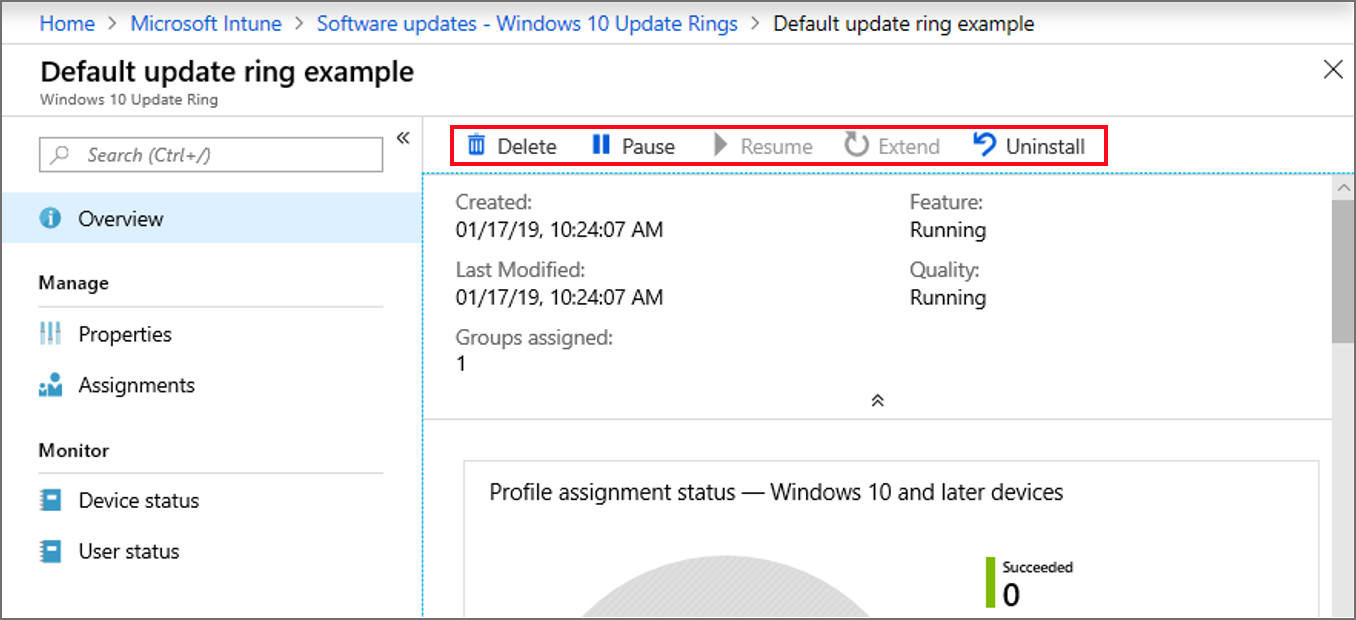
Once you've defined your ring settings, continue by assigning the ring to users and/or groups and create the profile.
For further information, visit Manage software updates in Intune.
Use GPOs to configure Windows Update for Business
You can also configure Windows Update for Business settings by using GPOs. Open the Group Policy Management Editor on a domain controller, and then navigate to Computer Configuration/Administrative Templates/Windows Components/Windows Update/Windows Update for Business.
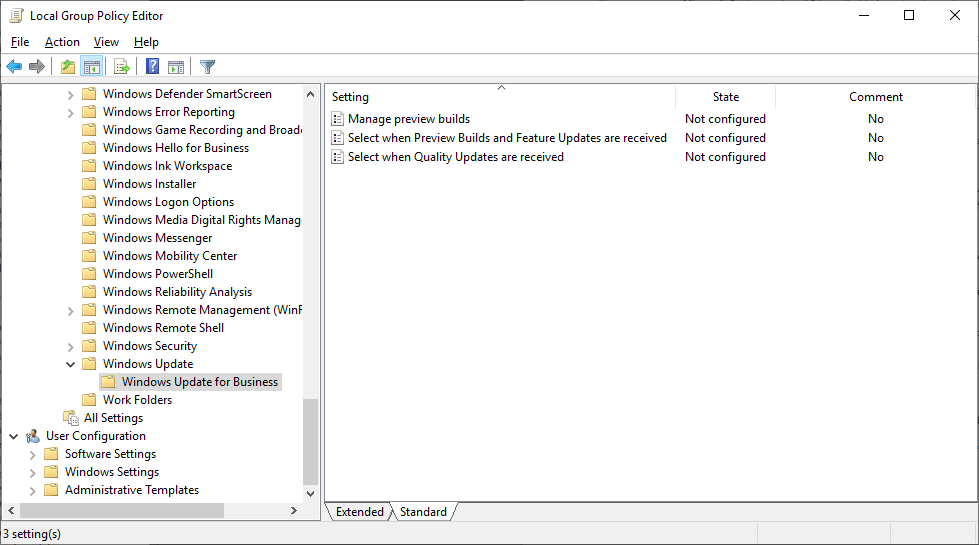
You can configure the following settings.
GPO value
Description
Manage preview builds
When enabled, you can then select to:
- Enable preview builds
- Disable preview builds
- Disable preview builds once the next release is public
Select when Preview Builds and Feature Updates are received
If enabled, you can then configure:
- The Windows readiness level for the updates you want to receive. Choose between Preview Build – Fast, Preview Build – Slow, Release Preview, and Semi-Annual Channel
- The number of days you’d like to defer receiving a Preview Build or Feature Update after it’s released.
- The date you’d like a Preview Build or Feature Updates to start.
Select when Quality Updates are received
If enable, you can then configure:
- The number of days you’d like to defer receiving a quality update after its release. You can specify a value between 0 and 30 days.
- The date you’d like Quality Updates to start.