View and apply system updates
To view available updates for your environment, follow these steps:
Sign in to Lifecycle Services by using your credentials.
In the Lifecycle Services project, select an environment.
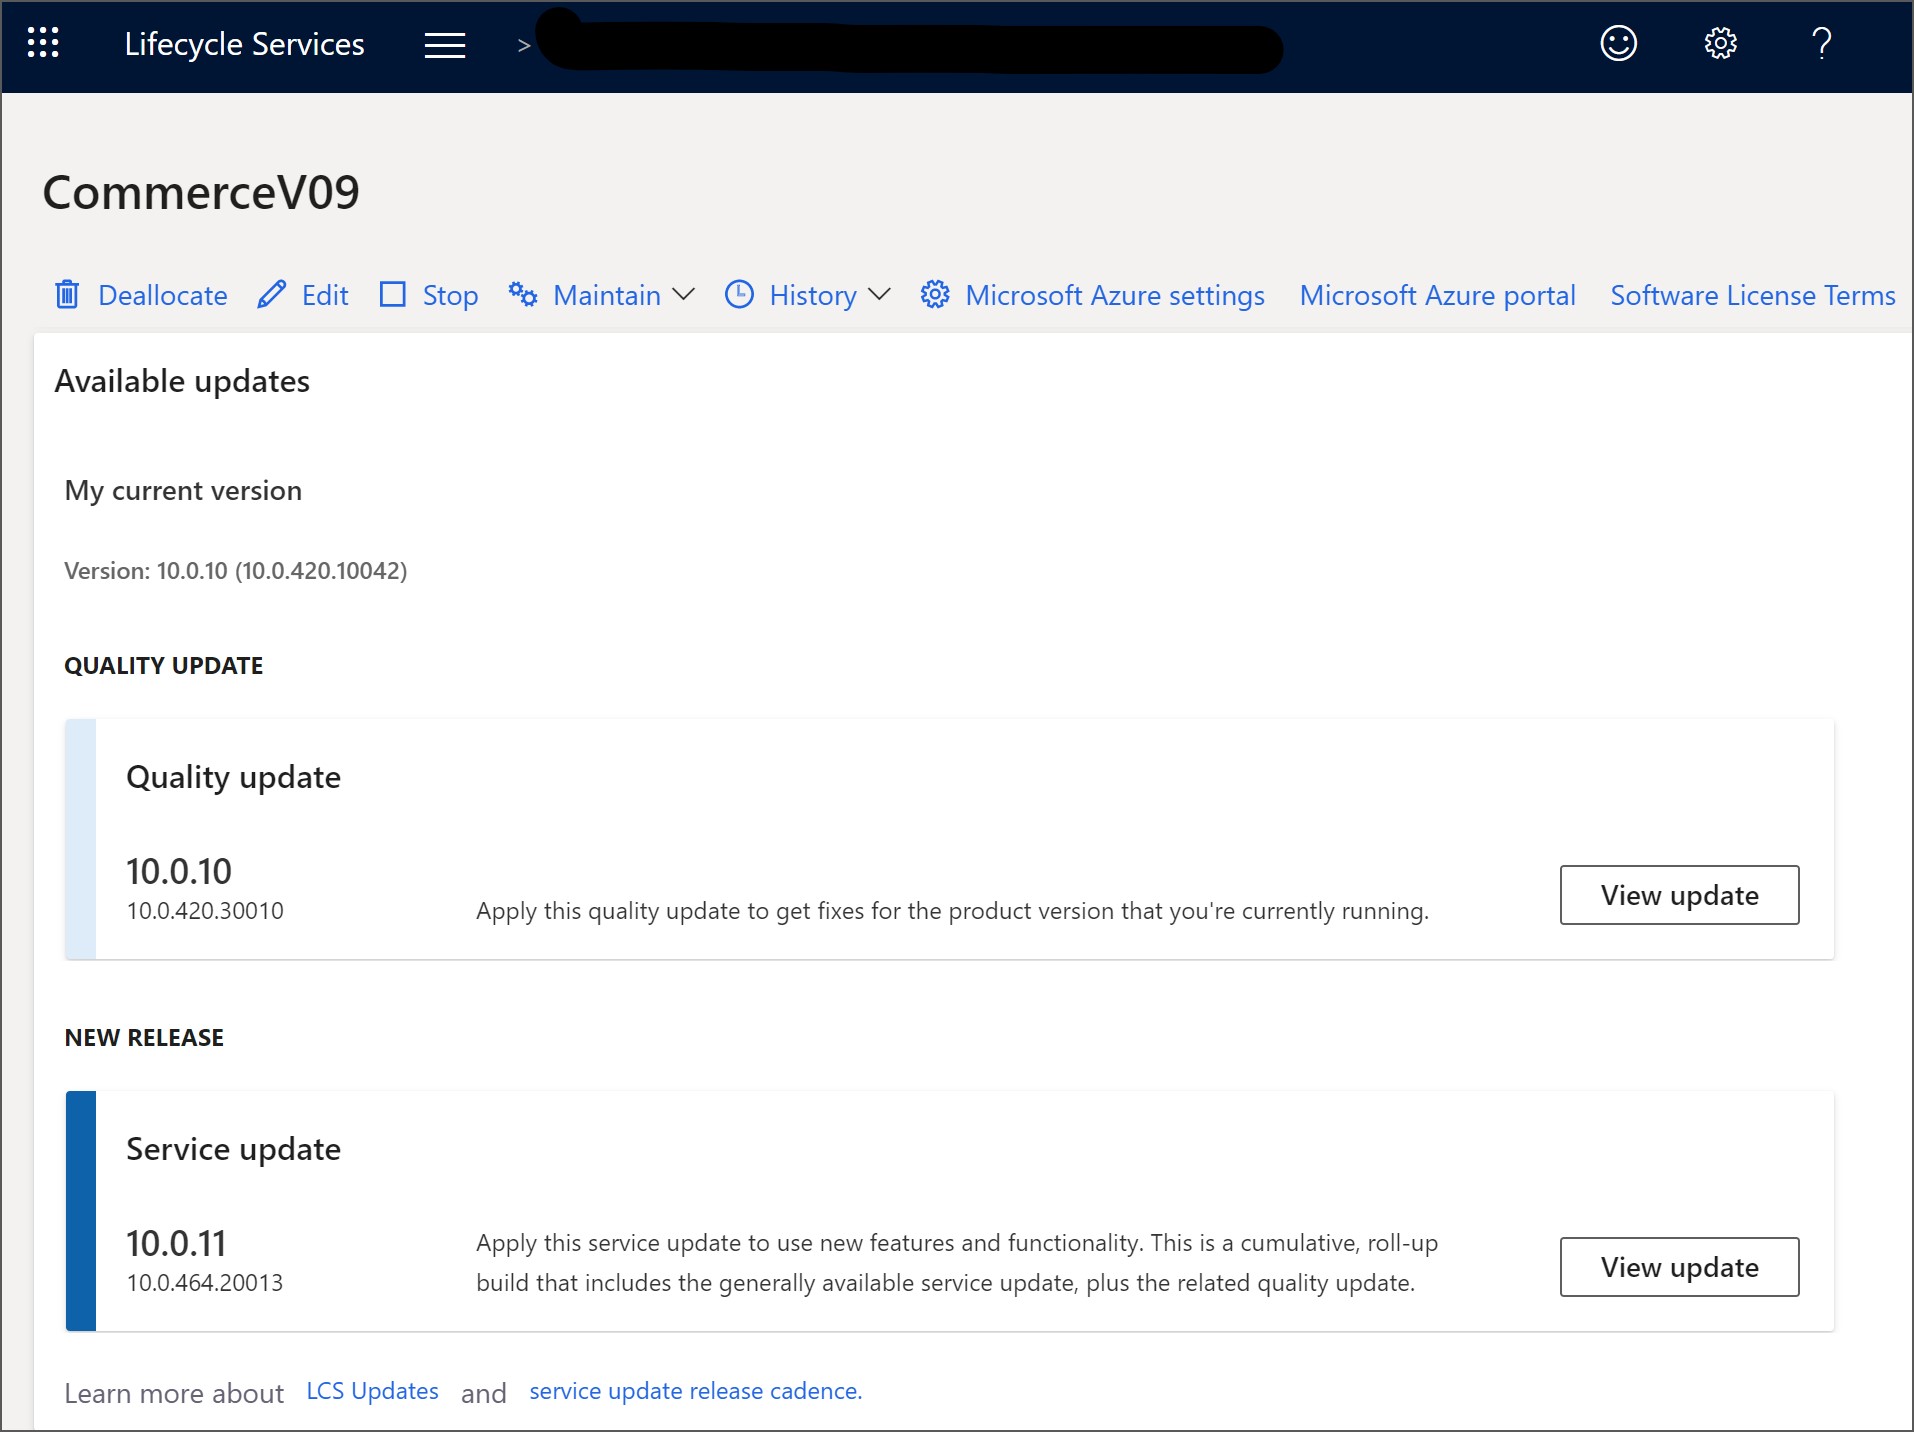
On the Environment details page, scroll down to see the Available updates.

To apply an update to a non-production environment by using Lifecycle Services, follow these steps:
Sign in to Lifecycle Services by using your credentials.
In the Lifecycle Services project, select an environment.
Open the Environment details view for the environment where you want to apply the update.
Select the update that you want to install in the Available updates section.
Select View update.
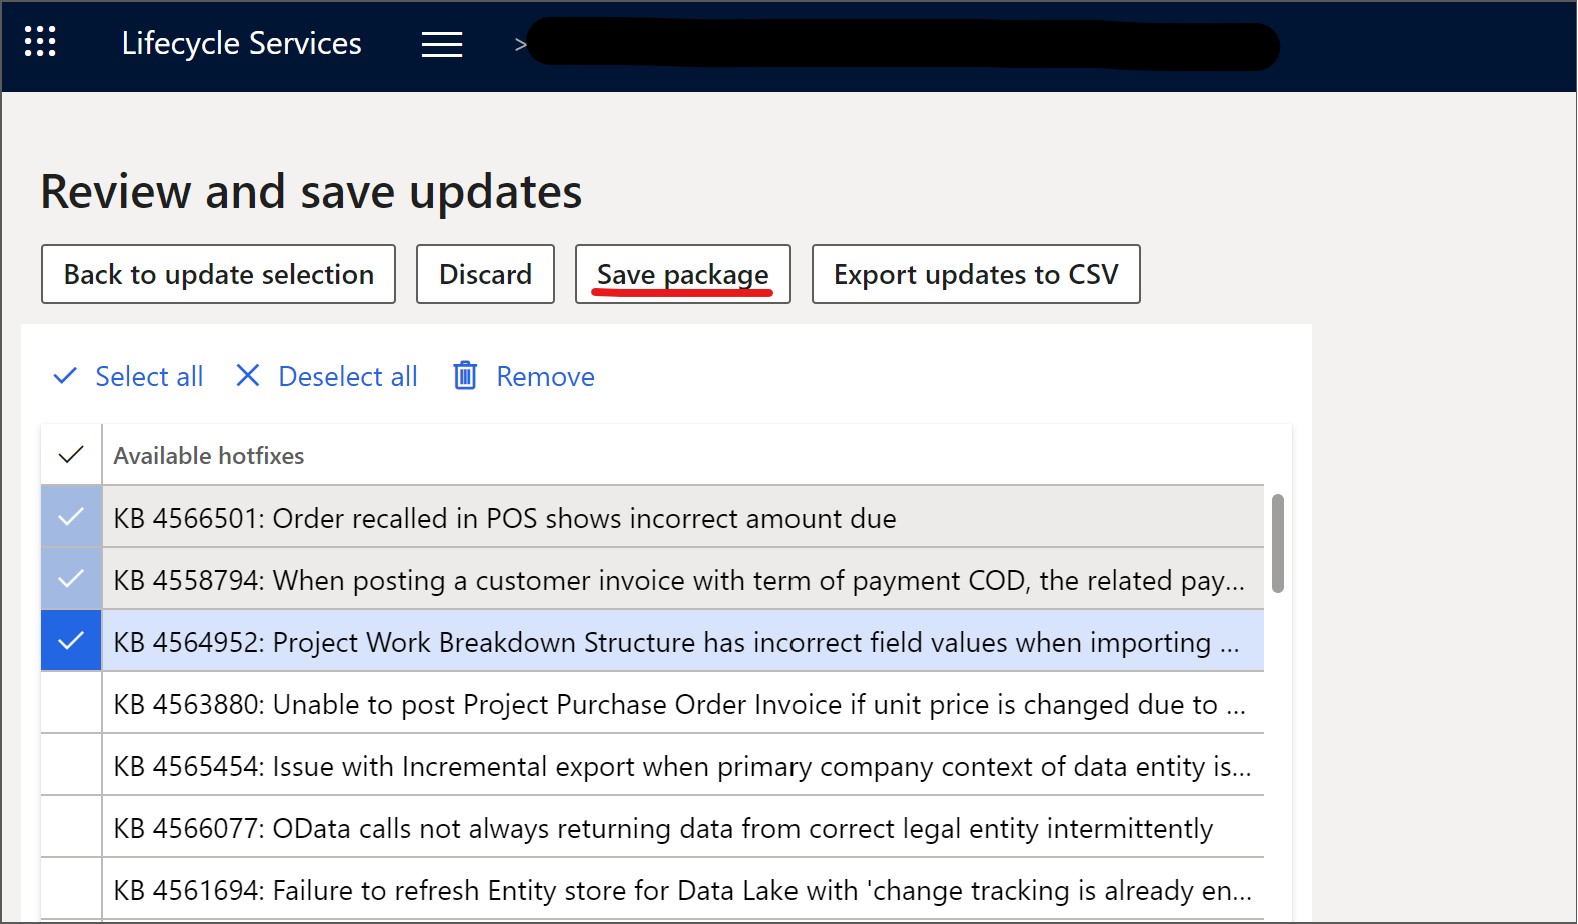
On the Binary updates page, select Save package.

On the Review and save updates page that opens, select the packages that you want to install and then select Save package.
In the Save package to asset library page that opens, enter values in the Name and Description fields and then select Save package. You will see the message that states, Your update package is being saved to asset library; this may take several minutes.
When the update package has been successfully saved, select Done.
On the Environment details page, select Maintain > Apply updates to apply an update.
Select the package to apply. You can use the filter to find your package.
Select Apply. The status in the upper-right corner of the Environment details page changes from Queued to In progress, and the Environment updates section now shows the progress of the package. You can refresh the page to check the status.
When the package has been applied, the environment status changes to Deployed and the servicing status changes to Completed.
Note
Each update or package that you want to apply on a production environment must first be successfully applied to at least one sandbox environment in the same project.
To learn about the prerequisites and steps for applying an update to a production environment, see Apply updates to cloud environments.
Update a Commerce Scale Unit
To update the (Microsoft-managed) Commerce Scale Unit (CSU), follow these steps:
Sign in to Lifecycle Services by using your credentials.
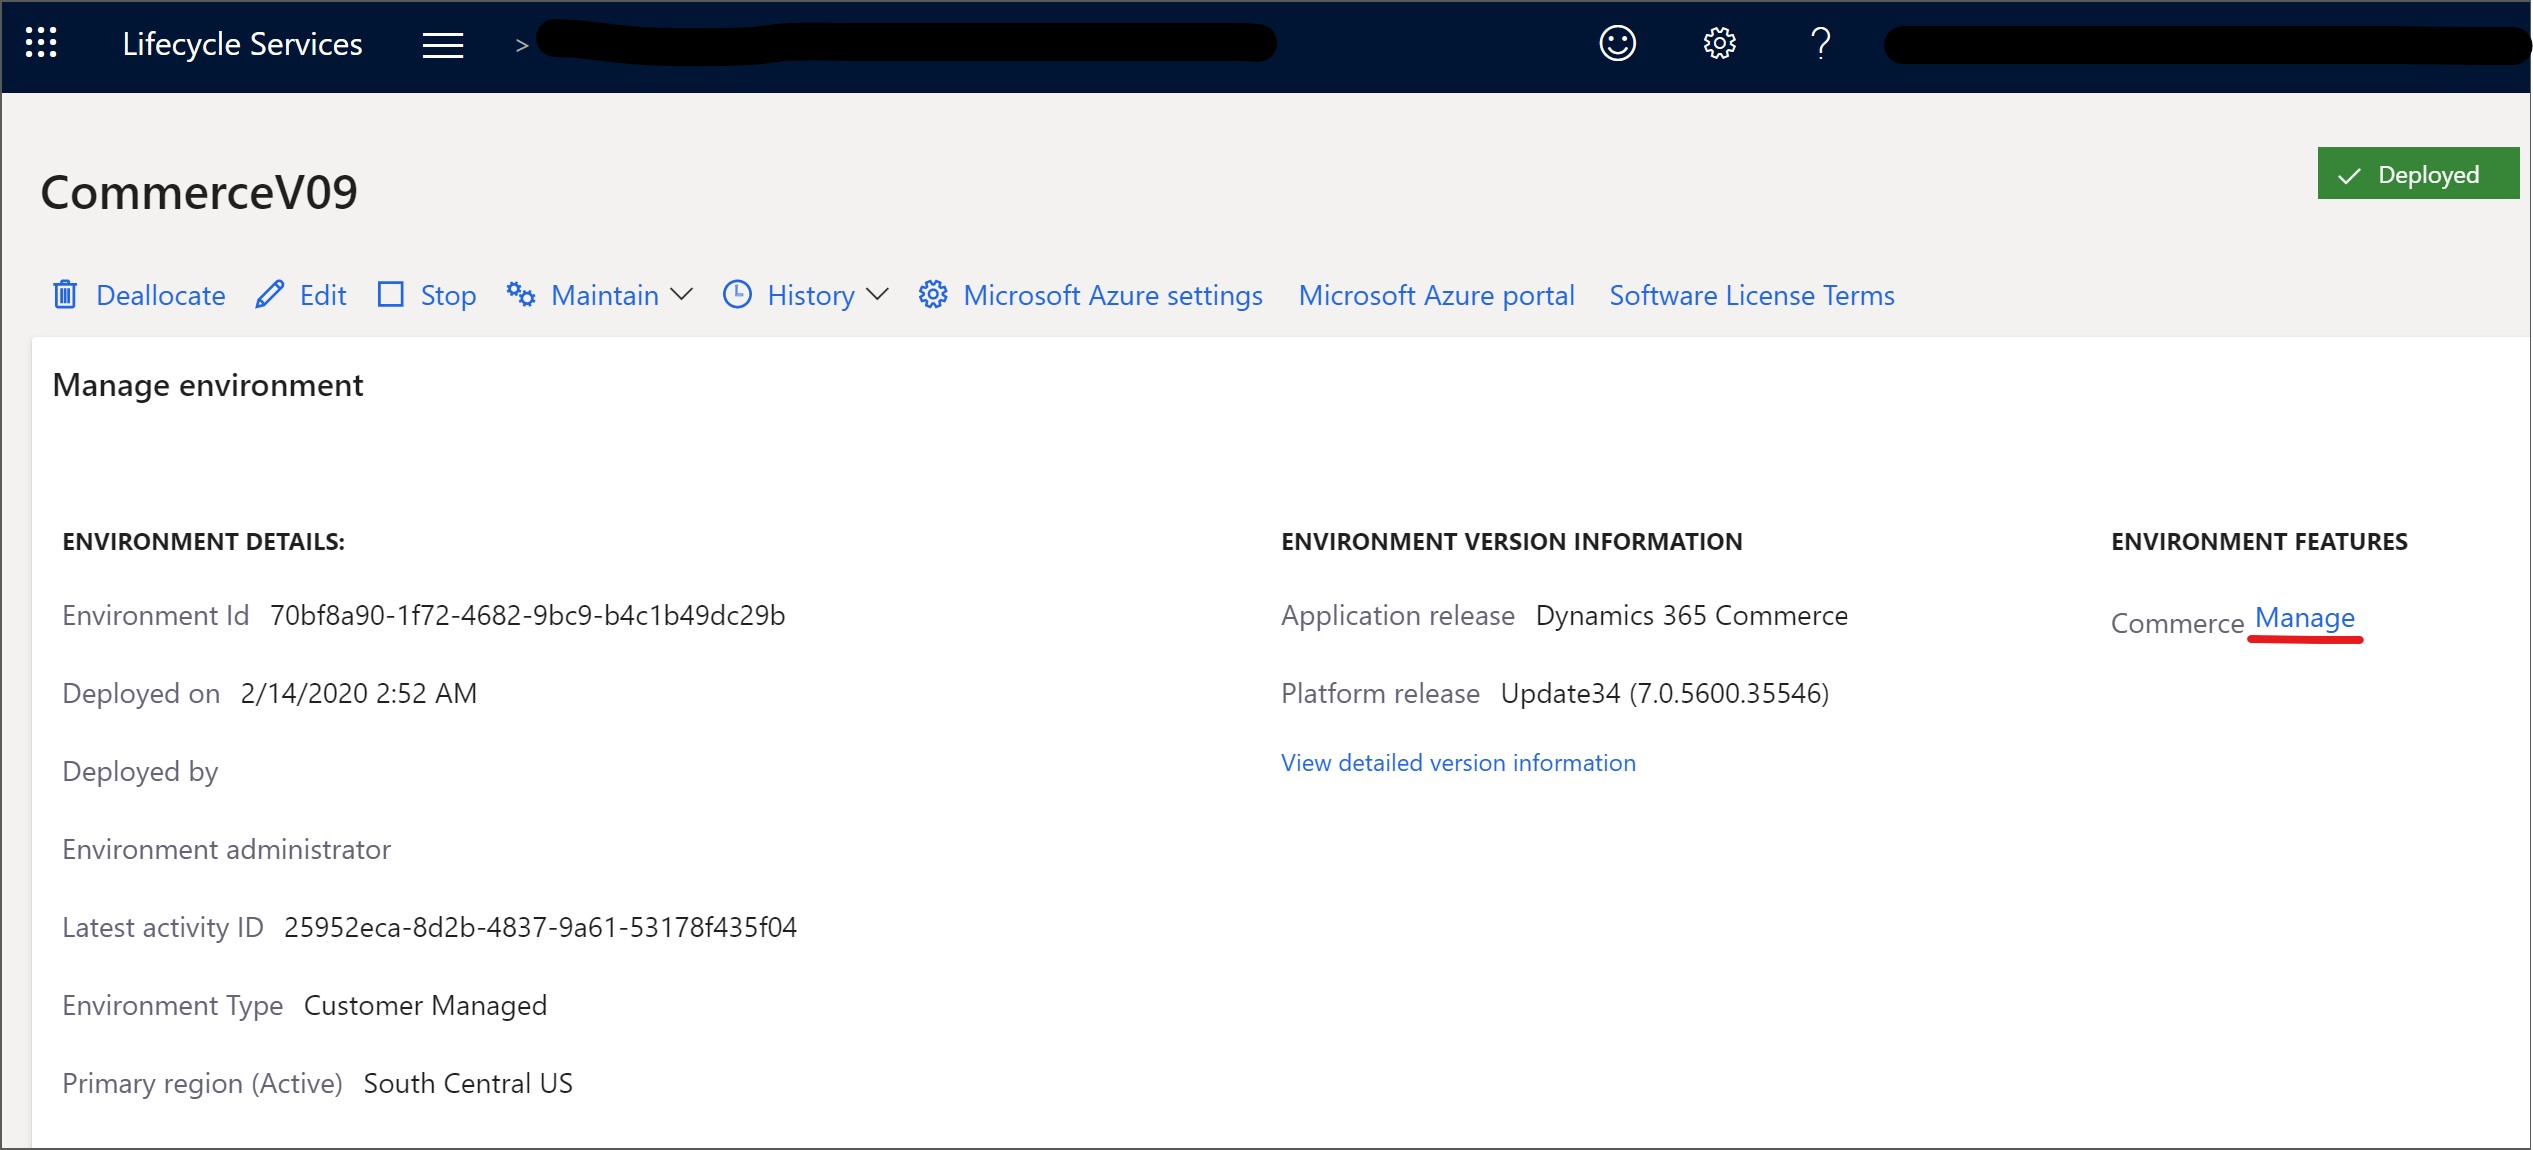
In the Lifecycle Services project, select your Commerce environment.
In the Manage environment section, select Manage in the Environment features section next to Commerce.
In the Commerce scale units section, select the scale unit that you want to update and then select Update.
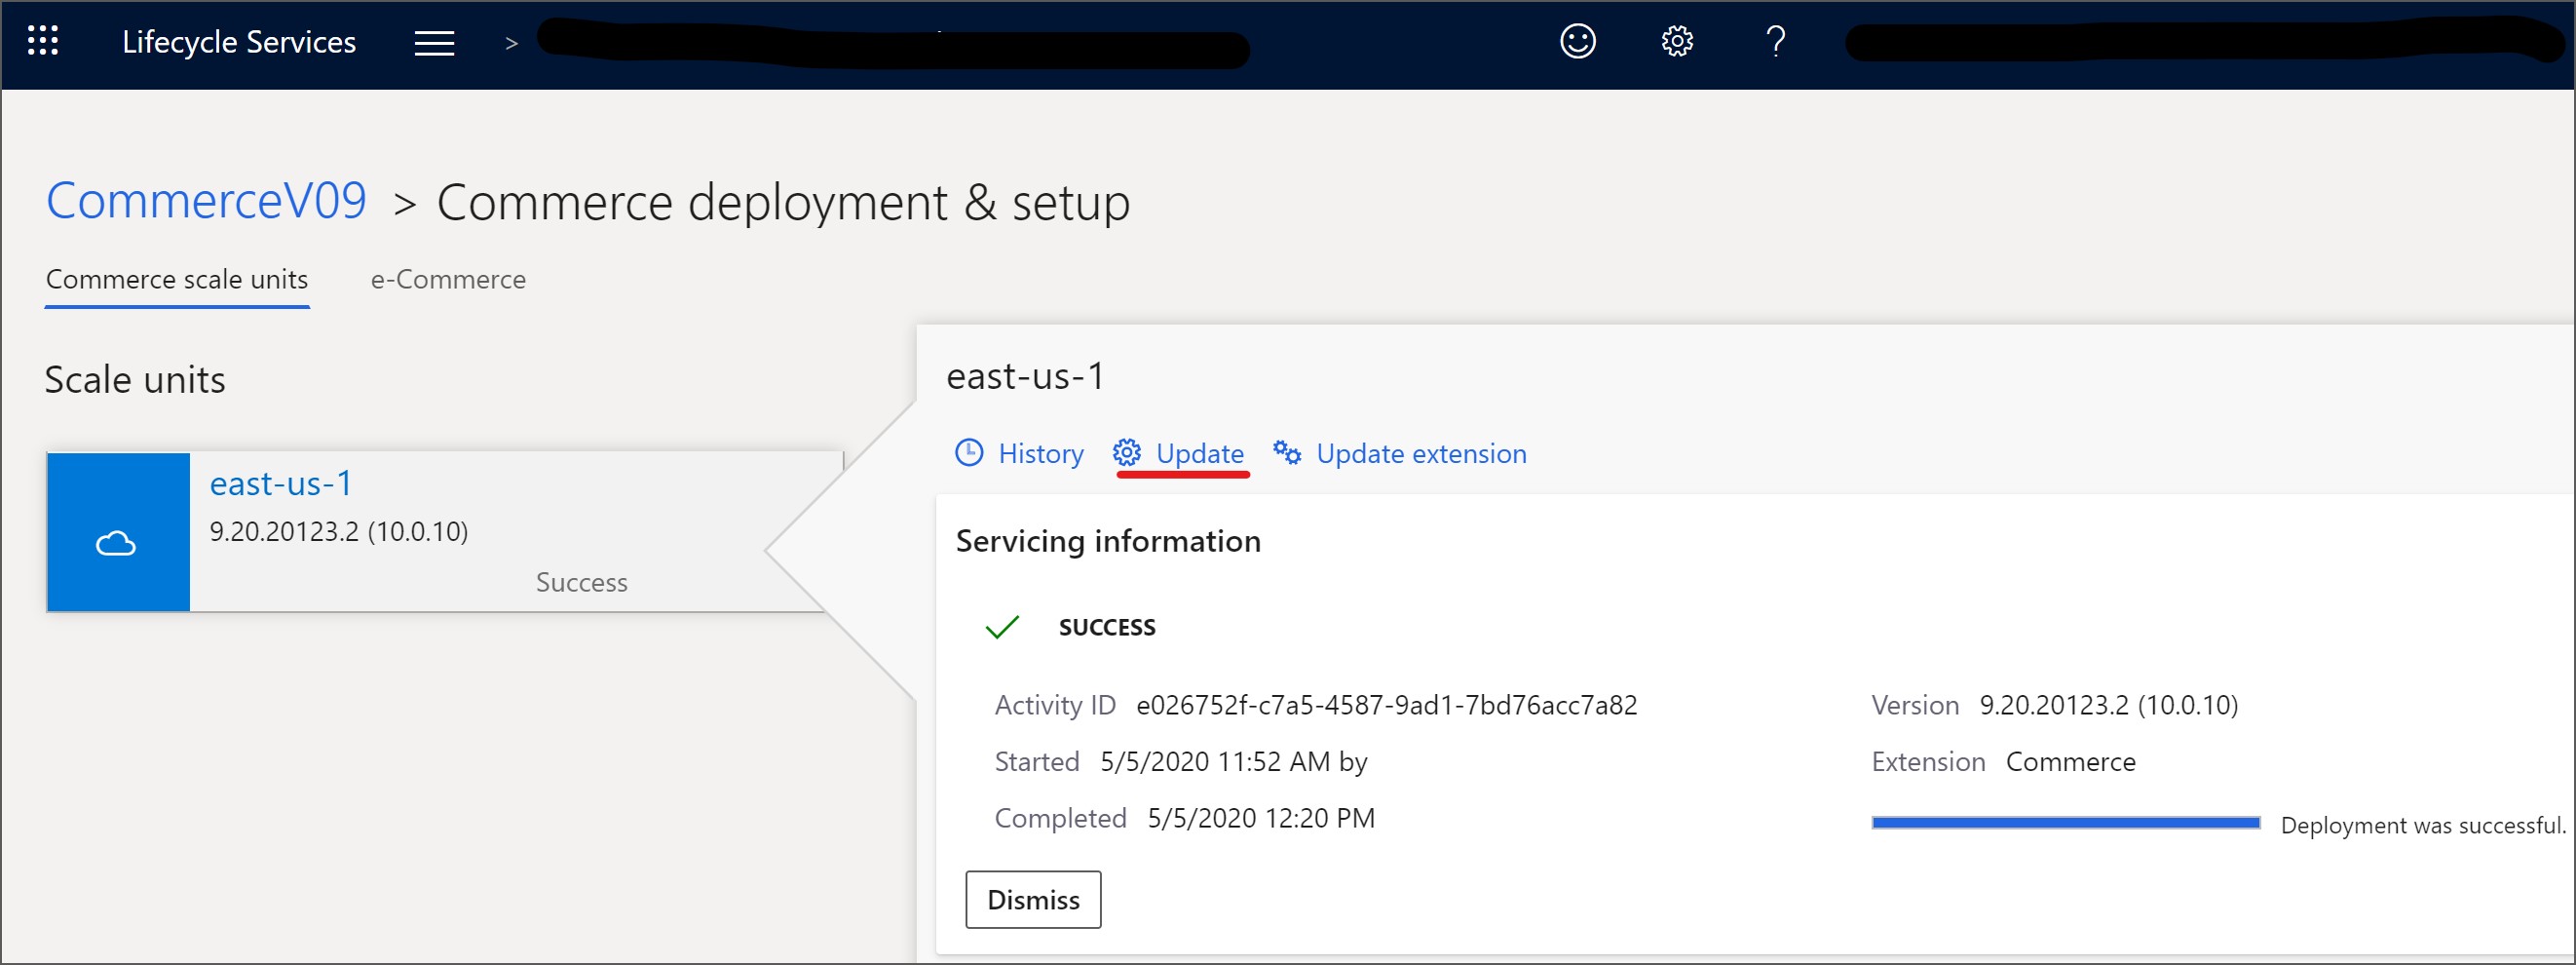
On the Update page that opens, select the update version that you want to apply from the Specify a version drop-down field, and then select Update.


Note
Applying a quality update usually requires about one hour of downtime of the Commerce channels that are associated with the scale unit.
Independent deployment and installation packages for the Store Commerce app, Store Commerce for web, hardware station (HWS), and CSU extensions
The package management function splits up extensions from the main components, allowing you to manage each package separately. The core installer framework and extension installers are separated. Store Commerce app, Store Commerce for web development, and packaging framework support this independent package and installation model by inheriting the Windows optional package, Desktop Bridge, and MSIX technologies.
All Store Commerce app extensions are created as separate APPX files under this model, and core Store Commerce loads these APPX files as add-ins. The add-ins (extensions APPX) will run under the context core Store Commerce app identity. The APPX extension will be unable to run on its own. Only the core APPX will be able to load it. Migrate the code to the new extension template to migrate the old Store Commerce app extension to this new model. To support the new UI controls and framework, some code refactoring may be required.
The HWS and CSU installer frameworks allow for the creation of installers that only contain extension components.
Commerce online software development kit (SDK) experience
All SDK updates are published to a public NuGet and GitHub repository so that updates can be downloaded and applied to the environment in minutes. This approach saves time and effort for developers.
- Extension development - To reduce the cost and the Lifecycle Services development VM dependency, the Commerce development experience is decoupled from the Lifecycle Services developer VM, and development is supported outside of the developer VM. Development can be done on any development machine that supports the Commerce development environment configurations.
- Commerce SDK reference to NuGet - Extensions can consume Commerce SDK references after they have been refactored and published to a new NuGet feed. The extension can download the binaries from the NuGet package instead of manually referring to them in the Commerce SDKReference folder. Using the NuGet package manager workflow, the package can be updated to the latest available version.
- Commerce SDK samples to GitHub - All the Commerce SDK samples are public on GitHub so that extensions can refer to them, and users can learn how to customize the Dynamics 365 Commerce solution to support a custom business process. Without having to download and apply any binary hotfix from Lifecycle Services, updated samples can be easily downloaded or referenced by cloning to this public repository.