Coverage time fences
Planners can use coverage time fences within master planning to define the planning horizon to exclude supply and demand recommendations that fall beyond the set coverage time fences. The coverage time fence prevents Master planning from scheduling orders too far out, which will ultimately distract the planner.
A coverage time fence specifies the number of days following the date of the planning run during which supply and demand are excluded. Although the system's default value is 100 days, it should be greater than the total lead time for products in your system.
You can specify a coverage time fence at each of the following levels:
- Coverage group – You can set a default coverage time fence for each coverage group.
- Item coverage – You can override the coverage time fence inherited from the coverage group assigned to an item.
- Master plan – You can override the coverage time fences inherited from the coverage group and item coverage settings.
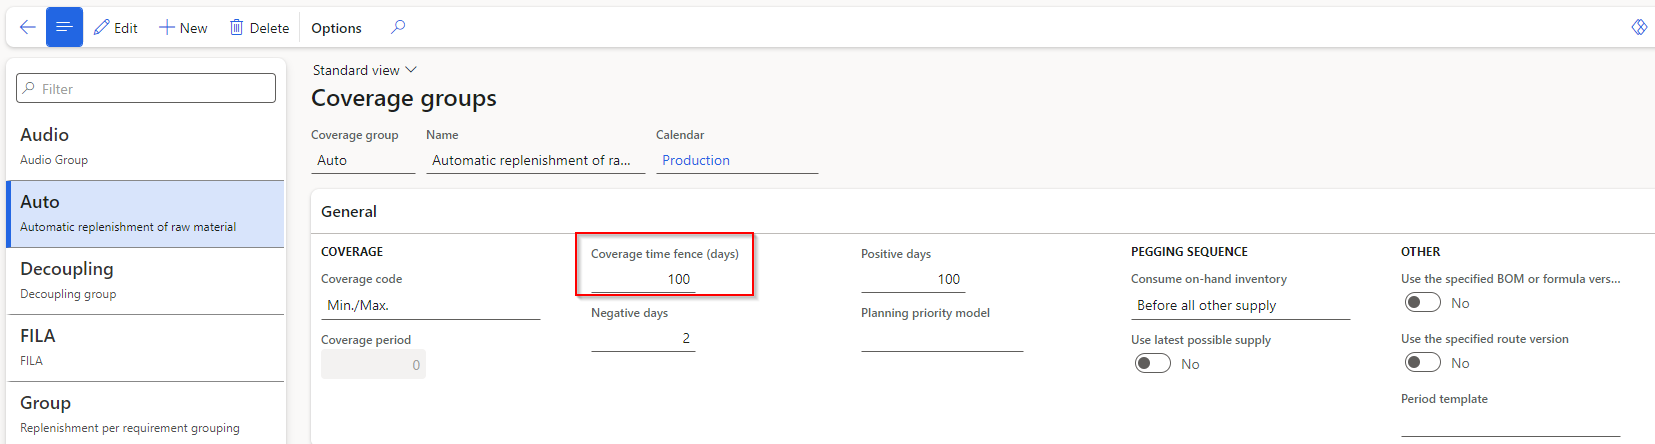
Coverage groups
When setting up coverage groups, the settings apply to all products that belong to that group. You can override the settings on the product, or when creating master plans.
To create a coverage group, follow these steps:
Go to Master planning > Setup > Coverage > Coverage groups.
Select New.
Enter the Coverage group name and Description.
Select the Calendar for the group.
Note
The duration of coverage time fences is specified in calendar days. Calendars that use working days won't affect the time fence calculation. For example, a week is seven days, even if the working time calendar designates weekends as closed days.
In the Coverage time fence (days) field, enter the coverage days as explained above.
For information on the other fields in this page, see Coverage settings.
Set up a coverage time fence on an item
Every product must belong to a coverage group. If a product doesn't have a coverage group assigned, a default coverage group is used. Each item inherits a time fence for coverage from its coverage group. However, if necessary, you can override the setting.
To specify a coverage time fence for a specific item, follow these steps.
- Go to Product information management > Products > Released products.
- Select a product in the grid.
- On the Action Pane, on the Plan tab, in the Coverage group, select Item coverage.
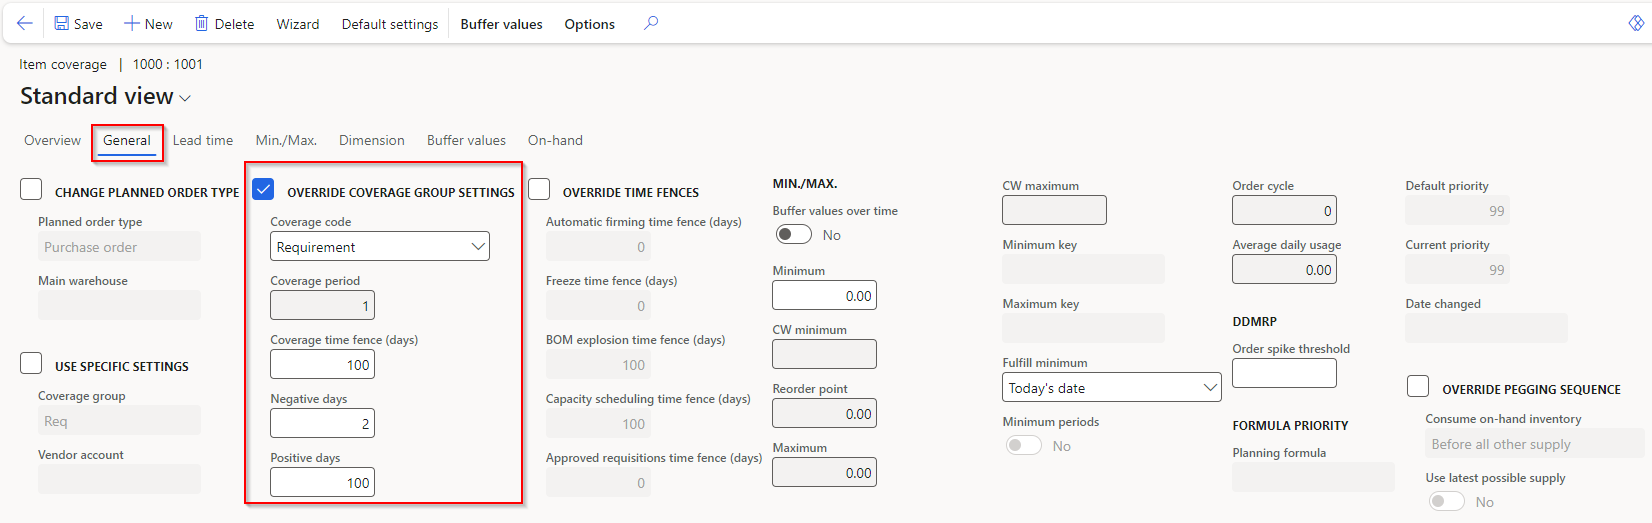
- On the Item coverage page, on the Overview tab, select or create a row for the site where you want to set a coverage time fence.
- Select the General tab to open the settings for the selected site.
- Select the Override coverage group settings check box.
- In the Coverage code field, select the method that master scheduling uses to calculate requirements for the item.
The following options are available:
- Period - when demand reduces projected inventory for the period to less than the specified minimum quantity, a planned order is generated to fulfill all demands that occur during the period specified in the Coverage period field. The period begins on the date of the first requirement, and the planned order is generated on this date.
- Requirement -a planned order is generated to fulfill every requirement that brings inventory below the minimum quantity
- Min./Max. -when demand brings the projected inventory below the specified minimum quantity, a planned order is generated to bring inventory to the specified maximum quantity. When you use this method, physically reserved items are excluded from the requirements calculation.
- Manual -master scheduling doesn't calculate requirements or generate planned orders for the item; the item is assumed to be manually planned; this method is best for items that are easy to buy, and items managed by visual inspection
- Priority -Balance supply for demand with a demand-driven approach, including Planning priority and use the values in Minimum, Reorder point, and Maximum; Priority is only available with Planning Optimization enabled
- Enter the Coverage period. This is the number of days during which master scheduling consolidates all requirements for the item and generates one planned order to cover the sum of these demands. For example, if you enter 5, planned orders are consolidated for five-day periods. The coverage period begins on the first requirement date, and the planned order is generated on that date. The requirement date, like the delivery date, determines when the planned order is placed. This field is available when you select Period in the Coverage code list.
- Set the Coverage time fence (days) field to the number of days you want to use as the coverage time fence for the item.
- Enter the number of Negative days, which is the number of days added to the due date of a requirement to define a time period during which a planned receipt can be used to satisfy the requirement. A planned receipt that isn't due within the specified time interval can't be used to satisfy the requirement, and master scheduling generates a new planned order. Negative days correspond to the number of days that a delivery can be late before you need to create a new fulfillment order. During this time, the item's inventory level is negative. You can specify negative days on the Item coverage page or the Coverage groups page. The behavior of negative days depends on whether you select the Use dynamic negative days option in the Master planning parameters page.
- Enter the number of Positive days. Subtract the number of days from the due date of a requirement to define the time during which a due planned receipt can be used to satisfy the requirement. A planned receipt that is due outside the defined time interval is invalid, and master scheduling generates a new planned order. Positive days can be equated to the number of days in which you use existing inventory before creating a new fulfillment order. During this time, the item's inventory level is positive.
Coverage time fence for a master plan
At the master plan level, you can specify a coverage time fence. This way, you can specify the duration of the master planning calculation for a master plan.
To specify a coverage time fence for a specific master plan, follow these steps.
- Go to Master planning > Setup > Plans > Master plans.
- Select an existing master plan in the list or create a new master plan.
- On the Time fences in days FastTab, set the Coverage option to Yes.
- Then, in the field under the option, enter the number of days you want to use as the coverage time fence for the master plan. This setting overrides any coverage time settings that were defined for each product and coverage group.