Ask Learn
PreviewPlease sign in to use this experience.
Sign inThis browser is no longer supported.
Upgrade to Microsoft Edge to take advantage of the latest features, security updates, and technical support.
When you're writing tests, you need to consider the test's internal organization, how to run the test, how to use good test-writing patterns, and how to define under what conditions the test succeeds.
In this unit, we'll cover a few basics.
A unit test is the most basic type of test, so it's a good place to start learning. A unit test specifically tests only one method or the smallest testable unit of code.
Test methods are very much like regular methods. Test methods can accept parameters and are organized into test classes that are all a part of a test project. You can also group test classes by namespace, just like other classes.
The following code is an example of a simple test class. It first imports the unit testing framework. In this case, that's the built-in Microsoft testing framework Microsoft.VisualStudio.TestTools.UnitTesting, also known as MSTest. The second using directive refers to the calculator app that's being tested, LearnMyCalculatorApp. Then the test class is declared and within that, a test method is declared.
using Microsoft.VisualStudio.TestTools.UnitTesting;
using LearnMyCalculatorApp;

[TestClass]
public class CalculatorTests
{
    [TestMethod]
    public void CalculatorNullTest()
    {
        var calculator = new Calculator();
        Assert.IsNotNull(calculator);
    }
}
This test class is part of a test project that references the app that needs to be tested. In this case, it's the LearnMyCalculatorApp project.
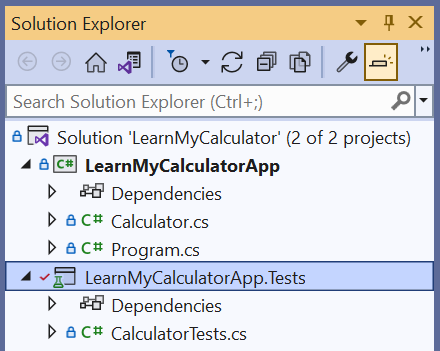
Tests reference and call your product code (that is, your non-test code). For example, let's say that you need to test an Add method in the Calculator class.
public class Calculator
{
    public int Add(int x, int y)
    {
        return x + y;
    }
}
A test for the Add method might look something like the following code.
[TestMethod]
public void AddTest()
{
    // Arrange
    var calculator = new Calculator();

    // Act
    var actual = calculator.Add(1, 1);

    // Assert
    Assert.AreEqual(2, actual);
}
You can use two approaches to add tests to your production code:
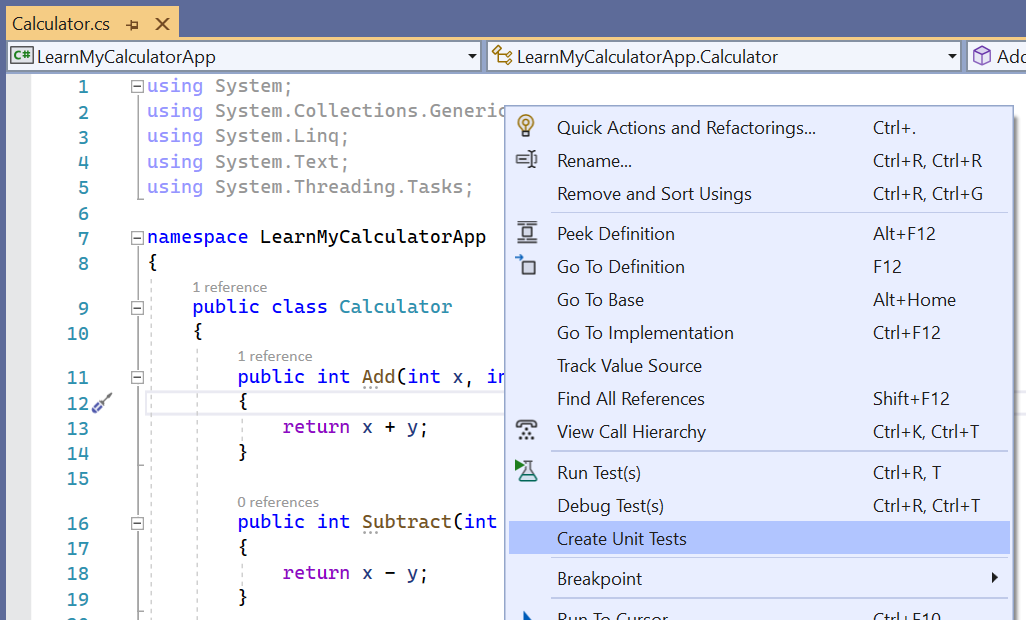
The easiest way to add a test project for testing a specific method in your code is to right-click that method and select Create Unit Tests. This option to autogenerate test methods is available for most .NET projects.
You can manually create a test project, add tests, and add the product code reference. You can do this at the command line or with Visual Studio tooling, as described in the next unit.
The three A's in the comments provide basic guidelines for your testing structure:
calculator object to call its Add method.Now that you understand the basic setup of a test and test project, the next step is running your tests. Visual Studio provides a few helpful ways to run tests from whatever context you're working in.
Right-click: You can right-click to run tests from the shortcut menu. This command will run tests according to the scope that your cursor is in. For example, if you right-click a test class and select Run Test(s), the command will run all the tests in that class. If you right-click a test namespace, the command will run all the tests in that namespace.
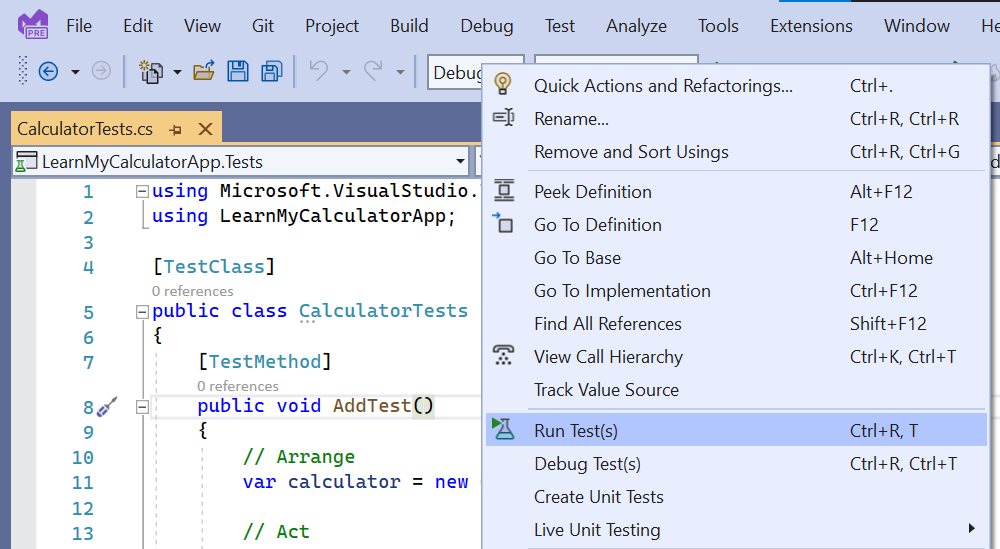
Ctrl+R, T: This keyboard shortcut will also run the tests that are currently in the context of your cursor.
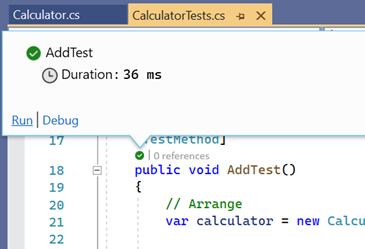
CodeLens test glyph: Optionally, the editor can show a small test glyph next to test methods. You can enable this glyph by switching on CodeLens in Tools > Options. This helpful UI provides a way to run the tests and shows the test result from inside the code editor.
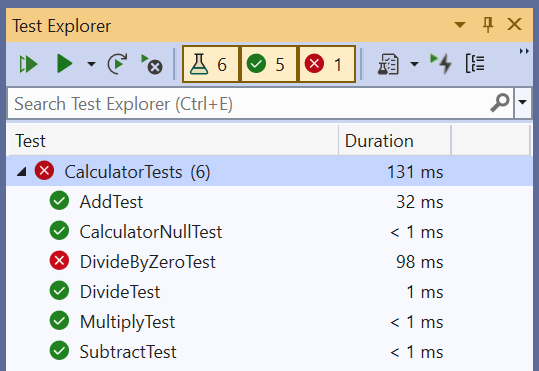
Test Explorer: When you have multiple tests, you can use Test Explorer to run, view, and organize your test suite. We'll dive into Test Explorer more later on.
We recommend the red, green, refactor pattern for testing:
When you're writing a test, it's good to see it fail at least once so that you know it can fail. A common problem is believing a test covers a certain scenario, only to find a bug in production. It's no fun to realize that your test wasn't making the right calls or never correctly asserted the expected outcome.
This pattern provides an easy guide as you get into a programming flow. If you're interested in learning more about different testing schools of thought, see Introduction to software testing concepts.
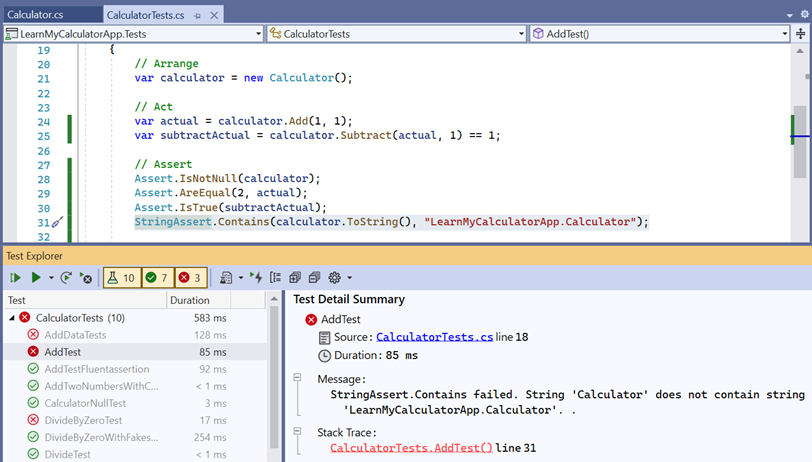
Assert statements are what determine if your test passes or fails. The different types of assertions also help clearly identify what part of the code behavior is causing the test to fail. Tests can fail for reasons besides failing the assertion criteria, such as uncaught exceptions or hitting test timeout limits.
We'll expand AddTest to include some of the most common assertions. The syntax might differ slightly across testing frameworks, but the most common assertions check for null, assert an equality, assert a condition, or check the contents of a string.
[TestMethod]
public void AddTest()
{
    // Arrange
    var calculator = new Calculator();

    // Act
    var actual = calculator.Add(1, 1);
    var subtractActual = calculator.Subtract(actual, 1) == 1;

    // Assert
    Assert.IsNotNull(calculator);
    Assert.AreEqual(2, actual);
    Assert.IsTrue(subtractActual);
    StringAssert.Contains(actual.ToString(), "2");
}
IsFalse to assert that a condition is false.Matches checks for a matching regular expression. StartsWith checks if the string begins with a specified substring.If one of these assertions fails, it helps track down what behavior is unexpected in the code. For example, if everything worked correctly with the calculator except for an overloaded ToString method, only StringAssert would fail. It would immediately bubble up what specific behavior is failing.
You can read more about the various Assert classes and explore the API in Use Assert classes for unit testing.
Having an issue? We can help!
Please sign in to use this experience.
Sign in