Exercise - Extend Viva Connections desktop with application customizers
In this exercise, you'll build a SharePoint Framework application customizer that gets data from a SharePoint list and shows it in the Viva Connections desktop experience.
Create a new solution
To start, create a solution by using the SharePoint Framework Yeoman generator:
Create a folder for your project named spfx-company-announcements-appcustomizer.
In a terminal, change the working directory to spfx-company-announcements-appcustomizer.
Run the
yo @microsoft/sharepointcommand to start scaffolding a new solution.Answer the generator's prompts:
Prompt Entry What is your solution name? spfx-company-announcements-appcustomizer Only SharePoint Online (latest) is supported. For earlier versions of SharePoint (2016 and 2019) please use the 1.12.1 version of the generator. SharePoint Online only (latest) Where do you want to place the files? Use the current folder Do you want to allow the tenant admin the choice of being able to deploy the solution to all sites immediately without running any feature deployment or adding apps in sites? No Will the components in the solution require permissions to access web APIs that are unique and not shared with other components in the tenant? No Which type of client-side component to create? Extension Which type of client-side extension to create? Application Customizer What is your Web part name? Important company announcements What is your Web part description? Shows important company announcements Wait for the project creation to finish. It might take a few minutes.
Tip
While you're waiting, you'll likely see some warnings. You can safely ignore them.
Run the
npm install @microsoft/sp-office-ui-fabric-corecommand to install the Office UI Fabric package. You'll need it to style the application customizer.
Install the development certificate
The SharePoint Framework uses a workbench hosted in SharePoint Online where you can test your code before deploying it to Viva Connections. When you test your code, you start a local web server by using Gulp. The SharePoint Framework workbench then loads files from your local server so you can test them.
To let the workbench load files from your local development server, use the following procedure to trust the development certificate from the SharePoint Framework.
Important
You need to install the development certificate only once on your machine. When you create a new project, the SharePoint Framework will use the previously installed certificate. If you've done this already, you can skip these steps.
- Open a terminal.
- Change the working directory to your project folder.
- Run the
gulp trust-dev-certcommand. - Follow the instructions on the screen to complete the installation of the certificate.
Edit the application customizer code
After you create the project, the next step is to extend the application customizer so that it loads important announcements from the list and shows them in the page's top placeholder:
Open the project in your code editor.
In the code editor, open the ./src/extensions/importantCompanyAnnouncements/ ImportantCompanyAnnouncementsApplicationCustomizer.ts file.
Extend the
@microsoft/sp-application-baseimport statement to includePlaceholderContentandPlaceholderName:import { BaseApplicationCustomizer, PlaceholderContent, PlaceholderName } from '@microsoft/sp-application-base';Add
import { SPHttpClient } from '@microsoft/sp-http';.In the
ImportantCompanyAnnouncementsApplicationCustomizerclass, add the private_topPlaceholdervariable:private _topPlaceholder: PlaceholderContent | undefined;Extend the
onInit()method with an event handler to render the placeholder:@override public onInit(): Promise<void> { this.context.placeholderProvider.changedEvent.add(this, this._renderPlaceHolders); return Promise.resolve(); }Create a new
_renderPlaceHoldersprivate method by using the following code:private _renderPlaceHolders(): void { if (!this._topPlaceholder) { this._topPlaceholder = this.context.placeholderProvider.tryCreateContent( PlaceholderName.Top ); if (!this._topPlaceholder) { console.error('The expected placeholder (Top) was not found.'); return; } this.context.spHttpClient .get(`${this.context.pageContext.web.absoluteUrl}/_api/web/lists/getByTitle('Announcements')/items?$filter=Important eq 1&$select=Title`, SPHttpClient.configurations.v1, { headers: { 'accept': 'application/json;odata.metadata=none' } }) .then(response => response.json()) .then(announcements => { const announcementsHtml = announcements.value.map(announcement => `<li>${announcement.Title}</li>`); this._topPlaceholder.domElement.innerHTML=`<div class="${styles.app}"> <ul>${announcementsHtml.join('')}</ul></div>`; }).catch(error => console.log(error)); } }The preceding code will instantiate the placeholder. It will check if the placeholder is available or not and then get important announcements from the Announcements list. Finally, it will render retrieved announcements in the placeholder's DOM element.
In the /src/extensions/importantCompanyAnnouncements folder, add a new file named ImportantCompanyAnnouncementsApplicationCustomizer.module.scss with the following contents:
@import '~@microsoft/sp-office-ui-fabric-core/dist/sass/SPFabricCore.scss';
.app {
  background-color: $ms-color-themePrimary;
  color: $ms-color-white;
  display: flex;
  font-size: 1.5em;
  justify-content: center;

  ul {
    list-style: none;
  }
}
You start with importing Fluent UI to ensure consistent styling with Microsoft 365. Next, you add CSS classes to style the application customizer.
At the top of the ImportantCompanyAnnouncementsApplicationCustomizer.ts file, add an import statement for the style file ImportantCompanyAnnouncementsApplicationCustomizer.module.scss that you created:
import styles from './ImportantCompanyAnnouncementsApplicationCustomizer.module.scss';
Test the application customizer on a page
To build and preview the application customizer for important announcements:
In a terminal, run the
gulp serve --nobrowsercommand. It starts a local web server onhttps://localhost:4321.Warning
If you see the following warning in the terminal, it means that the local web server couldn't load your development certificate:
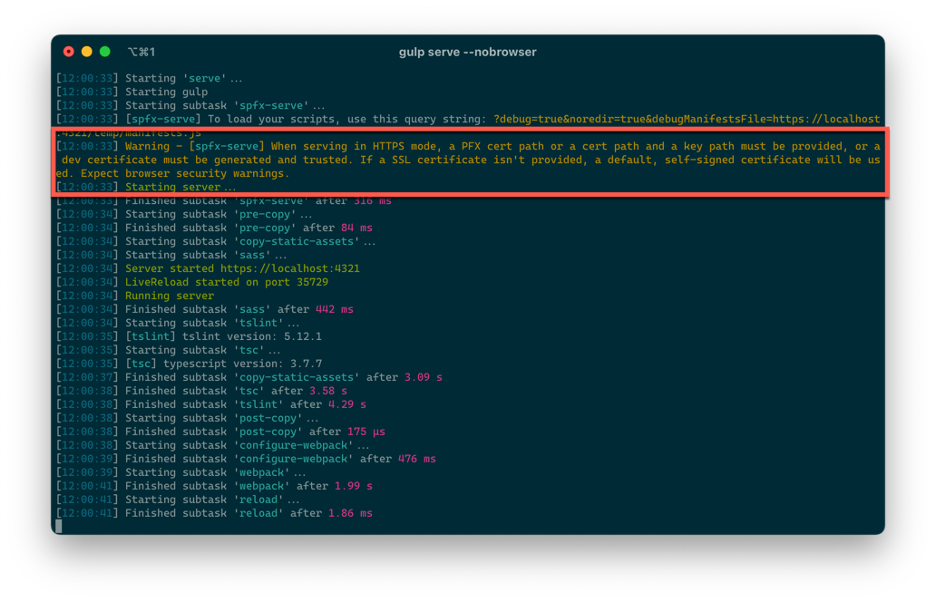
Warning - [spfx-serve] When serving in HTTPS mode, a PFX cert path or a cert path and a key path must be provided, or a dev certificate must be generated and trusted. If a SSL certificate isn't provided, a default, self-signed certificate will be used. Expect browser security warnings.
To fix this problem, stop the web server by selecting Ctrl+C and run the
gulp trust-dev-certcommand.In the code editor, open the src/extensions/importantCompanyAnnouncements/ImportantCompanyAnnouncementsApplicationCustomizer.manifest.json file and copy the
idvalue. You'll need this value to create the page debug URL to test the local version of the application customizer.In a web browser, go to the page debug URL at
<Home site URL>/SitePages/home.aspx?debugManifestsFile=https://localhost:4321/temp/manifests.js&loadSPFX=true&customActions={"<id>":{"location":"ClientSideExtension.ApplicationCustomizer","properties":{ }}}. Replace<id>with the value that you copied from the application customizer's manifest.Tip
The home site URL is the URL of the SharePoint site where you created the Announcements list in the previous exercise.
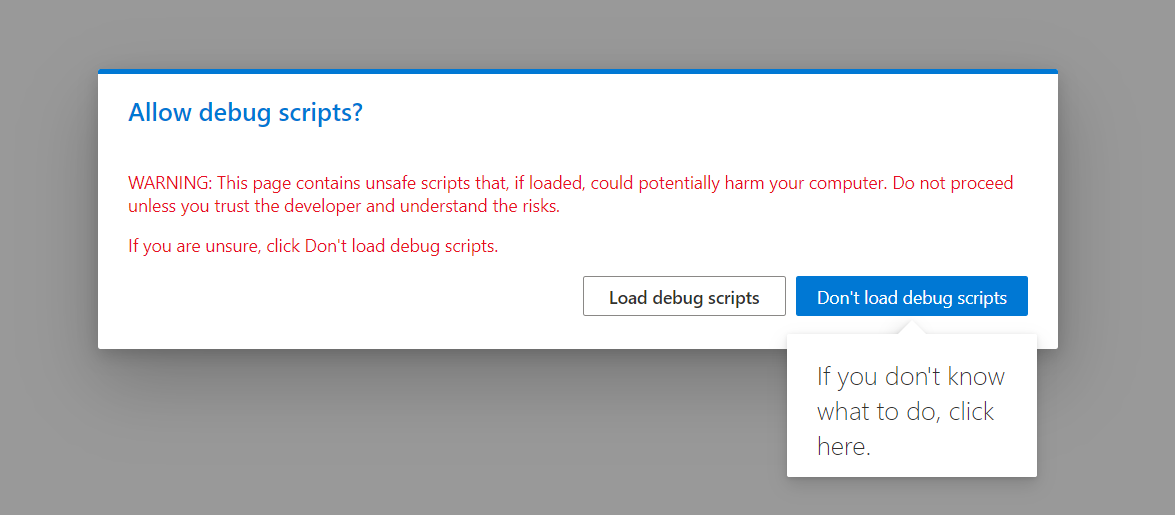
When you're prompted, select the Load debug scripts button to continue loading the application customizer.
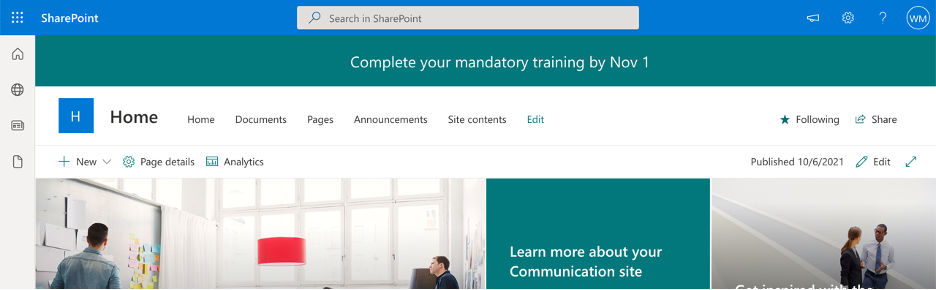
Important announcements now appear on top of the page.
To stop testing:
To disable the page debug mode, go to
<Home site URL>/SitePages/home.aspx?reset=true.Important
If you don't disable the debug mode and only stop the local web server, the next time you go to the home site, you'll see an error stating that the page can't load manifests from the local web server. To fix that problem, add
?reset=trueto the page URL, which will disable the debug mode.To stop the development web server, go back to the terminal and select Ctrl+C.
Deploy the application customizer to Viva Connections
You've built the Important announcements application customizer by using the SharePoint Framework. Now, deploy it to Viva Connections.
Package the web part into an app by using Gulp:
- Go to a terminal where the working directory is the root folder of the project.
- To build the solution in release mode, run the
gulp bundle --shipcommand. - To make a release mode package of the solution, run the
gulp package-solution --shipcommand. It will create the ./sharepoint/solution/spfx-company-announcements-appcustomizer.sppkg app package file.
Next, you'll deploy the app package into the SharePoint app catalog. If you don't have an app catalog in your tenant, create it now:
In a web browser, go to the Microsoft 365 admin center.
From the side menu, select Show all.
From the Admin centers list, select SharePoint.
In the SharePoint admin center, from the side menu, select More features.
From the Apps section, select the Open button to go to the Apps admin page.
Under Apps, select App Catalog.
If the site opens, you already have an app catalog and you can skip further steps.
If the app catalog doesn't exist, you're prompted to create one.
From the list of options, select Automatically create a new app catalog site, and then select OK.
Deploy your application to the app catalog:
In a web browser, go to the SharePoint app catalog.
From the side menu in the catalog, select Apps for SharePoint.
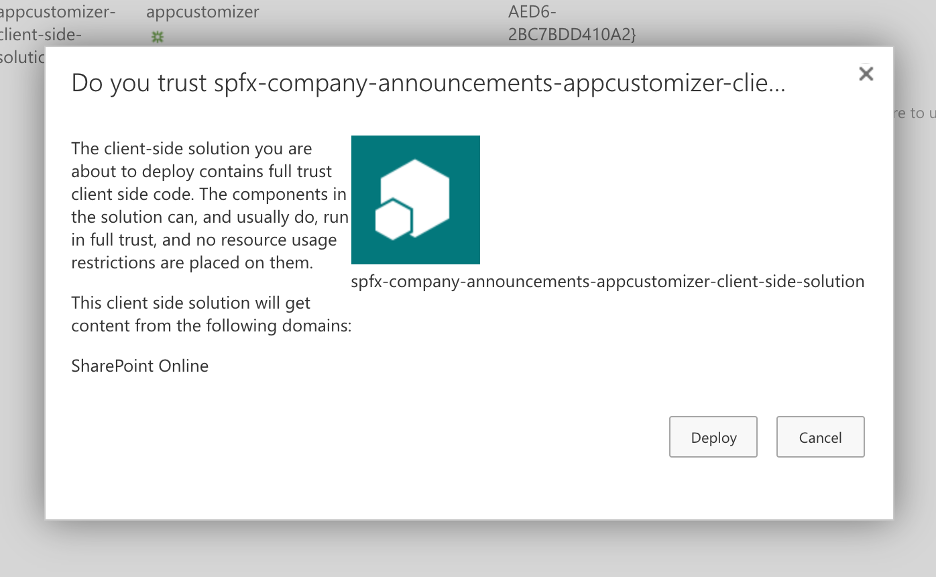
Drag the spfx-company-announcements-appcustomizer.sppkg file into the list.
SharePoint asks you to confirm and deploy the package. Select Deploy to make the package available to install on SharePoint sites.
After the app is successfully deployed in the app catalog, you need to install it on your Home site:
- In a web browser, go to the home site.
- From the top menu, select the Settings (gear) icon.
- From the SharePoint section, select the Add an app link.
- In the search box on the My Apps page, type Company and find the spfx-company-announcements-appcustomizer-client-side-solution app.
- Select the Add button.
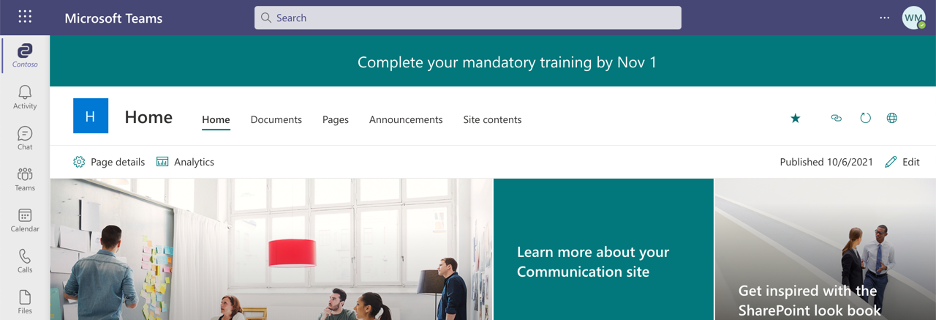
The Important company announcements application customizer is now visible on all SharePoint pages on the home site. Test the app to see how it looks in Viva Connections:
Open the Microsoft Teams desktop client, or go to the Teams site in a web browser.
Open on the Viva Connections app and confirm that the Important company announcements banner appears on top of the home site's home page.