Azure Batch node gets stuck in the Unusable state because of configuration issues
Azure Batch might set the state of a Batch node to Unusable for any of several reasons. You can't schedule tasks to a node in the Unusable state, but it still incurs charges. In most cases, the Batch service tries to recover the node. However, if the Unusable state is caused by a configuration issue, the node can't be recovered. This article discusses some common configuration issues that cause nodes to become unusable, and provides solutions.
Issue 1: Virtual network configuration issues
This section discusses the virtual network (VNet) configuration issues in both classic and simplified node communication modes.
Classic node communication
The classic node communication mode is the original communication way for a pool that's associated with a subnet of a VNet. This feature will be replaced with the simplified communication node mode in 2026.
In a pool that's associated with a subnet of a VNet, all nodes are in the Unusable state. But there's no error code on the nodes.
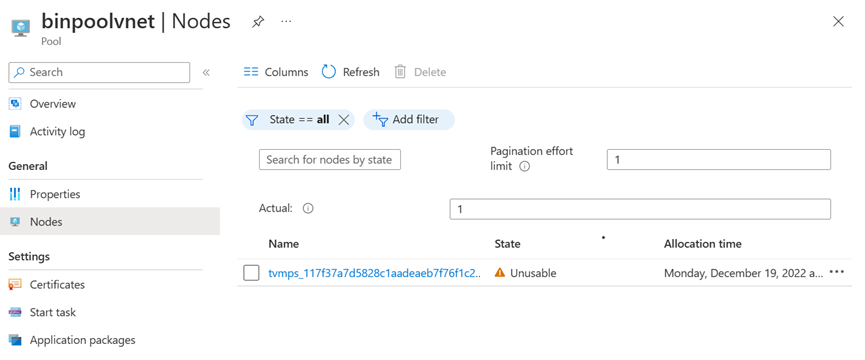
The preceding symptom means that the Batch service is unable to communicate with the nodes. In most cases, it's caused by VNet configuration issues. The following sections describe the two most common causes.
Cause 1: Missing required network security group (NSG) rules
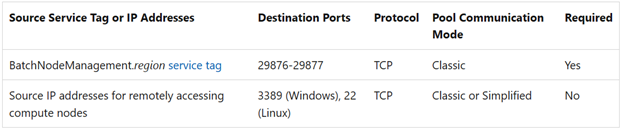
If an NSG is configured in the subnet, you must configure this NSG to have at least the inbound and outbound security rules (as shown in the following screenshot) so that the Batch service can communicate with the nodes. If the communication to the nodes in the specified subnet is denied by the NSG, the Batch service will set the state of the nodes to Unusable.
Inbound security rules
Outbound security rules

Solution 1: Configure NSG to have the required inbound and outbound security rules
To resolve this issue, configure the NSG to have the required inbound and outbound security rules, as recommended in Network security groups for Virtual Machine Configuration pools: Specifying subnet-level rules.
To perform the configuration, follow these steps:
Navigate to the pool from the Azure portal.
Check the pool properties to obtain the VNet and subnet names.

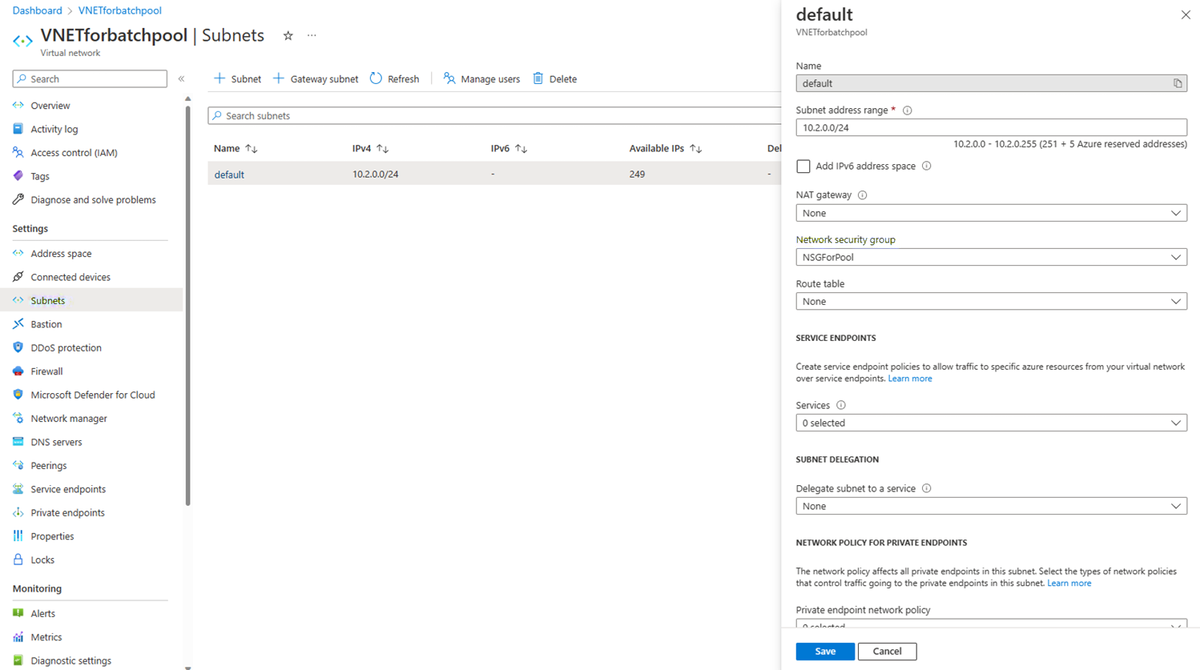
Navigate to the VNet. On the VNet page, select Settings > Subnets. In the list of subnets, select the expected subnet. In the subnet pane, locate the NSG.
Navigate to the NSG. Check the configuration on the NSG page.

Configure this NSG to have the required inbound and outbound security rules.
Restart the node to return it to the default state.


Cause 2: Missing required user-defined routes (UDR)
If the VNet to which the pool is associated enables forced tunneling, you must add a UDR that corresponds to the BatchNodeManagement.<region> service tag in the region where your Batch account exists. Otherwise, the traffic between the Batch service and the nodes is blocked, and the compute nodes become unusable.
Solution 2: Add UDR corresponding to BatchNodeManagement.<region> service tag
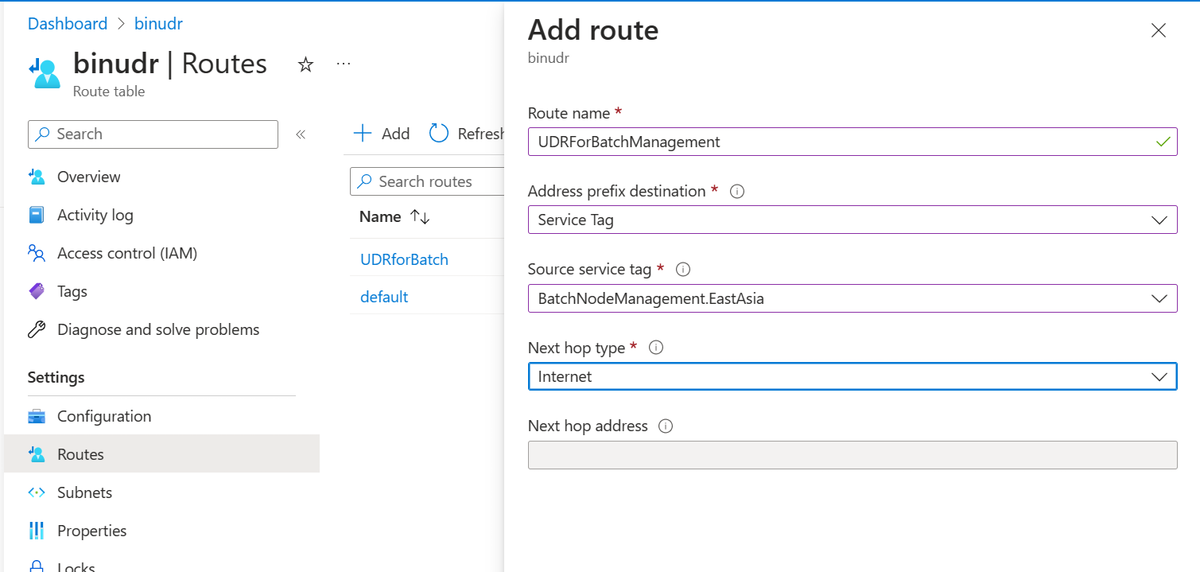
To resolve this issue, add a UDR that corresponds to the BatchNodeManagement.<region> service tag in the region in which your Batch account exists. Then, set the Next hop type to Internet. For more information, see User-defined routes for forced tunneling.
To do this, follow these steps:
Navigate to the pool from the Azure portal.
Check the pool properties to obtain the VNet and subnet names.
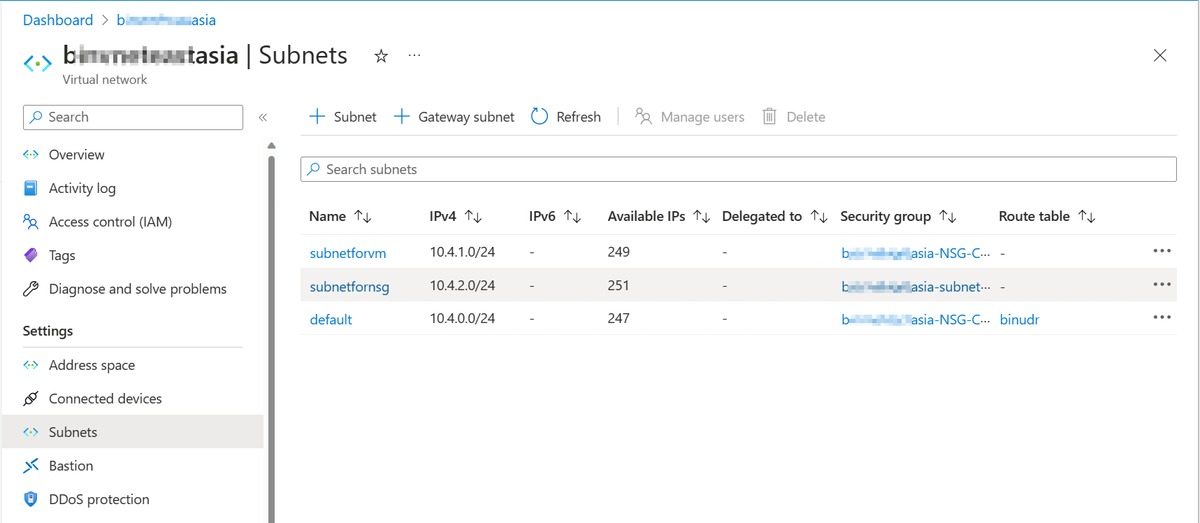
Navigate to the VNet. On the VNet page, select Settings > Subnets. In the list of subnets, select the route table that's associated with the expected subnet.
On the root table page, select Routes > Add. In the Add route pane, add the required UDR, and then set the Next hop type to Internet.
Restart the node to return it to the default state.
Simplified node communication
Using the simplified node communication mode can simplify the VNet configuration in a pool. If the nodes in a pool that uses the simplified node communication mode show the Unusable state, check the following possible causes and solutions for self-troubleshooting.
Cause 1: Missing outbound NSG rules
When applying a VNet, you must configure the outbound request from the internal node to the external correctly. Otherwise, the node will become unusable.
Solution 1: Add an outbound service tag BatchNodeManagement.<region>
To resolve this issue, add the BatchNodeManagement.<region> service tag in the outbound NSG rule.

For more information, see Outbound security rules.
Cause 2: Missing outbound access for Batch node management
This cause only applies to the scenario where the Batch pool doesn't have public IP addresses. By default, all the nodes in an Azure Batch virtual machine configuration pool are assigned public IP addresses. However, users may provision the pool without public IP addresses to restrict access to these nodes and reduce the discoverability of these nodes on the internet. A pool with no public IP addresses doesn't have internet outbound access enabled by default, leading to network communication issues between Batch nodes and the Batch node management service.
Solution 2: Configure a node management private endpoint
Check your network settings by navigating to your Batch account and selecting Settings > Networking. If the Selected network or Disable option is enabled, but you only configure a batchAcount private endpoint or don't configure any private endpoint, configure a nodeManagement private endpoint to ensure the internal communication between nodes.
Cause 3: A bad DNS configuration prevents the node from communicating with the node management endpoint
If the DNS isn't configured correctly, the nodes might be unable to communicate with the Batch service endpoint. This situation causes the Batch nodes to become stuck in an unusable state.
Note
This scenario is for batch pools that enable a node management private endpoint. Usually these pools have simplified node communication and don't use public IP addresses.
Solution 3: Fix the DNS configuration
Check whether DNS name resolution works correctly, and fix the DNS configuration if necessary. The correct process to verify the DNS configuration depends on whether you created the node management private endpoint by using an automatic private DNS integration or a custom DNS configuration.
Procedure for automatic private DNS integration
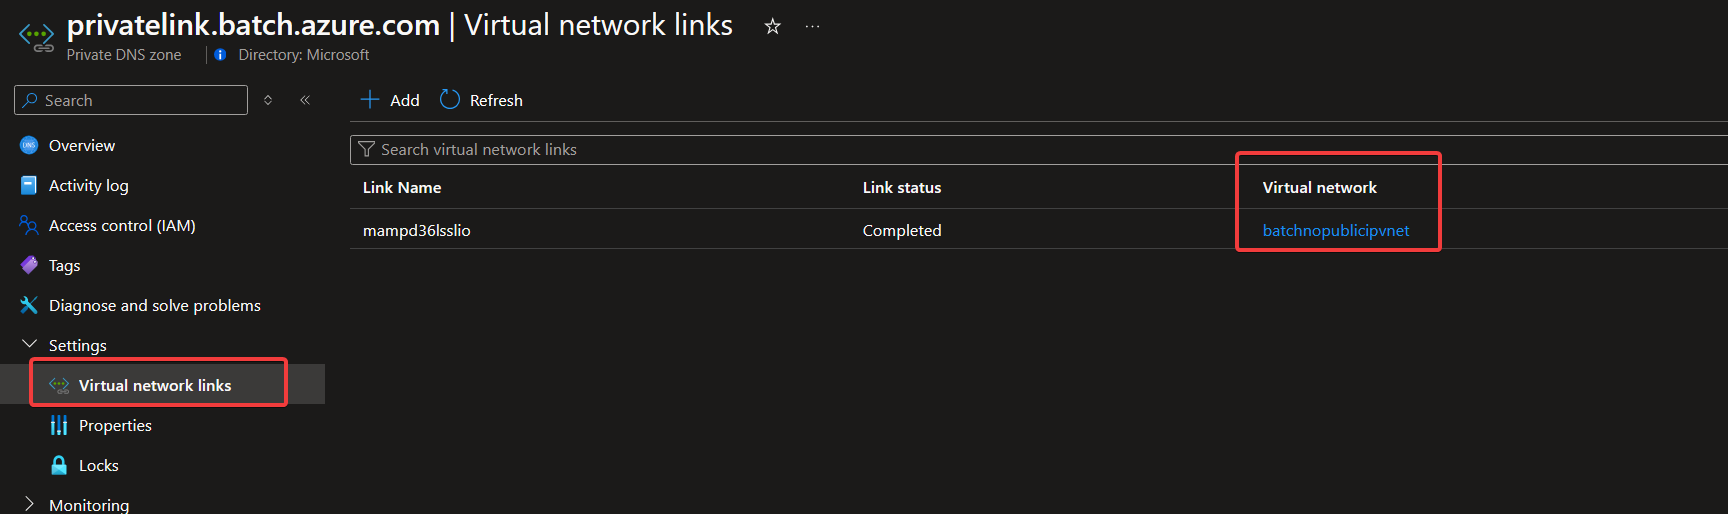
Verify that the automatic private DNS integration is configured correctly by following these steps:Make sure that the private endpoint is integrated into the private DNS zone
privatelink.batch.azure.com.
Make sure that this private DNS zone is linked to the same or peered VNet that the batch pool uses.


Procedure for custom DNS configuration
Verify whether the custom DNS is configured correctly and points to the private endpoint IP address by following these steps:In the Azure portal, search for and select Batch accounts.
In the list of Batch accounts, select the name of your Batch account.
In the Overview page of your Batch account, locate the Essentials section, and then copy the value in the Node management endpoint field. (This value is usually a URL that has the following format:
<guid>.<region>.service.batch.azure.com.)
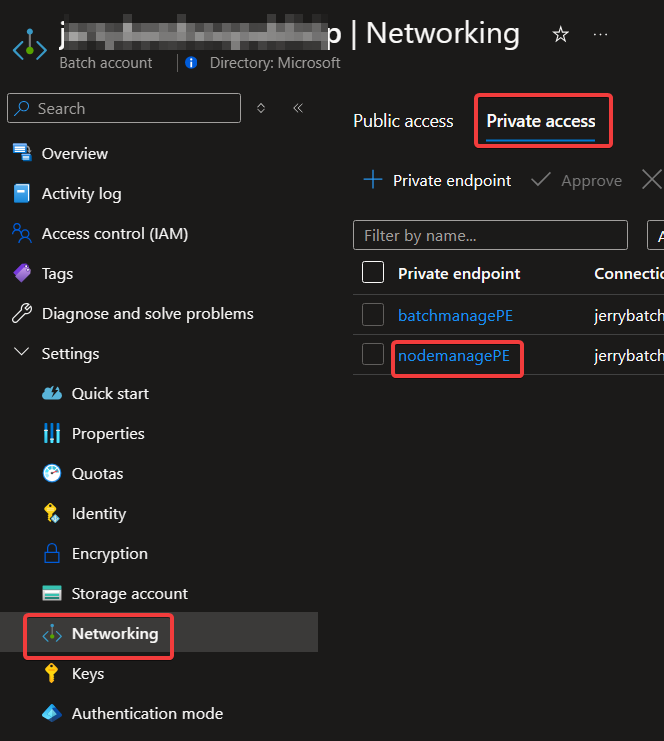
In the navigation pane of the Batch account, locate the Settings heading, and then select Networking. In the Networking page, select the Private access tab, and then in the list of private endpoints, select the node management private endpoint.
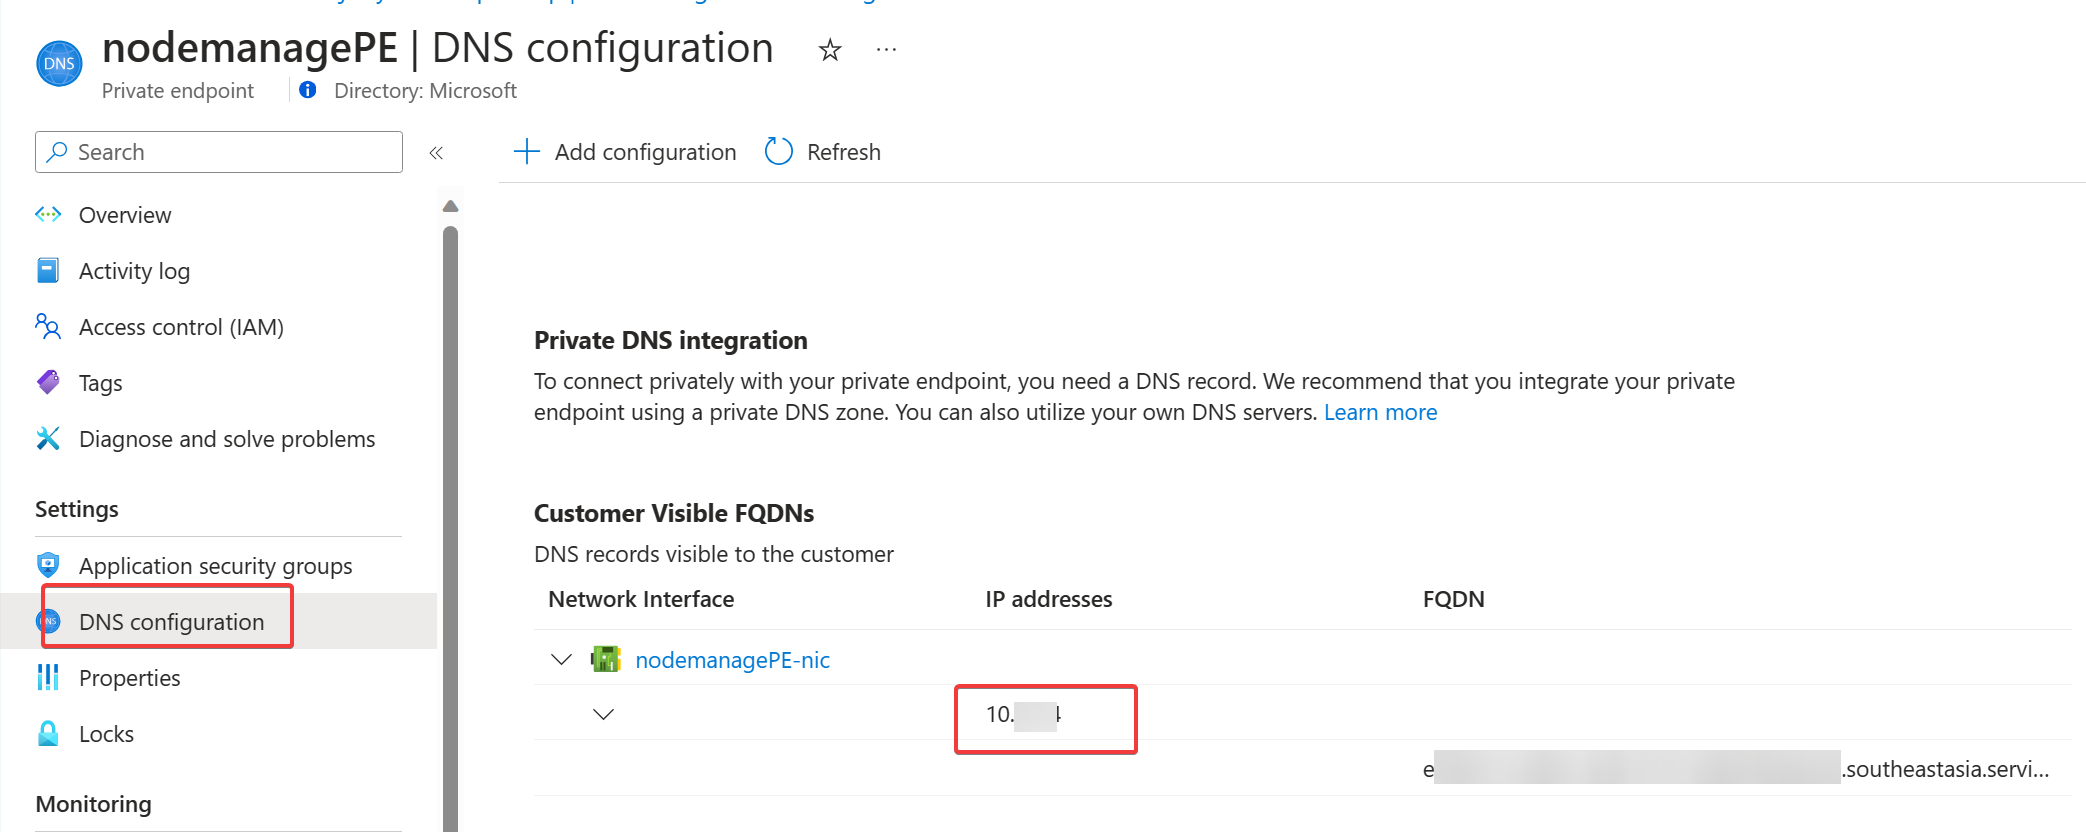
In the navigation pane of the private endpoint, locate the Settings heading, and then select DNS configuration. In the DNS configuration page, locate the Customer Visible FQDNs section, and then copy the value in the IP addresses column for the network interface of your node management private endpoint.
Create a Batch node or a virtual machine (VM) inside the same subnet in which the pool is created. Then, connect to the VM and open a PowerShell console (in Windows) or a Shell console (in Linux).
Test the DNS name resolution by running the following nslookup command. (In Windows, nslookup is installed by default. In Linux, install nslookup or use other tools.)
nslookup <node-management-endpoint-url>The expected result is the same as for the private IP address of node management private endpoint:
PS C:\Users\xxx> nslookup <node-management-endpoint-url>
Server:  UnKnown
Address:  x.x.x.x

Name:     <node-management-endpoint-url>
Address:  <private-ipnode-management-endpoint-private-ip>
Aliases:  <node-management-endpoint-url>
Test the connectivity to the node management endpoint URL on port 443. To do this, run the Test-NetConnection cmdlet in Windows, or run the Netcat (
nc) command in Linux.Test-NetConnection -ComputerName <node-management-endpoint-url> -Port 443nc -v <node-management-endpoint-url> 443The expected result is a successful connection, as shown in the following example output:
PS C:\Users\xxx> Test-NetConnection -ComputerName <node-management-endpoint-url> -Port 443

ComputerName     : <node-management-endpoint-url>
RemoteAddress    : <private-ipnode-management-endpoint-private-ip>
RemotePort       : 443
InterfaceAlias   : Ethernet
SourceAddress    : <vm-private-ip>
TcpTestSucceeded : True
If you encounter any issues after you try the previous two steps, apply the troubleshooting guidance in the following table.
Issue scenario Troubleshooting guidance The result of the nslookup command isn't as expected. Check the custom DNS setting of the VNet of the batch pool. Values to verify include the following items: - The private DNS zone name
- The custom DNS server
- Any other services or components that might affect the DNS name resolution
The result of the nslookup command is expected, but the result of the Test-NetConnectioncmdlet ornccommand is unexpected.Check whether any service exists (such as Network Security Group and Firewall) that can block the outgoing connectivity from the VNet.


For more information, see Troubleshoot node management private endpoints.
Issue 2: Disk full issue
A node is in the Unusable state, and the following error message appears on the node:
Code: DiskFull
Message:
There is not enough disk space on the node
Values:
Message - The VM disk is full. Delete job, tasks, or file on the node to free up spaces and then restart the node.

Cause: Not enough disk space on the node
When a job runs on the node, each task in the job can produce output data. This output data is written to the file system of the Batch node. When this data reaches more than 90 percent capacity of the disk size of the node SKU, the Batch service marks the node as unusable and blocks the node from running any other tasks until the Batch service does a cleanup.
The Batch node agent reserves 10 percent capacity of the disk space for its functionality. Before any tasks are scheduled to run, depending on the capacity of the Batch node, it's essential to keep enough space on the disk. For best practices to follow when you design the tasks, see Tasks.
Solution: Clear files in task folders
To resolve the issue, follow these steps:
Connect to the node by using RDP.
Check the space that's available on the disk.
If there isn't enough available space on the disk, go to step 3.
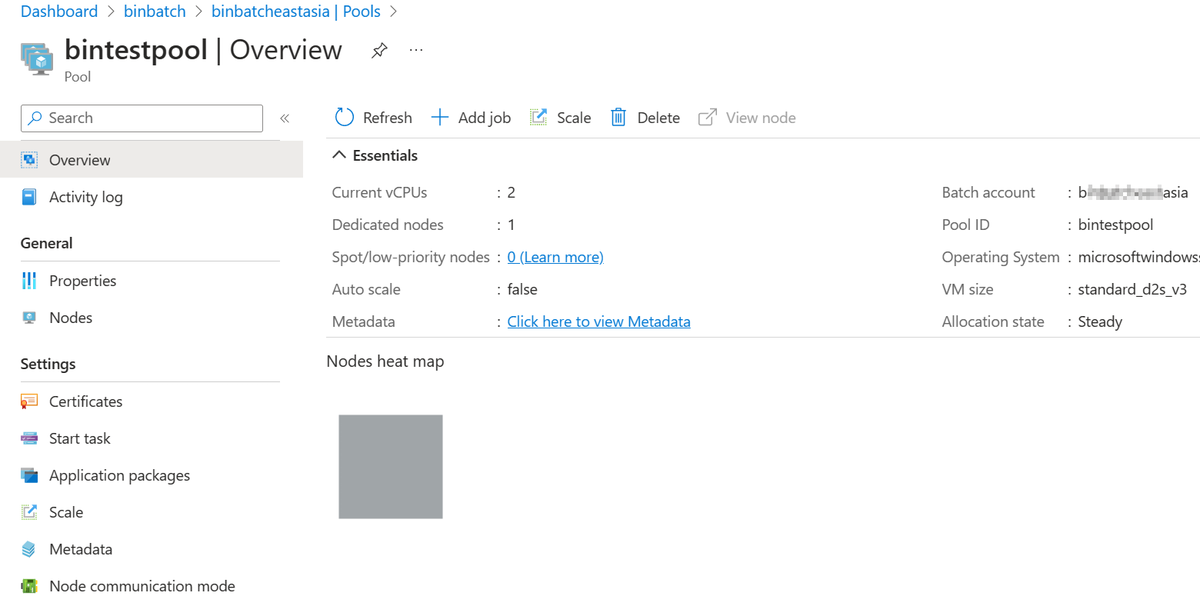
The following example shows that there isn't enough available space on the disk. In this example, the VM SKU for Windows and Linux is Standard_D2s_V3, and the disk size is 16 Gigabytes (GB).
For Windows, the following screenshot shows that less than 1 GB of space is available on the disk.
Note
For Windows, you can also use File Explorer to check the disk space.
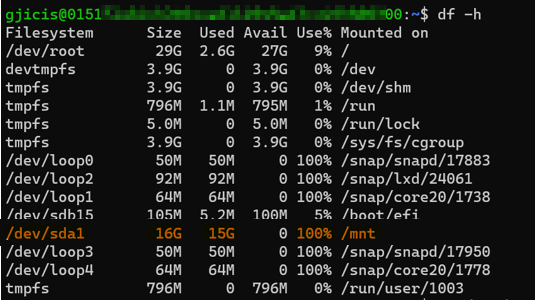
For Linux, the following screenshot shows that 100 percent of the mounted disk is utilized.
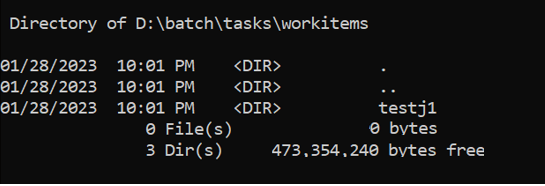
Task related files on Linux are located under
./mnt/batch/tasks/workitems/.If enough disk space is available for the tasks to run, but the node is unusable, the Batch service might have cleaned up the files based on the retention policy of the task. In this case, go to step 4.
Navigate to each task folder and clear the files.
After the files are cleared, restart the node.
After the node is restarted, the node should be in a healthy state and can accept new tasks.
Issue 3: Custom image configuration issue
Sometimes, custom image configuration issues (such as incorrect preparation) can damage nodes. Custom images use a wide range of variables that can cause nodes to be unusable.
For example, a Batch node is in the Unusable or Starting state, and the following error code appears on the node:
Code:
BatchAgentInstallationFailure
Message:
The batch agent extension provisioning has failed on compute node

Cause: Custom image OS SKU differs from OS SKU selected during pool creation
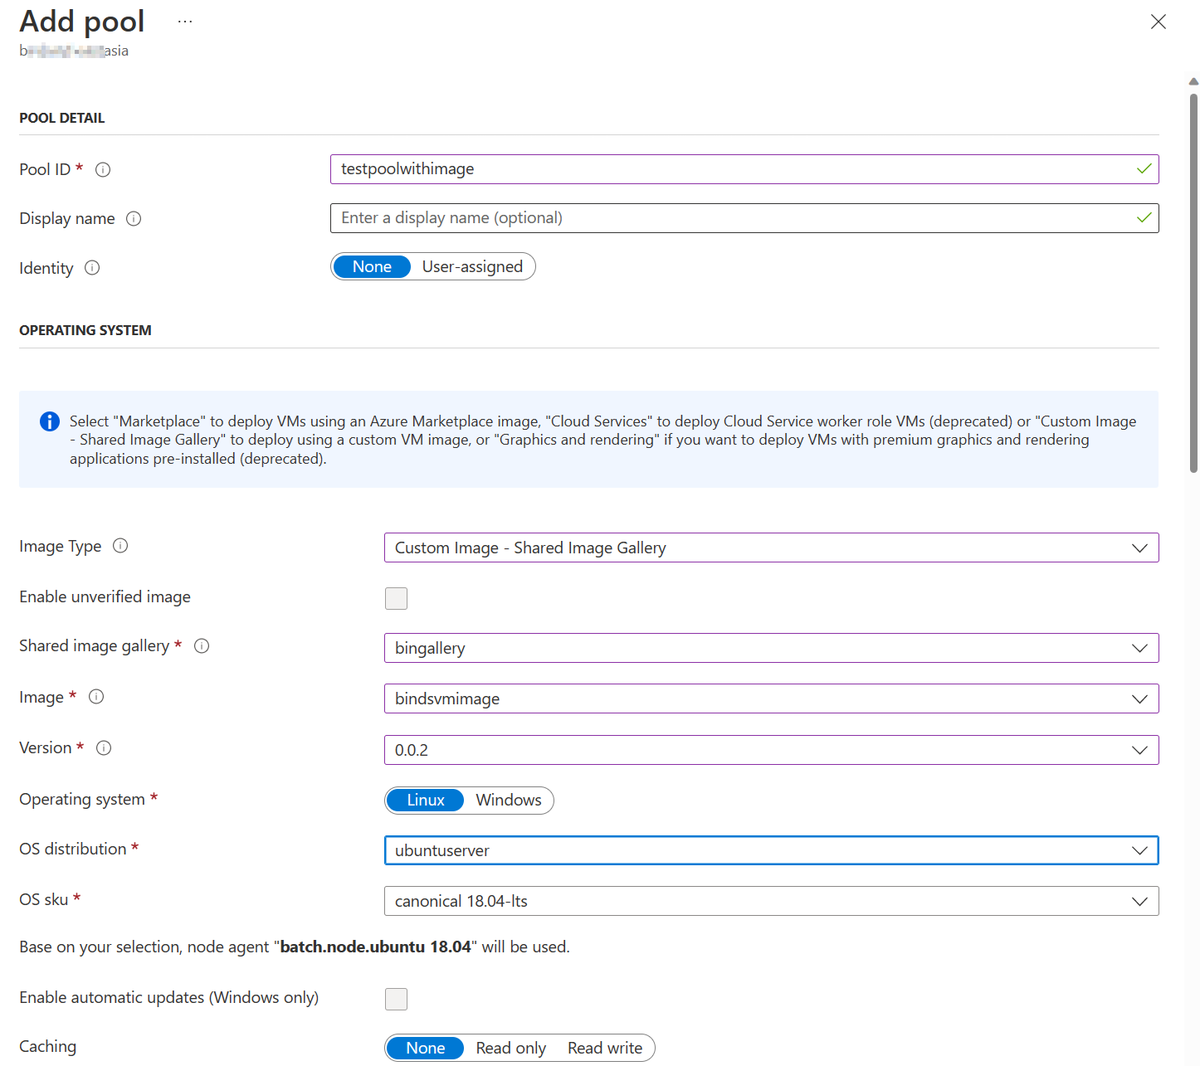
When you create an Azure Batch pool through the Azure portal, and you set Image Type to Custom Image – Shared Image Gallery, the Azure portal doesn't run the OS SKU validation. If you select an OS SKU that differs from the actual OS SKU that's used in the custom image, Azure Batch installs the Batch Node Agent that matches the selected OS SKU instead of the actual OS SKU that's used in the custom image.
In the following screenshot, the custom image is based on Canonical's Ubuntu 20 Azure Marketplace image. When you set the OS sku, the Azure Batch doesn't run the validation.
Solution: Re-create the pool that has the custom image OS SKU
To resolve this issue, re-create the pool to have the OS SKU that's used in the custom image.
For more information about how to create a custom image, see the following articles:
- Use the Azure Compute Gallery to create a custom image pool
- Remove machine specific information by generalizing a VM before creating an image
Issue 4: Managed identity configuration issue
If the authentication mode of the linked Azure Storage account (also called auto-storage account) is set to Batch Account Managed Identity (as shown in the following screenshot), the wrong configuration on the pool identity causes nodes to become unusable. For more information, see Behavior scenarios.

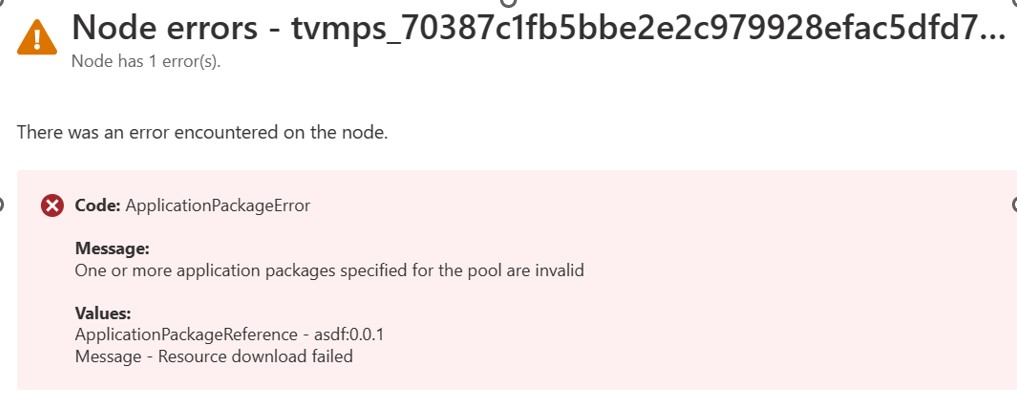
A Batch node is in the Unusable state, and the following error code appears on the node:
Code: ApplicationPackageError
Message:
One or more application packages specified for the pool are invalid
Values:
ApplicationPackageReference - asdf:0.0.1
Message - Resource download failed
Cause: Managed identity defined in node identity reference isn't added to pool identity
When you create the pool, you can specify multiple managed identities. If the managed identity defined in the node identity reference (configured in the auto-storage account) isn't added to the pool identity, nodes can't use the correct managed identity for authentication. This causes the application package download process to fail and the node to become unusable.
Solution: Re-create the pool to correct the managed identity
To resolve this issue, re-create the pool to include the correct managed identity (configured in the auto-storage account) that's defined in the node identity reference. For more information about how to use Batch pool-managed identity, see Set up managed identity in your batch pool.
Contact us for help
If you have questions or need help, create a support request, or ask Azure community support. You can also submit product feedback to Azure feedback community.
Feedback
Coming soon: Throughout 2024 we will be phasing out GitHub Issues as the feedback mechanism for content and replacing it with a new feedback system. For more information see: https://aka.ms/ContentUserFeedback.
Submit and view feedback for