Note
Access to this page requires authorization. You can try signing in or changing directories.
Access to this page requires authorization. You can try changing directories.
This article describes how to resolve an Azure batch pool creation failure.
Scenario 1: Batch account public network access-related issue
When you create an Azure Batch account, one of the following three options can be selected for the Public network access:
- All networks
- Selected networks
- Disabled

Depending on the selected option, you may come across issues at the Batch pool creation.
Symptom 1 for Scenario 1
When you select the Image Type during the Batch pool creation, you may encounter the following error message:
Failed to retrieve supported OS image information
code : AuthorizationFailure message : This request is not authorized to perform this operation. RequestId:22b29112-fd1b-4376-bbd9-8036aa722e43 Time:2022-10-24T04:17:03.5602162Z
Cause 1: Public network access is disabled, but Batch account doesn't have private endpoint
You create a Batch account with the Public network access set to Disabled. This setting makes access from the public network be removed. If the Batch account doesn't have a private endpoint, the connection to the Batch account will be restricted.
Solution 1: Create private endpoint for Batch account
Create a private endpoint for the Batch account. By enabling a private endpoint, you're bringing the Batch account into the virtual network of the private endpoint. Access from the virtual network will be available.
Create a virtual machine (VM) in the same virtual network as the Batch account private endpoint where you won't see the error during the pool creation.
Cause 2: Public access is only allowed from selected networks, but IP addresses aren't specified
You create a Batch account with the Public network access set to Selected networks. This setting makes the Batch account accessible only from the specified IP addresses. However, the specified IP addresses aren't added.
Solution 2: Add specified IP addresses
To resolve the issue, add the IP addresses from which you would like to access the Batch account.
See the following screenshot as an example:

Symptom 2 for Scenario 1
Consider the following scenario:
- You create a new Batch account with Public network access set to Disabled.
- The Batch account has a private endpoint.
- You access the Batch account from within the virtual network of the Batch account private endpoint.
In this scenario, you may get the following error message:
Failed to retrieve supported OS image information
An error was encountered when sending your request, please make sure your network/DNS/firewall/proxy is configured correctly to not block rest api calls to Batch service. Error details: {"readyState":0,"status":0,"statusText":"error"}
Cause: No DNS record
The creation of the private endpoint will assign a private IP address from the selected virtual network. To connect privately with your private endpoint, you need a DNS record.
Solution: Configure private DNS zone for private endpoint
In this section, assume that the Batch account endpoint is "testbatchdoc.eastus2.batch.azure.com".

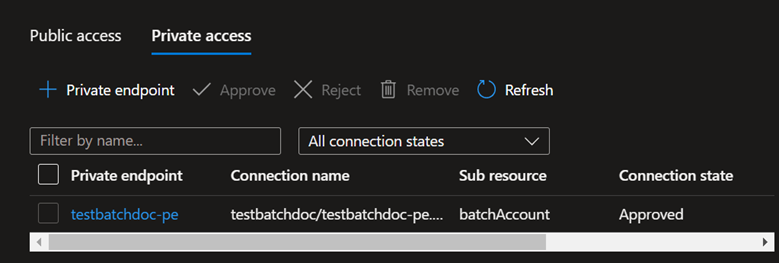
Check if the Batch account endpoint FQDN resolves to the private IP address.
Select the private endpoint.

Navigate to the DNS configuration of the private endpoint and find the private IP address of the FQDN "testbatchdoc.eastus2.batch.azure.com".

From a VM within the same virtual network as the Batch account, run the following PowerShell command to resolve the FQDN:
nslookup testbatchdoc.eastus2.batch.azure.comHere's a command output example:

The command output indicates that the FQDN doesn't resolve to the private IP address 10.2.0.15. It means that no private DNS zone is configured for the private endpoint.
Configure a private DNS zone in the private endpoint DNS configuration.

Once the private DNS zone "eastus2.privatelink.batch.azure.com" is configured, select it or search it, and check if the record set "testbatchdoc" is added for the FQDN.

Run the
nslookup <FQDN>command.Here's a command output example.

The command output indicates that the FQDN is resolved to the private IP address. Now, the Batch connectivity for the pool creation should be allowed.


Scenario 2: Batch pool virtual network-related issue
Symptom for Scenario 2
When you create a Batch pool with a virtual network, the operation fails immediately. The following error message appears in the activity log or in the notification, which indicates a subnet setting issue:
InvalidPropertyValue: The value provided for one of the properties in the request body is invalid.
RequestId:6886b8ad-3c3d-4de5-adc8-f0d10795939c Time:0000-00-00T00:00:00.Z
PropertyName: subnetId
PropertyValue: /subscriptions//<subscription-id>/resourceGroups/<resource-group-name>/providers/Microsoft.Network/virtualNetworks/<virtualnetwork-name>/subnets/<subnet-name>
Reason: The specified subnet '<subnet-name>' has PrivateLinkServiceNetworkPolicies or PrivateEndpointNetworkPolicies enabled, please disable them to provision NoPublicAddresses Pool
PropertyPath: properties.networkConfiguration.subnetId
Cause: Private endpoint network policy is enabled
The subnet you're using has the Private endpoint network policy set to Enabled. This network policy prevents the pool creation operations from being completed.
Solution: Disable Private endpoint network policy
To resolve this issue, before you create the Batch pool, disable the Private endpoint network policy by using the Azure portal, PowerShell, Azure CLI, or Azure Resource Manager Template in the subnet.
For more information, see Disable network policies for Azure Private Link service source IP address.
Scenario 3: Azure Policy-related issue
Symptom for Scenario 3
When you create a new Batch pool without data disk encryption (Disk Encryption Configuration is set to None), the operation fails immediately.

The following error message appears in the notification or the activity log:

Cause: Azure policy blocks Batch pool creation
There's a built-in policy called "Azure Batch pools should have disk encryption enabled." It has a policy assignment that denies the creation of a new Batch pool that doesn't have disk encryption.
The pool creation may be blocked by other Azure policies, and the error message would be similar to the one in the activity log or the notification.
Solution: Modify policy or enable disk encryption for the Batch pool
To resolve this issue, modify your policy or enable disk encryption for the Batch pool.
Here are the steps to modify a policy:
Go to the Azure Policy portal.
Find the assignment "Azure Batch pools should have disk encryption enabled."
Modify the assignment effect or delete it.
To modify the assignment effect, follow these steps:
- Select Edit.
- Under Parameters, change the effect from Deny to Audit.
Scenario 4: Feature not supported issue
Symptom for Scenario 4
When you create a Batch pool without public IP addresses, the following message prompts out. It informs you that the Batch pool creation failed due to the "NoPublicIPAddress" feature being disabled.

You also can see the same error in the activity log:

Cause: Batch account's region doesn't support pools without public IP addresses
Support for pools without public IP addresses in Azure Batch is currently in public preview for the following regions: France Central, East Asia, West Central US, South Central US, West US 2, East US, North Europe, East US 2, Central US, West Europe, North Central US, West US, Australia East, Japan East, and Japan West.
If your Batch account isn't located in those regions, when you create the Batch pool without public IP addresses, you'll encounter the "FeatureDisabled" error.
For more information, see Create an Azure Batch pool without public IP addresses (preview).
Solution 1: Create Batch account in a region that supports pools without public IP addresses
To use a Batch pool without public IP addresses, create a Batch account located in the following regions: France Central, East Asia, West Central US, South Central US, West US 2, East US, North Europe, East US 2, Central US, West Europe, North Central US, West US, Australia East, Japan East, and Japan West.
Solution 2: Enable simplified compute node communication
If your Batch account is located in the following regions, to use the pool without public IP addresses, raise a support ticket to enable the simplified compute node communication:
- Public: Central US EUAP, East US 2 EUAP, West Central US, North Central US, South Central US, East US, East US 2, West US 2, West US, Central US, West US 3, East Asia, South East Asia, Australia East, Australia Southeast, Brazil Southeast, Brazil South, Canada Central, Canada East, North Europe, West Europe, Central India, South India, Japan East, Japan West, Korea Central, Korea South, Sweden Central, Sweden South, Switzerland North, Switzerland West, UK West, UK South, UAE North, France Central, Germany West Central, Norway East, and South Africa North.
- Government: USGov Arizona, USGov Virginia, and USGov Texas.
- China: China North 3.
Once you enable the simplified compute node communication, create a simplified compute node communication pool without public IP addresses. It will have the same functionalities as the pool without public IP addresses, but the simplified compute node communication can support more regions.
Contact us for help
If you have questions, you can ask Azure community support. You can also submit product feedback to Azure feedback community.