Lab 4.2 Analyze core dump files on another machine - Using WSL to open core dump files
Applies to: .NET Core 2.1, .NET Core 3.1, .NET 5
This article discusses how to use Windows Subsystem for Linux (WSL) version 2 to open a core dump file on another virtual machine (VM).
Prerequisites
To be able to follow along and complete this section, you should have the following:
- A Windows 10-based computer to enable Windows Subsystem for Linux.
- At least one core dump file that's copied to your Windows-based computer in any folder.
Goal of this lab
You'll learn how to open a core dump file on another VM by using WSL version 2.
Use Windows Subsystem for Linux
WSL lets developers run a GNU/Linux environment directly on Windows without the overhead of a traditional VM or dual-boot setup.
To enable WSL, go to Windows Server Installation Guide, and then upgrade to WSL2. This lab assumes that you have chosen the same Ubuntu 18.04 LTS as previously as your Linux operating system. The system will be run by using WSL2.
After you install WSL2, update the package manager by using the sudo apt update and sudo apt upgrade commands. You should be familiar with these commands from the earlier sections of this series when you installed the Linux VM the first time.
sudo apt update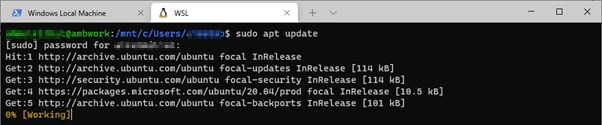
sudo apt upgrade
Copy files from Windows to Linux
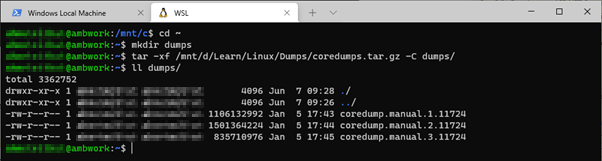
You should now have WSL2 running inside your Windows-based computer. In the previous section, you copied core dump files from the D:\Learn\Linux\Dumps folder on your Windows-based computer, and the file name was assumed to be coredumps.tar.gz. Your goal now is to copy D:\Learn\Linux\Dumps\coredumps.tar.gz to the Linux VM that's running inside WSL2.
Looking at the following screenshot of the command line in WSL2, notice that the C drive in Windows is mapped as /mnt/c on the WSL2 Linux machine. Therefore, to list the content of the D:\Learn\Linux\Dumps folder, you can run ll mnt/d/Learn/Linux/Dumps/.

Now, copy and extract the coredumps.tar.gz file to a dump files folder inside the Linux home directory. The steps are easy:
- Change the directory to your home directory using the
cd ~command. - Create a dump files folder by running
mkdir dumps. - Extract the coredumps.tar.gz file by running
tar -xf /mnt/d/Learn/Linux/Dumps/coredumps.tar.gz -C dumps/.
The following screenshot shows these commands in action.
Open core dump file by using dotnet-dump
The rest of the procedure is similar to the earlier troubleshooting labs in which you installed the .NET Core and .NET SDK. This section will take you through those steps again.
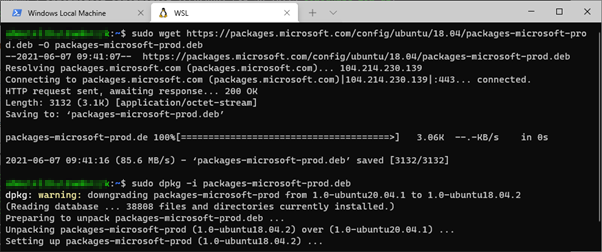
The dotnet-dump tool requires .NET SDK. Therefore, before you install dotnet-dump, you have to install the .NET SDK. As discussed earlier, before you install the .NET SDK, you have to add the Microsoft package-signing key to the list of trusted keys, and then add the package repository, as explained in Install the SDK. See the steps in action in the following screenshot.
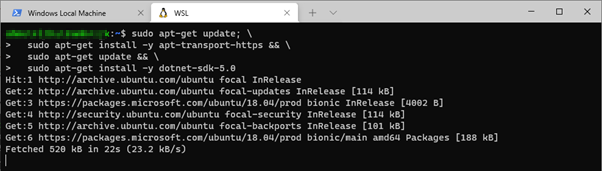
Now, you're ready to install the latest SDK again, as explained in Install the SDK. The following screenshot shows the Windows Terminal displaying the result of the commands.
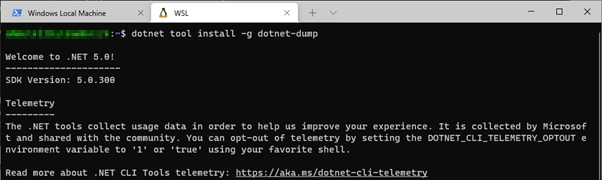
You'll open the core dump file by using dotnet-dump. Therefore, you have to install the tool first. As discussed earlier, the command to install dotnet-dump as a global tool is dotnet tool install -g dotnet-dump.
Following the installation, you're ready to start exploring the core dump files. Open the core dump file by using dotnet-dump. As you did in the previous lab, run the following command:
dotnet-dump analyze ~/dumps/coredump.manual.1.11724

Try to run clrthreads to display the managed threads. This command is expected to fail and generate the following error message.
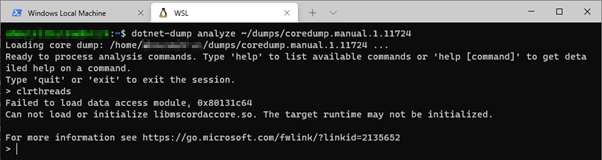
The error message is as follows:
Cannot load or initialize mscordaccore.dll. The target runtime may not be initialized.
This error occurs because the required .NET Core runtime isn't installed on the Linux VM. As explained in Debug Linux dumps, in order to analyze .NET Core dumps, both LLDB and SOS require the following .NET Core binaries from the environment that the dump file was created in:
- libmscordaccore.so
- libcoreclr.so
- dotnet (the host used to launch the app)
This wasn't a problem in the earlier troubleshooting labs because you had analyzed the dump files on the same VM on which the application was hosted and running. Therefore, the files were already present. Now, you must either copy the correct version of these files from somewhere (for example, from the VM on which the core dump files were taken), or, you have to install the same .NET runtime on the WSL2 Linux VM.
There are several methods to determine the target .NET Core runtime. The easiest is to ask the application owner. Or, if you're the owner, you'll know the application's target .NET Core runtime. What if you don't have that information at all? In that case, you can use an SOS extension command, lm or modules, that lists the native modules that are loaded in the process. Run this command to determine the version of your .NET installation.

As shown in this screenshot, the .NET Core runtime version was 3.1.10. You need the correct version of libmscordaccore.so, libcoreclr.so, and .NET. You can copy those files from the VM on which the core dump files were generated.
Is there another way to achieve the same result? For instance, can you install .NET Core runtime version 3.1.10 to have those files? The short answer is yes, you can. But you can't install it by using the sudo apt install dotnet-runtime-3.1.10 command.

Instead, you could install the .NET Core runtime 3.1. However, that version will install that latest .NET Core 3.1 version (.NET Core 3.1.15 at the time that this article was written).

This won't work because the core dump file is for a .NET Core 3.1.10 process. You must have the matching version of those required files.
Fortunately, there is a dotnet-symbol tool that can download the files (symbols, DAC, modules, and so on) that are required for debugging core dump files. You might recall this tool from our earlier sections. To install this tool, run the dotnet tool install -g dotnet-symbol command.

Now, you have to ask the dotnet-symbol tool to download the necessary files that target our core dump file. This passes the core dump file name and other necessary parameters: dotnet-symbol --host-only --debugging ~/dumps/coredump.manual.1.11724.
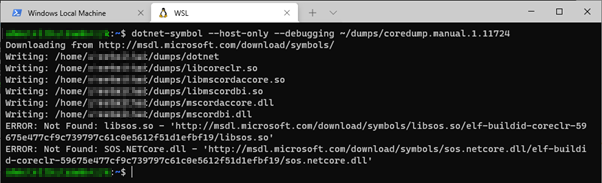
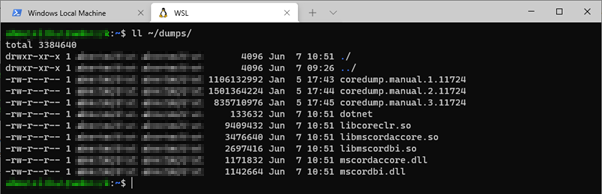
You can ignore the last two errors in the list. The necessary files are downloaded to the ~/dumps folder.
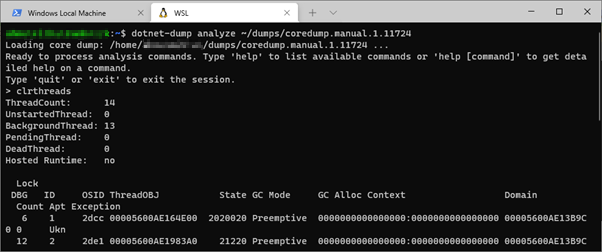
Open the core dump file by using dotnet-dump, and try to run the same clrthreads commands.
You should now be able to open the core dump file on your Windows VM by using WSL2.
Open dump files in lldb
These steps are the same as in previous troubleshooting labs. You should already have covered the important parts earlier to get the necessary files to debug core dump files by using dotnet-dump. The procedure is the same for LLDB. If you want to install and use lldb for debugging, check the previous labs.
If dotnet-symbol can't find the necessary files
Dotnet-symbol will work for most of the core dump files. If for some reason, it fails to download the necessary files, there are ways to work around the blockage. You can download and extract the binaries from the official Microsoft webpage. Then, manually copy the necessary files to the same folder that contains the core dump file.
For example, if you need the files for .NET Core 3.1.10 x64, you can download the binaries from this ASP.NET Core 3.1 Runtime (v3.1.10) - Linux x64 Binaries download page, and copy the files manually:
- .\shared\Microsoft.NETCore.App\3.1.10\libcoreclr.so
- .\shared\Microsoft.NETCore.App\3.1.10\libmscordaccore.so
- .\shared\Microsoft.NETCore.App\3.1.10\libmscordbi.so
- .\shared\Microsoft.NETCore.App\3.1.10\
- .\dotnet
If the target runtime version is a private one (remember that .NET Core is open source, and you can build and use your own private version), you'll have to copy these files from the Linux VM on which the core dump file was generated.
Next steps
Lab 4.3 Analyze core dump files on another machine - Use Docker to open core dump files
Feedback
Coming soon: Throughout 2024 we will be phasing out GitHub Issues as the feedback mechanism for content and replacing it with a new feedback system. For more information see: https://aka.ms/ContentUserFeedback.
Submit and view feedback for