How to create a minimal repro canvas app
A minimal repro app is an app that contains the minimum amount of logic and controls to reproduce a problem. This app helps you narrow down the source of the issue, whether it be with the data source, formulas, or a particular configuration.
After creating a minimal repro app, you can download a copy of it and share it with others, like in the Microsoft Power Apps Community or with Microsoft Support.
You can create a minimal repro app with one of the following methods:
- Create a blank app and add just the necessary connections and controls to demonstrate the problem.
- Make a copy of the original app, progressively remove irrelevant screens and controls, and simplify formulas until you're left with the issue's essence.
Replace external data sources
A minimal repro app should be self-contained. It shouldn't rely on connections to external data sources, like Dataverse or SharePoint, because external parties won't be able to access them.
You can see data sources used in the app in the Data panel.
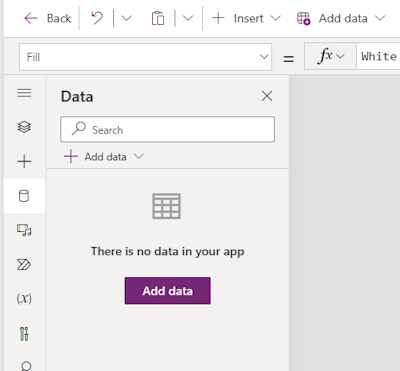
To handle data sources when creating a minimal repro app, you can:
- Remove them if they're not relevant to the issue you're showing.
- Use Collections with sample data.
- Provide sample data in a csv or Excel file. Explain how to re-create the data source from scratch.
Sample data should be as simple as possible.
Stub integrations and external web services
Apps may use features from other web services. For example, it may display a Power BI tile, YouTube video, or Power Automate flows.
Remove these components if they're not relevant to the issue you're showing. If they're essential, you should provide materials and instructions on how to re-create them. Use sample content instead of the original. If the issue doesn't occur with sample content, it might be an issue with the external content or service. For example, a Power BI report may not be configured correctly for embedding.
Simplify components
If the app contains components or code components, others may not be able to see their internals or load them correctly.
Remove these components if they're not relevant to the issue you're showing. If they're essential, you should simplify them as much as possible and then:
- Package them together with the app in an unmanaged solution
- Provide instructions on how to re-create these components from scratch.
- For code components, mention which lines of code and framework feature aren't working.
Review for privacy and security
Unauthorized users won't be able to access data sources in exported apps, but they can see how the data sources are used in them. They can also see the app's controls and formulas. If an entire solution .zip file is provided, assets like images are also visible.
Follow the below steps to help you limit privacy and security exposure before distributing the exported app:
- Don't include private and confidential information in the app. Check names of variables, controls, and other app elements that can inadvertently give away sensitive information.
- Create a new app from scratch instead of simplifying an existing production app. A new app will also reduce the accidental exposure of sensitive information if you were to use the original app instead. You'll save time by not needing to manually remove sensitive information from the original app.
- Distribute just the .msapp file instead of the .zip file. The .msapp file can be found inside the .zip package.
Download the minimal repro app
A canvas app can be saved in a .msapp or .zip file, depending on how it was created.
Power Apps
Sign in to Power Apps.
Open the app for editing.
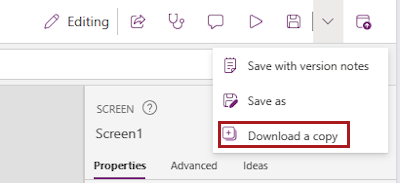
Expand the Save menu item and select Download a copy.
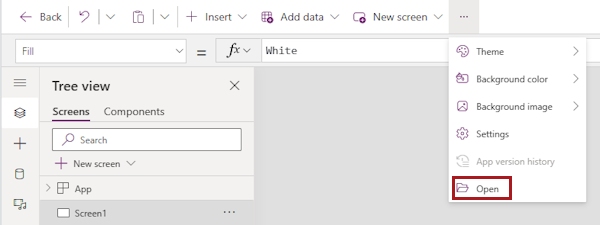
The downloaded .msapp file can be opened by others selecting Open in the menu bar of Power Apps. You may have to expand the menu bar to see this option.
Microsoft Lists
Open the list.
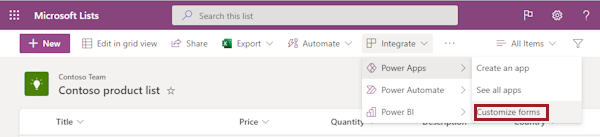
Select Integrate > Power Apps > Customize forms. The customized form will open in Power Apps.
Select Share from the menu at the top. The details page with the sharing panel will open.

Dismiss the sharing panel.
Select Export package in the menu bar.
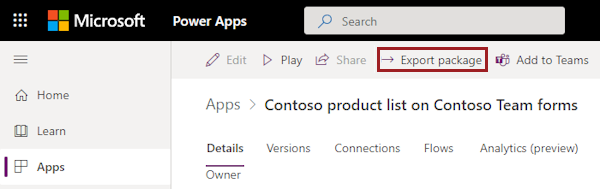
Type a name to the package. Review the exported content and select Export.
The downloaded .zip file can be opened by others.
Power Apps in Teams
In Microsoft Teams, go to the Power Apps app list for your team.
Select the app.
Select Export solution from the menu at the top.
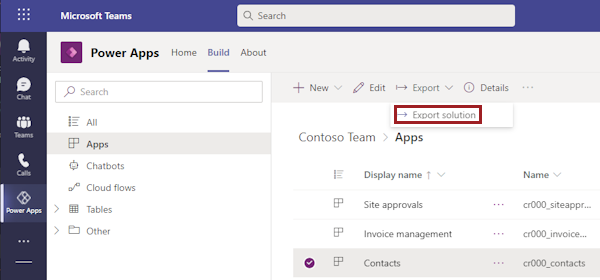
Review the exported content and select Export as zip.
The downloaded .zip file can be imported by other users.
Custom pages
Only custom pages in unmanaged solutions can be exported. If the custom page is in a managed solution, ask the publisher of the solution to create an unmanaged solution that contains the custom page. You can also create a new unmanaged solution and custom page there.
You can export custom pages in an unmanaged solution just like any other solution component. The downloaded .zip file can be imported into any environment by other users.
Next steps
See also
Feedback
Coming soon: Throughout 2024 we will be phasing out GitHub Issues as the feedback mechanism for content and replacing it with a new feedback system. For more information see: https://aka.ms/ContentUserFeedback.
Submit and view feedback for