Note
Access to this page requires authorization. You can try signing in or changing directories.
Access to this page requires authorization. You can try changing directories.
Applies to: SQL Server 2016, SQL Server 2017 on Windows, SQL Server 2019 on Windows
Symptoms
On a server hosting a SQL Server instance with a large amount of memory, the SQL Server frequently allocates and frees memory. In this scenario, if the Lock Pages in Memory option is not enabled for the SQL Server service account, the SQL Server may encounter a non-yielding scheduler condition and generate a memory dump file. The SQL Server error log displays this entry:
Process 0:0:0 (<ProcessID>) Worker <WorkerID> appears to be non-yielding on Scheduler 1.
Thread creation time: 13246605454359.
Approx Thread CPU Used: kernel 70203 ms, user 0 ms. Process Utilization 69%. System Idle 76%. Interval: 70213 ms.
Here is the top of stack:
sqldk!SOS_MemoryBlockAllocator::CommitBlockAndCheckNumaLocality
sqldk!SOS_MemoryBlockAllocator::AllocateBlock
sqldk!SOS_MemoryWorkSpace::AllocatePage
sqldk!MemoryNode::AllocateReservedPages
sqldk!MemoryClerkInternal::AllocateReservedPages
Cause
This issue occurs if there are large size or a large number of memory allocations or deallocations, which results in a long wait for those allocations and deallocations in the OS to complete.
Note
In the entry, the kernel time is almost same as the interval time, which indicates a high amount of privileged CPU time.
Resolution
To fix this issue, enable the Lock Pages in Memory option for the SQL Server service account to keep data in physical memory. After this operation, the system will use the Address Windowing Extensions (AWE) API instead of the VMM.
To enable the lock pages in memory option, follow the steps:
Press Win+R, in the Open box, type gpedit.msc.
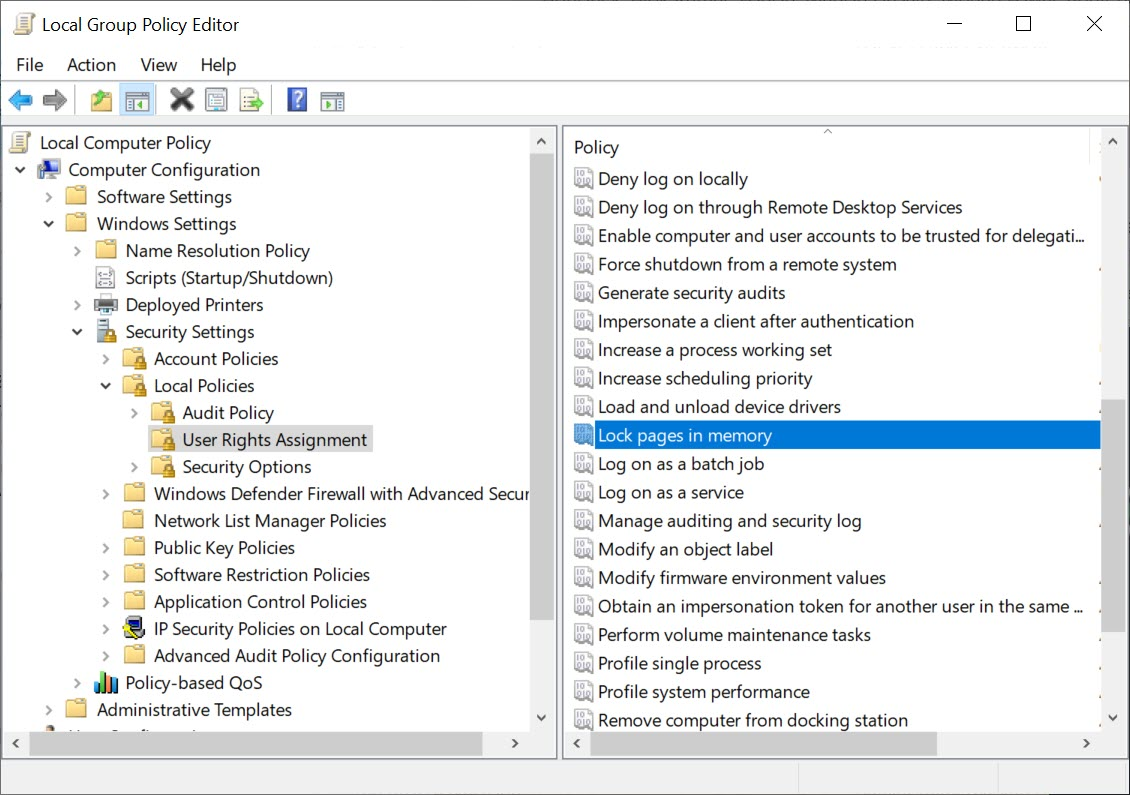
On the Local Group Policy Editor console, expand Computer Configuration > Windows Settings.
Expand Security Settings > Local Policies.
Select the User Rights Assignment folder.
The policies will be displayed in the details pane.
In the pane, double-click Lock pages in memory.
In the Local Security Setting - Lock pages in memory Properties dialog box, click Add User or Group.
In the Select Users, Service Accounts, or Groups dialog box, select the SQL Server Service account.
Restart the SQL Server Service for this setting to take effect.
See the following screenshot of the Local Group Policy Editor console.