Note
Access to this page requires authorization. You can try signing in or changing directories.
Access to this page requires authorization. You can try changing directories.
In this tutorial, you learn how to manage more than one container and communicate between them when using Container Tools in Visual Studio. Managing multiple containers requires container orchestration and requires an orchestrator such as Docker Compose. For these procedures, you use Docker Compose. Docker Compose is great for local debugging and testing in the course of the development cycle.
The completed sample that you create in this tutorial can be found on GitHub at https://github.com/MicrosoftDocs/vs-tutorial-samples in the folder docker/ComposeSample.
Prerequisites
- Docker Desktop
- Visual Studio with the ASP.NET and web development, Azure development workload, and/or .NET cross-platform development workload installed. This installation includes the .NET SDK.
- Docker Desktop or Podman Desktop
- Visual Studio with the ASP.NET and web development, Azure development workload, and/or .NET cross-platform development workload installed. This installation includes the .NET SDK.
Tip
This tutorial uses Docker Compose, but Visual Studio also supports Podman Compose as an alternative Compose runtime. The docker-compose.yml file format is compatible with both.
Create a Web Application project
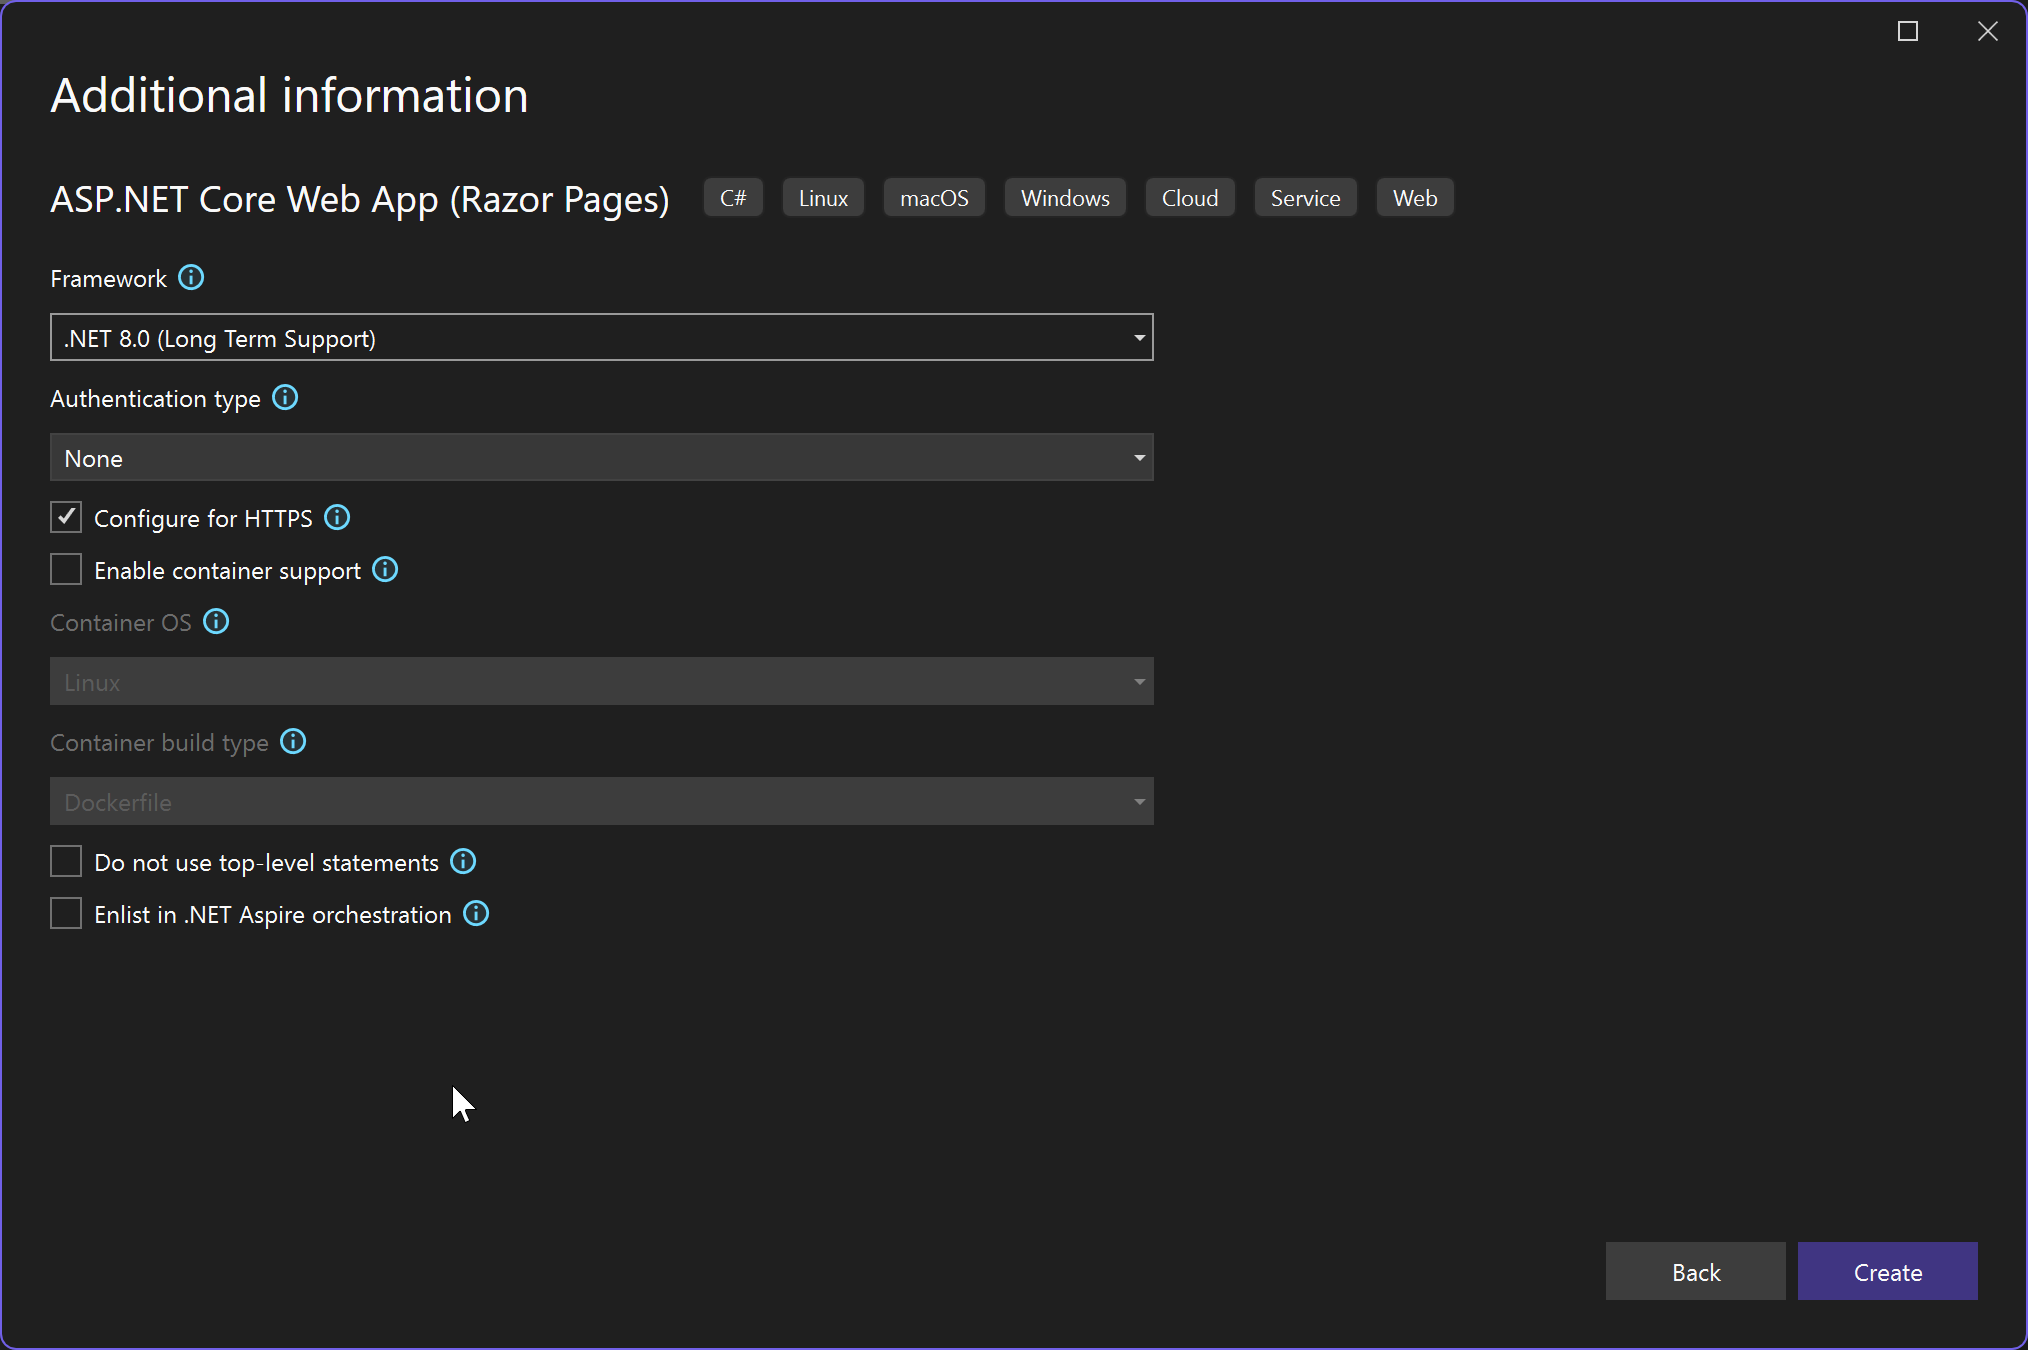
In Visual Studio, create an ASP.NET Core Web App project, named WebFrontEnd, to create a web application with Razor pages.
Don't select Enable container support. You add container support later in the process.
Create a Web API project
Add a project to the same solution and call it MyWebAPI. Select API as the project type, and clear the checkbox for Configure for HTTPS.
Note
In this design, we're only using HTTPS for communication with the client, not for communication from between containers in the same web application. Only
WebFrontEndneeds HTTPS and the code in the examples assumes that you have cleared that checkbox. In general, the .NET developer certificates used by Visual Studio are only supported for external-to-container requests, not for container-to-container requests.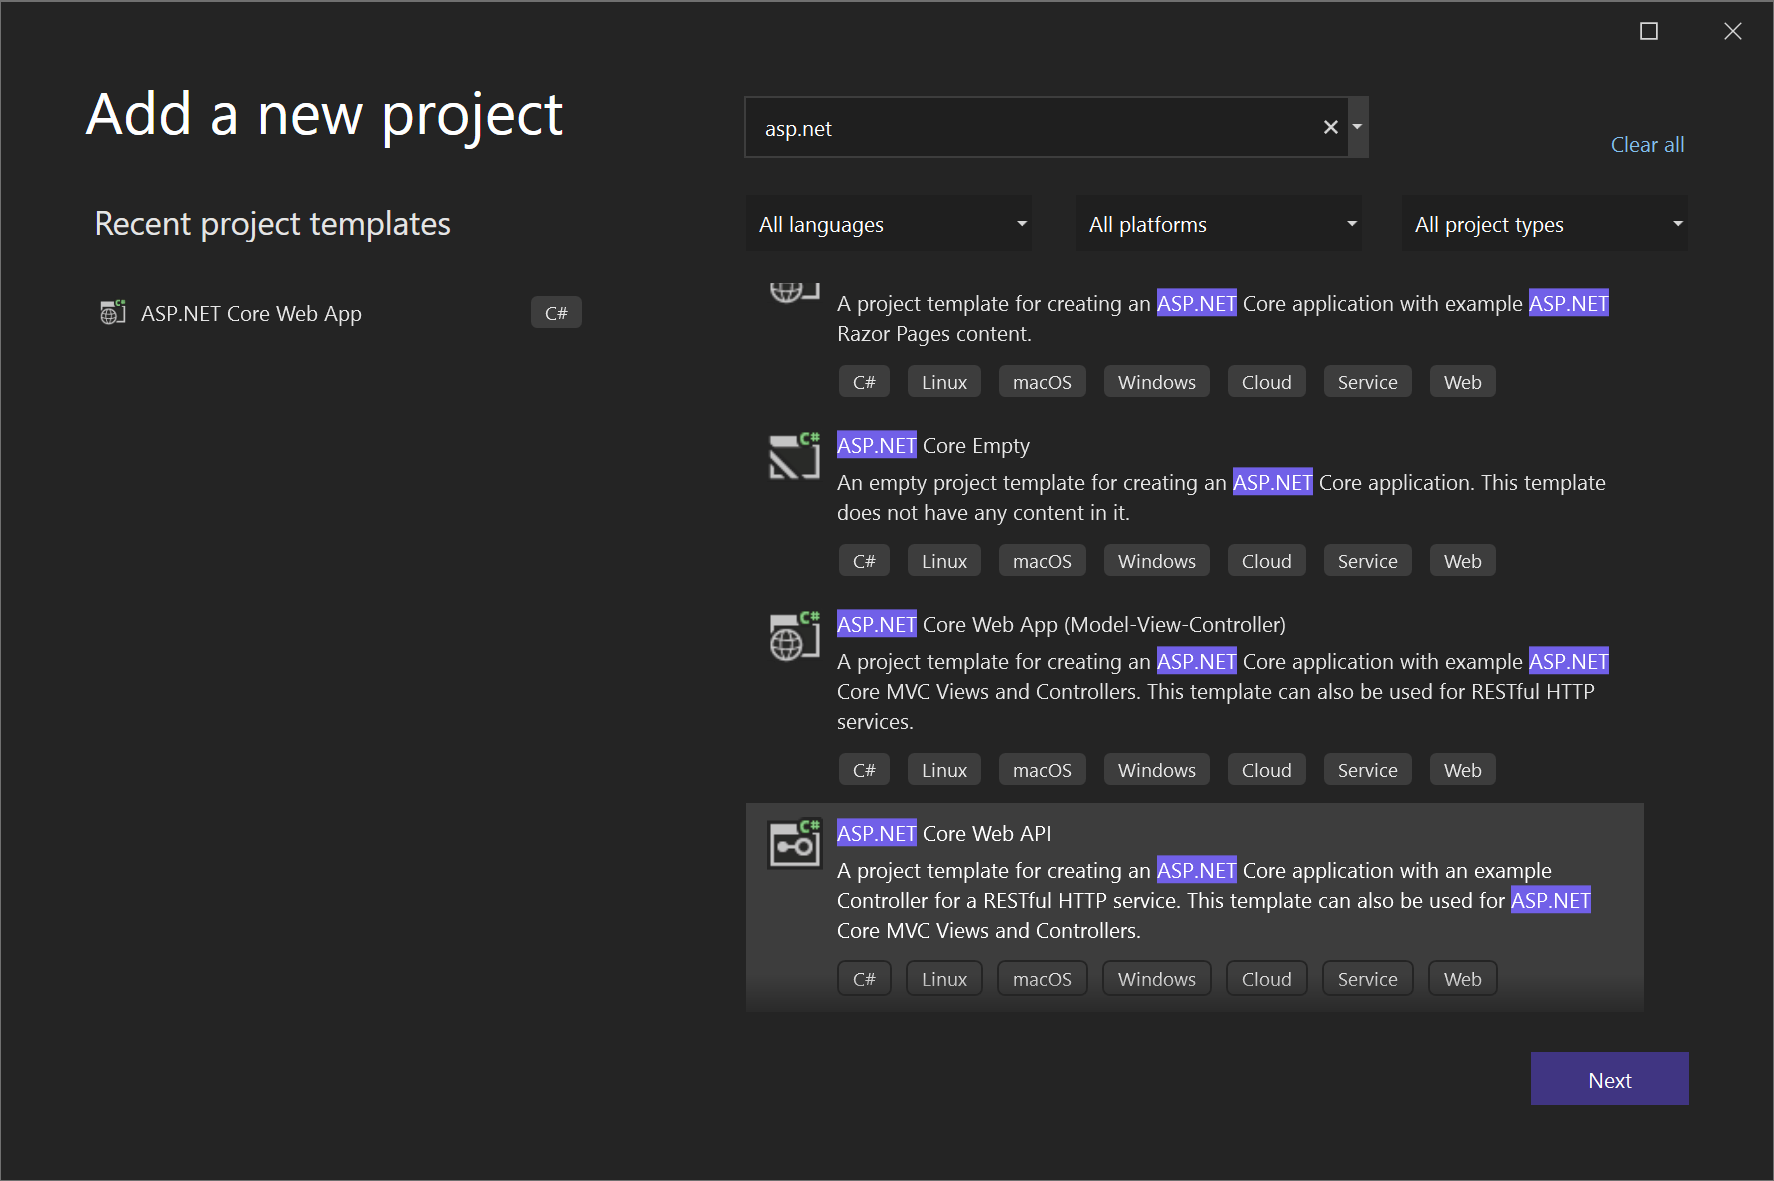
Add support for Azure Cache for Redis. Add the NuGet package
Microsoft.Extensions.Caching.StackExchangeRedis(notStackExchange.Redis). In Program.cs, add the following lines, just beforevar app = builder.Build():builder.Services.AddStackExchangeRedisCache(options => { options.Configuration = "redis:6379"; // redis is the container name of the redis service. 6379 is the default port options.InstanceName = "SampleInstance"; });Add using directives in
Program.csforMicrosoft.Extensions.Caching.DistributedandMicrosoft.Extensions.Caching.StackExchangeRedis.using Microsoft.Extensions.Caching.Distributed; using Microsoft.Extensions.Caching.StackExchangeRedis;In the Web API project, delete the existing
WeatherForecast.csand Controllers/WeatherForecastController.cs, and add a file under Controllers, CounterController.cs, with the following contents:using Microsoft.AspNetCore.Mvc; using Microsoft.Extensions.Caching.Distributed; using StackExchange.Redis; namespace WebApi.Controllers { [ApiController] [Route("[controller]")] public class CounterController : ControllerBase { private readonly ILogger<CounterController> _logger; private readonly IDistributedCache _cache; public CounterController(ILogger<CounterController> logger, IDistributedCache cache) { _logger = logger; _cache = cache; } [HttpGet(Name = "GetCounter")] public string Get() { string key = "Counter"; string? result = null; try { var counterStr = _cache.GetString(key); if (int.TryParse(counterStr, out int counter)) { counter++; } else { counter = 0; } result = counter.ToString(); _cache.SetString(key, result); } catch(RedisConnectionException) { result = "Redis cache is not found."; } return result; } } }The service increments a counter every time the page is accessed and stores the counter in the cache.
Add code to call the Web API
In the
WebFrontEndproject, open the Index.cshtml.cs file, and replace theOnGetmethod with the following code.public async Task OnGet() { // Call *mywebapi*, and display its response in the page using (var client = new System.Net.Http.HttpClient()) { var request = new System.Net.Http.HttpRequestMessage(); // A delay is a quick and dirty way to work around the fact that // the mywebapi service might not be immediately ready on startup. // See the text for some ideas on how you can improve this. // Uncomment if not using healthcheck (Visual Studio 17.13 or later) // await System.Threading.Tasks.Task.Delay(10000); // mywebapi is the service name, as listed in docker-compose.yml. // Docker Compose creates a default network with the services // listed in docker-compose.yml exposed as host names. // The port 8080 is exposed in the WebAPI Dockerfile. // If your WebAPI is exposed on port 80 (the default for HTTP, used // with earlier versions of the generated Dockerfile), change // or delete the port number here. request.RequestUri = new Uri("http://mywebapi:8080/Counter"); var response = await client.SendAsync(request); string counter = await response.Content.ReadAsStringAsync(); ViewData["Message"] = $"Counter value from cache :{counter}"; } }Note
In real-world code, you shouldn't dispose
HttpClientafter every request. For best practices, see Use HttpClientFactory to implement resilient HTTP requests.The URI given references a service name defined in the docker-compose.yml file. Docker Compose sets up a default network for communication between containers using the listed service names as hosts.
The code shown here works with .NET 8 and later, which sets up a user account in the Dockerfile without administrator privileges, and exposes port 8080 because the HTTP default port 80 is not accessible without elevated privilege.
In the
Index.cshtmlfile, add a line to displayViewData["Message"]so that the file looks like the following code:@page @model IndexModel @{ ViewData["Title"] = "Home page"; } <div class="text-center"> <h1 class="display-4">Welcome</h1> <p>Learn about <a href="/aspnet/core">building Web apps with ASP.NET Core</a>.</p> <p>@ViewData["Message"]</p> </div>This code displays the value of the counter returned from the Web API project. It increments every time the user accesses or refreshes the page.
Add Docker Compose support
In the
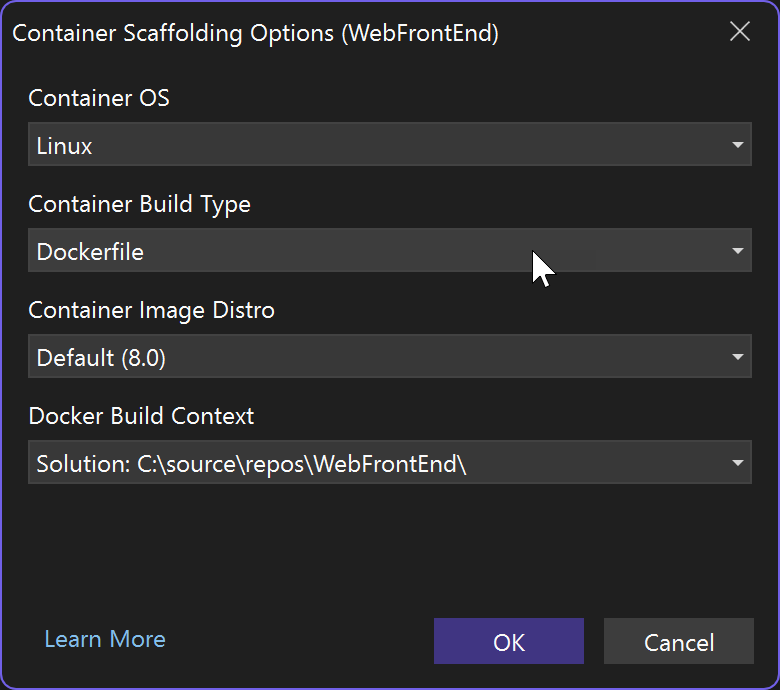
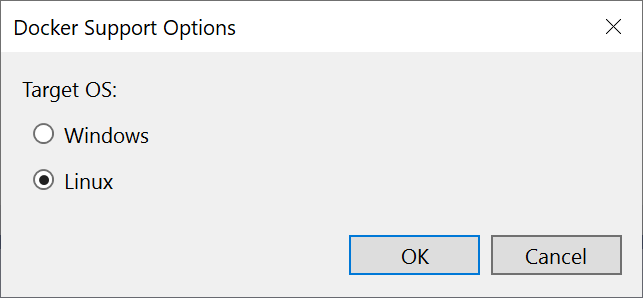
WebFrontEndproject, choose Add > Container Orchestrator Support. The Docker Support Options dialog appears.Choose Docker Compose.
Visual Studio 17.12 and later Choose the scaffolding options for the WebFrontEnd project.
Visual Studio 17.11 and earlier Choose your Target OS, for example, Linux.
Visual Studio creates a docker-compose.yml file and a
.dockerignorefile in the docker-compose node in the solution, and that project shows in boldface font, which shows that it's the startup project.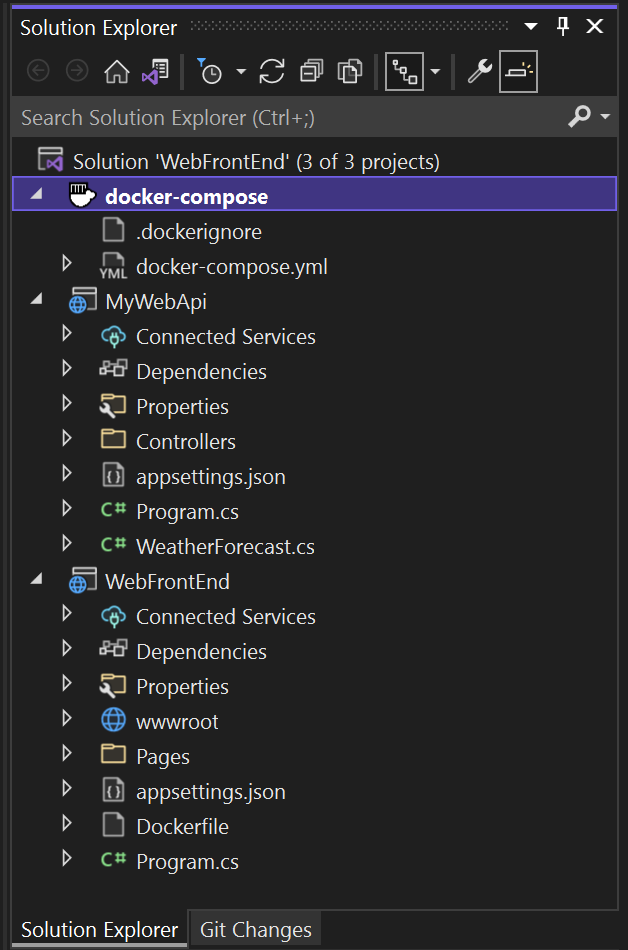
The docker-compose.yml appears as follows:
 services:
   webfrontend:
     image: ${DOCKER_REGISTRY-}webfrontend
     build:
       context: .
       dockerfile: WebFrontEnd/Dockerfile
The
.dockerignorefile contains file types and extensions that you don't want Docker to include in the container. These files are generally associated with the development environment and source control, not part of the app or service you're developing.Look at the Container Tools section of the output pane for details of the commands being run. You can see the command-line tool
docker-composeis used to configure and create the runtime containers.In the Web API project, again right-click on the project node, and choose Add > Container Orchestrator Support. Choose Docker Compose, and then select the same target OS.
Note
In this step, Visual Studio will offer to create a Dockerfile. If you do this on a project that already has Docker support, you are prompted whether you want to overwrite the existing Dockerfile. If you've made changes in your Dockerfile that you want to keep, choose no.
Visual Studio makes some changes to your
docker-composeYML file. Now both services are included.services: webfrontend: image: ${DOCKER_REGISTRY-}webfrontend build: context: . dockerfile: WebFrontEnd/Dockerfile mywebapi: image: ${DOCKER_REGISTRY-}mywebapi build: context: . dockerfile: MyWebAPI/DockerfileAdd the cache to the
docker-compose.ymlfile:redis: image: redisMake sure the indentation is at the same level as the other two services.
(Visual Studio 17.13 or later) The dependent services demonstrate a common problem. The HTTP request in the front end's main page could run immediately on application launch, before the
mywebapiservice is ready to receive web requests. If you're using Visual Studio 17.13 or later, you can use the Docker Compose featuresdepends_onandhealthcheckin docker-compose.yml to make the projects start in the right sequence, and have them be ready to serve requests when required. See Docker Compose - Startup order.services: webfrontend: image: ${DOCKER_REGISTRY-}webfrontend depends_on: mywebapi: condition: service_healthy build: context: . dockerfile: WebFrontEnd/Dockerfile mywebapi: image: ${DOCKER_REGISTRY-}mywebapi depends_on: redis: condition: service_started healthcheck: test: curl --fail http://mywebapi:8080/Counter || exit 1 interval: 20s timeout: 20s retries: 5 build: context: . dockerfile: MyWebAPI/Dockerfile redis: image: redisIn this example, the health check uses
curlto verify that the service is ready to process requests. If the image you're using doesn't havecurlinstalled, add lines to thebasestage of the MyWebAPI Dockerfile to install it. This step requires elevated privileges, but you can restore the normal user privileges after installing it as shown here (for the Debian images used in this example):USER root RUN apt-get update && apt-get install -y curl USER $APP_UIDNote
If you're using a Linux distro, like Alpine, that doesn't support
apt-get, tryRUN apk --no-cache add curlinstead.These Docker Compose features require a property setting in the Docker Compose project file (
.dcproj). Set the propertyDependencyAwareStartto true:<PropertyGroup> <!-- existing properties --> <DependencyAwareStart>true</DependencyAwareStart> </PropertyGroup>This property activates a different way of starting the containers for debugging that supports the service dependency features.
With these changes, the
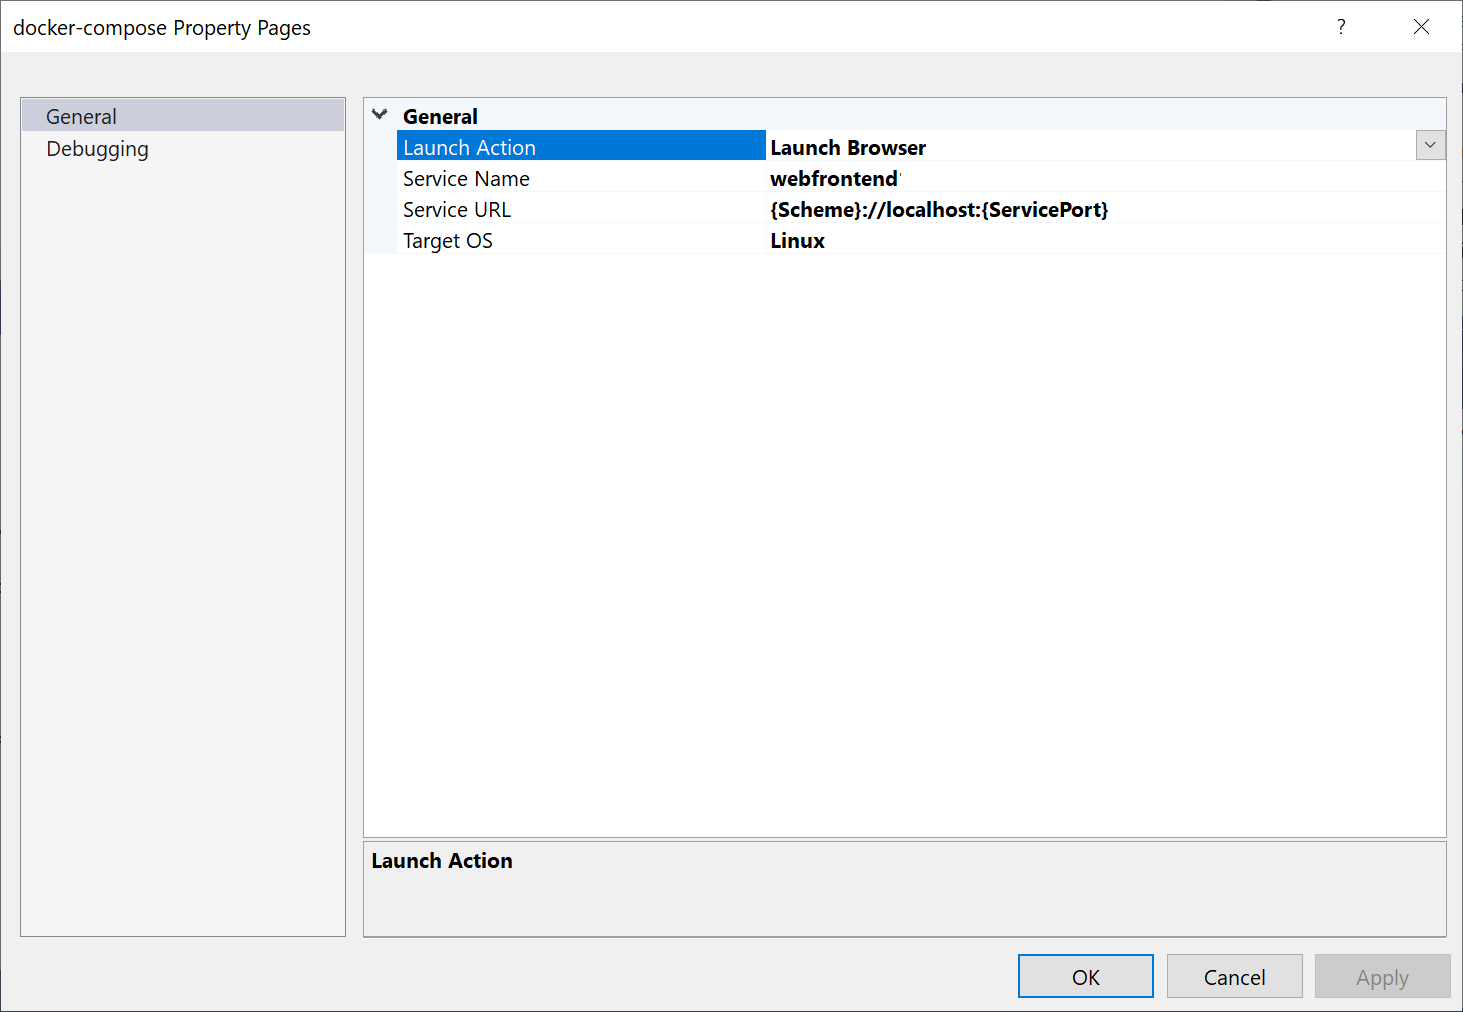
webfrontendservice will not start untilmywebapistarts and successfully handles a web request.The first project that you add container orchestration to is set up to be launched when you run or debug. You can configure the launch action in the Project Properties for the Docker Compose project. On the Docker Compose project node, right-click to open the context menu, and then choose Properties, or use Alt+Enter. For example, you can change the page that is loaded by customizing the Service URL property.
Press F5. Here's what you see when launched:

You can monitor the containers using the Containers window. If you don't see the window, use the search box, press Ctrl+K, Ctrl+O, or press Ctrl+Q. Under Feature search, search for
containers, and choose View > Other Windows > Containers from the list.Expand the Solution Containers node, and choose the node for your Docker Compose project to view combined logs in the Logs tab of this window.

You can also select the node for an individual container to view logs, environment variables, the filesystem, and other details.

Set up launch profiles
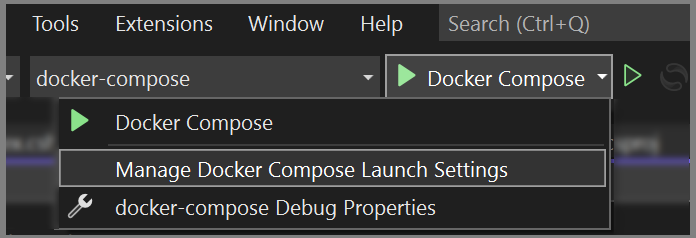
This solution has an Azure Cache for Redis, but it's not efficient to rebuild the cache container every time you start a debugging session. To avoid that situation, you can set up a couple of launch profiles. Create one profile to start the Azure Cache for Redis. Create a second profile to start the other services. The second profile can use the cache container that's already running. From the menu bar, you can use the dropdown list next to the start button to open a menu with debugging options. Select Manage Docker Compose Launch Settings.
The Manage Docker Compose Launch Settings dialog comes up. With this dialog, you can control which subset of services is launched during a debugging session, which are launched with or without the debugger attached, and the launch service and URL. See Start a subset of Compose services.
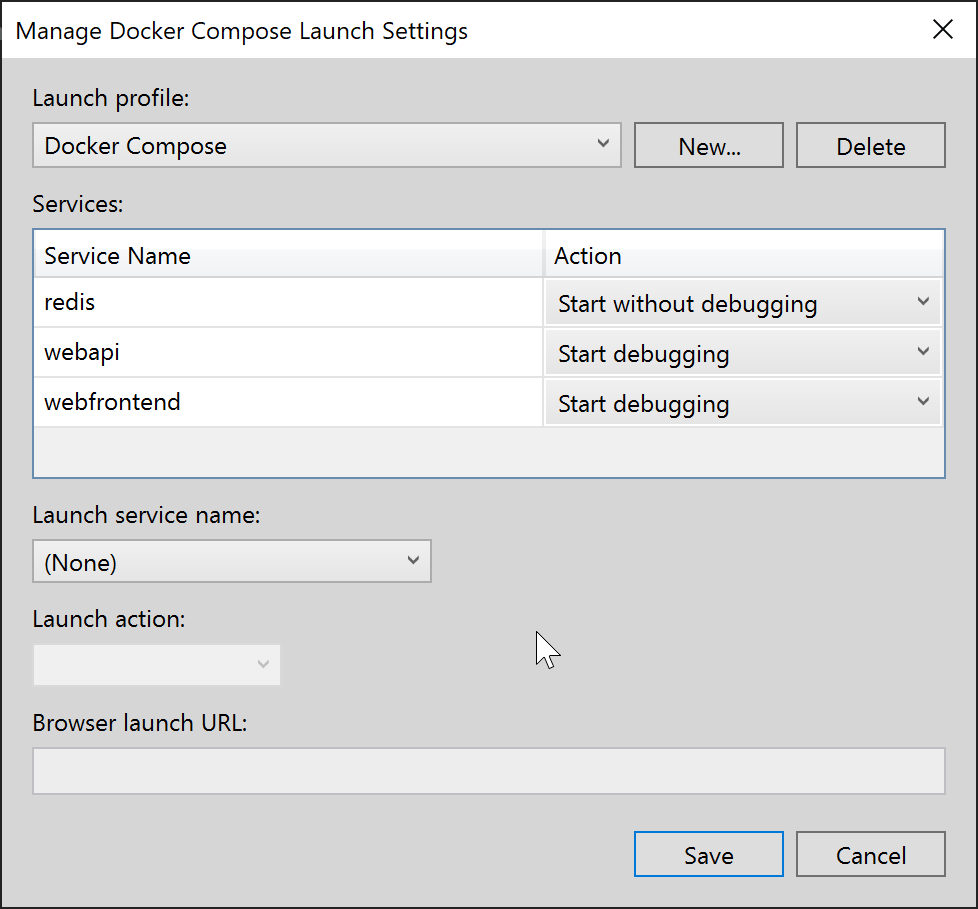
Choose New to create a new profile, and name it
Start Redis. Then, set the Redis container to Start without debugging, leave the other set to Do not start, and choose Save.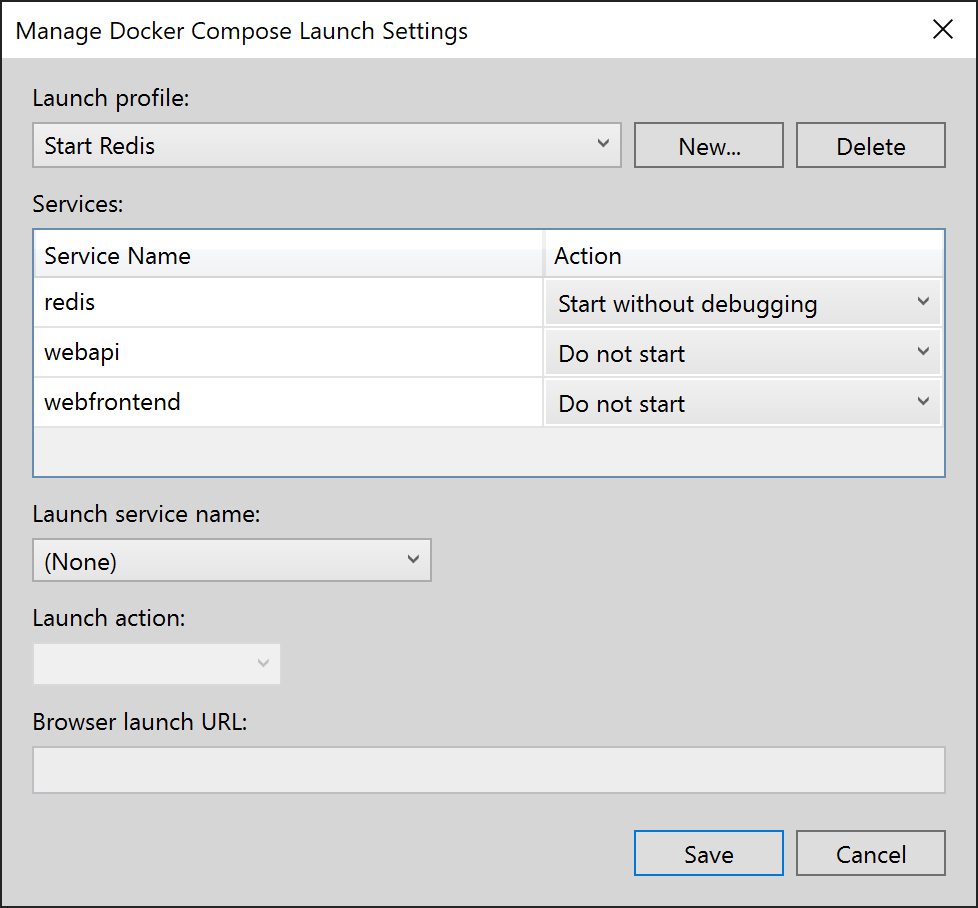
Then create another profile
Start My Servicesthat doesn't start Redis, but starts the other two services.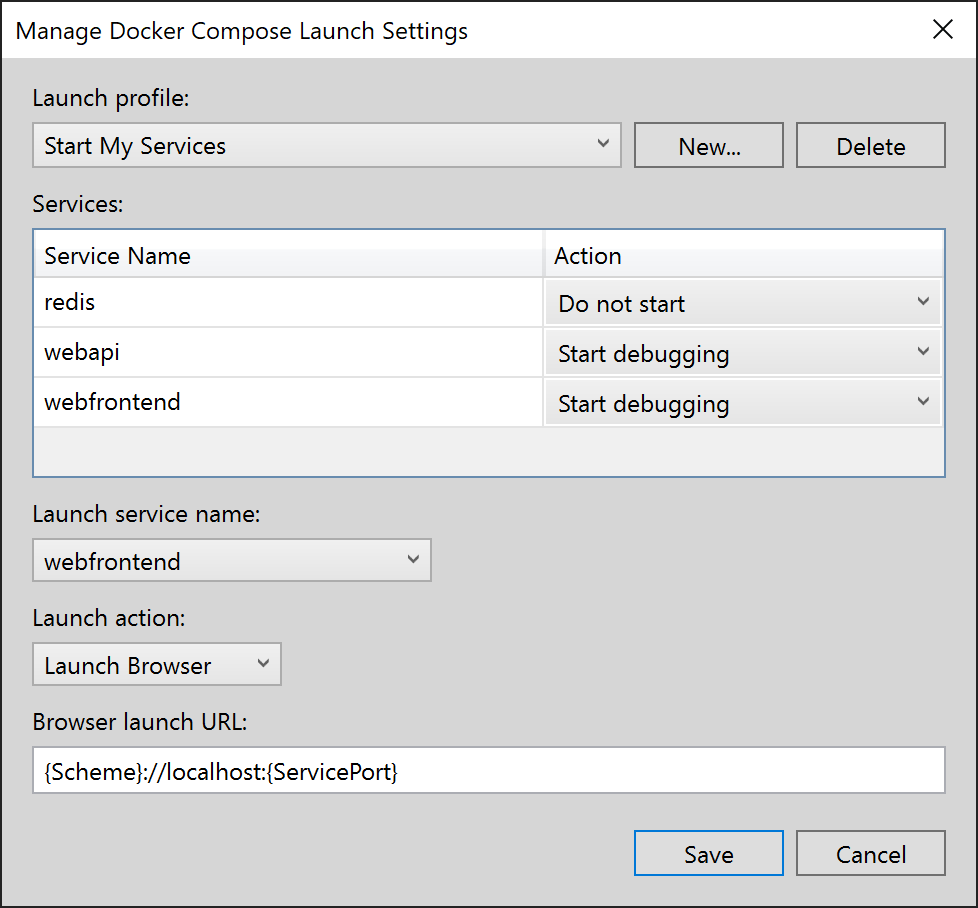
(Optional) Create a third profile
Start Allto start everything. You can choose Start without debugging for Redis.Choose Start Redis from the dropdown list on the main Visual Studio toolbar. The Redis container builds and starts without debugging. You can use the Containers window to see that it's running. Next, choose Start My Services from the dropdown list and press F5 to launch them. Now you can keep the cache container running throughout many subsequent debug sessions. Every time you use Start My Services, those services use the same cache container.
Congratulations, you're running a Docker Compose application with a custom Docker Compose profile.
Next steps
Look at the options for deploying your containers to Azure. If you're ready to deploy to Azure Container Apps, see Deploy a multicontainer app to Azure Container Apps.