Note
Access to this page requires authorization. You can try signing in or changing directories.
Access to this page requires authorization. You can try changing directories.
In this Quickstart, you create and run a base Vue.js front-end web application. This article provides a 5-10 minute introduction to the Visual Studio integrated development environment (IDE).
Prerequisites
Prepare your configuration with the following prerequisites:
Visual Studio 2022 or later (Get the free version at Visual Studio downloads)
npm (included with Node.js, https://www.npmjs.com/)
Vue.js (Installation | Vue.js (vuejs.org))
Create your Vue app
Create a Vue.js web app by following these steps:
In the Visual Studio Start window (select File > Start Window), select Create a new project.

In the Create a new project dialog, enter Vue in the search box. Select the Vue App template for JavaScript or TypeScript, and select Next.

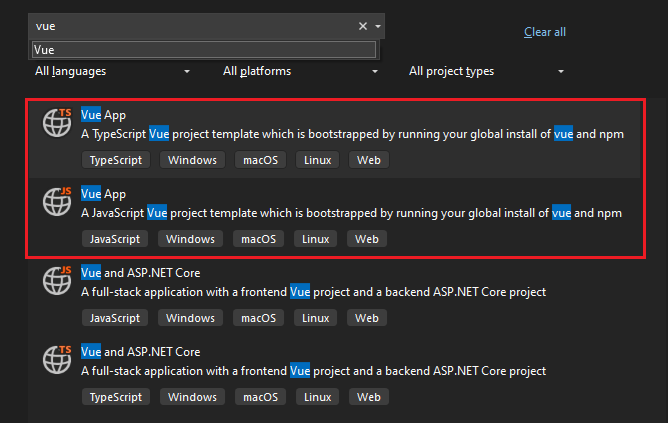
In Visual Studio 2022 version 11 and later, the template name Standalone JavaScript Vue Project is changed to Vue App.
Enter a name for your project and solution, and select Create.
Wait for Visual Studio to create your new project.
View the project properties
The default project settings allow you to build and debug the project.
If you want to change any settings, follow these steps:
Right-click the project in Solution Explorer and select Properties.
In the project properties pane, select Debug, Linting, Build, or Deploy to see the corresponding properties.
For debugger configuration, use the launch.json file.
Note
The launch.json debugger configuration file stores the startup settings associated with the Start action in the Debug toolbar. The launch.json file must be located under the .vscode folder in your project.
Build your project
To build your new project, select Build > Build Solution.
Start your project
Select F5 or use the Start action at the top of the window.
The project opens a command prompt with the following text (or similar):
VITE v4.4.9 ready in 780 ms
Note
Check the console output for messages, such as instructions to update your version of Node.js.
When the process succeeds, the base Vue.js app opens.