Note
Access to this page requires authorization. You can try signing in or changing directories.
Access to this page requires authorization. You can try changing directories.
Share a server or terminal as a collaboration session host in Visual Studio Code.
Share a server
From time to time, collaboration session hosts might want to share a web application or other locally running servers or services with guests. This can range from other RESTful endpoints to databases and other servers. Visual Studio Live Share lets you specify a local port number, optionally give it a name, and then share it with all guests.
The guests will then be able to access the server you shared on that port from their own local computers on the same port. For example, if you share a web server running on port 3000, guests can access that same running web server on their own computers at http://localhost:3000.
This connection is accomplished via an improved security SSH or SSL tunnel between the host and guests and authenticated via the service. This connection mechanism helps to ensure that only people in the collaboration session have access.
Tip
As a host, be selective about the ports you share with guests. Stick to application ports (rather than sharing a system port). For guests, shared ports will behave exactly as they would if the server/service were running on the guest's computer. This behavior is useful, but it can be risky if you share the wrong port.
For security reasons, only servers running on ports that you specify are available to other guests. It's easy for the collaboration session host to add one. Here's how:
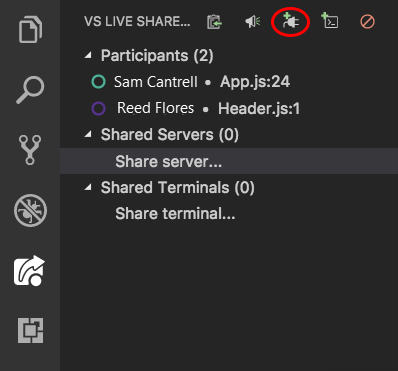
On the Live Share tab or the Live Share Explorer tab, select the Share server item or button:
Enter the number of the port the server is running on. Optionally, enter a name:

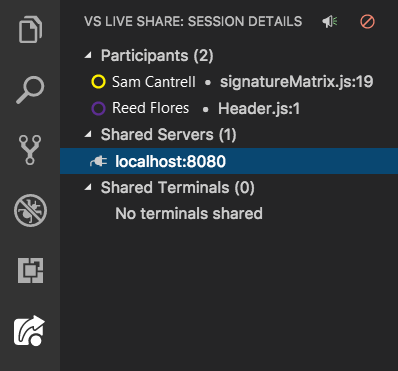
That's it! The server on the port you specified will now be mapped to each guest's localhost on the same port (unless that port is already being used).
If the port is already being used on the guest's computer, a different one is automatically selected. As a guest, you can see a list of shared ports (by name, if specified) on the Live Share Explorer tab or the VS Live Share tab. The list is under Shared Servers. If you select a port, that server opens in your browser. You can also right-click and select an option to copy the server link to the clipboard.
For security reasons, guests can't control which ports on the host's computer are shared.
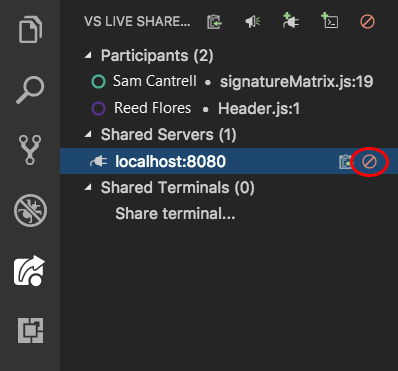
To stop sharing a local server, the host can hover over the server item in the Shared Servers list and then select the Unshare server button:
Share a terminal
Modern developers frequently use of a variety of command-line tools. Live Share allows hosts to share a terminal with guests. The shared terminal can be read-only or fully collaborative, so you and the guests can run commands and see the results. You can make terminal output visible to guests. You can also let them run tests or builds or even triage environment-specific problems that only happen on your computer.
By default, terminals aren't shared because they give guests at least read-only access to the output of commands you run (if not the ability to run commands themselves). This default configuration allows you to run commands in local terminals with reduced risk and share only when you need to. And only hosts can start shared terminals. This limitation prevents guests from starting one up and doing something you aren't expecting.
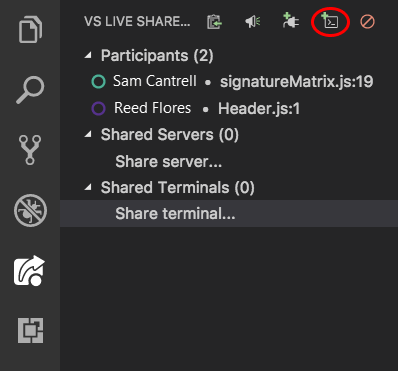
As a host, you can share a terminal from the Live Share or the Live Share Explorer tab. Select the Share terminal item or button:
At this point, you can choose whether to make the terminal read-only or read/write. When the terminal is read/write, everyone can type in the terminal, including the host. So, as a host, you can easily intervene if a guest is doing something you don't like.
To be safe, you should give read/write access to guests only when you know they actually need it. Stick with read-only terminals when you just want the guests to see the output of commands you run. Keep in mind that read/write access gives guests the same access to your terminal that you have. They can run any command on your computer that you can.
Note
If a collaboration session is in read-only mode, only read-only terminals can be shared by the host.

After you select the kind of shared terminal you want to start, a new shared terminal will appear in the Visual Studio Code Terminal tab:

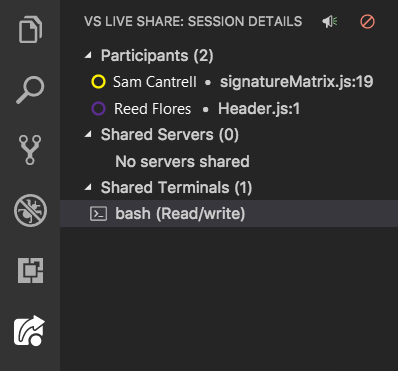
If multiple terminals are shared, or if your focus is in a different tab, you can bring focus to a terminal by selecting the entry in the Shared Terminals list:
To end a terminal session, enter exit, close the terminal window, or select the Unshare terminal button on the Live Share Explorer tab or the Live Share tab. Everyone will be disconnected.
Next steps
Check out these articles for more information:
- Quickstart: Share your first project
- Quickstart: Join your first session
- Install and sign in to Live Share in Visual Studio
- Connectivity requirements for Live Share
- Security features of Live Share
- Linux installation details
Having problems? See troubleshooting or provide feedback.