Note
Access to this page requires authorization. You can try signing in or changing directories.
Access to this page requires authorization. You can try changing directories.
Create unit tests to help keep your code working correctly through incremental code changes. There are several frameworks that you can use to write unit tests, including some developed by third parties. Some test frameworks are specialized for testing in different languages or platforms. Test Explorer provides a single interface for unit tests in any of these frameworks. For more information about Test Explorer, see Run unit tests with Test Explorer and Test Explorer FAQ.
This article demonstrates how to develop a tested method in C# using Microsoft Test Framework (MSTest). You can easily adapt it for other languages or other test frameworks, such as NUnit. For more information, see Install third-party unit test frameworks.
Create a test and generate code
Create a C# Class Library project for .NET or .NET Standard. This project will contain the code that we want to test. Name the project MyMath.
In the same solution, add a new MSTest test project for .NET.
In Visual Studio 2019 version 16.9, the MSTest project template name is Unit Test Project.
Name the test project MathTests.
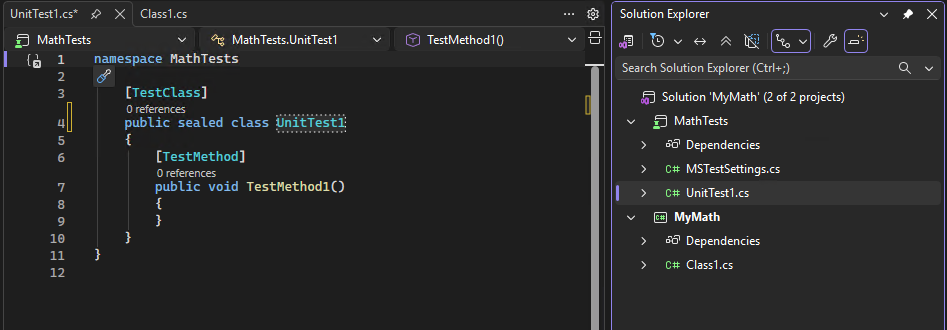
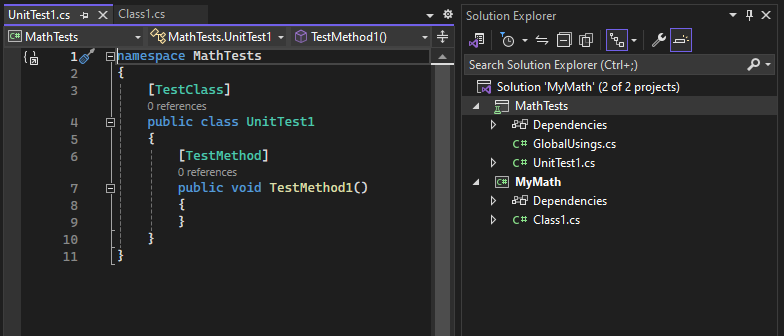
In the test project, write a simple test method that verifies the result obtained for a specific input. Add the following code to the
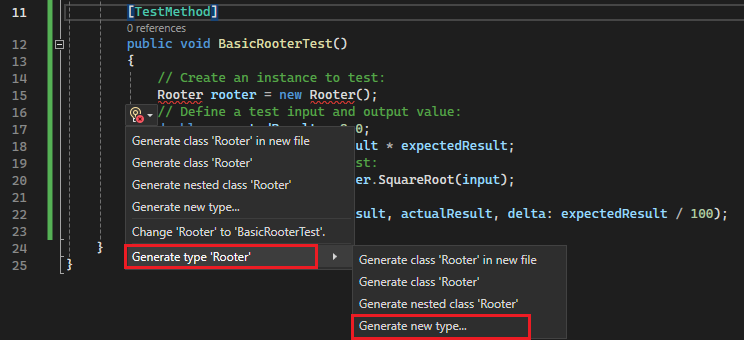
Test1orUnitTest1class:[TestMethod] public void BasicRooterTest() { // Create an instance to test: Rooter rooter = new Rooter(); // Define a test input and output value: double expectedResult = 2.0; double input = expectedResult * expectedResult; // Run the method under test: double actualResult = rooter.SquareRoot(input); // Verify the result: Assert.AreEqual(expectedResult, actualResult, delta: expectedResult / 100); }Generate a type from the test code.
Place the cursor on
Rooter, and then open the light bulb menu.Choose Generate new type.
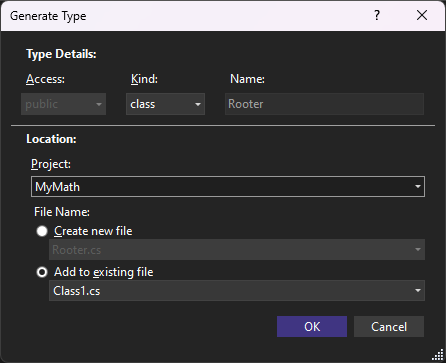
In the Generate Type dialog box, set Project to MyMath, the class library project, and then choose OK.
Generate a method from the test code. Place the cursor on
SquareRoot, and then from the light bulb menu, choose Generate method 'SquareRoot' or Generate method 'Rooter.SquareRoot'.Run the unit test.
Open Test Explorer.
To open Test Explorer from the Test menu, choose Test Explorer.
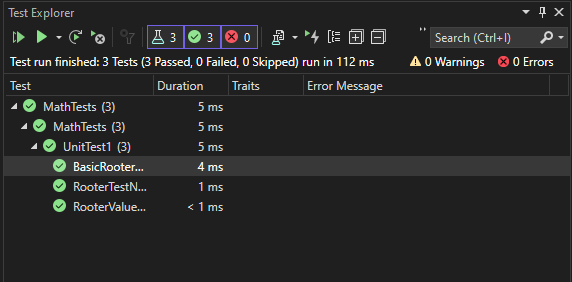
In Test Explorer, choose the Run All button to run the test.
The solution builds, and the test runs and fails.
Select the name of the test.
The details of the test appear in the Test Detail Summary pane.

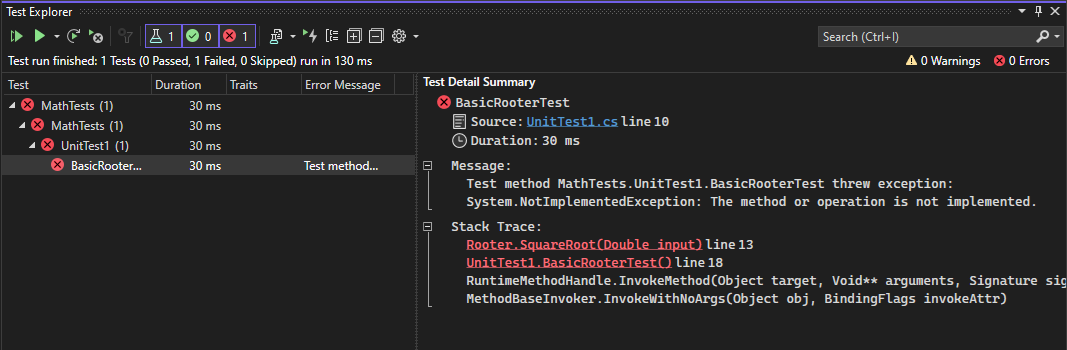
Select the top link under Stack Trace to jump to the location where the test failed.


At this point, you've created a test and a stub that you can modify so that the test passes.
Verify a code change
In the Class1.cs file, improve the code of
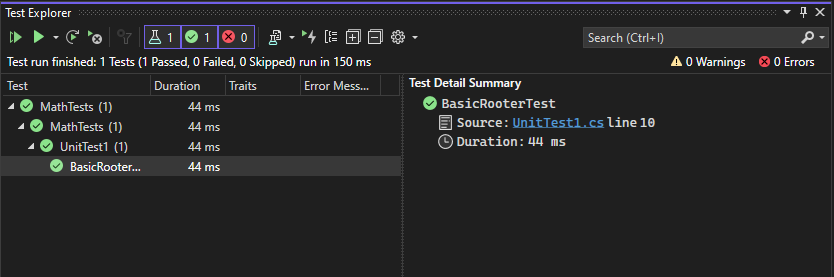
SquareRoot:public double SquareRoot(double input) { return input / 2; }In Test Explorer, choose Run All.
The solution builds, and the test runs and passes.


Extend the range of inputs
To improve our confidence that the code works in all cases, add tests that try a broader range of input values.
Tip
Avoid altering existing tests that pass. Instead, add new tests. Change existing tests only when the user requirements change. This policy helps to make sure that you don't lose existing functionality as you work to extend the code.
In the test class, add the following test, which tries a range of input values:
[TestMethod]
public void RooterValueRange()
{
    // Create an instance to test.
    Rooter rooter = new Rooter();

    // Try a range of values.
    for (double expected = 1e-8; expected < 1e+8; expected *= 3.2)
    {
        RooterOneValue(rooter, expected);
    }
}

private void RooterOneValue(Rooter rooter, double expectedResult)
{
    double input = expectedResult * expectedResult;
    double actualResult = rooter.SquareRoot(input);
    Assert.AreEqual(expectedResult, actualResult, delta: expectedResult / 1000);
}
In Test Explorer, choose Run All.
The new test fails (although the first test still passes). To find the point of failure, select the failing test, and then look at the details in the Test Detail Summary pane.
Inspect the method under test to see what might be wrong. Alter the
SquareRootcode as follows:public double SquareRoot(double input) { double result = input; double previousResult = -input; while (Math.Abs(previousResult - result) > result / 1000) { previousResult = result; result = result - (result * result - input) / (2 * result); } return result; }In Test Explorer, choose Run All.
Both tests now pass.
Add tests for exceptional cases
Add a new test for negative inputs:
[TestMethod]
public void RooterTestNegativeInput()
{
    Rooter rooter = new Rooter();
    Assert.ThrowsException<ArgumentOutOfRangeException>(() => rooter.SquareRoot(-1));
}
In Test Explorer, choose Run All.
The new test fails.
If the method under test loops, choose Cancel on the toolbar of Test Explorer. The test stops executing and fails.
Fix the
SquareRootcode by adding the followingifstatement at the beginning of the method:public double SquareRoot(double input) { if (input <= 0.0) { throw new ArgumentOutOfRangeException(); } ...In Test Explorer, choose Run All.
All the tests pass.
Refactor the code under test
Refactor the code, but do not change the tests.
Tip
A refactoring is a change that is intended to make the code perform better or easier to understand. It is not intended to alter the behavior of the code, and therefore the tests are not changed.
We recommend that you perform refactoring steps separately from steps that extend functionality. Keeping the tests unchanged gives you confidence that you have not accidentally introduced bugs while refactoring.
Change the line that calculates
resultin theSquareRootmethod as follows:public double SquareRoot(double input) { if (input <= 0.0) { throw new ArgumentOutOfRangeException(); } double result = input; double previousResult = -input; while (Math.Abs(previousResult - result) > result / 1000) { previousResult = result; result = (result + input / result) / 2; //was: result = result - (result * result - input) / (2*result); } return result; }Choose Run All, and verify that all the tests still pass.