Note
Access to this page requires authorization. You can try signing in or changing directories.
Access to this page requires authorization. You can try changing directories.
If you’re authenticated to GitHub or Azure DevOps and have pushed changes to your remote repository, you can create a pull request without leaving Visual Studio. Pull requests are an essential tool in GitHub and Azure DevOps for code review. These reviews help catch issues in new features and allow teammates to share their experience with different regions of the codebase – improving the health of the codebase overall.
To create a pull request, follow these steps:
Before you can create a pull request, you need to create a new branch for your changes. This branch keeps your modifications separate from the main branch until they’re ready to be merged.
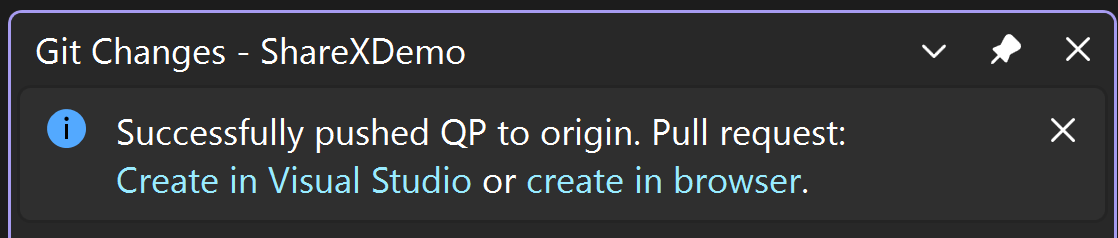
Then, you can commit and push your changes as you normally would in the Git Changes window.
Select the link in the notification banner to Create in Visual Studio or Create in Browser.

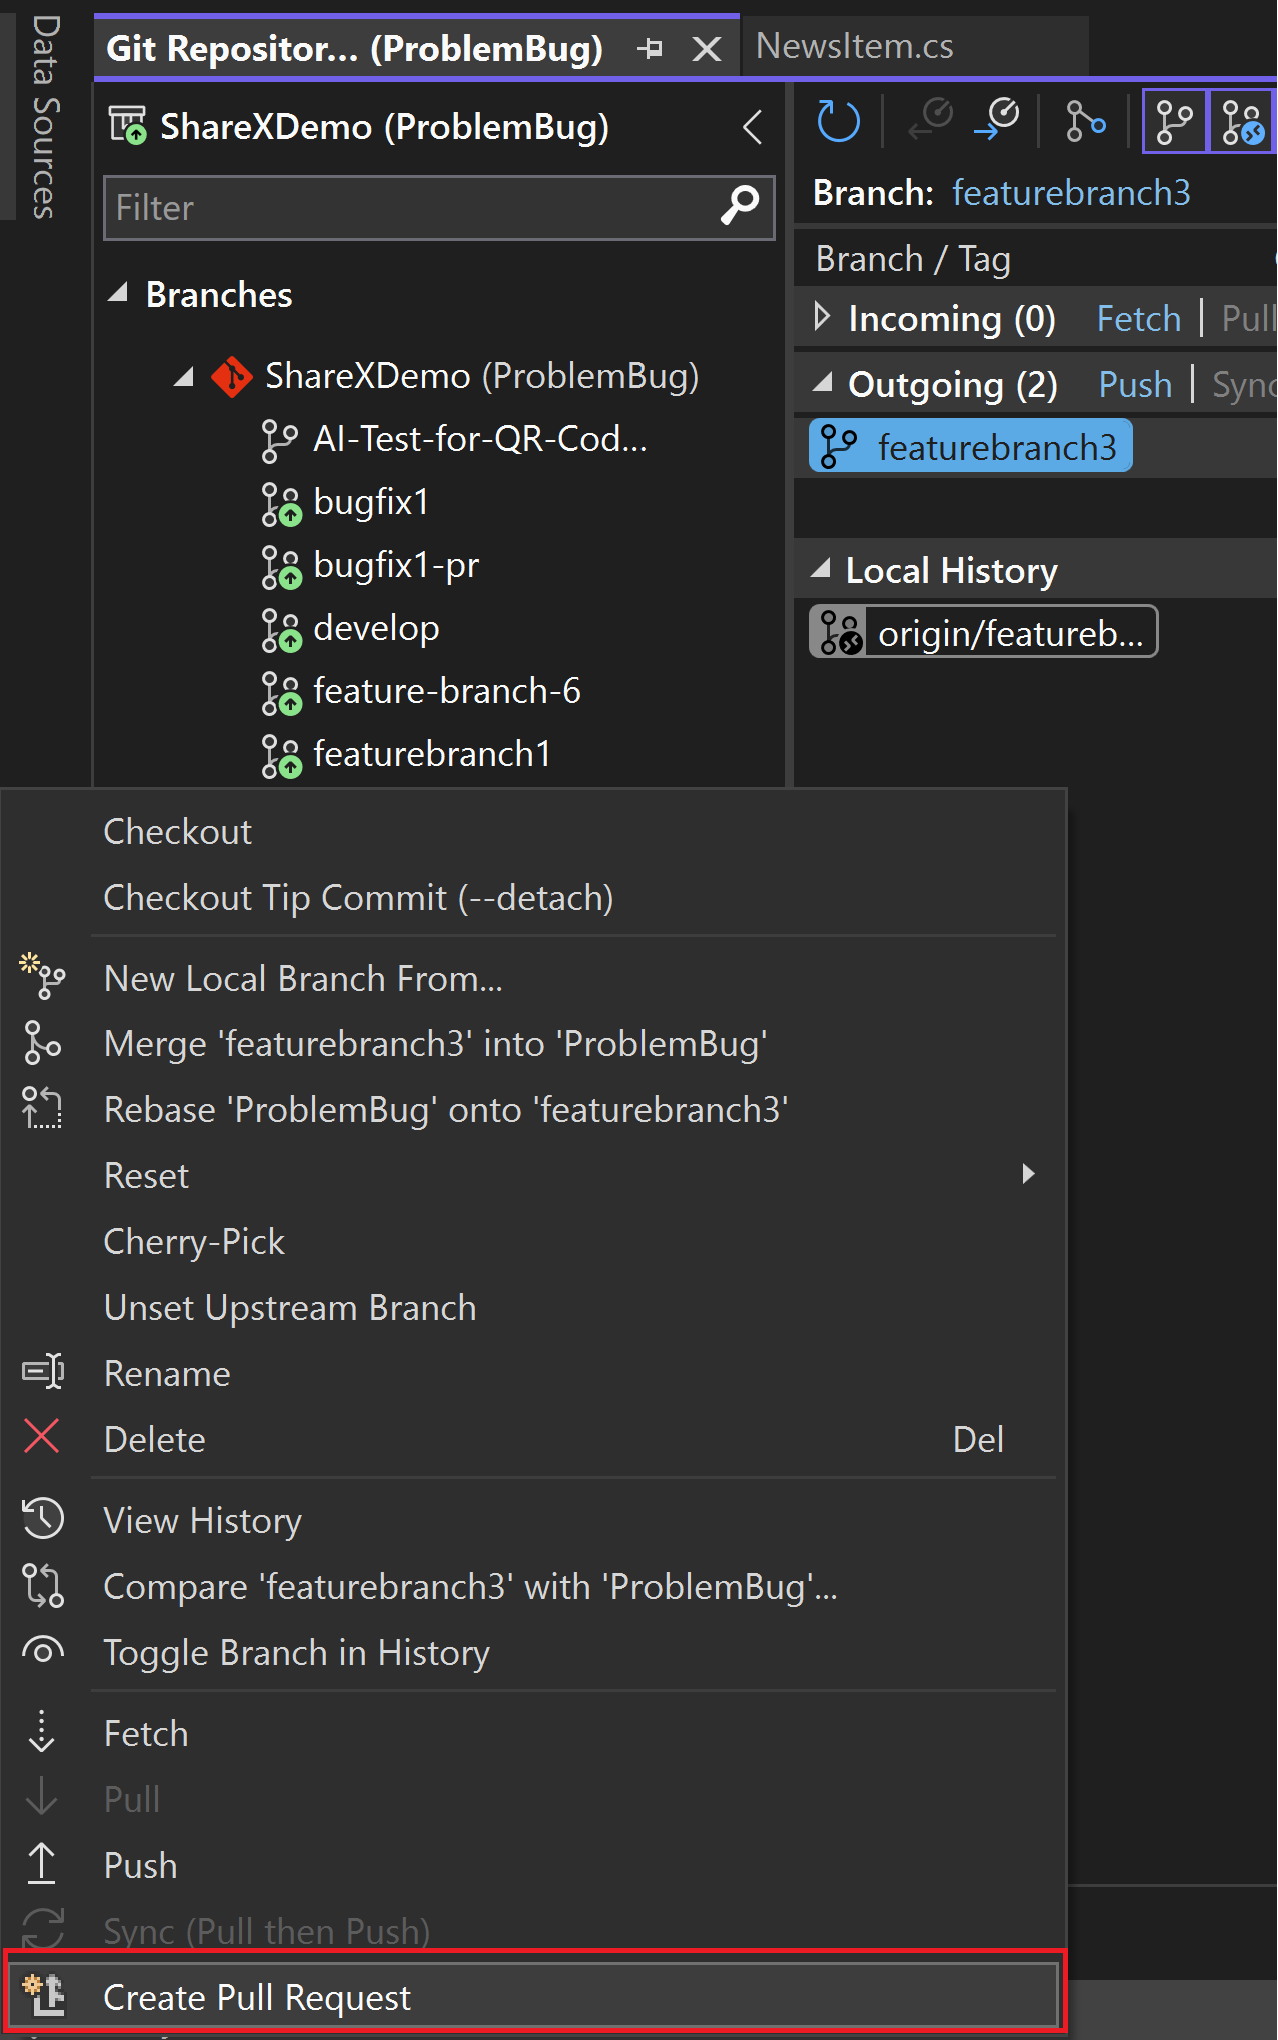
Alternatively, you can create a pull request from a remote branch by navigating to the New Pull Request window via the top-level menu Git > GitHub or Azure DevOps > New Pull Request. Or right-click a branch in the Git Repository Window.

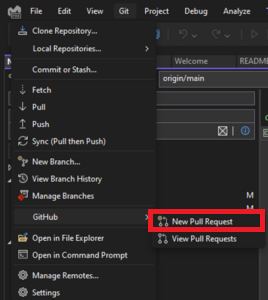
Or right select a branch in the Git Repository Window to open the context menu and select New Pull Request.

When you try to create a pull request but you have multiple accounts in your keychain, you see a prompt asking you which account to use. See Add GitHub accounts to your keychain.
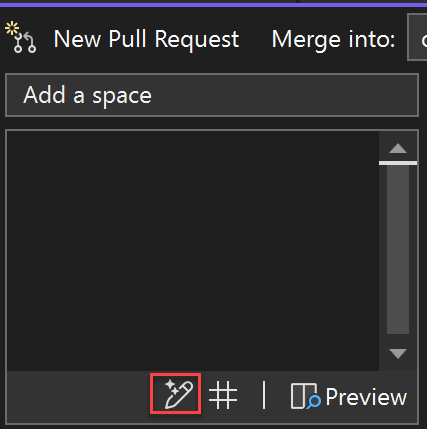
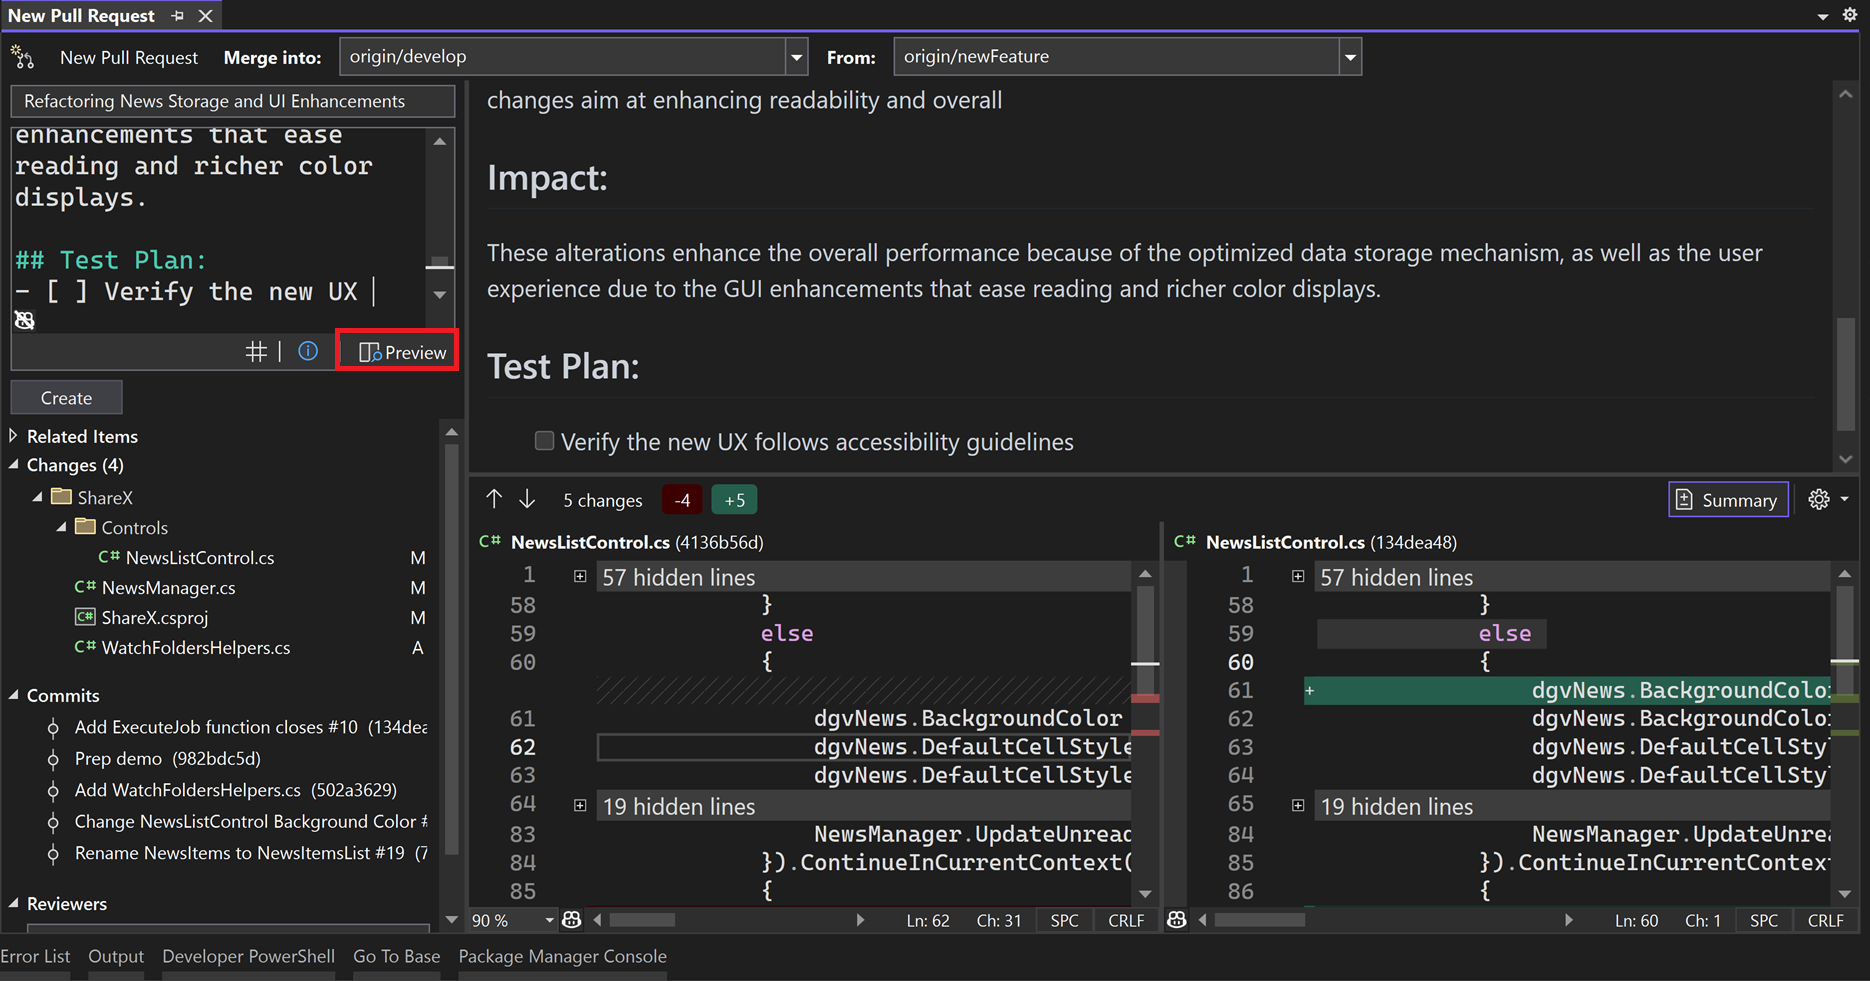
Select the branch that you want to merge into and give your pull request a descriptive title and description. You can use markdown syntax to format your pull request description from Visual Studio. Try it out by typing the markdown symbols in the Description box and preview your markdown by selecting the Preview button.
Tip
With Visual Studio 2022 version 17.10 and later and the GitHub Copilot extensions, you can use AI to generate a detailed pull request description that describes your changes. Press the sparkle pen icon to request that GitHub Copilot generate a PR description. To install GitHub Copilot, see Install and manage GitHub Copilot in Visual Studio.
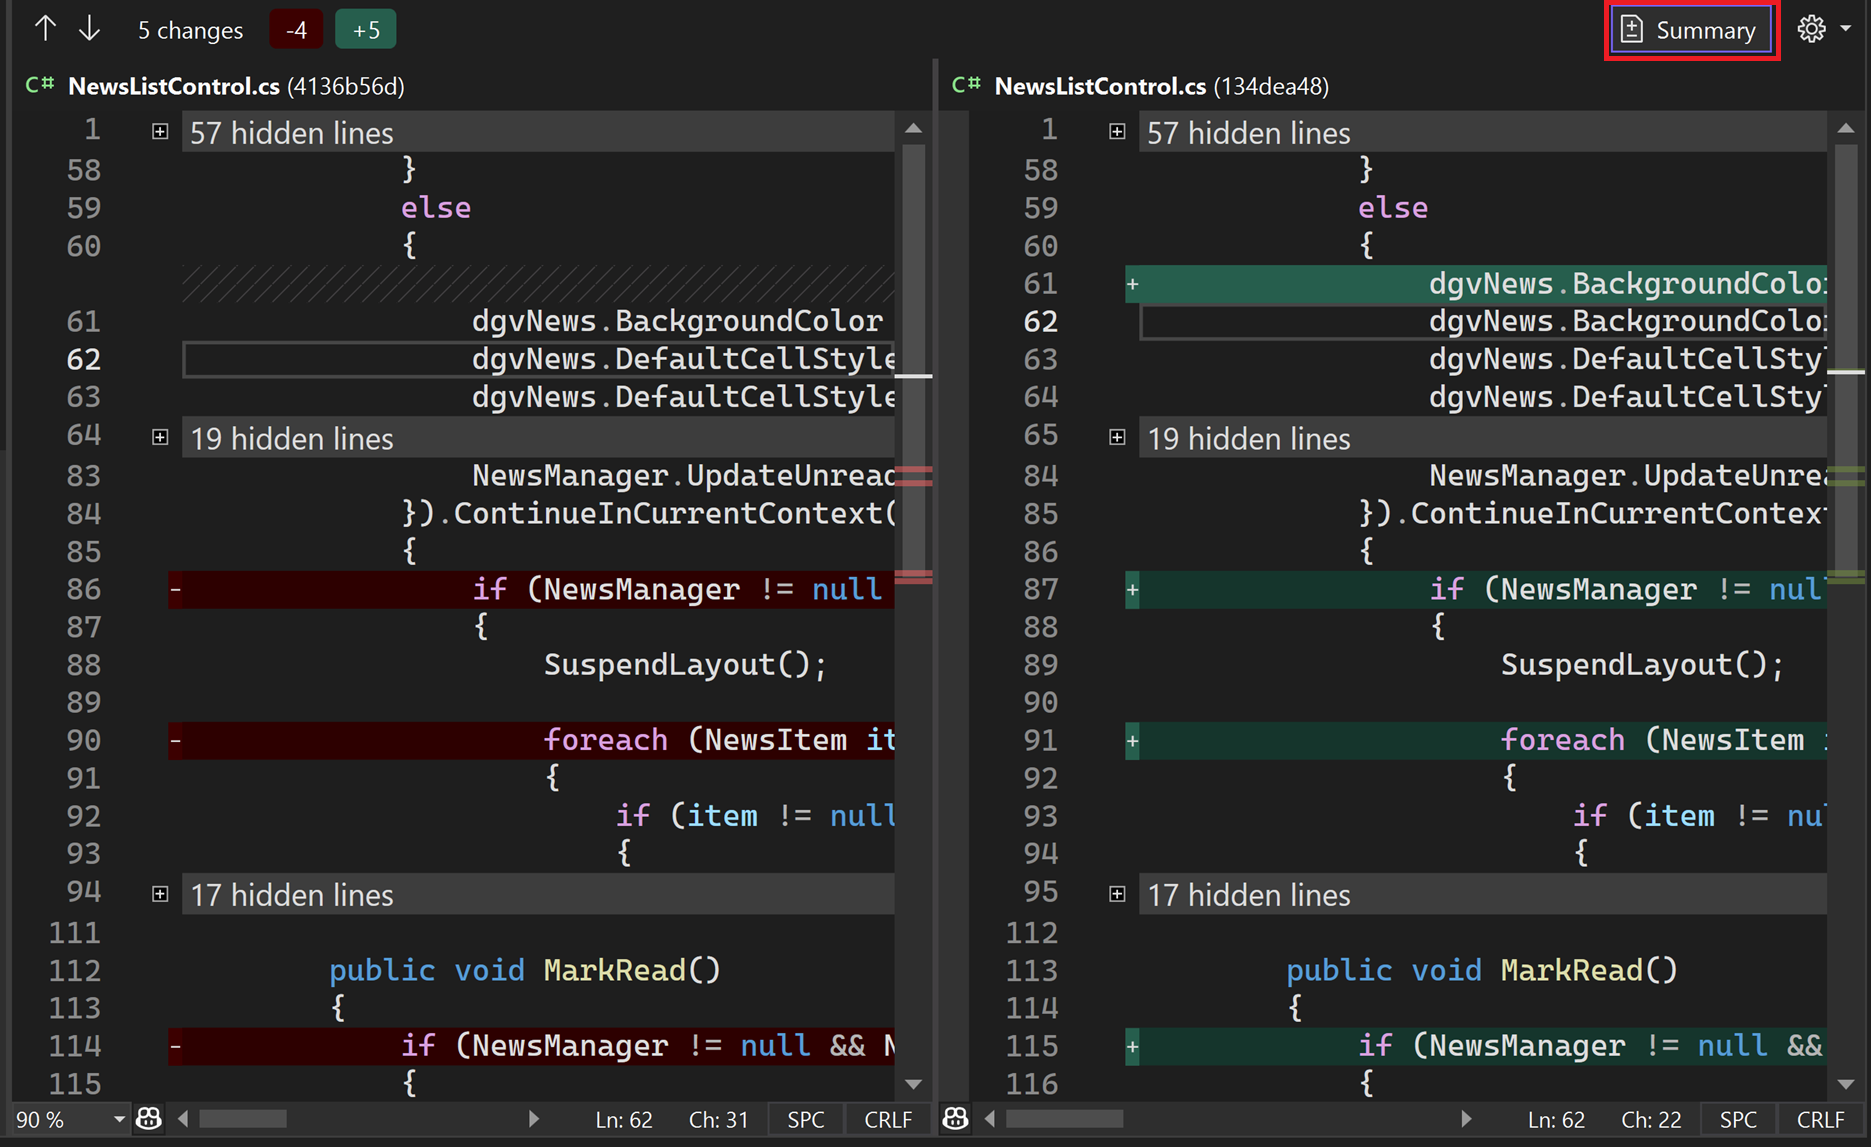
The difference preview allows you to see all the changes in the files that have been committed as a part of your pull request. See Compare files - diff view.
Tip
The summary difference view option allows you to review only the changed sections of code.
You can link work items by referencing them with the issue search, by typing
#in the description box or pressing the # button in the lower right corner. You can also add your reviewers by typing their GitHub username or Azure DevOps identity or email.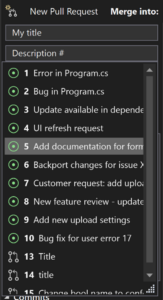
Once you’ve clicked Create on your pull request, other developers can review your changes and provide feedback. Or, with Visual Studio 17.12 and later, select the dropdown and choose Create as Draft.


Learn more about how to add a pull request template to your repository in the GitHub documentation and Azure DevOps documentation.
View or add pull request comments in the editor
With Visual Studio 17.11 or later, you can view comments and suggestions from reviewers without switching contexts to the browser.
To enable this feature, open the Tools > Options pane, expand the All Settings > Preview Features section, and select the Pull Request Comments checkbox.
To enable this feature, open the Tools > Options dialog, and expand the Environment > Preview Features section. Select the Pull Request Comments checkbox, and then select OK.
View pull request comments
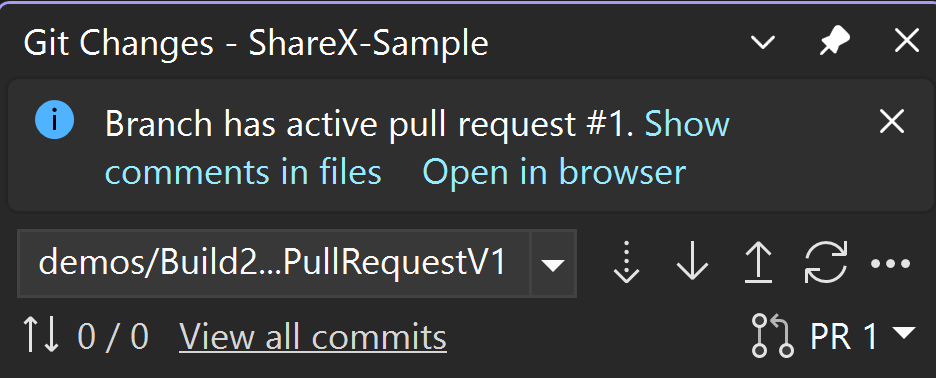
To view the comments for a pull request, check out any branch with an active pull request branch and select Show comments in files from the infobar. You can also select the PR number in the Git Changes window or from the Git top level menu with Git > GitHub or Azure DevOps > Show comments in files.

Add pull request comments
With Visual Studio 17.13 or later, you can review a pull request, or add comments. To enable this feature, open the Tools > Options pane, expand the All Settings > Preview Features section, and select the Pull Request Comments checkbox.
With Visual Studio 17.13 or later, you can review a pull request, or add comments. To enable this feature, open the Tools > Options dialog, and expand the Environment > Preview Features section. Select the Pull Request Comments checkbox, and then select OK.
After you activate comments, check out any branch with an active pull request and click on Show comments in files in the infobar. Navigate through the changes by using the toolbar buttons above the code file.
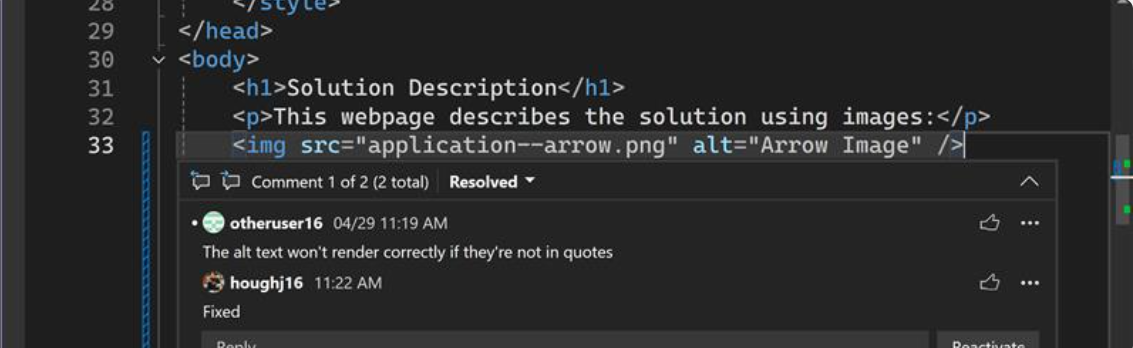
To add a comment, select the Add Comment icon to the left side of the editor, as shown in the following screenshot.


You can also right-click on a line of code and, on the context menu, choose Git > Add comment.
The comment text isn't published until you click the Add Comment button on the comment window.
You can continue the conversation on an existing comment by using the Reply section in the comment box. Comments are either active or resolved. You can click Reply and Resolve to reply to a comment and change the status to resolved in one click, or change the status using the dropdown above the comment text.
You can toggle your like status on a comment by clicking on the icon, or by clicking on the three dots, you can copy the comment text to the clipboard, copy a link to the comment to the clipboard, delete the comment, or open the comment in the web browser at the provider's site (such as github.com or your Azure DevOps project site).
The ability to add comments to a pull request is limited for some Git providers. For example, with GitHub as the provider, you can only add comments on lines within 3 lines of a change, but with the Azure DevOps provider, you can add comments at any line of a file involved in the pull request. In any case, you can only add comments on files that are included in the pull request.
View comments in diff view
You can view comments in the diff view as well as the file view. In the diff view, you can see comments alongside the original and updated code. This makes it easier to see exactly what was changed and why. You can also edit the working file directly in this view.

Markdown formatting in comments
In file view or diff view, comments render using Markdown formatting.

Apply a suggested change from a pull request comment
When a reviewer includes a code suggestion in a pull request comment, you can apply the change directly in the editor without copying and pasting. Select the sparkle icon at the top right of the comment to incorporate the suggestion into your code. You can view the original code, the proposed change, and surrounding context all in one place, so you can evaluate, edit, and test the fix before committing.

Request a suggested change from Copilot
If a pull request comment doesn't include a code suggestion, you can ask GitHub Copilot to generate one. Copilot takes into account the comment text and the surrounding code context to propose a change. You can review, modify, and test the suggested edit before committing, just as you would with a human-authored suggestion.

Note
This feature requires GitHub Copilot to be installed and requires you to be signed in.
Enable or disable pull request comment suggestions
To use the apply and Copilot suggestion features, enable both of the following feature flags:
- Tools > Options > Preview Features > Pull Request Comments
- Tools > Options > GitHub > Copilot > Source Control Integration > Enable Git preview features
You can also apply code suggestions from comments during local code review. Copilot uses your local review comments to suggest fixes before you commit.
Use the keyboard
You can navigate across files and individual comments using the icons in the toolbar, or use the following keyboard shortcuts:
| Action | Keyboard shortcut |
|---|---|
| Go to the previous file in the pull request | Ctrl+Shift+Alt+F6 |
| Go to the next file in the pull request | Ctrl+Alt+F6 |
| Go to the previous comment | Ctrl+Shift+Alt+F8 |
| Go to the next comment | Ctrl+Alt+F8 |
| Hide comments in files | Ctrl+Shift+F1 |
Next steps
To continue your journey, visit the Fetch, pull, and sync in Visual Studio page.