Note
Access to this page requires authorization. You can try signing in or changing directories.
Access to this page requires authorization. You can try changing directories.
After you've authenticated to GitHub, Visual Studio can improve your GitHub workflow. One of those improvements is the ability to push (also known as publish) a local project directly to GitHub with a single click. The final stage in a simple Git workflow is to push changes to your remote.
A remote is a reference to a Git repository hosted somewhere other than the local computer, called something like origin/main (or origin/master), where "origin" is the default name for a remote. For more information about this terminology, see the Git Branching - Remote Branches page on the Git website.
While this article references GitHub repositories, you can work remotely with the Git provider of your choice, such as GitHub, GitLab, or Azure DevOps.
Here's how to push to a remote in Visual Studio.
Make sure you've got a file open to work on that's in a previously created or cloned repo.
Make a change to the file, save it, select the Git Changes tab, and then commit the change.
In the Git Changes window, notice the link text that includes the number of incoming and outgoing commits. In the following example, the link text reads 1 outgoing / 0 incoming.
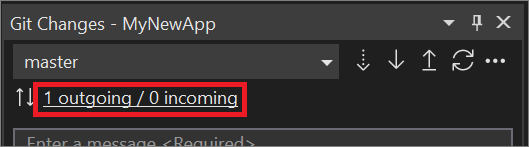
The "outgoing" text represents the number of commits that haven't yet been pushed to the remote, while the "incoming" text represents the commits that have been fetched but not yet pulled from the remote.
To push to your remote, select Push button (the up arrow), or select Push from the Git menu.
If the local branch is behind the remote branch, git doesn't allow a normal push, and you're prompted for what to do next. You can:
Pull then Push. Use if you want to get the latest changes on the remote branch and then push your changes to the remote branch. This works well if you don't have any conflicting changes and you want to get up-to-date.
Pull. Updates the local branch, but doesn't push your changes. With this option, you can inspect the changes or resolve conflicts before trying to push your changes again.
(If you enable it) Force push. Push your changes without updating your local branch.
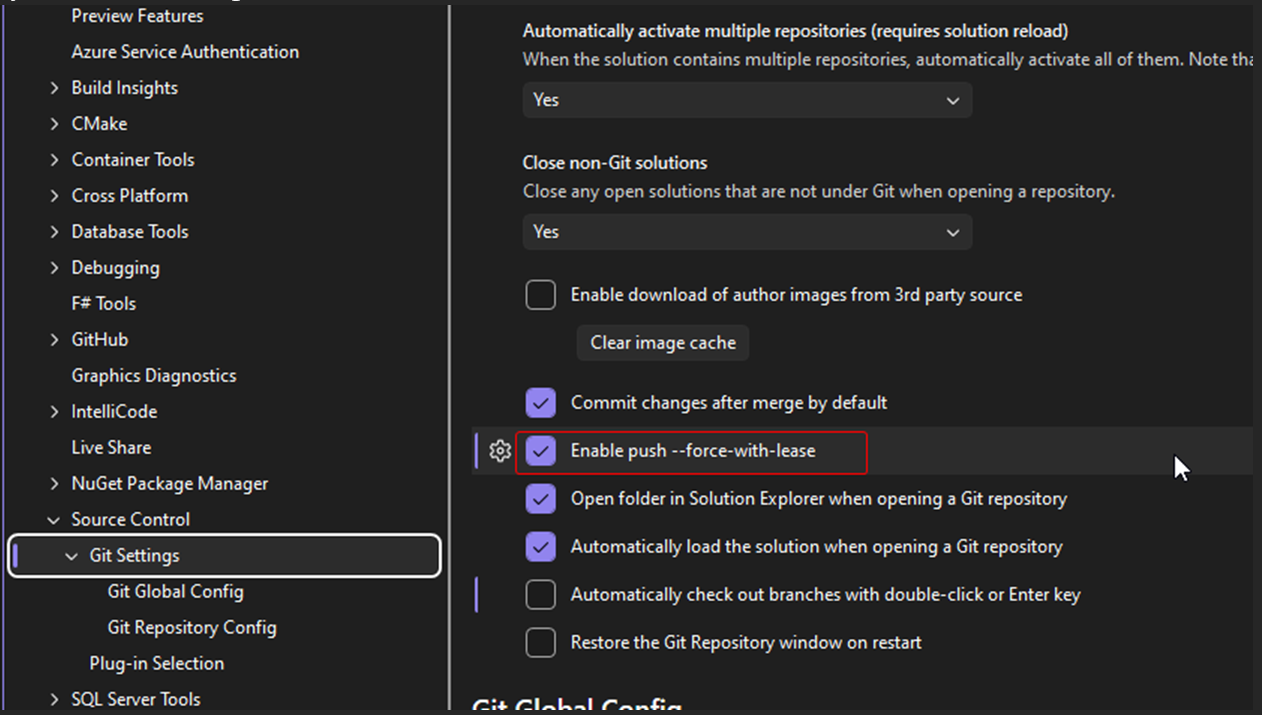
To enable force push, go to Tools > Options > All Settings > Source Control > Git Settings, and enable Enable push --force-with-lease. The intent of this option is to allow you to attempt a push even if changes have taken place in the remote repository, without overwriting the other changes. For more information about this option, see this Stackoverflow question and the official git push documentation.
If you enable this option, the Pull option isn't available in the prompt. You can still pull normally as described in git fetch, pull, push, & sync.
Cancel. Nothing happens. The changes from the remote branch are not pulled, and your changes are not pushed. Your local branch is still out-of-date.