Note
Access to this page requires authorization. You can try signing in or changing directories.
Access to this page requires authorization. You can try changing directories.
Follow the steps below to use an Azure Data Factory template to send data to the API-based import.
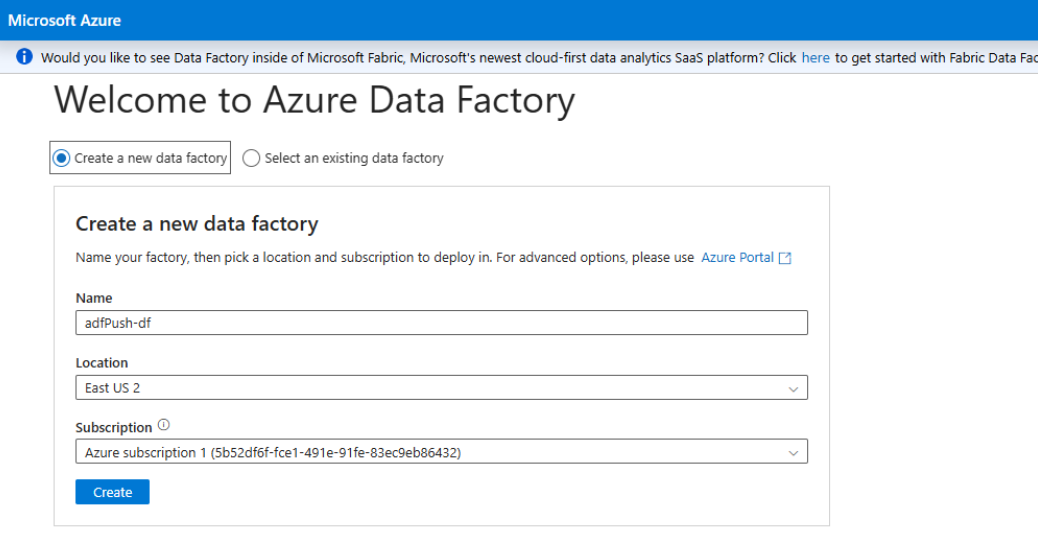
1. Create new Azure Data Factory
Log in to https://adf.azure.com/en/datafactories.
Create a new data factory or use an existing data factory. Complete the fields, then select Create.
2. Create a new pipeline and activity
Create a new pipeline and enter a name for the pipeline.
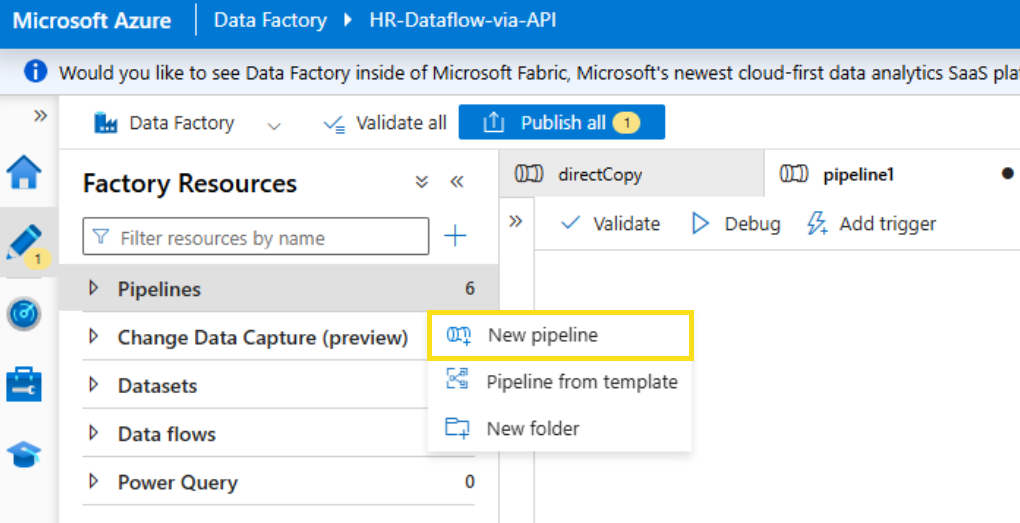
Under Activities, add Copy data.
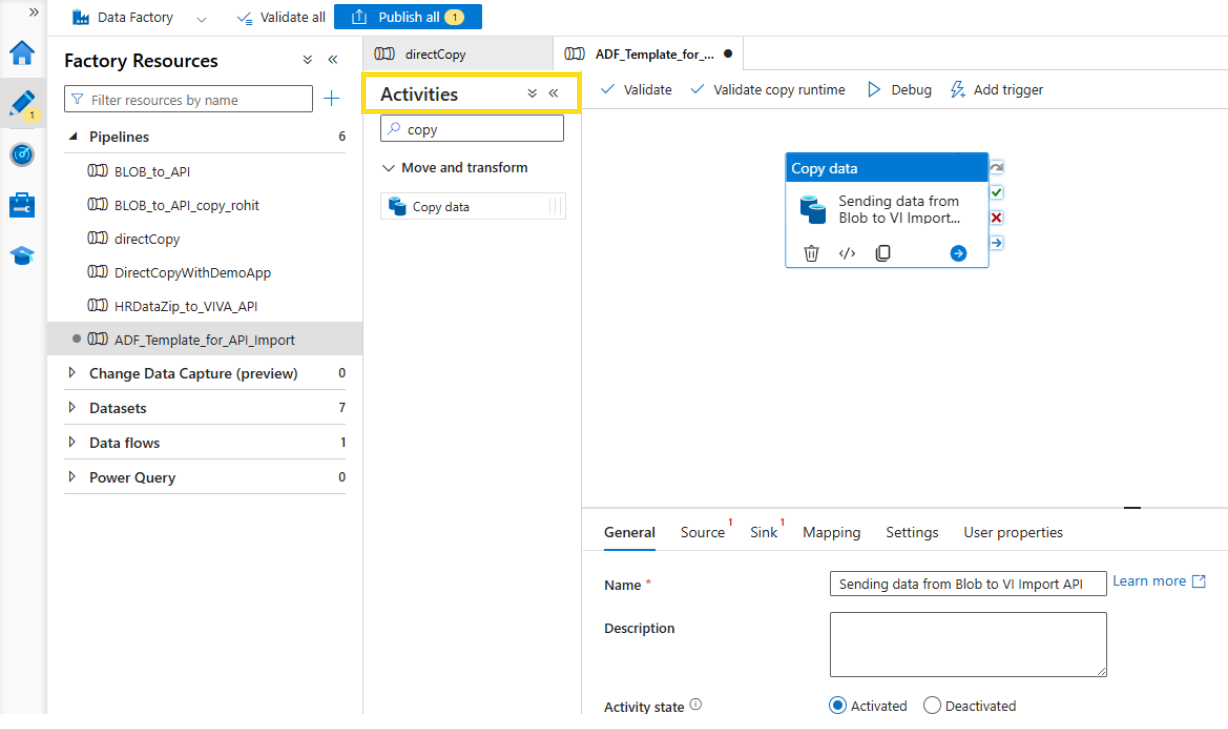
3. Copy data activity settings: General
Select your Copy data activity, then select General to complete each field using the guidance below.
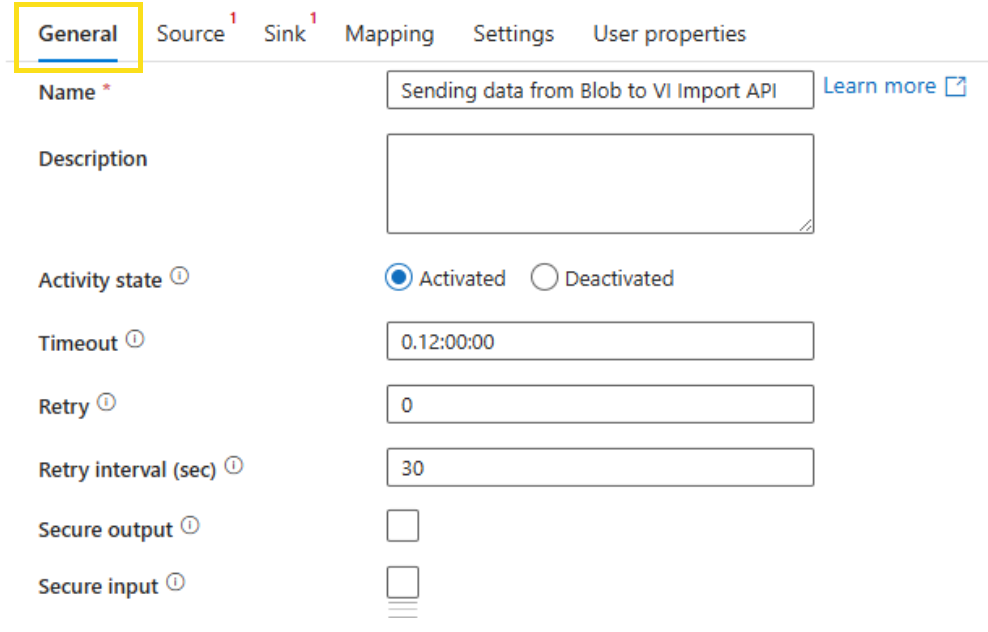
- Name: Enter a name for your activity.
- Description: Enter a description for your activity.
- Activity state: Select Activated. Or select Deactivated to exclude the activity from the pipeline run and validation.
- Timeout: This is the maximum amount of time an activity can run. The default is 12 hours, the minimum is 10 minutes, and the maximum amount of time allowed is seven days. The format is in D.HH:MM:SS.
- Retry: The maximum number of retry attempts. This can be left as 0.
- Retry interval (sec): The maximum number of retry attempts. This can be left as 30 if the retry attempt is set as 0.
- Secure output: When selected, the output from the activity isn't captured in logging. You can leave this cleared.
- Secure input: When selected, the input from the activity isn't captured in logging. You can leave this cleared.
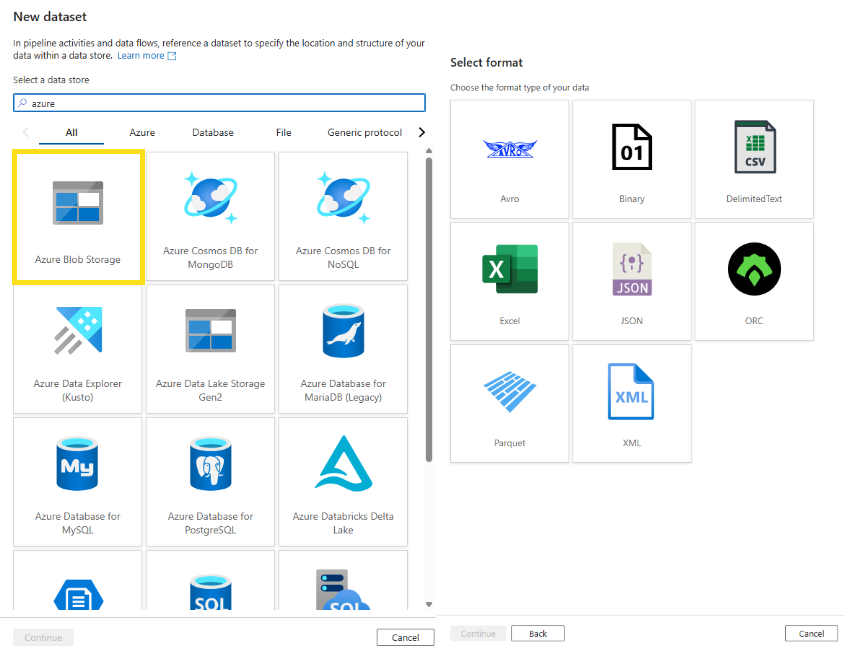
4. Copy data activity settings: Source
Select Source.
Select an existing source dataset or select +New to create a new source dataset. For example, under New dataset select Azure Blob Storage, then select the format type of your data.
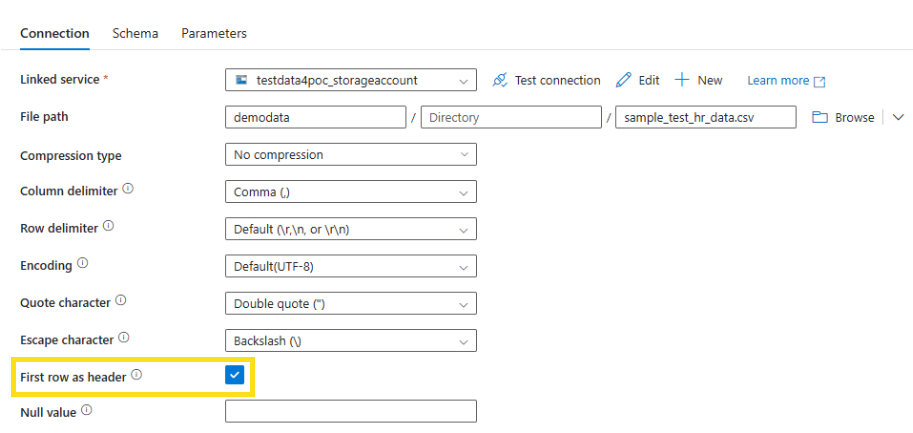
Set the properties for the .csv file. Enter a Name and under Linked service, select an existing location or select +New.
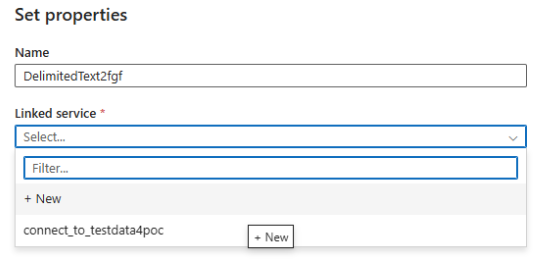
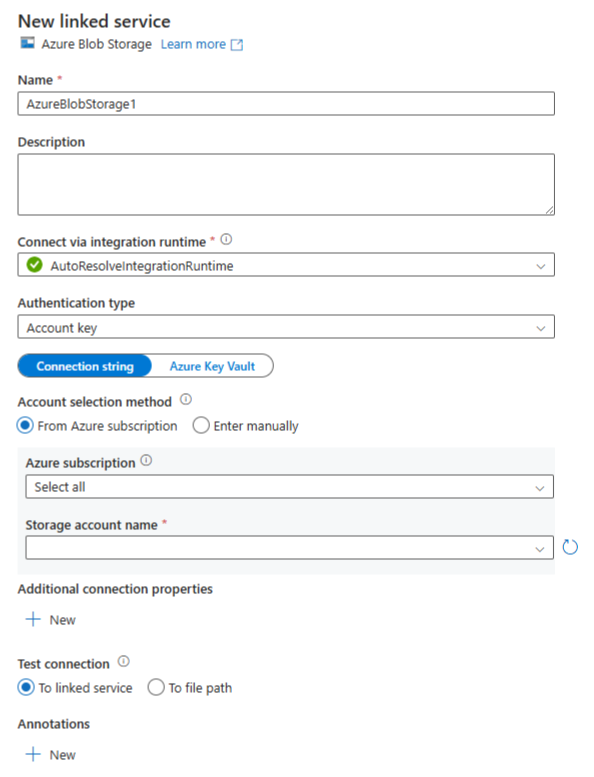
If you selected +New, enter the details for the new linked service using the guidance below.
Next to Source dataset, select Open.
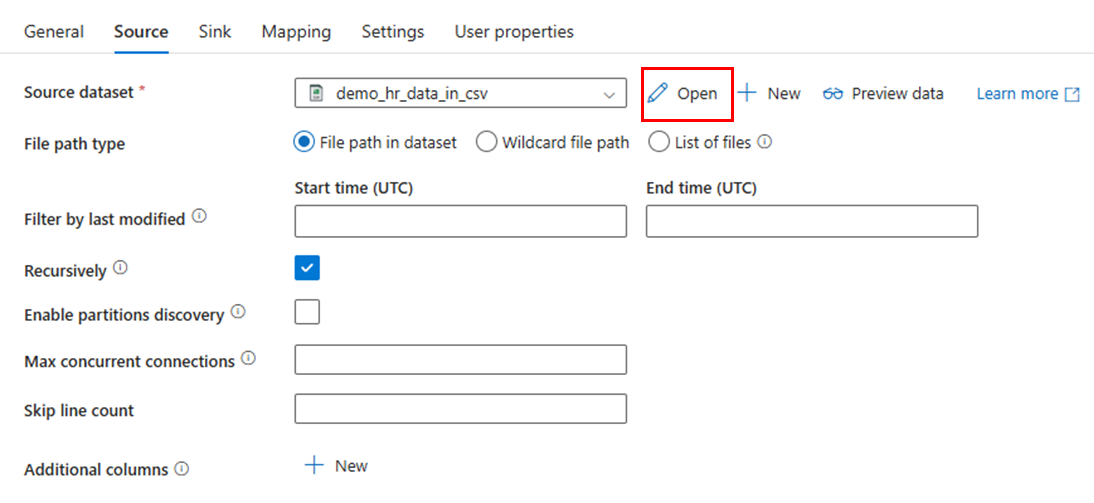
Select First row as header.
5. Copy data activity settings: Sink
Select Sink.
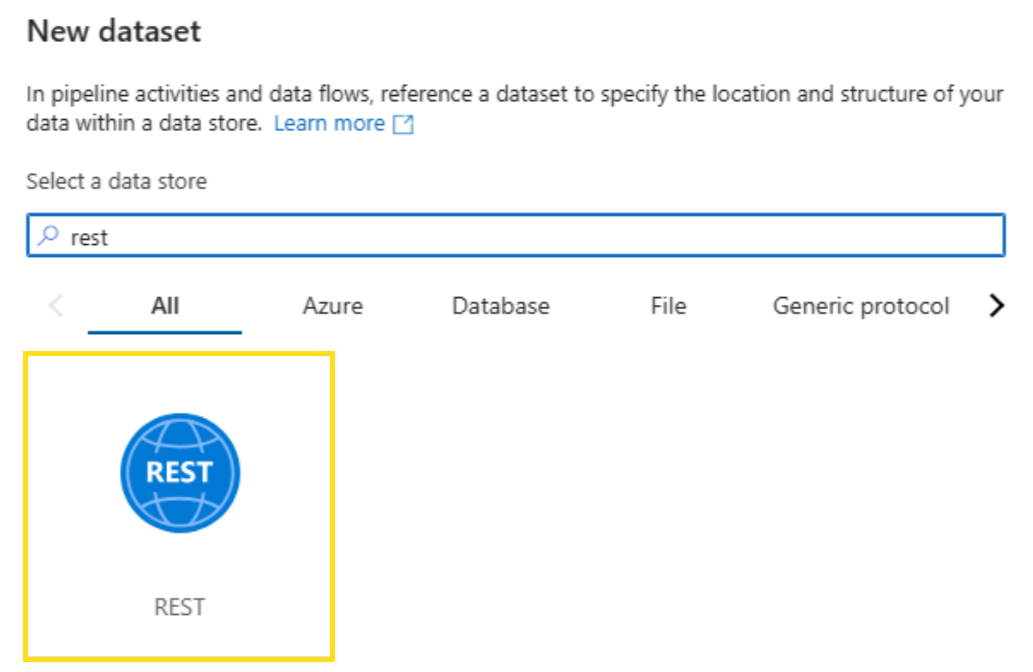
Select +New to configure a new rest resource to connect to the API. Search for "Rest" and select Continue.

Name the service. Under Linked service select +New.
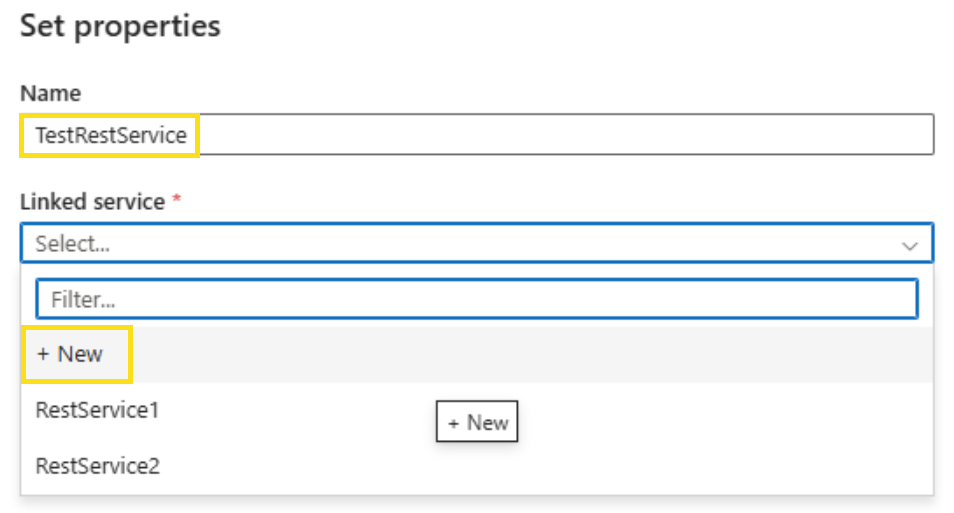
Search for "Rest" and select it.
Enter the fields using the guidance below.
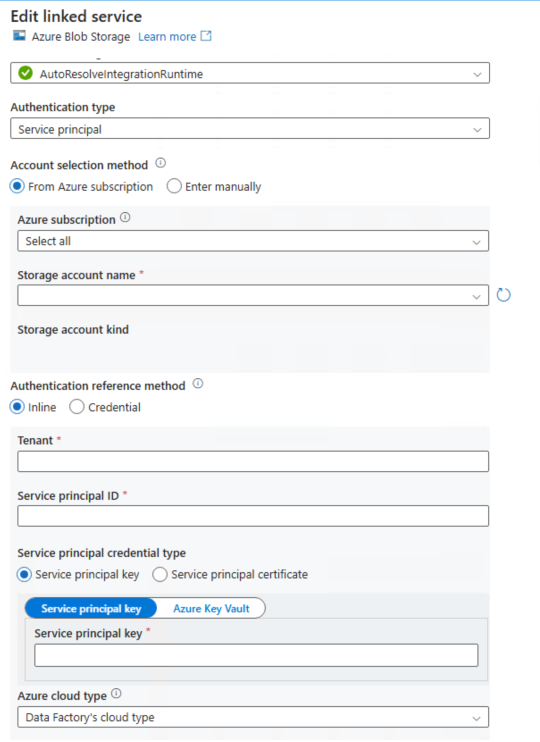
- Name: Enter a name for your new linked service.
- Description: Enter a description to your new linked service.
- Connect via integration runtime: Enter preferred method.
- Base URL: Use the URL below and replace {tenantid} with your tenant ID:
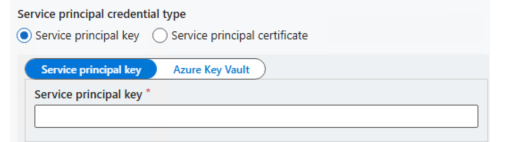
https://api.orginsights.viva.office.com/v1.0/tenants/{tenantid}/modis/connectors/HR/ingestions/fileIngestion - Authentication type: Select your authentication type as Service principal, then select Secret or Certificate. Service principal example:
Inline: Select it.
Service principal ID: Enter the App ID authorized for the API connector.
Service principal key: Enter the key.
Tenant: Enter the tenant ID.
Microsoft Entra ID resource: https://api.orginsights.viva.office.com
Azure cloud type: Select your Azure cloud type.
Server certificate validation: Select Enabled.
Enter the Sink settings using the guidance below.
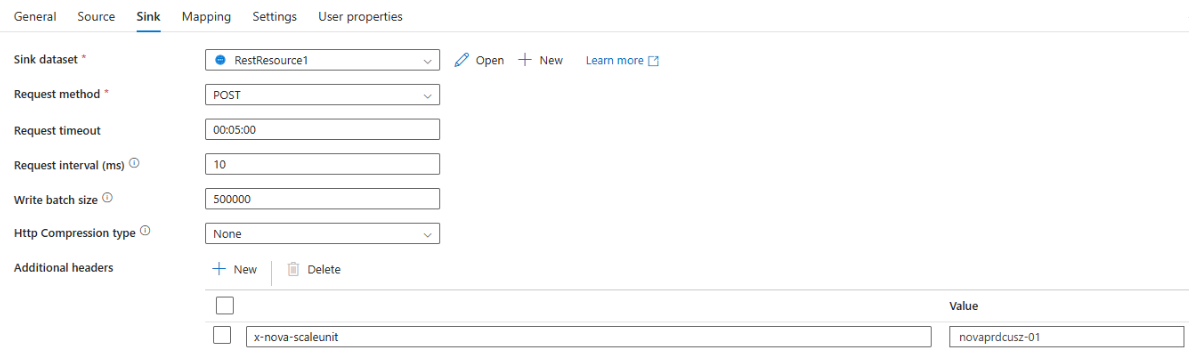
- Sink dataset: Select the existing or newly created dataset.
- Request method: Select POST.
- Request timeout: Five minutes is the default.
- Request interval (ms): 10 is the default.
- Write batch size: The batch size should be higher than the maximum number of lines in your file.
- Http compression type: None is the default. Or you can use GZip.
- Additional headers: Select +New.
- Box 1: x-nova-scaleunit
- Value: You can retrieve the value by navigating to the Data Connections page on the Organizational Data in Microsoft 365 page (Home > Setup > Migration and imports > Organizational Data in Microsoft 365 > Data Connections). Then, select New import > Select connection type > Start API based setup > Set up API based connection page.
6. Copy data activity settings: Mapping
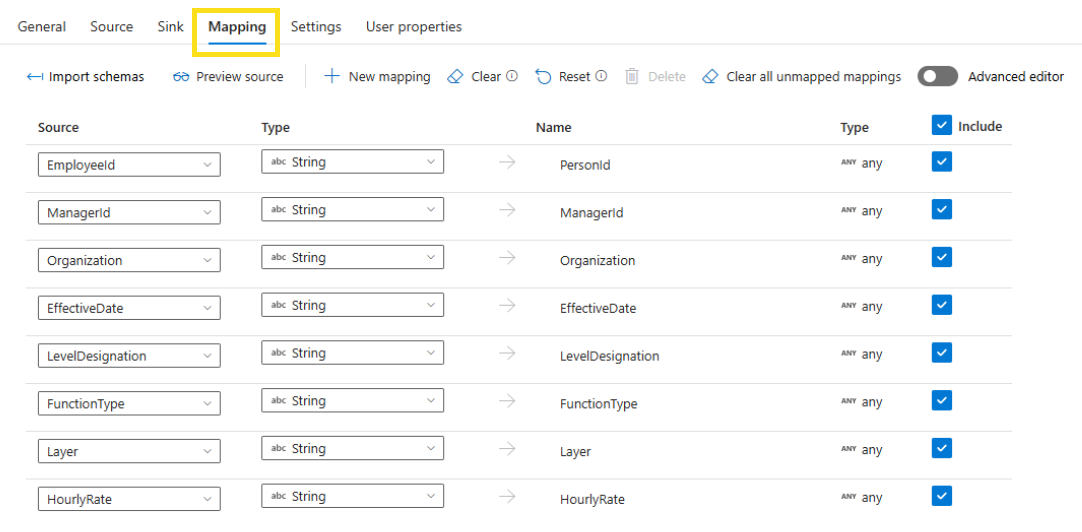
Select Mapping.
For the bootstrap upload, make sure to include PersonId, ManagerId, and Organization in the mapping (destination name). For the incremental upload, verify that the destination names are consistent with those in the previous upload, along with PersonId. You can't perform incremental uploads with new columns, and PersonId is required in all uploads.
7. Copy data activity settings: Settings and User Properties
No other customizations are required for Settings or User Properties. You can edit these settings on a case-by-case basis if you need to.
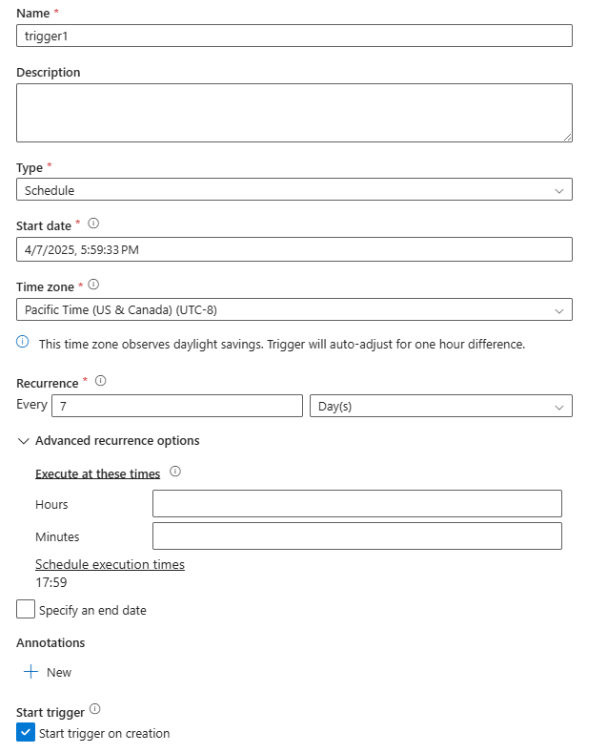
8. Copy data activity: Trigger Setup (Automation)
To add a trigger to the automation setup, select Add trigger. The recommended automation is weekly. You can also customize the frequency.