Note
Access to this page requires authorization. You can try signing in or changing directories.
Access to this page requires authorization. You can try changing directories.
You can add link to content found in SharePoint, YouTube, Vimeo, news articles, and other sources into Viva Learning. Content can be bookmarked, recommended, and shared.
Viva Learning supports the following document types, when adding content from SharePoint:
- Word, PowerPoint, Excel, PDF
- Audio (.m4a, .mp3)
- Video (.mov, .mp4, .avi)
- Linked objects
Note
Viva Learning is currently unable to support video (.avi) document type in the standalone web app due to an ongoing issue. Once the issue is fixed, we continue to support this document type.
Note
- You need a Viva Suite or Viva Learning license to add link to content.
- This content isn't searchable in Viva Learning.
- The default language for this content is the one set by your organization's admin.
Create a learning path, learning collection, or featured set
Select Add content to add courses to you're learning path.
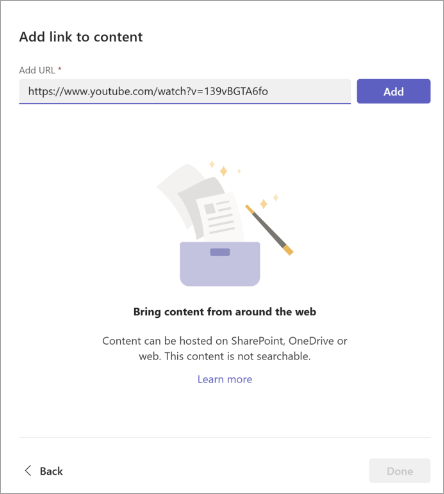
Select Add link to content.
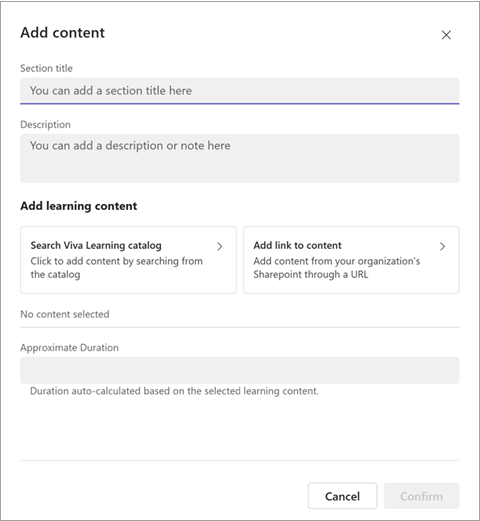
Paste the SharePoint URL or web link. Select Add.
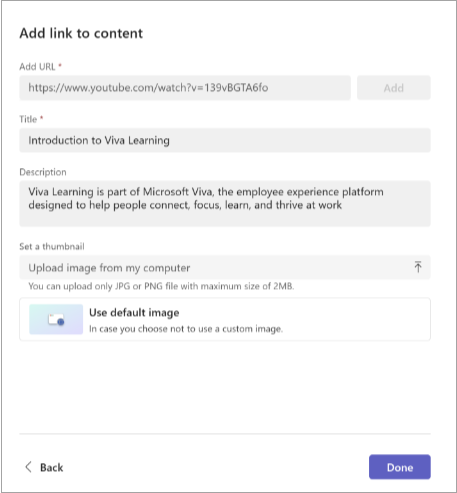
Edit the title, thumbnail, and description.
Select Done.
To edit content, go to the section and select the pencil icon.
To delete content, go to the section, edit, and select the cross.
Add linked objects
You can add links to both internal content from SharePoint and external content from sites such as YouTube or Vimeo included in Viva Learning.
To add a SharePoint page or SharePoint site, create a linked object and add the link using this process:
In your folder, select New and then choose Link.
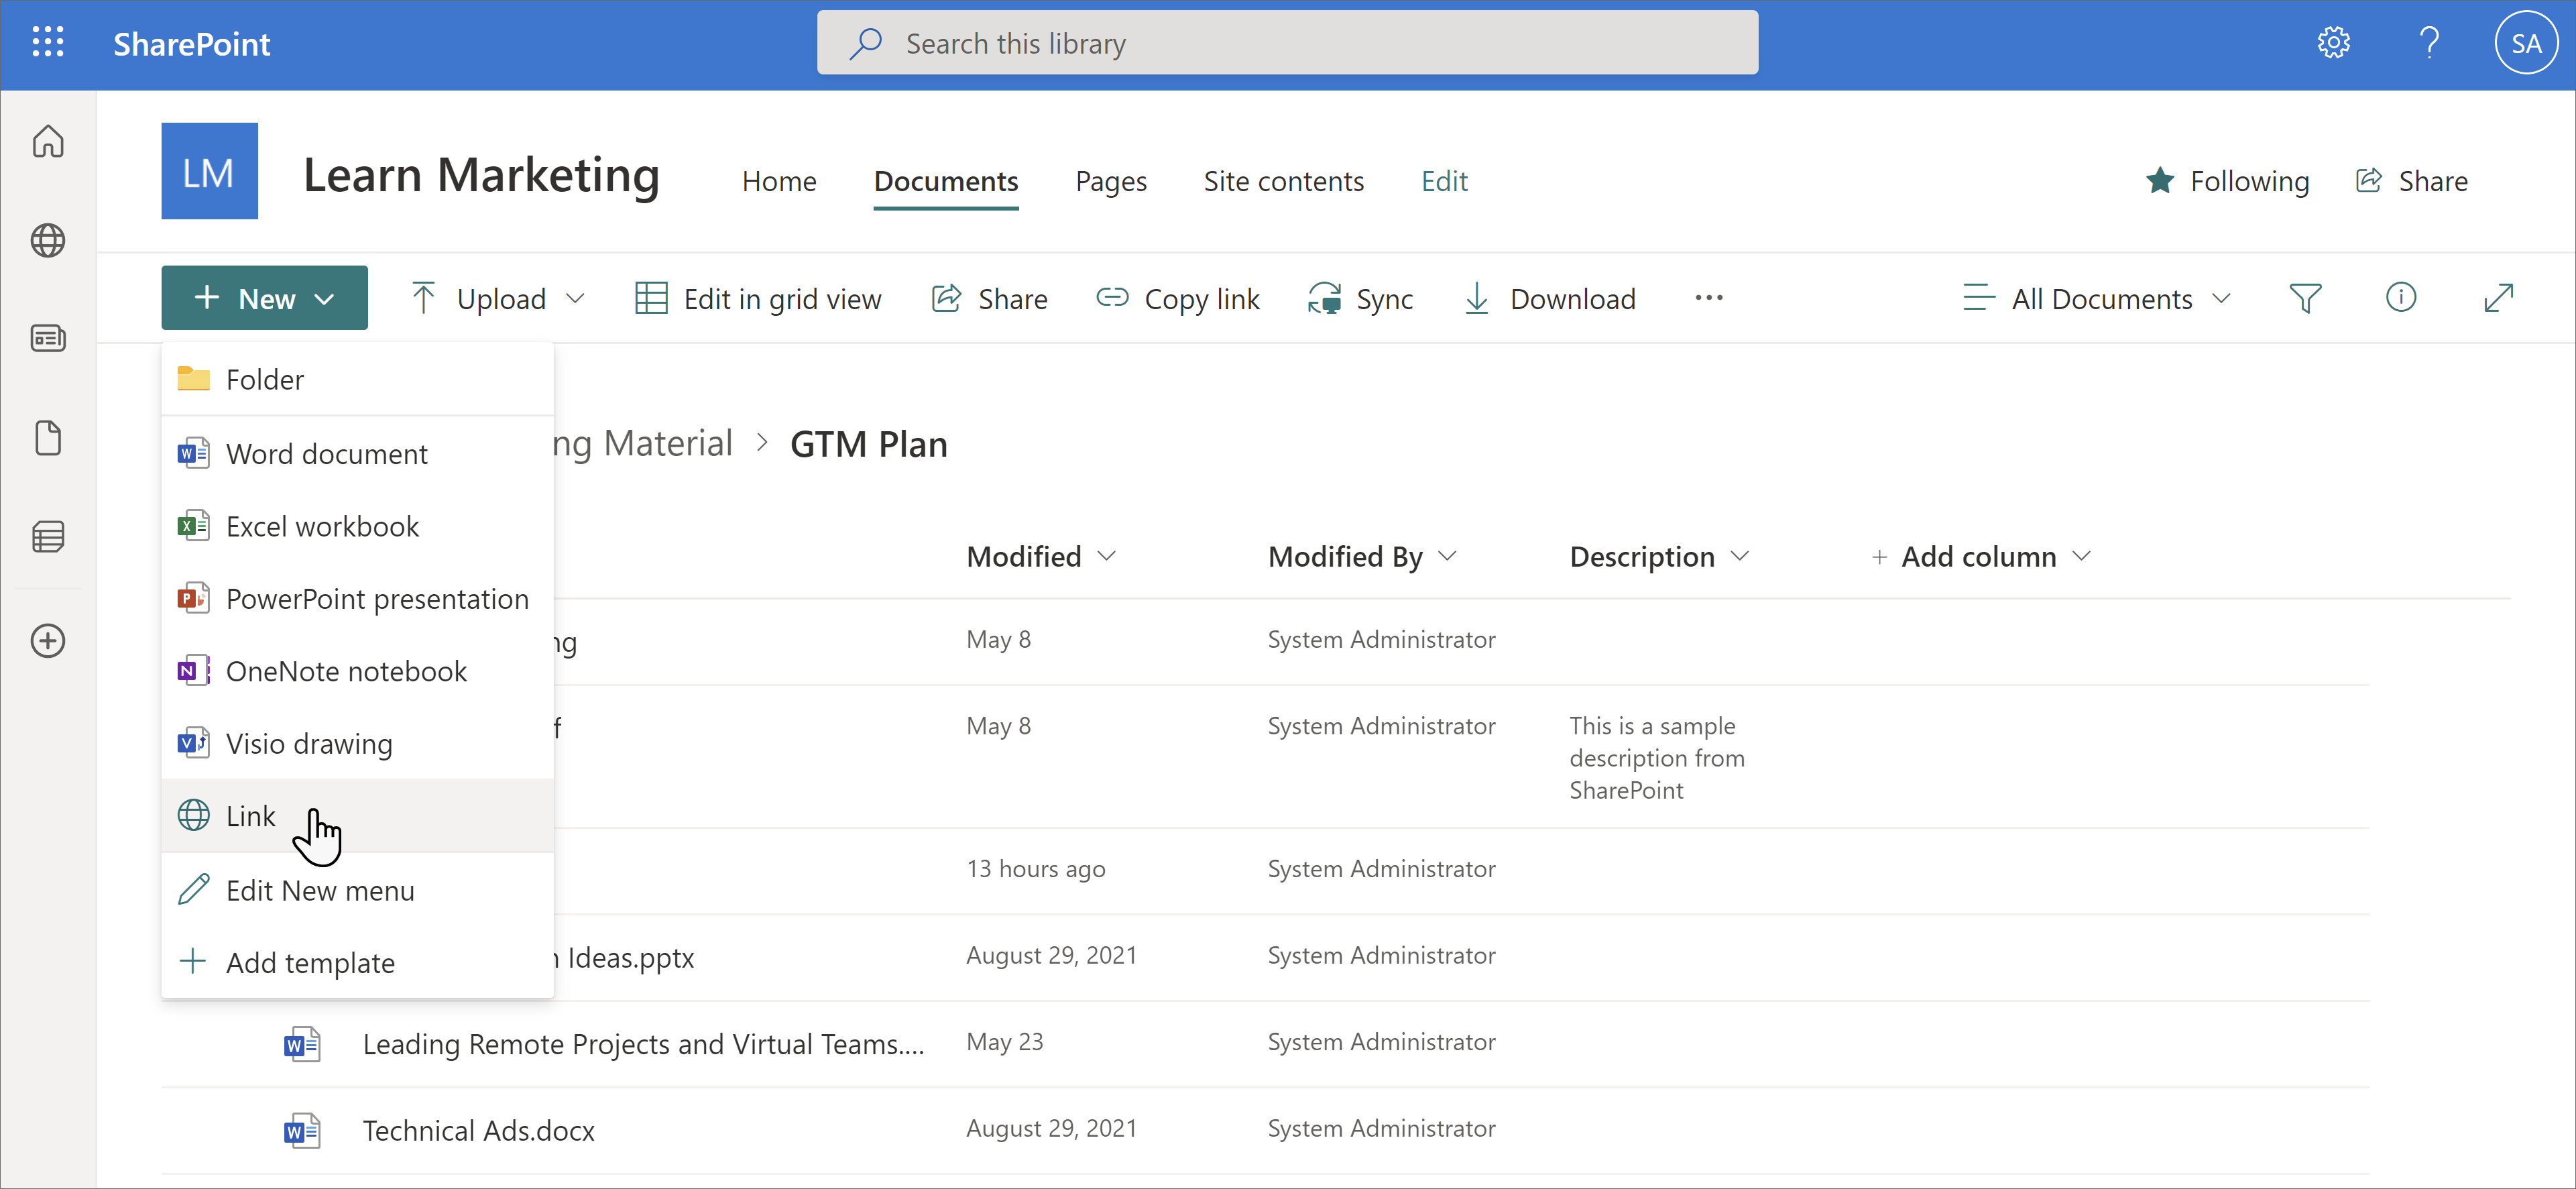
Add the URL and choose a name.
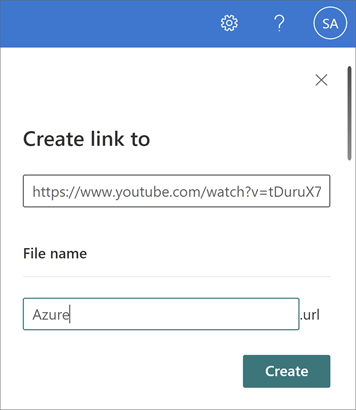
Select Create.
The link appears in your document library with the name you selected.
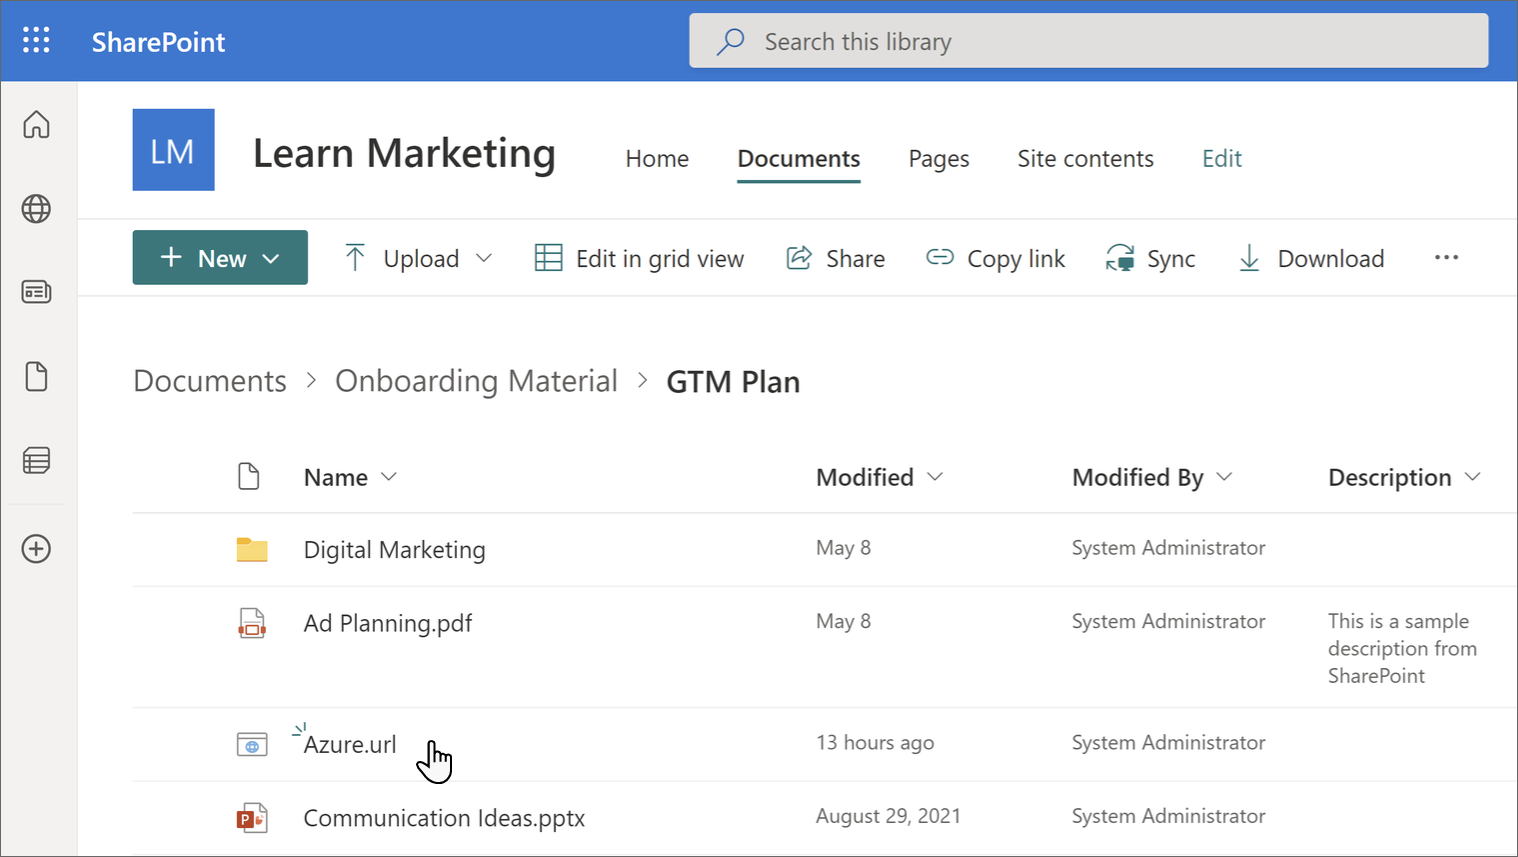

The linked object now displays in the Viva Learning app.