Note
Access to this page requires authorization. You can try signing in or changing directories.
Access to this page requires authorization. You can try changing directories.
This topic provides a walkthrough of a simulated firmware update on a virtual HID device.
Note
CFU is available in Windows 10, version 2004 (Windows 10 May 2020 Update) and later versions.
Build and install the CFU virtual HID device sample
Install Visual Studio 2019 and the Windows Driver Kit (WDK) as outlined at Download the Windows Driver Kit (WDK).
Clone the Microsoft CFU repository into a local repository directory
git clone https://github.com/microsoft/CFU.gitIn your local CFU repository directory, at a command prompt, run the following git commands to get the Driver Module Framework (DMF) submodule required to build the sample:
git submodule initgit submodule updateBuild the CfuVirtualHid device solution in Visual Studio
Navigate to the location of the CfuVirtualHid.sln file on your development system. For example:
C:\<your_repo_folder>\CFU\Host\CFUFirmwareSimulation\CfuVirtualHid.slnOpen the CfuVirtualHid.sln file in Visual Studio.
From the Build menu, select Build Solution. You should see output text indicating that the solution built successfully:

Install the CfuVirtualHid device and driver
Navigate to the location of the cfuvirtualhid.inf file on your development system. For example:
C:\<your_repo_folder>\CFU\Host\CFUFirmwareSimulation\x64\Debug\CfuVirtualHidAt an administrative command prompt, run the following command:
devcon.exe install cfuvirtualhid.inf HID\CFU_VIRTUAL_DEVICEYou should see output text indicating that the virtual device installed successfully:

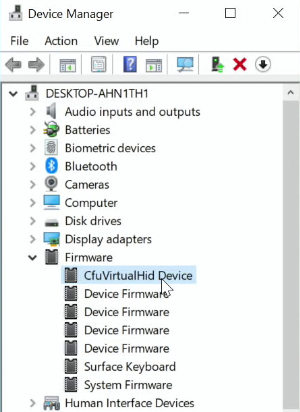
From Control Panel, open Device Manager, select the View menu, and select the Devices by type menu item.
In the devices list, expand the Firmware node, and select the CfuVirtualHid Device as shown here:
Right-click the CfuVirtualHid Device to open the context menu, then click on the Properties menu item to open the CfuVirtualHid Device Properties dialog window.
Select the Details tab in the CfuVirtualHid Device Properties dialog window, then select Hardware Ids in the Property drop down list.
You should see the HID\CFU_VIRTUAL_DEVICE in the Value list box as shown here:
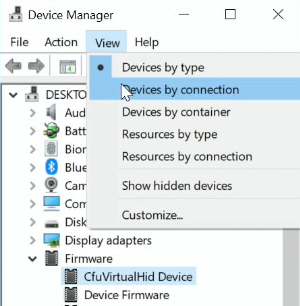
In the Device Manager menu, select the View menu, and select the Devices by connection menu item.
Navigate to the CfuVirtualHid Device and expand the CfuVirtualHid Device node, expand the Virtual HID Framework (VHF) HID device node, and select the HID-compliant device list item as shown here:

Right-click the HID-compliant device to open the context menu, then click on the Properties menu item to open the HID-compliant device Properties dialog window.
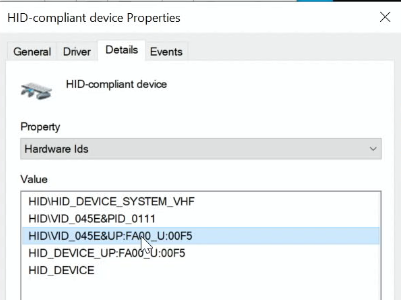
Select the Details tab in the HID-compliant device Properties dialog window, then select Hardware Ids in the Property drop down list.
You should see HID\VID_045E&UP:FA00_U:00F5 in the Value list box as shown here:
Install a firmware update for the CFU virtual HID device
This section provides an example of installing a firmware update on the sample CfuVirtualHid Device device built in Visual Studio 2019 and installed using the devcon.exe command-line tool as described in the section above.
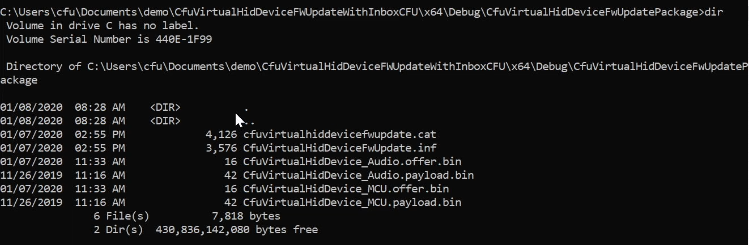
Navigate to the location of the .inf file and the firmware offer and payload .bin files for your target device. For example:
In a text editor, open your firmware update INF file. In this example, we'll use the CfuVirtualHidDeviceFwUpdate.inf file outlined in the CFU INF configuration.
In your firmware update INF file, move to the
[Standard.NTamd64]section and verify the following information exists for the HID\VID_045E&UP:FA00_U:00F5 device:[Standard.NTamd64] %CfuVirtualHidDeviceFwUpdate.DeviceDesc%=CfuVirtualHidDeviceFwUpdate, HID\VID_045E&UP:FA00_U:00F5 ; HardwareID for VirtualHidDevice MCU [CfuVirtualHidDeviceFwUpdate.NT] Include = HidCfu.inf Needs = HidCfu.NT CopyFiles = CfuVirtualHidDeviceFwUpdate.CopyFiles [CfuVirtualHidDeviceFwUpdate.NT.Wdf] Include = HidCfu.inf Needs = HidCfu.NT.WdfAt an administrative command prompt, run the following command:
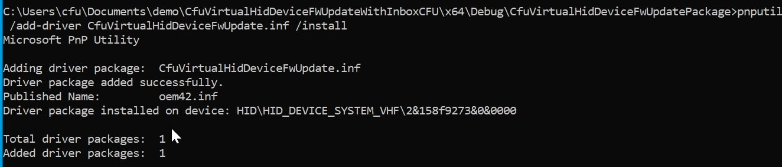
pnputil /add-driver CfuVirtualHidDeviceFwUpdate.inf /installThis command will return the PnP Utility output. For example:
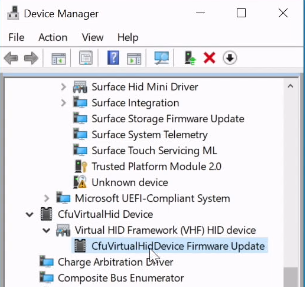
In Device Manager, navigate to the CfuVirtualHid Device node, then expand the node to verify that the CfuVirtualHidDevice Firmware Update has been installed, as shown here:
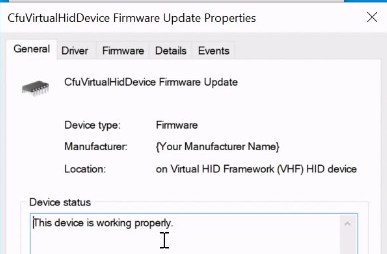
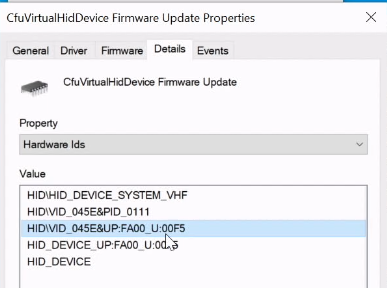
Select the CfuVirtualHidDevice Firmware Update node, then open the CfuVirtualHidDevice Firmware Update Properties window, as shown here:
In the CfuVirtualHidDevice Firmware Update Properties window, select the Details tab, then select Hardware Ids in the Property drop-down list, as shown here:
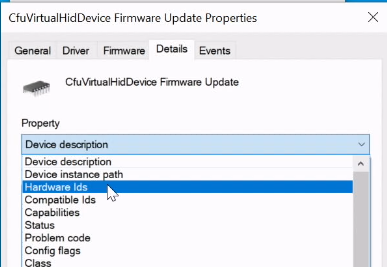
Verify that the HID\VID_045E&UP:FA00_U:00F5 device appears in the Hardware Ids Value of the CfuVirtualHidDevice Firmware Update.
Use the TraceView application to view log message information for the CFU virtual HID device installation. For example:
