Note
Access to this page requires authorization. You can try signing in or changing directories.
Access to this page requires authorization. You can try changing directories.
Note
The Mixed Reality Academy tutorials were designed with HoloLens (1st gen) and Mixed Reality Immersive Headsets in mind. As such, we feel it is important to leave these tutorials in place for developers who are still looking for guidance in developing for those devices. These tutorials will not be updated with the latest toolsets or interactions being used for HoloLens 2. They will be maintained to continue working on the supported devices. There will be a new series of tutorials that will be posted in the future that will demonstrate how to develop for HoloLens 2. This notice will be updated with a link to those tutorials when they are posted.

In this course, you will learn how to add Machine Learning (ML) capabilities to a mixed reality application using Azure Machine Learning Studio (classic).
Azure Machine Learning Studio (classic) is a Microsoft service, which provides developers with a large number of machine learning algorithms, which can help with data input, output, preparation, and visualization. From these components, it is then possible to develop a predictive analytics experiment, iterate on it, and use it to train your model. Following training, you can make your model operational within the Azure cloud, so that it can then score new data. For more information, visit the Azure Machine Learning Studio (classic) page.
Having completed this course, you will have a mixed reality immersive headset application, and will have learned how do the following:
- Provide a table of sales data to the Azure Machine Learning Studio (classic) portal, and design an algorithm to predict future sales of popular items.
- Create a Unity Project, which can receive and interpret prediction data from the ML service.
- Display the predication data visually within the Unity Project, through providing the most popular sales items, on a shelf.
In your application, it is up to you as to how you will integrate the results with your design. This course is designed to teach you how to integrate an Azure Service with your Unity Project. It is your job to use the knowledge you gain from this course to enhance your mixed reality application.
This course is a self-contained tutorial, which does not directly involve any other Mixed Reality Labs.
Device support
| Course | HoloLens | Immersive headsets |
|---|---|---|
| MR and Azure 307: Machine learning | ✔️ | ✔️ |
Note
While this course primarily focuses on Windows Mixed Reality immersive (VR) headsets, you can also apply what you learn in this course to Microsoft HoloLens. As you follow along with the course, you will see notes on any changes you might need to employ to support HoloLens. When using HoloLens, you may notice some echo during voice capture.
Prerequisites
Note
This tutorial is designed for developers who have basic experience with Unity and C#. Please also be aware that the prerequisites and written instructions within this document represent what has been tested and verified at the time of writing (May 2018). You are free to use the latest software, as listed within the install the tools article, though it should not be assumed that the information in this course will perfectly match what you'll find in newer software than what's listed below.
We recommend the following hardware and software for this course:
- A development PC, compatible with Windows Mixed Reality for immersive (VR) headset development
- Windows 10 Fall Creators Update (or later) with Developer mode enabled
- The latest Windows 10 SDK
- Unity 2017.4
- Visual Studio 2017
- A Windows Mixed Reality immersive (VR) headset or Microsoft HoloLens with Developer mode enabled
- Internet access for Azure setup and ML data retrieval
Before you start
To avoid encountering issues building this project, it is strongly suggested that you create the project mentioned in this tutorial in a root or near-root folder (long folder paths can cause issues at build-time).
Chapter 1 - Azure Storage Account setup
To use the Azure Translator API, you will need to configure an instance of the service to be made available to your application.
Log in to the Azure Portal.
Note
If you do not already have an Azure account, you will need to create one. If you are following this tutorial in a classroom or lab situation, ask your instructor or one of the proctors for help setting up your new account.
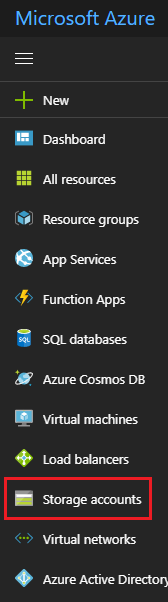
Once you are logged in, click on Storage Accounts in the left menu.
Note
The word New may have been replaced with Create a resource, in newer portals.
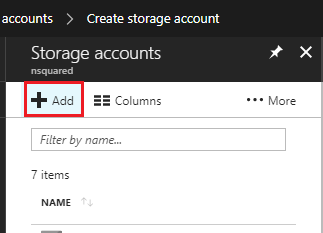
On the Storage Accounts tab, click on Add.
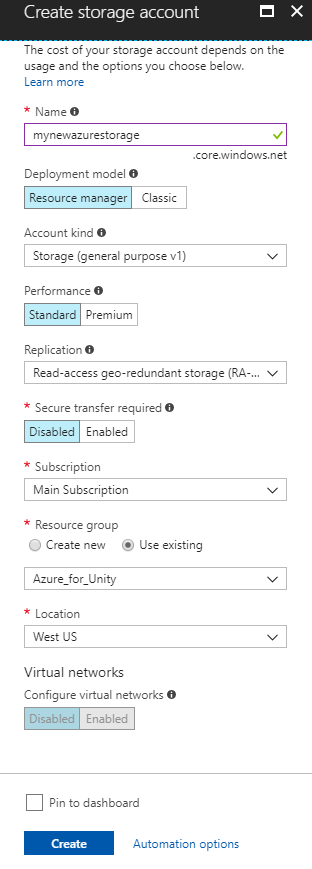
In the Create Storage Account panel:
Insert a Name for your account, be aware this field only accepts numbers, and lowercase letters.
For Deployment model, select Resource manager.
For Account kind, select Storage (general purpose v1).
For Performance, select Standard.
For Replication select Read-access-geo-redundant storage (RA-GRS).
Leave Secure transfer required as Disabled.
Select a Subscription.
Choose a Resource Group or create a new one. A resource group provides a way to monitor, control access, provision and manage billing for a collection of Azure assets. It is recommended to keep all the Azure services associated with a single project (e.g. such as these labs) under a common resource group).
If you wish to read more about Azure Resource Groups, please visit the resource group article.
Determine the Location for your resource group (if you are creating a new Resource Group). The location would ideally be in the region where the application would run. Some Azure assets are only available in certain regions.
You will also need to confirm that you have understood the Terms and Conditions applied to this Service.
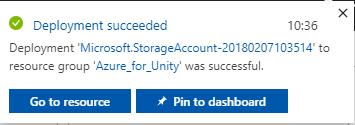
Once you have clicked on Create, you will have to wait for the service to be created, this might take a minute.
A notification will appear in the portal once the Service instance is created.
Chapter 2 - The Azure Machine Learning Studio (classic)
To use the Azure Machine Learning, you will need to configure an instance of the Machine Learning service to be made available to your application.
In the Azure Portal, click on New in the top left corner, and search for Machine Learning Studio Workspace, press Enter.

The new page will provide a description of the Machine Learning Studio Workspace service. At the bottom left of this prompt, click the Create button, to create an association with this service.
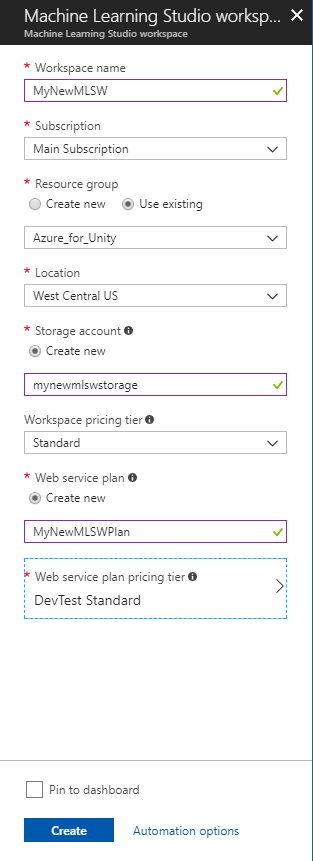
Once you have clicked on Create, a panel will appear where you need to provide some details about your new Machine Learning Studio service:
Insert your desired Workspace name for this service instance.
Select a Subscription.
Choose a Resource Group or create a new one. A resource group provides a way to monitor, control access, provision and manage billing for a collection of Azure assets. It is recommended to keep all the Azure services associated with a single project (e.g. such as these labs) under a common resource group).
If you wish to read more about Azure Resource Groups, please visit the resource group article.
Determine the Location for your resource group (if you are creating a new Resource Group). The location would ideally be in the region where the application would run. Some Azure assets are only available in certain regions. You should use the same resource group that you used for creating the Azure Storage in the previous Chapter.
For the Storage account section, click Use existing, then click the dropdown menu, and from there, click the Storage Account you created in the last Chapter.
Select the appropriate Workspace pricing tier for you, from the dropdown menu.
Within the Web service plan section, click Create new, then insert a name for it in the text field.
From the Web service plan pricing tier section, select the price tier of your choice. A development testing tier called DEVTEST Standard should be available to you at no charge.
You will also need to confirm that you have understood the Terms and Conditions applied to this Service.
Click Create.
Once you have clicked on Create, you will have to wait for the service to be created, this might take a minute.
A notification will appear in the portal once the Service instance is created.

Click on the notification to explore your new Service instance.
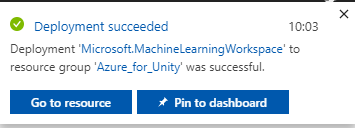
Click the Go to resource button in the notification to explore your new Service instance.
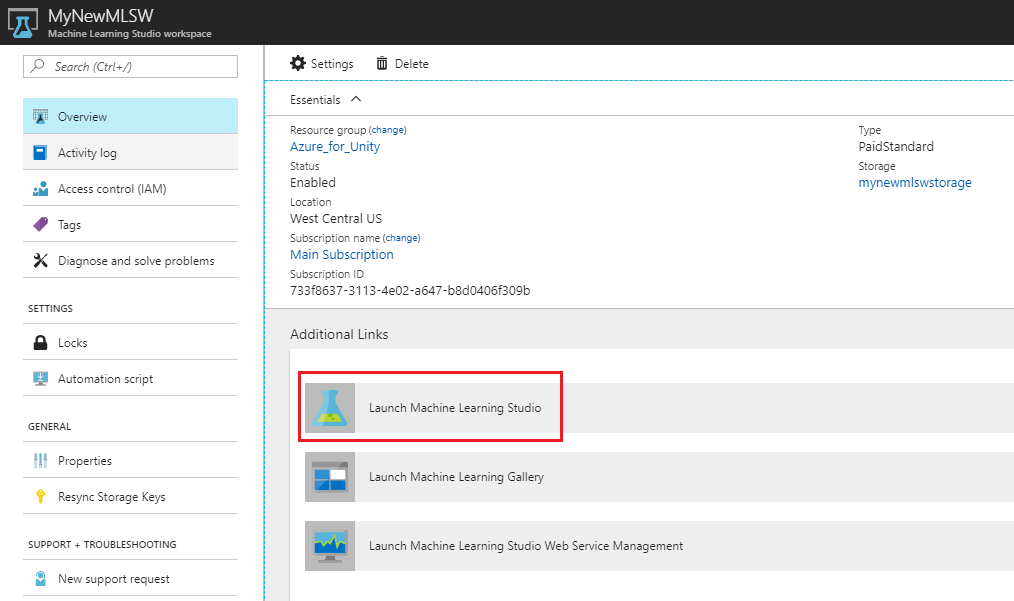
In the page displayed, under the Additional Links section, click Launch Machine Learning Studio, which will direct your browser to the Machine Learning Studio portal.
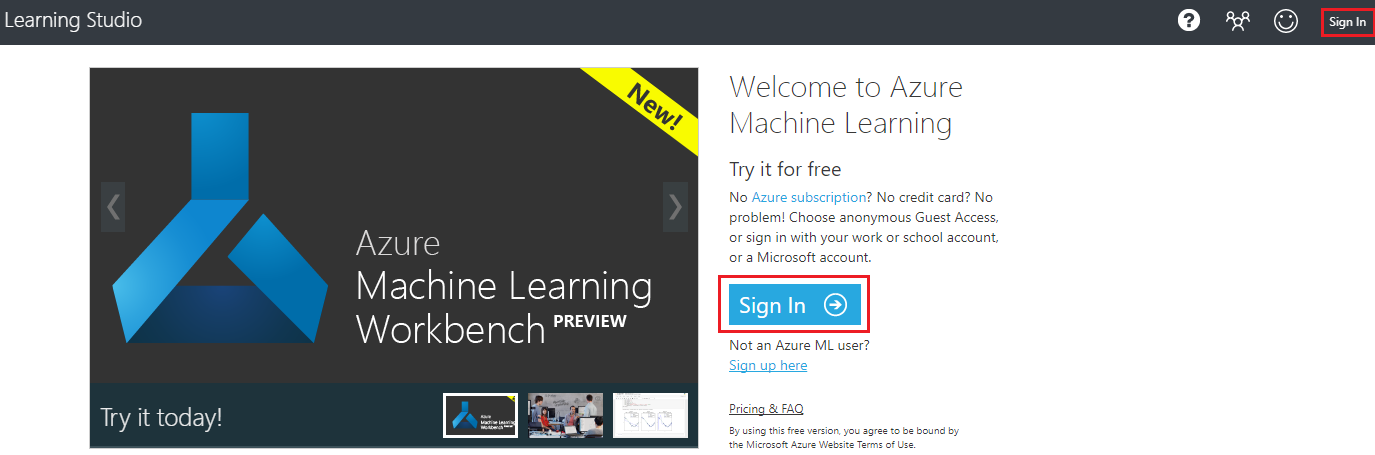
Use the Sign In button, at the top right or in the center, to log into your Machine Learning Studio (classic).
Chapter 3 - The Machine Learning Studio (classic): Dataset setup
One of the ways Machine Learning algorithms work is by analyzing existing data and then attempting to predict future results based on the existing data set. This generally means that the more existing data you have, the better the algorithm will be at predicting future results.
A sample table is provided to you, for this course, called ProductsTableCSV and can be downloaded here.
Important
The above .zip file contains both the ProductsTableCSV and the .unitypackage, which you will need in Chapter 6. This package is also provided within that Chapter, though separate to the csv file.
This sample data set contains a record of the best-selling objects at every hour of each day of the year 2017.
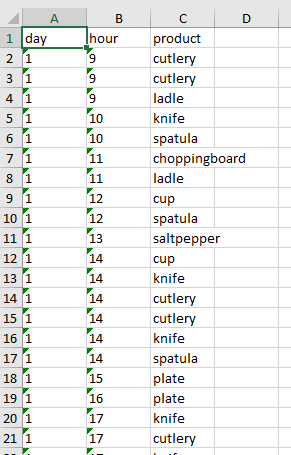
For example, on day 1 of 2017, at 1pm (hour 13), the best-selling item was salt and pepper.
This sample table contains 9998 entries.
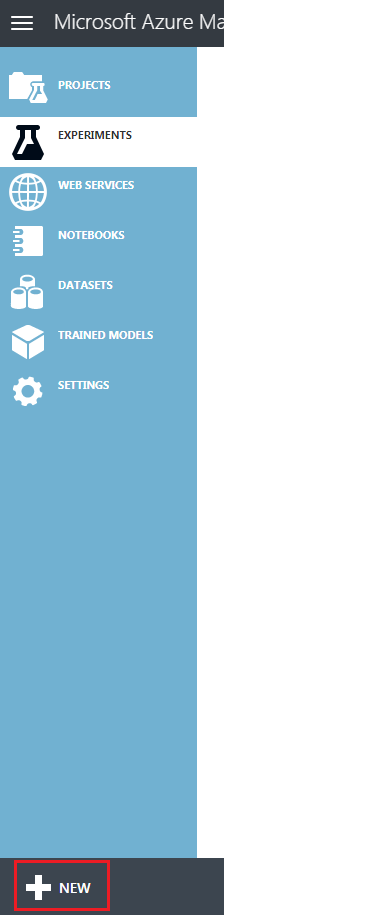
Head back to the Machine Learning Studio (classic) portal, and add this table as a Dataset for your ML. Do this by clicking the + New button in the bottom left corner of the screen.
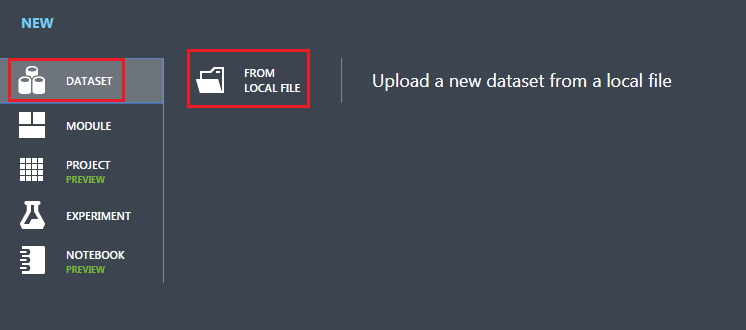
A section will come up from the bottom, and within that there is navigation panel on the left. Click Dataset, then to the right of that, From Local File.
Upload the new Dataset by following these steps:
The upload window will appear, where you can Browse your hard drive for the new dataset.
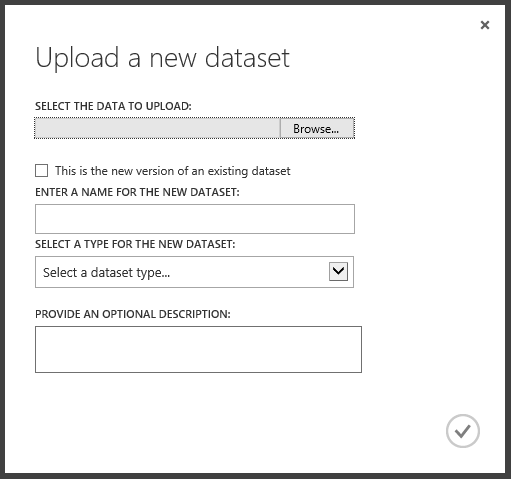
Once selected, and back in the upload window, leave the checkbox unticked.
In the text field below, enter ProductsTableCSV.csv as the name for the dataset (though should automatically be added).
Using the dropdown menu for Type, select Generic CSV File with a header (.csv).
Press the tick in the bottom right of the upload window, and your Dataset will be uploaded.
Chapter 4 - The Machine Learning Studio (classic): The Experiment
Before you can build your machine learning system, you will need to build an experiment, to validate your theory about your data. With the results, you will know whether you need more data, or if there is no correlation between the data and a possible outcome.
To start creating an experiment:
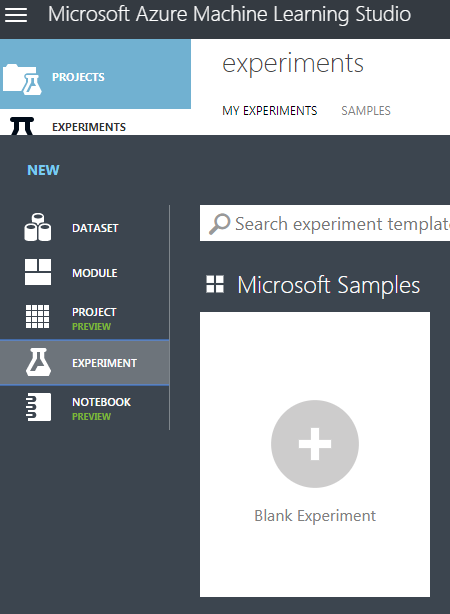
Click again on the + New button on the bottom left of the page, then click on Experiment > Blank Experiment.
A new page will be displayed with a blank Experiment:
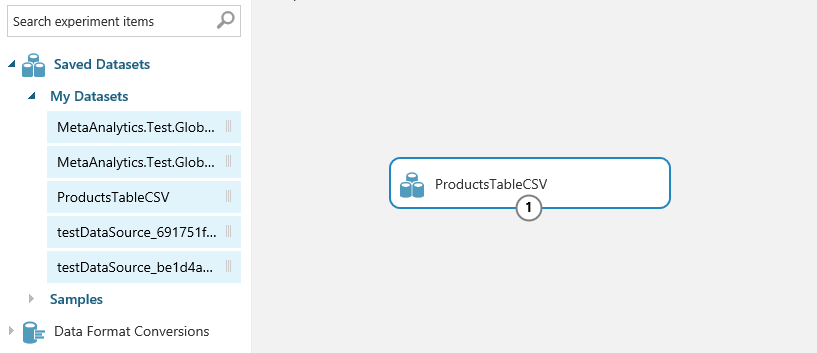
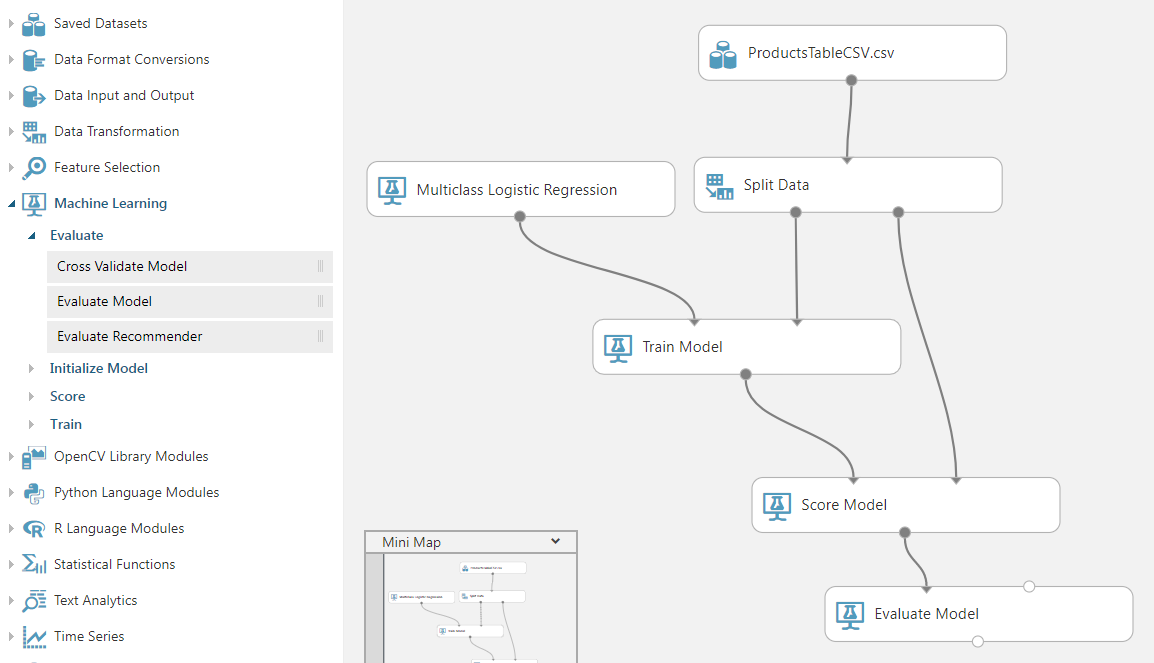
From the panel on the left expand Saved Datasets > My Datasets and drag the ProductsTableCSV on to the Experiment Canvas.
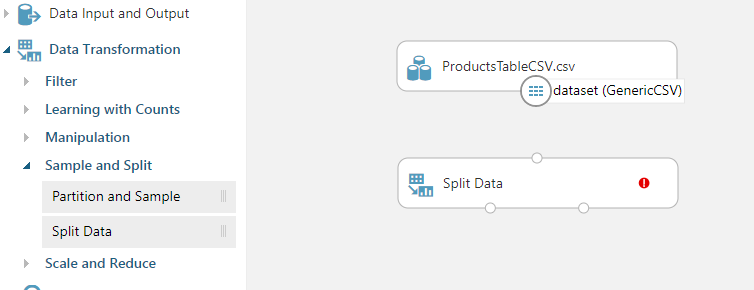
In the panel on the left, expand Data Transformation > Sample and Split. Then drag the Split Data item in to the Experiment Canvas. The Split Data item will split the data set into two parts. One part you will use for training the machine learning algorithm. The second part will be used to evaluate the accuracy of the algorithm generated.
In the right panel (while the Split Data item on the canvas is selected), edit the Fraction of rows in the first output dataset to 0.7. This will split the data into two parts, the first part will be 70% of the data, and the second part will be the remaining 30%. To ensure that the data is split randomly, make sure the Randomized split checkbox remains checked.

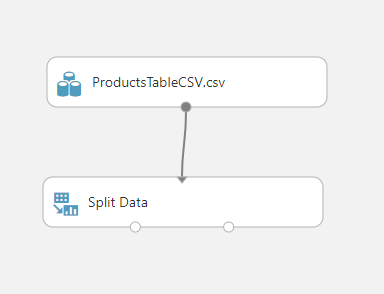
Drag a connection from the base of the ProductsTableCSV item on the canvas to the top of the Split Data item. This will connect the items and send the ProductsTableCSV dataset output (the data) to the Split Data input.
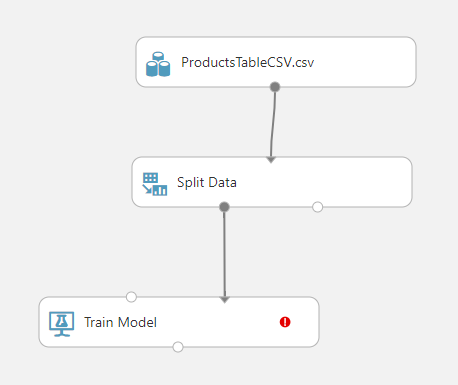
In the Experiments panel on the left side, expand Machine Learning > Train. Drag the Train Model item out in to the Experiment canvas. Your canvas should look the same as the below.
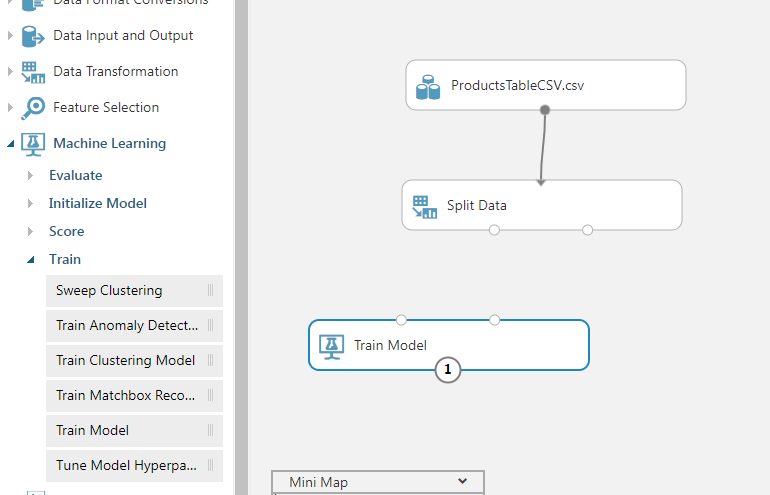
From the bottom left of the Split Data item drag a connection to the top right of the Train Model item. The first 70% split from the dataset will be used by the Train Model to train the algorithm.
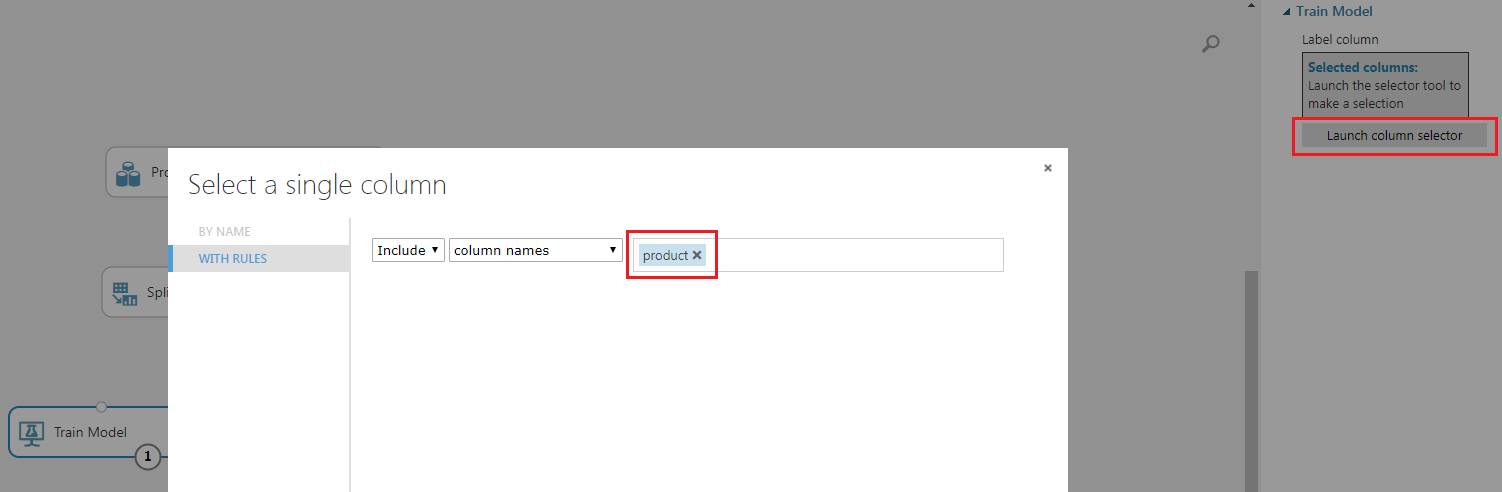
Select the Train Model item on the canvas, and in the Properties panel (on the right-hand side of your browser window) click the Launch column selector button.
In the text box type product and then press Enter, product will be set as a column to train predictions. Following this, click on the tick in the bottom-right corner to close the selection dialog.
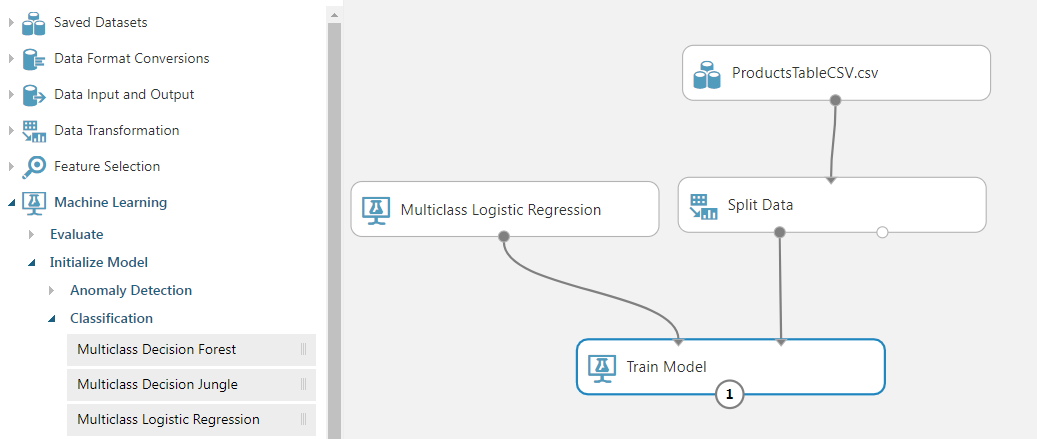
You are going to train a Multiclass Logistic Regression algorithm to predict the most sold product based on the hour of the day and the date. It is beyond the scope of this document to explain the details of the different algorithms provided by the Azure Machine Learning studio, though, you can find out more from the Machine Learning Algorithm Cheat Sheet
From the experiment items panel on the left, expand Machine Learning > Initialize Model > Classification, and drag the Multiclass Logistic Regression item on to the experiment canvas.
Connect the output, from the bottom of the Multiclass Logistic Regression, to the top-left input of the Train Model item.
In list of experiment items in the panel on the left, expand Machine Learning > Score, and drag the Score Model item on to the canvas.
Connect the output, from the bottom of the Train Model, to the top-left input of the Score Model.
Connect the bottom-right output from Split Data, to the top-right input of the Score Model item.

In the list of Experiment items in the panel on the left, expand Machine Learning > Evaluate, and drag the Evaluate Model item onto the canvas.
Connect the output from the Score Model to the top-left input of the Evaluate Model.
You have built your first Machine Learning Experiment. You can now save and run the experiment. In the menu at the bottom of the page, click on the Save button to save your experiment and then click Run to the start the experiment.

You can see the status of the experiment in the top-right of the canvas. Wait a few moments for the experiment to finish.
If you have a big (real world) dataset it is likely that the experiment could take hours to run.

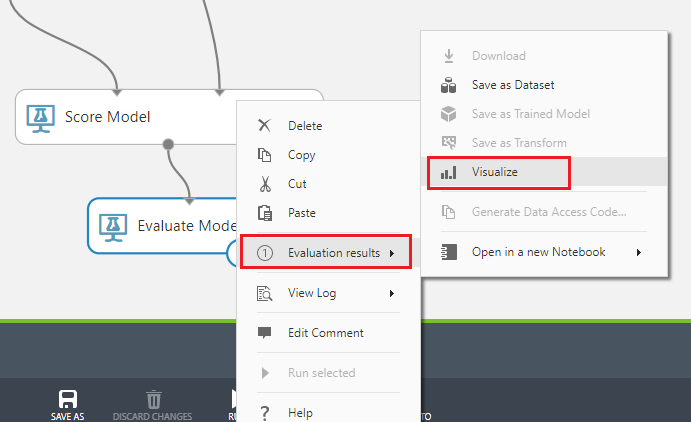
Right click on the Evaluate Model item in the canvas and from the context menu hover the mouse over Evaluation Results, then select Visualize.
The evaluation results will be displayed showing the predicted outcomes versus the actual outcomes. This uses the 30% of the original dataset, that was split earlier, for evaluating the model. You can see the results are not great, ideally you would have the highest number in each row be the highlighted item in the columns.
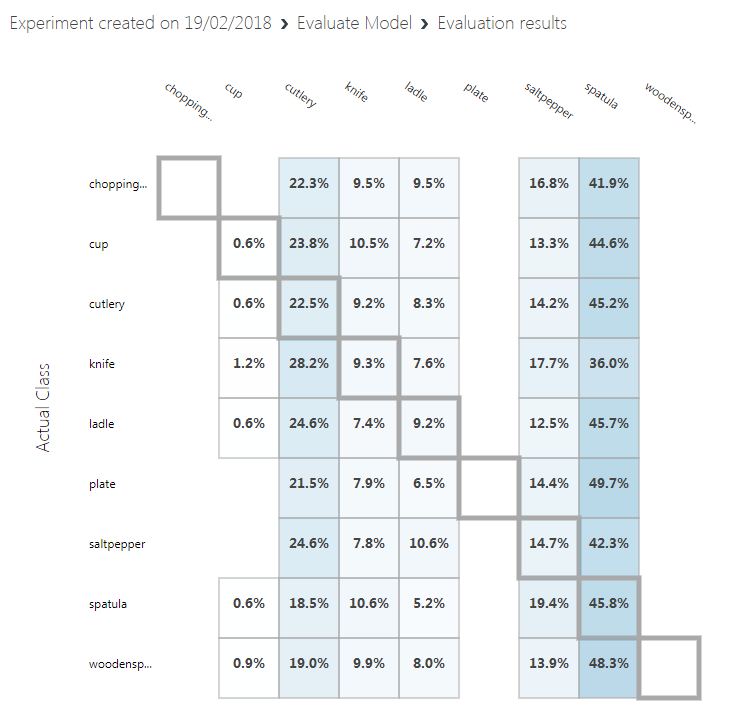
Close the Results.
To use your newly trained Machine Learning model you need to expose it as a Web Service. To do this, click on the Set Up Web Service menu item in the menu at the bottom of the page, and click on Predictive Web Service.

A new tab will be created, and the train model merged to create the new web service.
In the menu at the bottom of the page click Save, then click Run. You will see the status updated in the top-right corner of the experiment canvas.

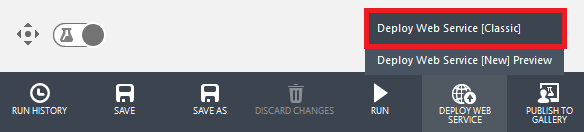
Once it has finished running, a Deploy Web Service button will appear at the bottom of the page. You are ready to deploy the web service. Click Deploy Web Service (Classic) in the menu at the bottom of the page.
Your browser may prompt to allow a pop-up, which you should allow, though you may need to press Deploy Web Service again, if the deploy page does not show.
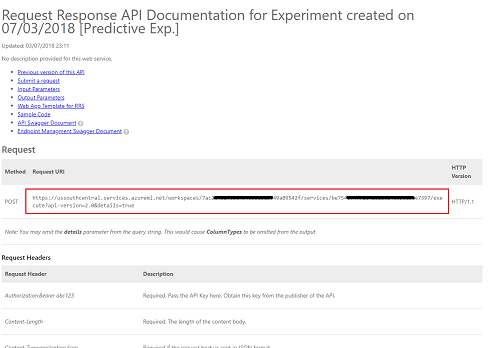
Once the Experiment has been created you will be redirected to a Dashboard page where you will have your API Key displayed. Copy it into a notepad for the moment, you will need it in your code very soon. Once you have noted your API Key, click on the REQUEST/RESPONSE button in the Default Endpoint section underneath the Key.
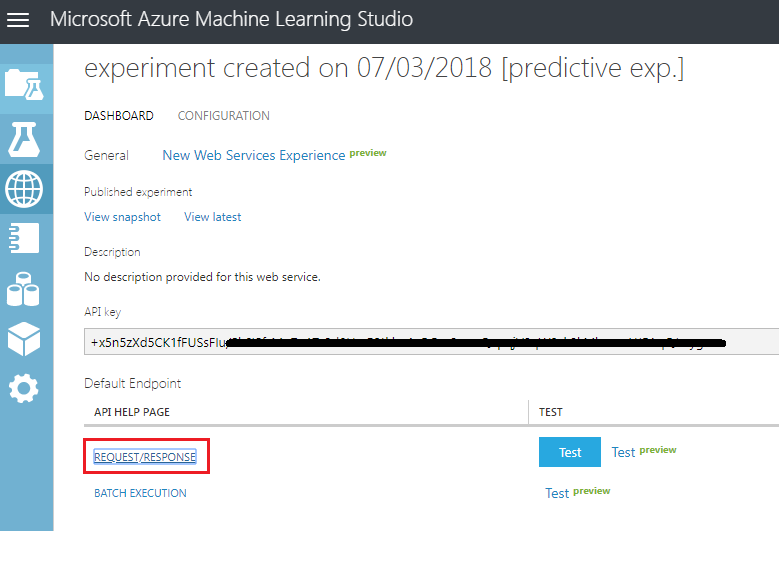
Note
If you click Test in this page, you will be able to enter input data and view the output. Enter the day and hour. Leave the product entry blank. Then click the Confirm button. The output on the bottom of the page will show the JSON representing the likelihood of each product being the choice.
A new web page will open up, displaying the instructions and some examples about the Request structure required by the Machine Learning Studio (classic). Copy the Request URI displayed in this page, into your notepad.
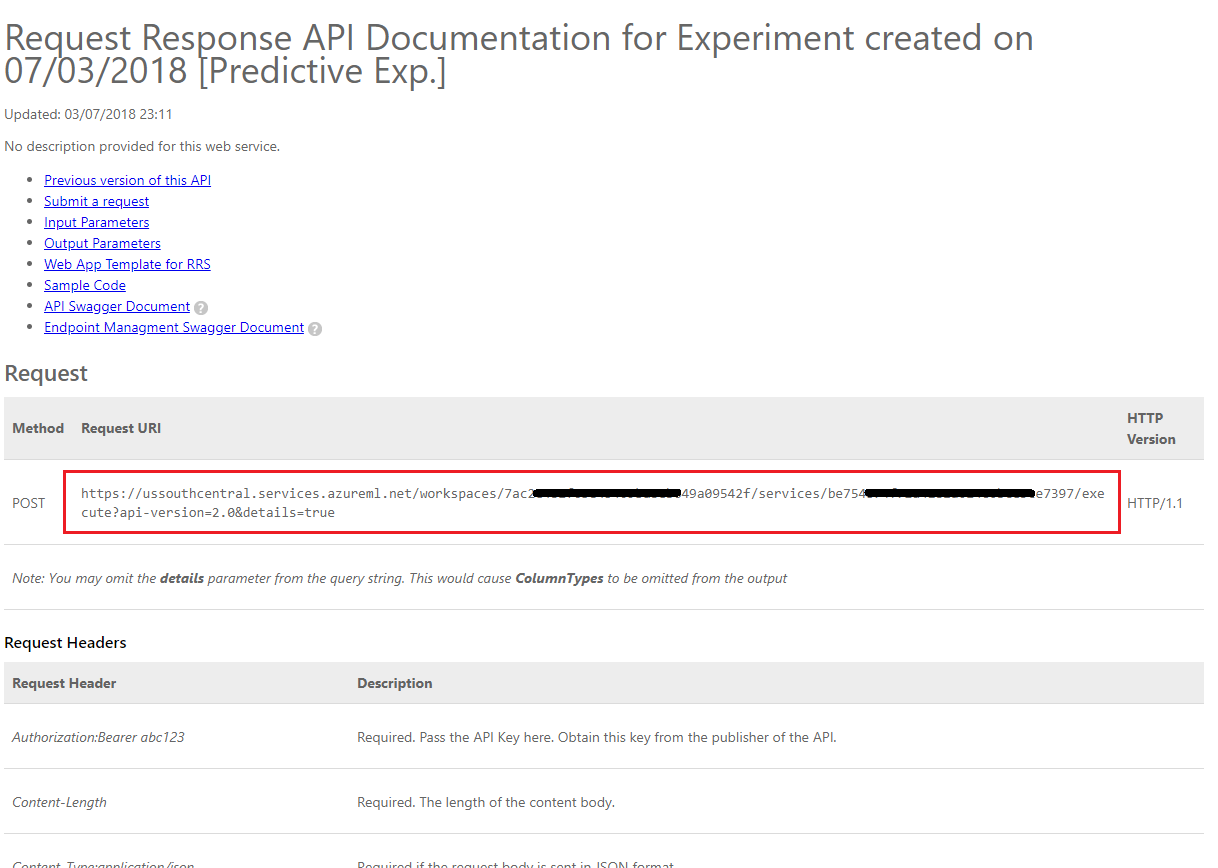
You have now built a machine learning system that provides the most likely product to be sold based on historical purchasing data, correlated with the time of the day and day of the year.
To call the web service, you will need the URL for the service endpoint and an API Key for the service. Click on the Consume tab, from the top menu.
The Consumption Info page will display the information you will need to call the web service from your code. Take a copy of the Primary Key and the Request-Response URL. You will need these in the next Chapter.
Chapter 5 - Setting up the Unity Project
Set up and test your Mixed Reality Immersive Headset.
Note
You will not require Motion Controllers for this course. If you need support setting up the Immersive Headset, please click HERE.
Open Unity and create a new Unity Project called MR_MachineLearning. Make sure the project type is set to 3D.
With Unity open, it is worth checking the default Script Editor is set to Visual Studio. Go to Edit > Preferences and then from the new window, navigate to External Tools. Change External Script Editor to Visual Studio 2017. Close the Preferences window.
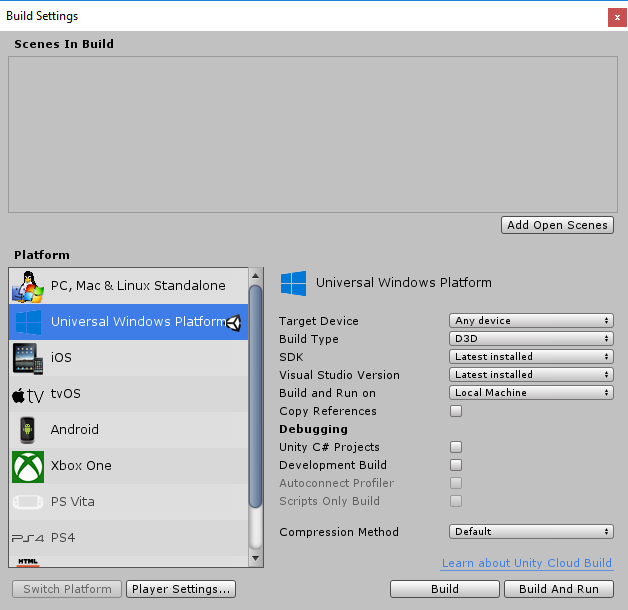
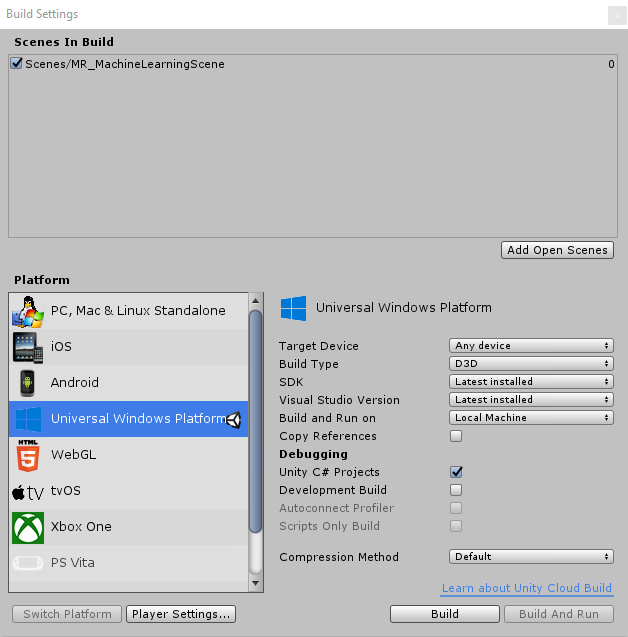
Next, go to File > Build Settings and switch the platform to Universal Windows Platform, by clicking on the Switch Platform button.
Also make sure that:
Target Device is set to Any Device.
For the Microsoft HoloLens, set Target Device to HoloLens.
Build Type is set to D3D.
SDK is set to Latest installed.
Visual Studio Version is set to Latest installed.
Build and Run is set to Local Machine.
Do not worry about setting up Scenes right now, as these are provided later.
The remaining settings should be left as default for now.
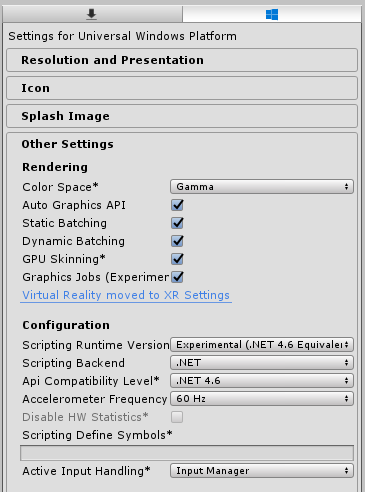
In the Build Settings window, click on the Player Settings button, this will open the related panel in the space where the Inspector is located.
In this panel, a few settings need to be verified:
In the Other Settings tab:
Scripting Runtime Version should be Experimental (.NET 4.6 Equivalent)
Scripting Backend should be .NET
API Compatibility Level should be .NET 4.6
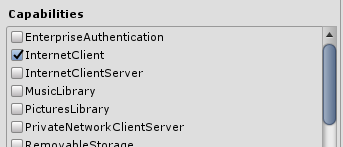
Within the Publishing Settings tab, under Capabilities, check:
InternetClient
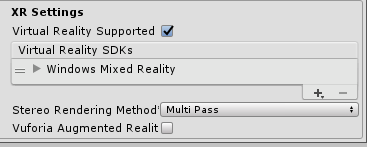
Further down the panel, in XR Settings (found below Publish Settings), tick Virtual Reality Supported, make sure the Windows Mixed Reality SDK is added
Back in Build Settings Unity C# Projects is no longer greyed out; tick the checkbox next to this.
Close the Build Settings window.
Save your Project (FILE > SAVE PROJECT).
Chapter 6 - Importing the MLProducts Unity Package
For this course, you will need to download a Unity Asset Package called Azure-MR-307.unitypackage. This package comes complete with a scene, with all objects in that prebuilt, so you can focus on getting it all working. The ShelfKeeper script is provided, though only holds the public variables, for the purpose of scene setup structure. You will need to do all other sections.
To import this package:
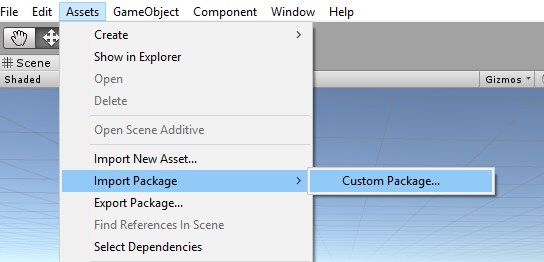
With the Unity dashboard in front of you, click on Assets in the menu at the top of the screen, then click on Import Package, Custom Package.
Use the file picker to select the Azure-MR-307.unitypackage package and click Open.
A list of components for this asset will be displayed to you. Confirm the import by clicking Import.
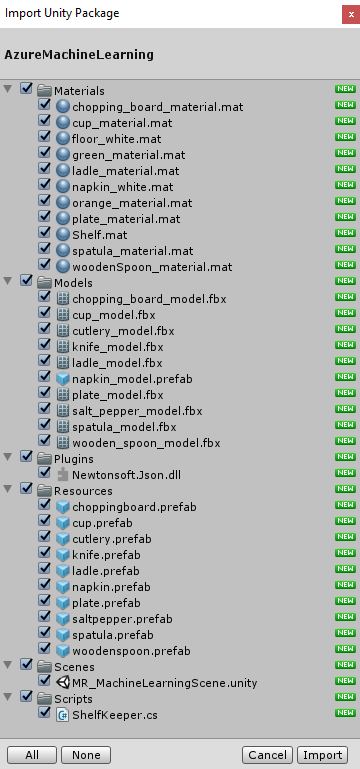
Once it has finished importing, you will notice that some new folders have appeared in your Unity Project Panel. Those are the 3D models and the respective materials that are part of the pre-made scene you will work on. You will write the majority of the code in this course.
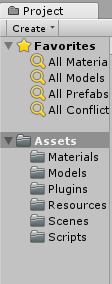
Within the Project Panel folder, click on the Scenes folder and double click on the scene inside (called MR_MachineLearningScene). The scene will open (see image below). If the red diamonds are missing, simply click the Gizmos button, at the top right of the Game Panel.

Chapter 7 - Checking the DLLs in Unity
To leverage the use of JSON libraries (used for serializing and deserializing), a Newtonsoft DLL has been implemented with the package you brought in. The library should have the correct configuration, though it is worth checking (particularly if you are having issues with code not working).
To do so:
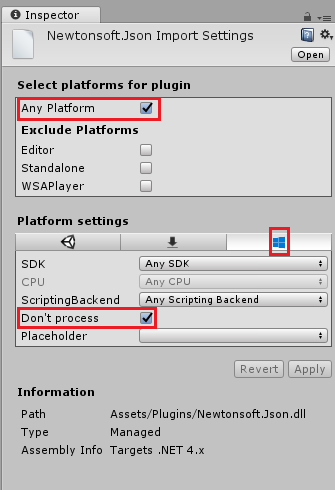
Left-click on the Newtonsoft file inside the Plugins folder and look at the Inspector panel. Make sure Any Platform is ticked. Go to the UWP tab and also ensure Don't process is ticked.
Chapter 8 - Create the ShelfKeeper class
The ShelfKeeper class hosts methods that control the UI and products spawned in the scene.
As part of the imported package, you will have been given this class, though it is incomplete. It is now time to complete that class:
Double click on the ShelfKeeper script, within the Scripts folder, to open it with Visual Studio 2017.
Replace all the code existing in the script with the following code, which sets the time and date and has a method to show a product.
using UnityEngine;

public class ShelfKeeper : MonoBehaviour
{
    /// <summary>
    /// Provides this class Singleton-like behavior
    /// </summary>
    public static ShelfKeeper instance;

    /// <summary>
    /// Unity Inspector accessible Reference to the Text Mesh object needed for data
    /// </summary>
    public TextMesh dateText;

    /// <summary>
    /// Unity Inspector accessible Reference to the Text Mesh object needed for time
    /// </summary>
    public TextMesh timeText;

    /// <summary>
    /// Provides references to the spawn locations for the products prefabs
    /// </summary>
    public Transform[] spawnPoint;

    private void Awake()
    {
        instance = this;
    }

    /// <summary>
    /// Set the text of the date in the scene
    /// </summary>
    public void SetDate(string day, string month)
    {
        dateText.text = day + " " + month;
    }

    /// <summary>
    /// Set the text of the time in the scene
    /// </summary>
    public void SetTime(string hour)
    {
        timeText.text = hour + ":00";
    }

    /// <summary>
    /// Spawn a product on the shelf by providing the name and selling grade
    /// </summary>
    /// <param name="name"></param>
    /// <param name="sellingGrade">0 being the best seller</param>
    public void SpawnProduct(string name, int sellingGrade)
    {
        Instantiate(Resources.Load(name),
            spawnPoint[sellingGrade].transform.position, spawnPoint[sellingGrade].transform.rotation);
    }
}
Be sure to save your changes in Visual Studio before returning to Unity.
Back in the Unity Editor, check that the ShelfKeeper class looks like the below:
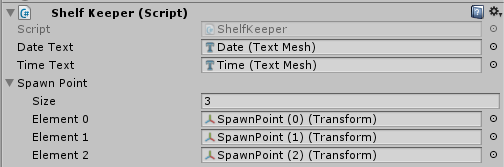
Important
If your script does not have the reference targets (i.e. Date (Text Mesh)), simply drag the corresponding objects from the Hierarchy Panel, into the target fields. See below for explanation, if needed:
Open the Spawn Point array within the ShelfKeeper component script by left-clicking it. A sub-section will appear called Size, which indicates the size of the array. Type 3 into the textbox next to Size and press Enter, and three slots will be created beneath.
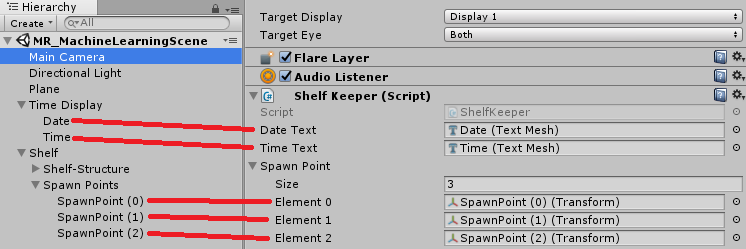
Within the Hierarchy expand the Time Display object (by left-clicking the arrow beside it). Next click the Main Camera from within the Hierarchy, so that the Inspector shows its information.
Select the Main Camera in the Hierarchy Panel. Drag the Date and Time objects from the Hierarchy Panel to the Date Text and Time Text slots within the Inspector of the Main Camera in the ShelfKeeper component.
Drag the Spawn Points from the Hierarchy Panel (beneath the Shelf object) to the 3 Element reference targets beneath the Spawn Point array, as shown in the image.
Chapter 9 - Create the ProductPrediction class
The next class you are going to create is the ProductPrediction class.
This class is responsible for:
Querying the Machine Learning Service instance, providing the current date and time.
Deserializing the JSON response into usable data.
Interpreting the data, retrieving the 3 recommended products.
Calling the ShelfKeeper class methods to display the data in the Scene.
To create this class:
Go to the Scripts folder, in the Project Panel.
Right-click inside the folder, Create > C# Script. Call the script ProductPrediction.
Double click on the new ProductPrediction script to open it with Visual Studio 2017.
If the File Modification Detected dialog pops up, click *Reload Solution.
Add the following namespaces to the top of the ProductPrediction class:
using System;
using System.Collections.Generic;
using UnityEngine;
using System.Linq;
using Newtonsoft.Json;
using UnityEngine.Networking;
using System.Runtime.Serialization;
using System.Collections;
Inside the ProductPrediction class insert the following two objects which are composed of a number of nested classes. These classes are used to serialize and deserialize the JSON for the Machine Learning Service.
    /// <summary>
    /// This object represents the Prediction request
    /// It host the day of the year and hour of the day
    /// The product must be left blank when serialising
    /// </summary>
    public class RootObject
    {
        public Inputs Inputs { get; set; }
    }

    public class Inputs
    {
        public Input1 input1 { get; set; }
    }

    public class Input1
    {
        public List<string> ColumnNames { get; set; }
        public List<List<string>> Values { get; set; }
    }
/// <summary> /// This object containing the deserialised Prediction result /// It host the list of the products /// and the likelihood of them being sold at current date and time /// </summary> public class Prediction { public Results Results { get; set; } } public class Results { public Output1 output1; } public class Output1 { public string type; public Value value; } public class Value { public List<string> ColumnNames { get; set; } public List<List<string>> Values { get; set; } }Then add the following variables above the previous code (so that the JSON related code is at the bottom of the script, below all other code, and out of the way):
    /// <summary>
    /// The 'Primary Key' from your Machine Learning Portal
    /// </summary>
    private string authKey = "-- Insert your service authentication key here --";

    /// <summary>
    /// The 'Request-Response' Service Endpoint from your Machine Learning Portal
    /// </summary>
    private string serviceEndpoint = "-- Insert your service endpoint here --";

    /// <summary>
    /// The Hour as set in Windows
    /// </summary>
    private string thisHour;

    /// <summary>
    /// The Day, as set in Windows
    /// </summary>
    private string thisDay;

    /// <summary>
    /// The Month, as set in Windows
    /// </summary>
    private string thisMonth;

    /// <summary>
    /// The Numeric Day from current Date Conversion
    /// </summary>
    private string dayOfTheYear;

    /// <summary>
    /// Dictionary for holding the first (or default) provided prediction
    /// from the Machine Learning Experiment
    /// </summary>
    private Dictionary<string, string> predictionDictionary;

    /// <summary>
    /// List for holding product prediction with name and scores
    /// </summary>
    private List<KeyValuePair<string, double>> keyValueList;
Important
Make sure to insert the primary key and request-response endpoint, from the Machine Learning Portal, into the variables here. The below images show where you would have taken the key and endpoint from.

Insert this code within the Start() method. The Start() method is called when the class initializes:
    void Start()
    {
        // Call to get the current date and time as set in Windows
        GetTodayDateAndTime();

        // Call to set the HOUR in the UI
        ShelfKeeper.instance.SetTime(thisHour);

        // Call to set the DATE in the UI
        ShelfKeeper.instance.SetDate(thisDay, thisMonth);

        // Run the method to Get Predication from Azure Machine Learning
        StartCoroutine(GetPrediction(thisHour, dayOfTheYear));
    }
The following is the method that collects the date and time from Windows and converts it into a format that our Machine Learning Experiment can use to compare with the data stored in the table.
    /// <summary>
    /// Get current date and hour
    /// </summary>
    private void GetTodayDateAndTime()
    {
        // Get today date and time
        DateTime todayDate = DateTime.Now;

        // Extrapolate the HOUR
        thisHour = todayDate.Hour.ToString();

        // Extrapolate the DATE
        thisDay = todayDate.Day.ToString();
        thisMonth = todayDate.ToString("MMM");

        // Extrapolate the day of the year
        dayOfTheYear = todayDate.DayOfYear.ToString();
    }
You can delete the Update() method since this class will not use it.
Add the following method which will communicate the current date and time to the Machine Learning endpoint and receive a response in JSON format.
    private IEnumerator GetPrediction(string timeOfDay, string dayOfYear)
    {
        // Populate the request object
        // Using current day of the year and hour of the day
        RootObject ro = new RootObject
        {
            Inputs = new Inputs
            {
                input1 = new Input1
                {
                    ColumnNames = new List<string>
                    {
                        "day",
                        "hour",
                    "product"
                    },
                    Values = new List<List<string>>()
                }
            }
        };

        List<string> l = new List<string>
        {
            dayOfYear,
            timeOfDay,
            ""
        };

        ro.Inputs.input1.Values.Add(l);

        Debug.LogFormat("Score request built");

        // Serialize the request
        string json = JsonConvert.SerializeObject(ro);

        using (UnityWebRequest www = UnityWebRequest.Post(serviceEndpoint, "POST"))
        {
            byte[] jsonToSend = new System.Text.UTF8Encoding().GetBytes(json);
            www.uploadHandler = new UploadHandlerRaw(jsonToSend);

            www.downloadHandler = new DownloadHandlerBuffer();
            www.SetRequestHeader("Authorization", "Bearer " + authKey);
            www.SetRequestHeader("Content-Type", "application/json");
            www.SetRequestHeader("Accept", "application/json");

            yield return www.SendWebRequest();
            string response = www.downloadHandler.text;

            // Deserialize the response
            DataContractSerializer serializer;
            serializer = new DataContractSerializer(typeof(string));
            DeserialiseJsonResponse(response);
        }
    }
Add the following method, which is responsible for deserializing the JSON response, and communicating the result of the deserialization to the ShelfKeeper class. This result will be the names of the three items predicted to sell the most at current date and time. Insert the code below into the ProductPrediction class, below the previous method.
    /// <summary>
    /// Deserialize the response received from the Machine Learning portal
    /// </summary>
    public void DeserialiseJsonResponse(string jsonResponse)
    {
        // Deserialize JSON
        Prediction prediction = JsonConvert.DeserializeObject<Prediction>(jsonResponse);
        predictionDictionary = new Dictionary<string, string>();

        for (int i = 0; i < prediction.Results.output1.value.ColumnNames.Count; i++)
        {
            if (prediction.Results.output1.value.Values[0][i] != null)
            {
                predictionDictionary.Add(prediction.Results.output1.value.ColumnNames[i], prediction.Results.output1.value.Values[0][i]);
            }
        }

        keyValueList = new List<KeyValuePair<string, double>>();

        // Strip all non-results, by adding only items of interest to the scoreList
        for (int i = 0; i < predictionDictionary.Count; i++)
        {
            KeyValuePair<string, string> pair = predictionDictionary.ElementAt(i);
            if (pair.Key.StartsWith("Scored Probabilities"))
            {
                // Parse string as double then simplify the string key so to only have the item name
                double scorefloat = 0f;
                double.TryParse(pair.Value, out scorefloat);
                string simplifiedName =
                    pair.Key.Replace("\"", "").Replace("Scored Probabilities for Class", "").Trim();
                keyValueList.Add(new KeyValuePair<string, double>(simplifiedName, scorefloat));
            }
        }

        // Sort Predictions (results will be lowest to highest)
        keyValueList.Sort((x, y) => y.Value.CompareTo(x.Value));

        // Spawn the top three items, from the keyValueList, which we have sorted
        for (int i = 0; i < 3; i++)
        {
            ShelfKeeper.instance.SpawnProduct(keyValueList[i].Key, i);
        }

        // Clear lists in case of reuse
        keyValueList.Clear();
        predictionDictionary.Clear();
    }
Save Visual Studio and head back to Unity.
Drag the ProductPrediction class script from the Script folder, onto the Main Camera object.
Save your scene and project File > Save Scene/File > Save Project.
Chapter 10 - Build the UWP Solution
It is now time to build your project as a UWP solution, so that it can run as a standalone application.
To Build:
Save the current scene by clicking on File > Save Scenes.
Go to File > Build Settings
Check the box called Unity C# Projects (this is important because it will allow you to edit the classes after build is completed).
Click on Add Open Scenes,
Click Build.
You will be prompted to select the folder where you want to build the Solution.
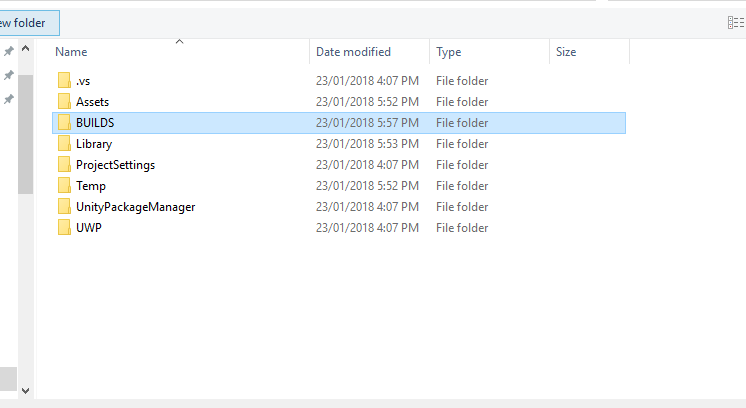
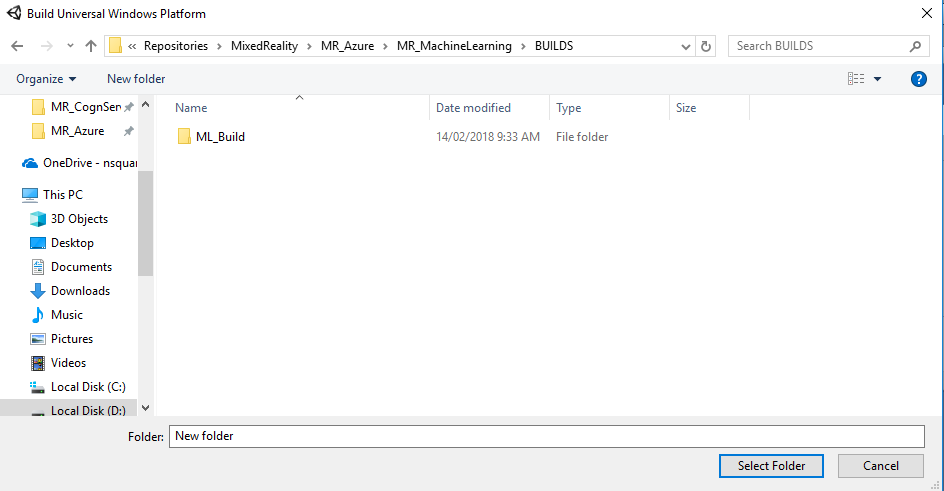
Create a BUILDS folder and within that folder create another folder with an appropriate name of your choice.
Click your new folder and then click Select Folder, to begin the build at that location.
Once Unity has finished building (it might take some time), it will open a File Explorer window at the location of your build (check your task bar, as it may not always appear above your windows, but will notify you of the addition of a new window).
Chapter 11 - Deploy your Application
To deploy your application:
Navigate to your new Unity build (the App folder) and open the solution file with Visual Studio.
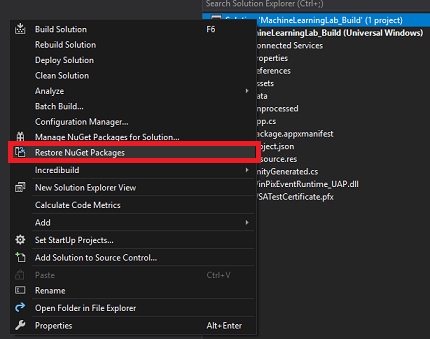
With Visual Studio open, you need to Restore NuGet Packages, which can be done through right-clicking your MachineLearningLab_Build solution, from the Solution Explorer (found to the right of Visual Studio), and then clicking Restore NuGet Packages:
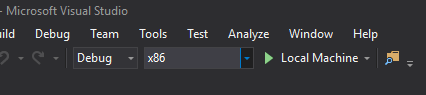
In the Solution Configuration select Debug.
In the Solution Platform, select x86, Local Machine.
For the Microsoft HoloLens, you may find it easier to set this to Remote Machine, so that you are not tethered to your computer. Though, you will need to also do the following:
- Know the IP Address of your HoloLens, which can be found within the Settings > Network & Internet > Wi-Fi > Advanced Options; the IPv4 is the address you should use.
- Ensure Developer Mode is On; found in Settings > Update & Security > For developers.
Go to Build menu and click on Deploy Solution to sideload the application to your PC.
Your App should now appear in the list of installed apps, ready to be launched.
When you run the Mixed Reality application, you will see the bench that was set up in your Unity scene, and from initialization, the data you set up within Azure will be fetched. The data will be deserialized within your application, and the three top results for your current date and time will be provided visually, as three models on the bench.
Your finished Machine Learning application
Congratulations, you built a mixed reality app that leverages the Azure Machine Learning to make data predictions and display it on your scene.
Exercise
Exercise 1
Experiment with the sort order of your application and have the three bottom predictions appear on the shelf, as this data would potentially be useful also.
Exercise 2
Using Azure Tables populate a new table with weather information and create a new experiment using the data.