Note
Access to this page requires authorization. You can try signing in or changing directories.
Access to this page requires authorization. You can try changing directories.
In the previous tutorial, you spent time setting up the chess app project. This section is going to walk you through setting up the app for mixed reality development, which means adding an AR session. You'll be using an ARSessionConfig data asset for this task, which has useful AR settings like spatial mapping and occlusion. You can find more details about the ARSessionConfig asset and the UARSessionConfig class in Unreal's documentation.
Objectives
- Working with Unreal Engine's AR settings
- Using an ARSessionConfig data asset
- Setting up a Pawn and game mode
Adding the session asset
AR sessions in Unreal don't happen by themselves. To use a session, you need an ARSessionConfig data asset to work with, which is your next task:
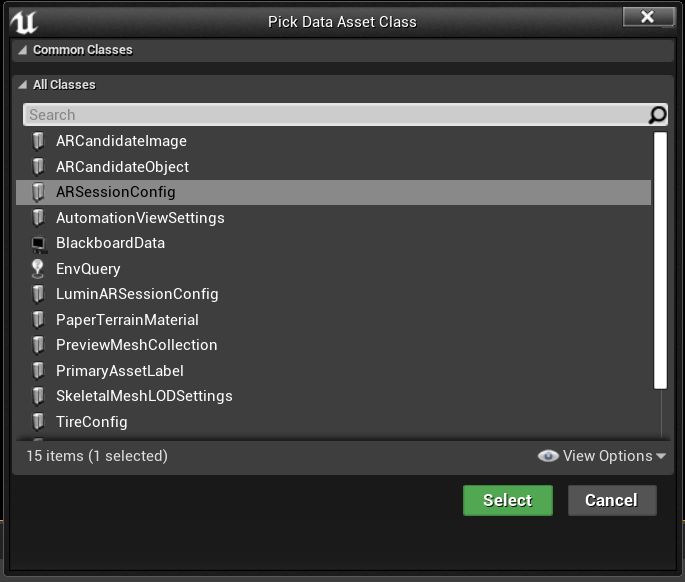
- Click Add New > Miscellaneous > Data Asset in the Content Browser. Make sure you're at the root Content folder level.
- Select ARSessionConfig, click Select, and name the asset ARSessionConfig.
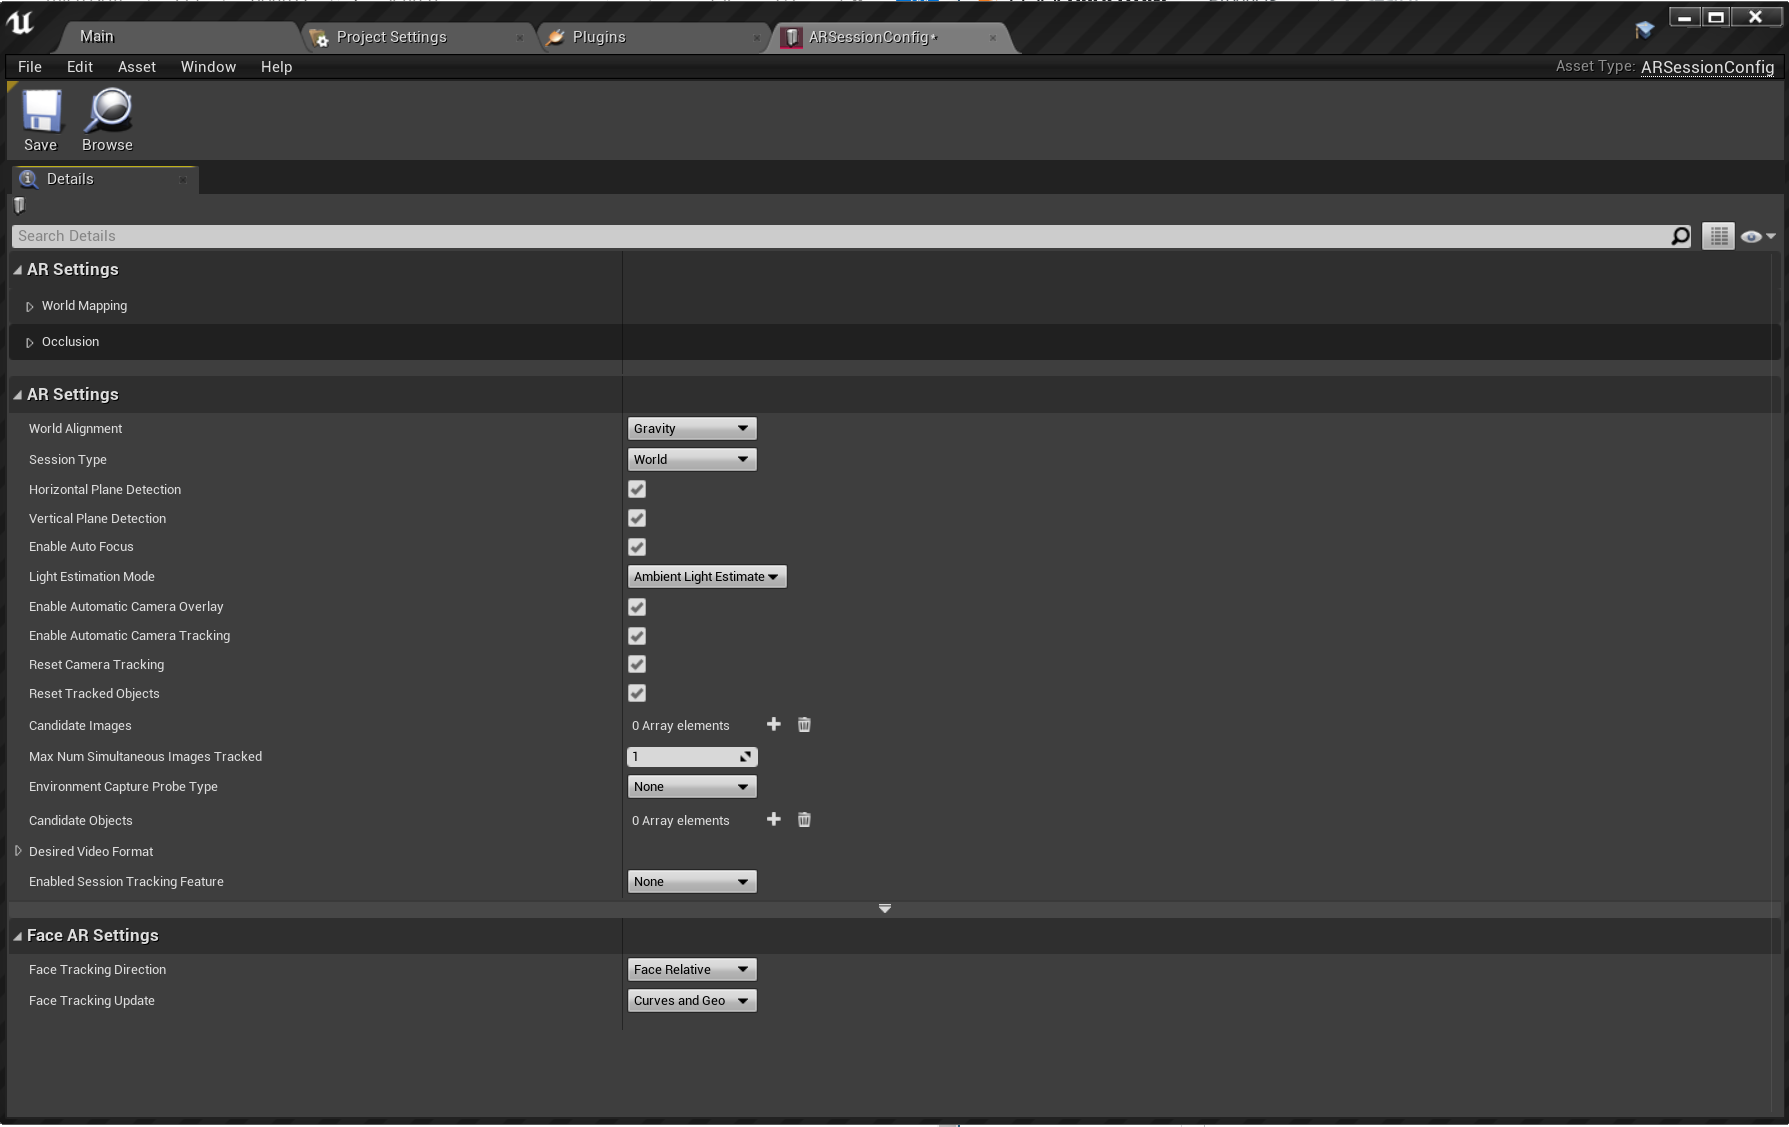
- Double-click ARSessionConfig to open it, leave all default settings and hit Save. Return to the Main window.
With that done, your next step is to make sure the AR session starts and stops when the level loads and ends. Luckily, Unreal has a special blueprint called a Level Blueprint that acts as a level-wide global event graph. Connecting the ARSessionConfig asset in the Level Blueprint guarantees the AR session will fire right when the game starts playing.
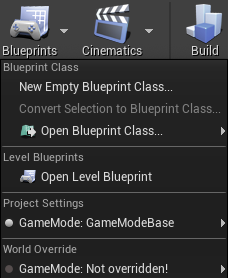
- Click Blueprints > Open Level Blueprint from the editor toolbar:
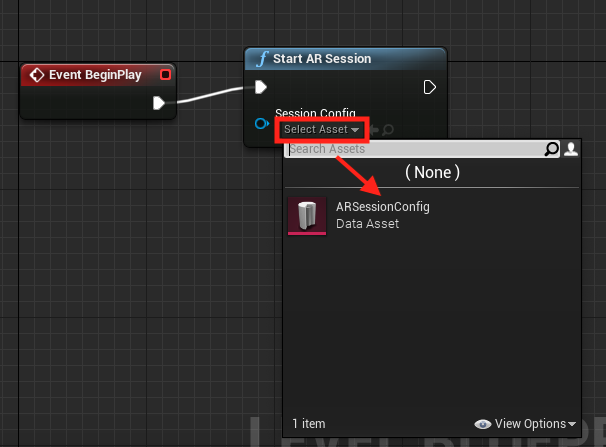
- Drag the execution node (left-facing arrow icon) off Event BeginPlay and release, then search for the Start AR Session node and hit enter.
- Click the Select Asset dropdown under Session Config and choose the ARSessionConfig asset.
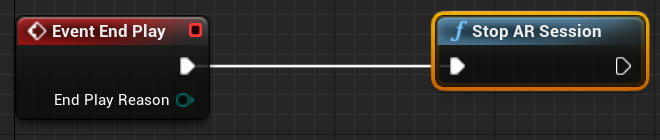
- Right-click anywhere in the EventGraph and create a new Event EndPlay node. Drag the execution pin and release, then search for a Stop AR Session node and hit enter. If the AR session is still running when the level ends, certain features may stop working if you restart your app while streaming to a headset.
- Hit Compile, then Save and return to the Main window.
Create a Pawn
At this point, the project still needs a player object. In Unreal, a Pawn represents the user in the game, but in this case it's going to be the HoloLens 2 experience.
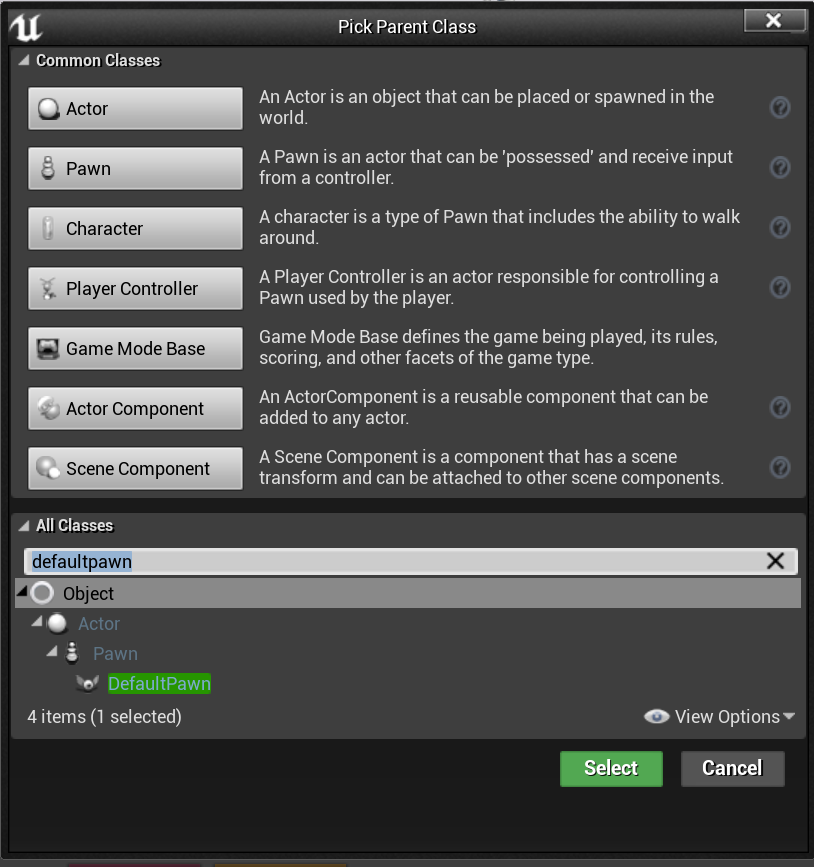
- Click Add New > Blueprint Class in the Content folder and expand the All Classes section at the bottom.
- Search for DefaultPawn, click Select, name it MRPawn, and double-click the asset to open.
- Click Add Component > Camera from the Components panel and name it Camera. Make sure that the Camera component is a direct child of the root (CollisionComponent). This allows the player camera to move with the HoloLens 2 device.
Note
By default, Pawns have mesh and collision components. In most Unreal projects, Pawns are solid objects that can collide with other components. Since the Pawn and user are the same in mixed reality, you want to be able to pass through holograms without any collisions.
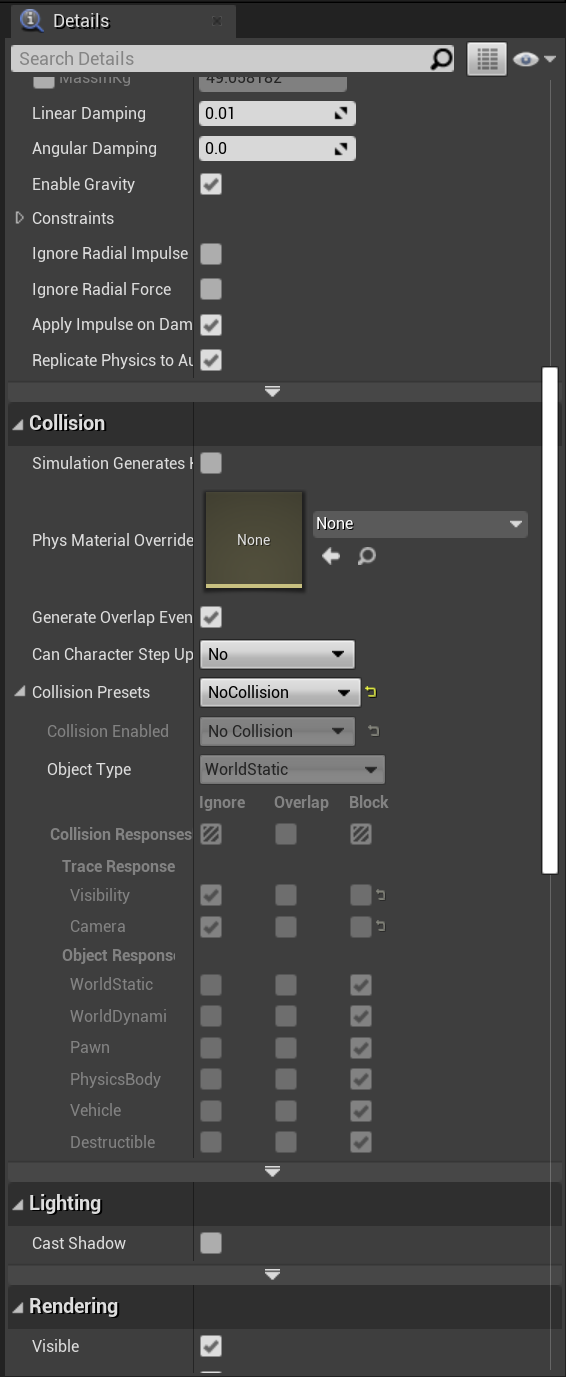
- Select CollisionComponent from the Components panel and scroll down to the Collision section of the Details panel.
- Click the Collision Presets dropdown and change the value to NoCollision.
- Do the same for the MeshComponent
- Compile and Save the Blueprint.
With your work here done, return to the Main Window.
Create a Game Mode
The last puzzle piece of the mixed reality setup is the Game Mode. The Game Mode determines a number of settings for the game or experience, including the default pawn to use.
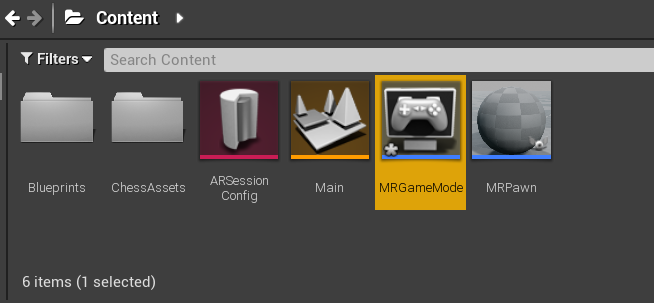
- Click Add New > Blueprint Class in the Content folder and select Game Mode Base as the parent class. Name it MRGameMode and double-click to open.
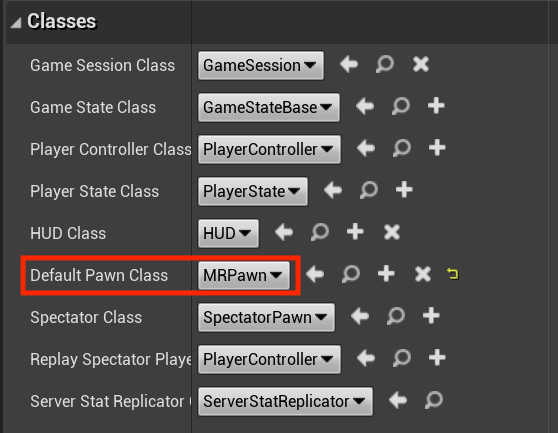
- Go to the Classes section in the Details panel and change the Default Pawn Class to MRPawn.
- Hit Compile, then Save and return to the Main window.
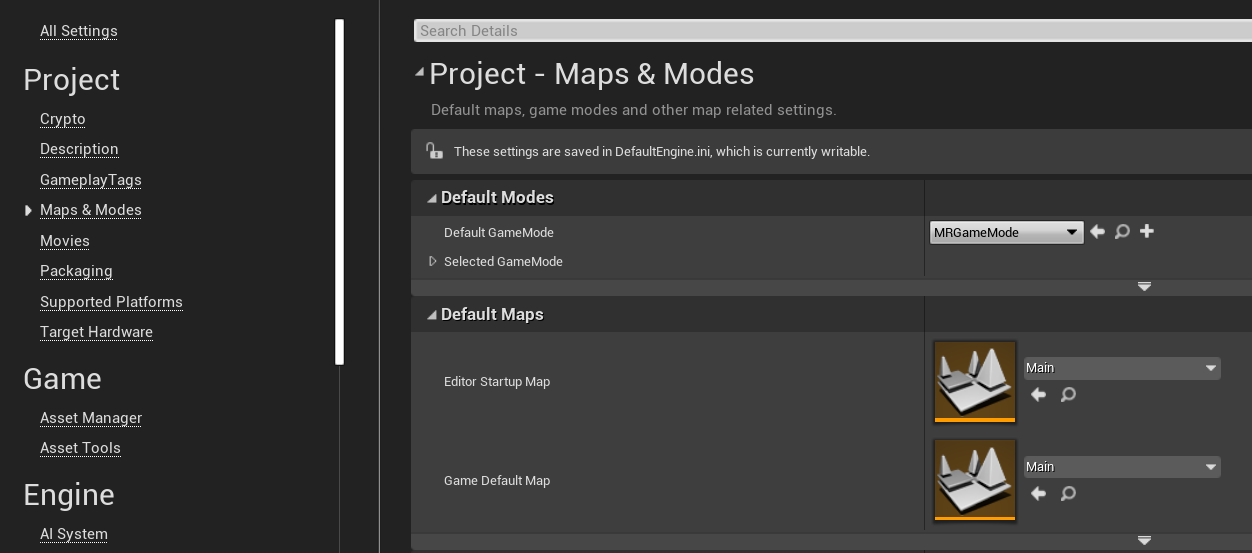
- Select Edit > Projects Settings and click Maps & Modes in the left-hand list.
- Expand Default Modes and change Default Game Mode to MRGameMode.
- Expand Default Maps and change both EditorStartupMap and GameDefaultMap to Main. When you close and reopen the editor or play the game, the Main map will now be selected by default.
With the project fully set up for mixed reality, you're ready to move on to the next tutorial and start adding user input to the scene.