Note
Access to this page requires authorization. You can try signing in or changing directories.
Access to this page requires authorization. You can try changing directories.
Panes give you the ability to run multiple command-line applications next to each other within the same tab. This minimizes the need to switch between tabs and lets you see multiple prompts at once.
Creating a new pane
Using the keyboard
You can either create a new vertical or horizontal pane in Windows Terminal. Splitting vertically will open a new pane to the right of the focused pane and splitting horizontally will open a new pane below the focused pane. Using directional splits up, right, down, or left gives more options for where the new pane can go. right and down are equivalent to vertical and horizontal, whereas up and left allow you to put the new pane above and to the left of the focused pane respectively. To create a new vertical pane of your default profile, you can press the Alt+Shift++ key combination. For a horizontal pane of your default profile, you can use Alt+Shift+-.
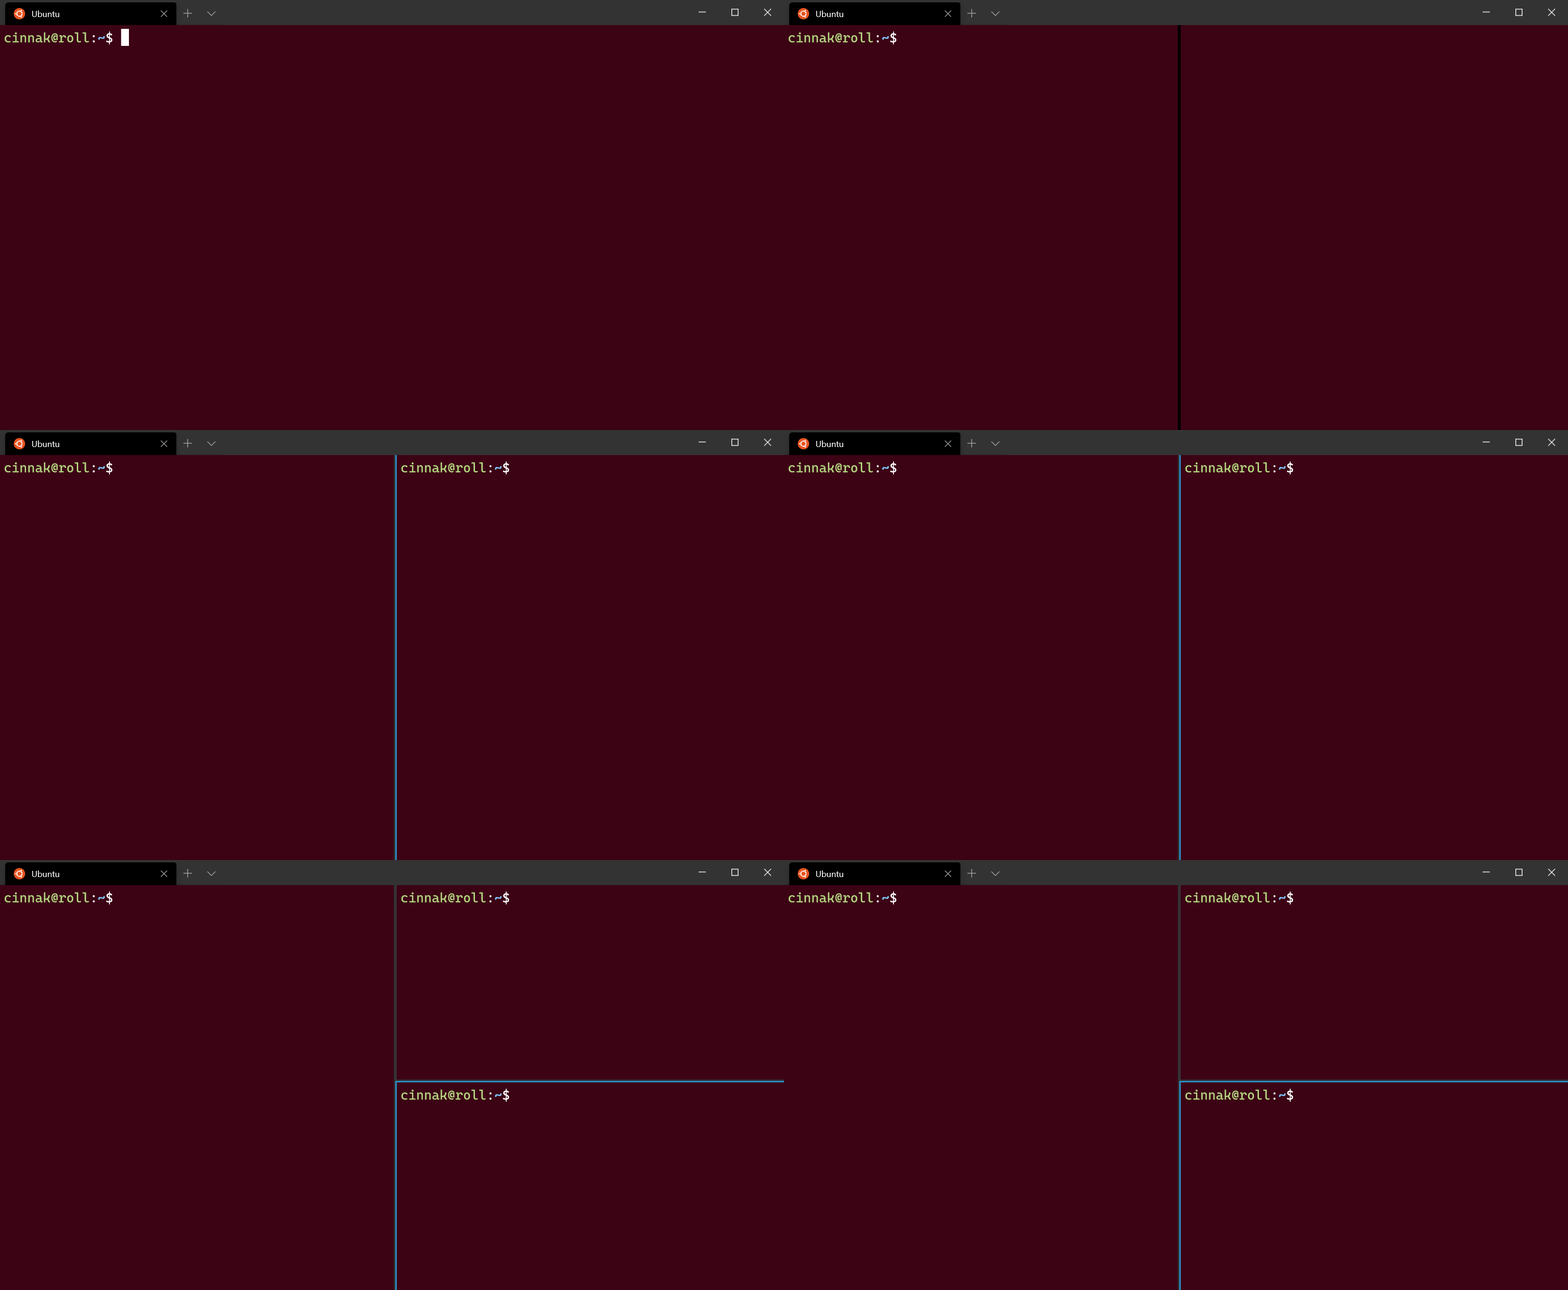 Configuration: Raspberry Ubuntu
If you would like to change these key bindings, you can create new ones using the splitPane action and vertical, horizontal, up, right, down, left, or auto values for the split property in your profiles.json file. The auto method will choose the direction that gives you the squarest panes. To learn more about key bindings, visit the Actions page.
{ "command": { "action": "splitPane", "split": "vertical" }, "keys": "alt+shift+plus" },
{ "command": { "action": "splitPane", "split": "horizontal" }, "keys": "alt+shift+-" },
{ "command": { "action": "splitPane", "split": "auto" }, "keys": "alt+shift+d" },
{ "command": { "action": "splitPane", "split": "up" } },
{ "command": { "action": "splitPane", "split": "right" } },
{ "command": { "action": "splitPane", "split": "down" } },
{ "command": { "action": "splitPane", "split": "left" } },
Using the new tab button and dropdown menu
If you'd like to open a new pane of your default profile, you can hold the Alt key and click the new tab button. If you'd like to open a new pane through the dropdown menu, you can hold Alt and click on your desired profile. Both of these options will auto split the active window or pane into a new pane of the selected profile. The auto split mode splits in the direction that has the longest edge to create a pane.
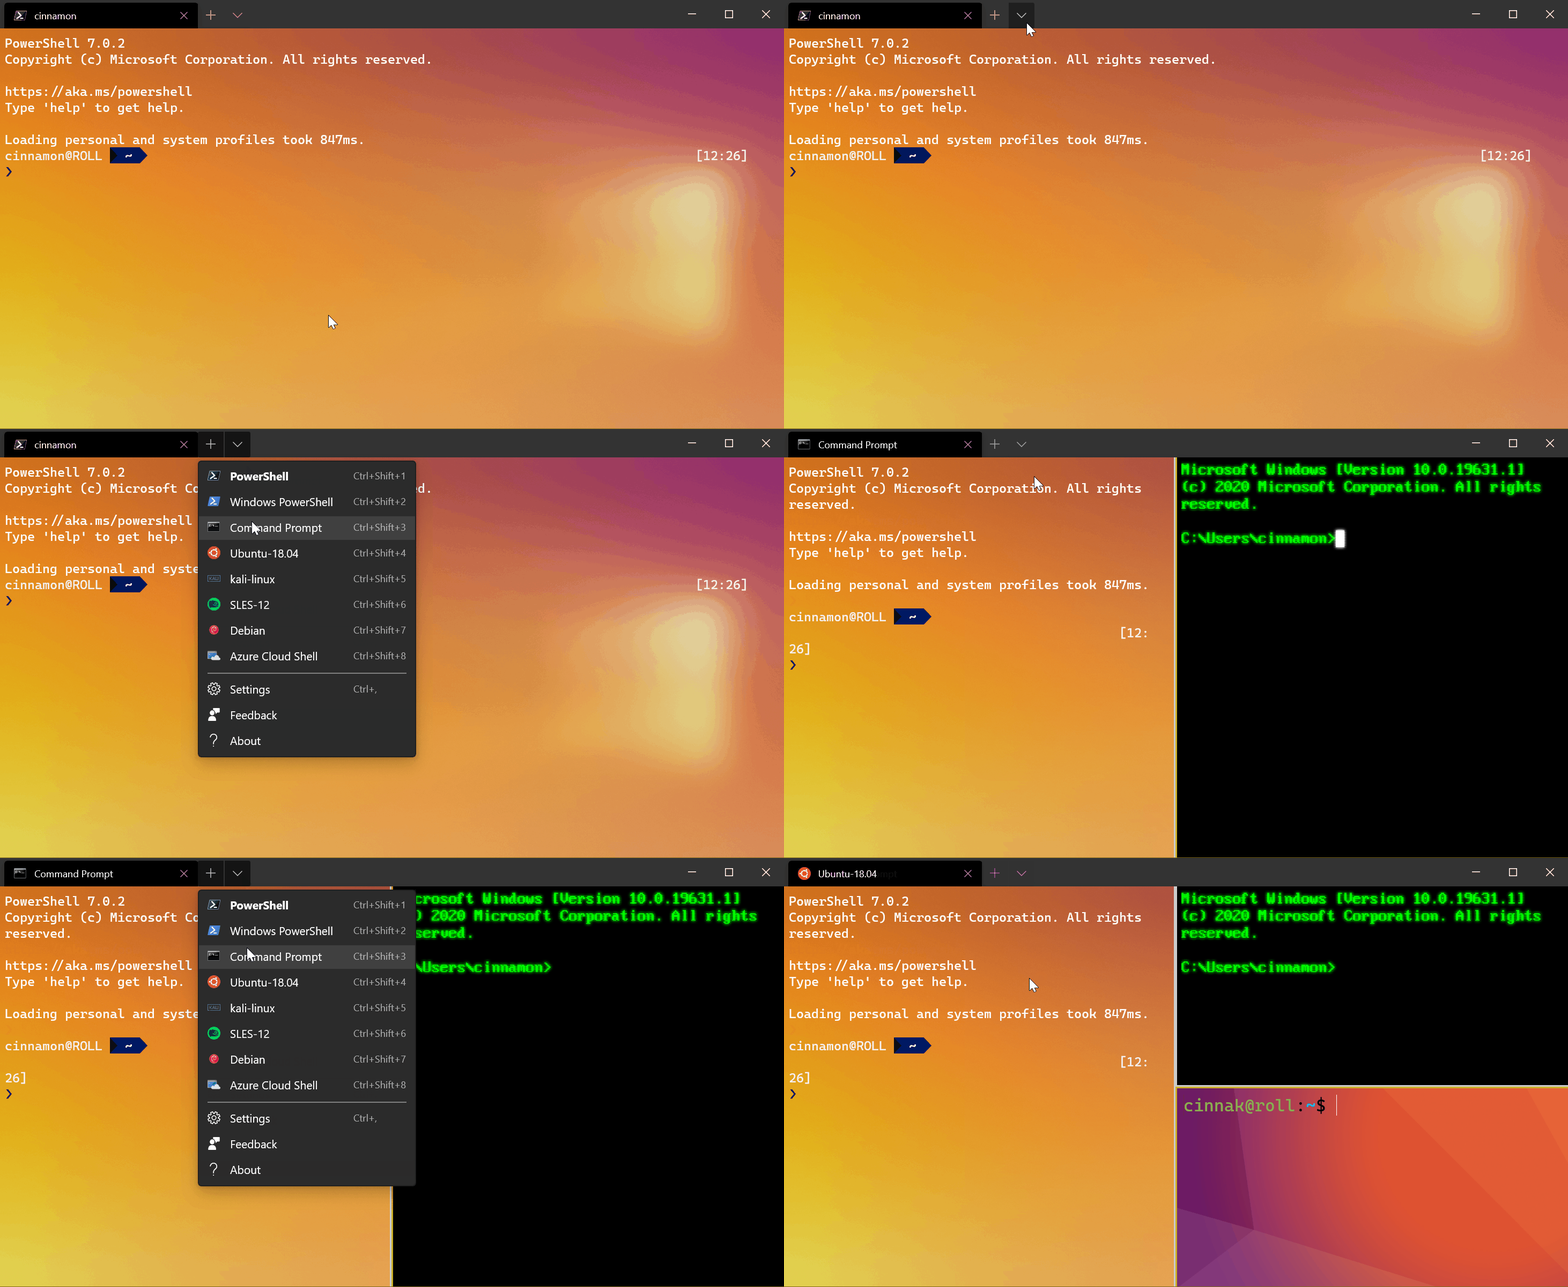
Using the tab context menu
If you'd like to open a new pane of a profile that is already open in your terminal, you can right click on the tab and click Split Tab. This will duplicate the focused pane in the current tab.
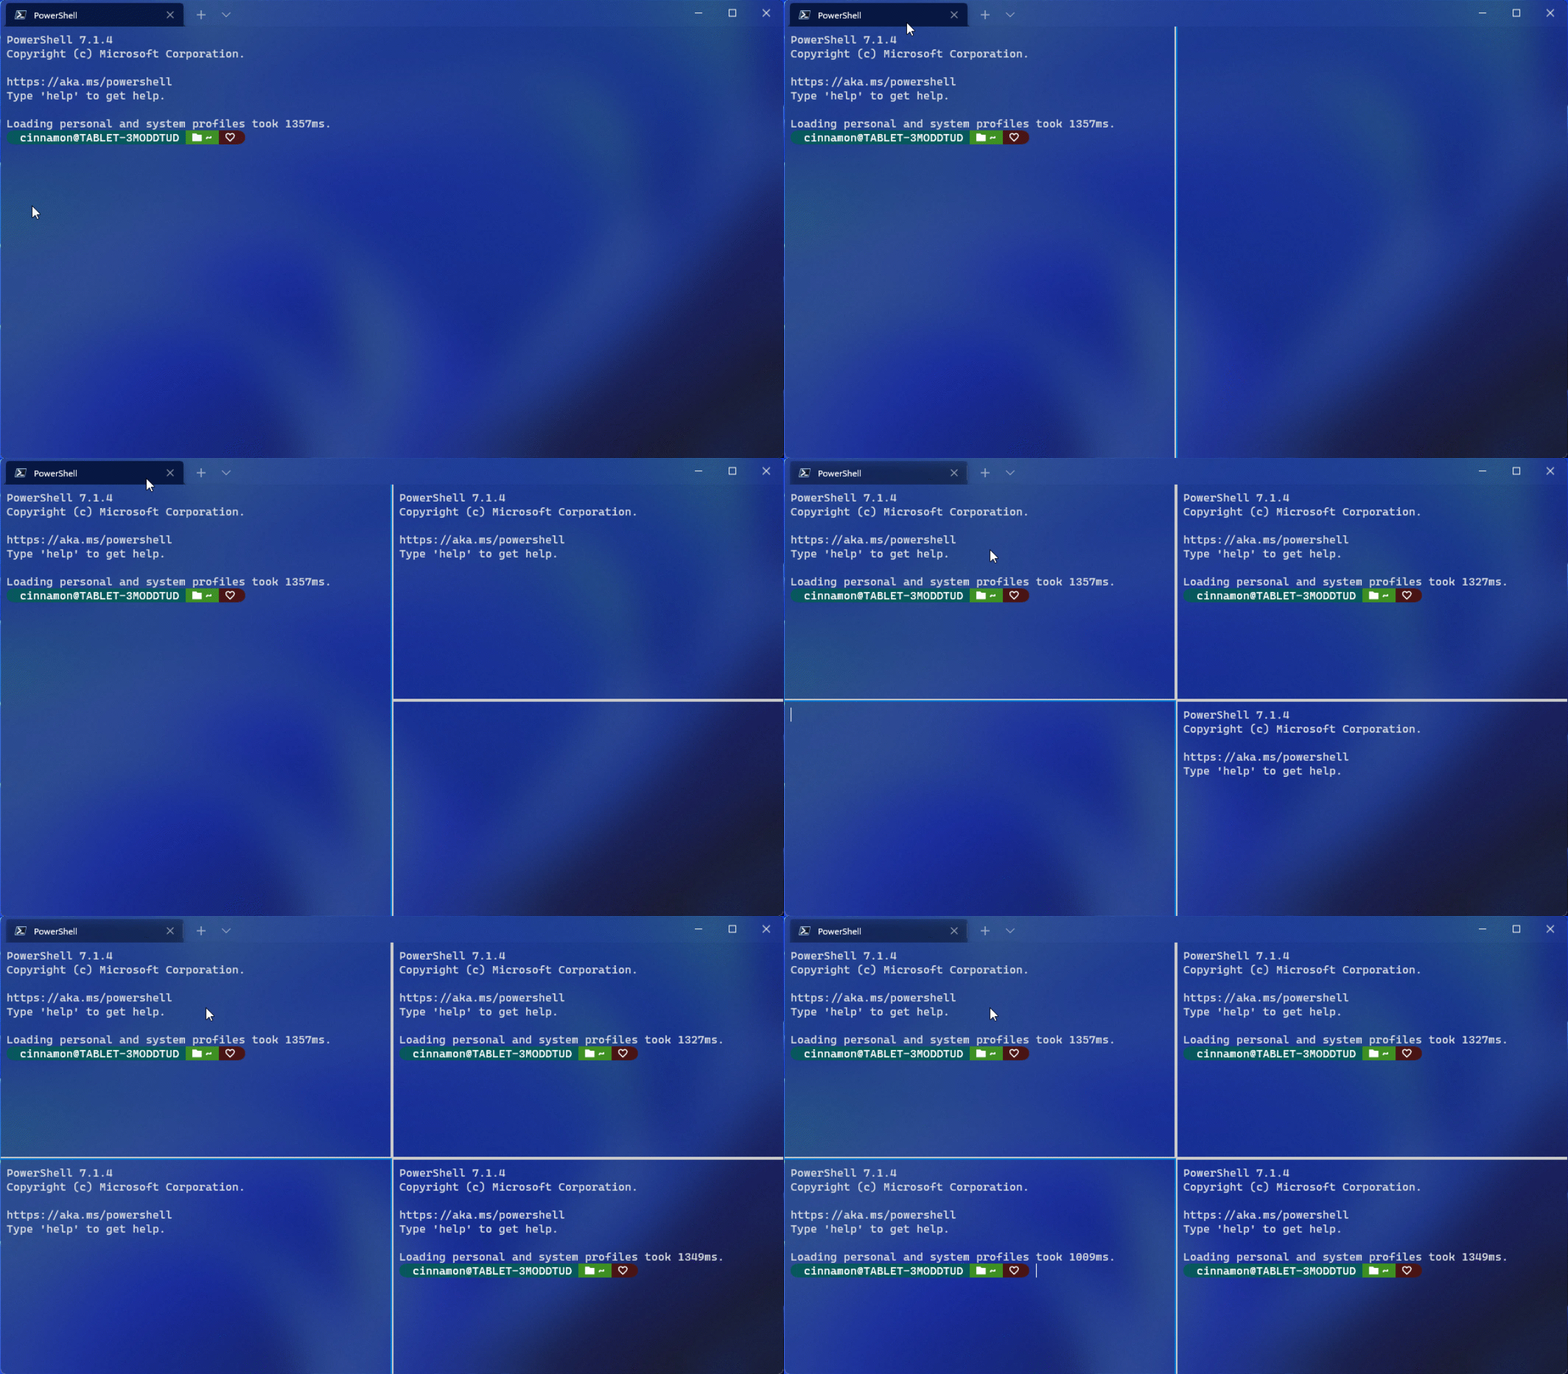
Switching between panes
The terminal allows you to navigate between panes by using the keyboard. If you hold the Alt key, you can use your arrow keys to move your focus between panes. You can identify which pane is in focus by the accent color border surrounding it. Note that this accent color is set in your Windows color settings.
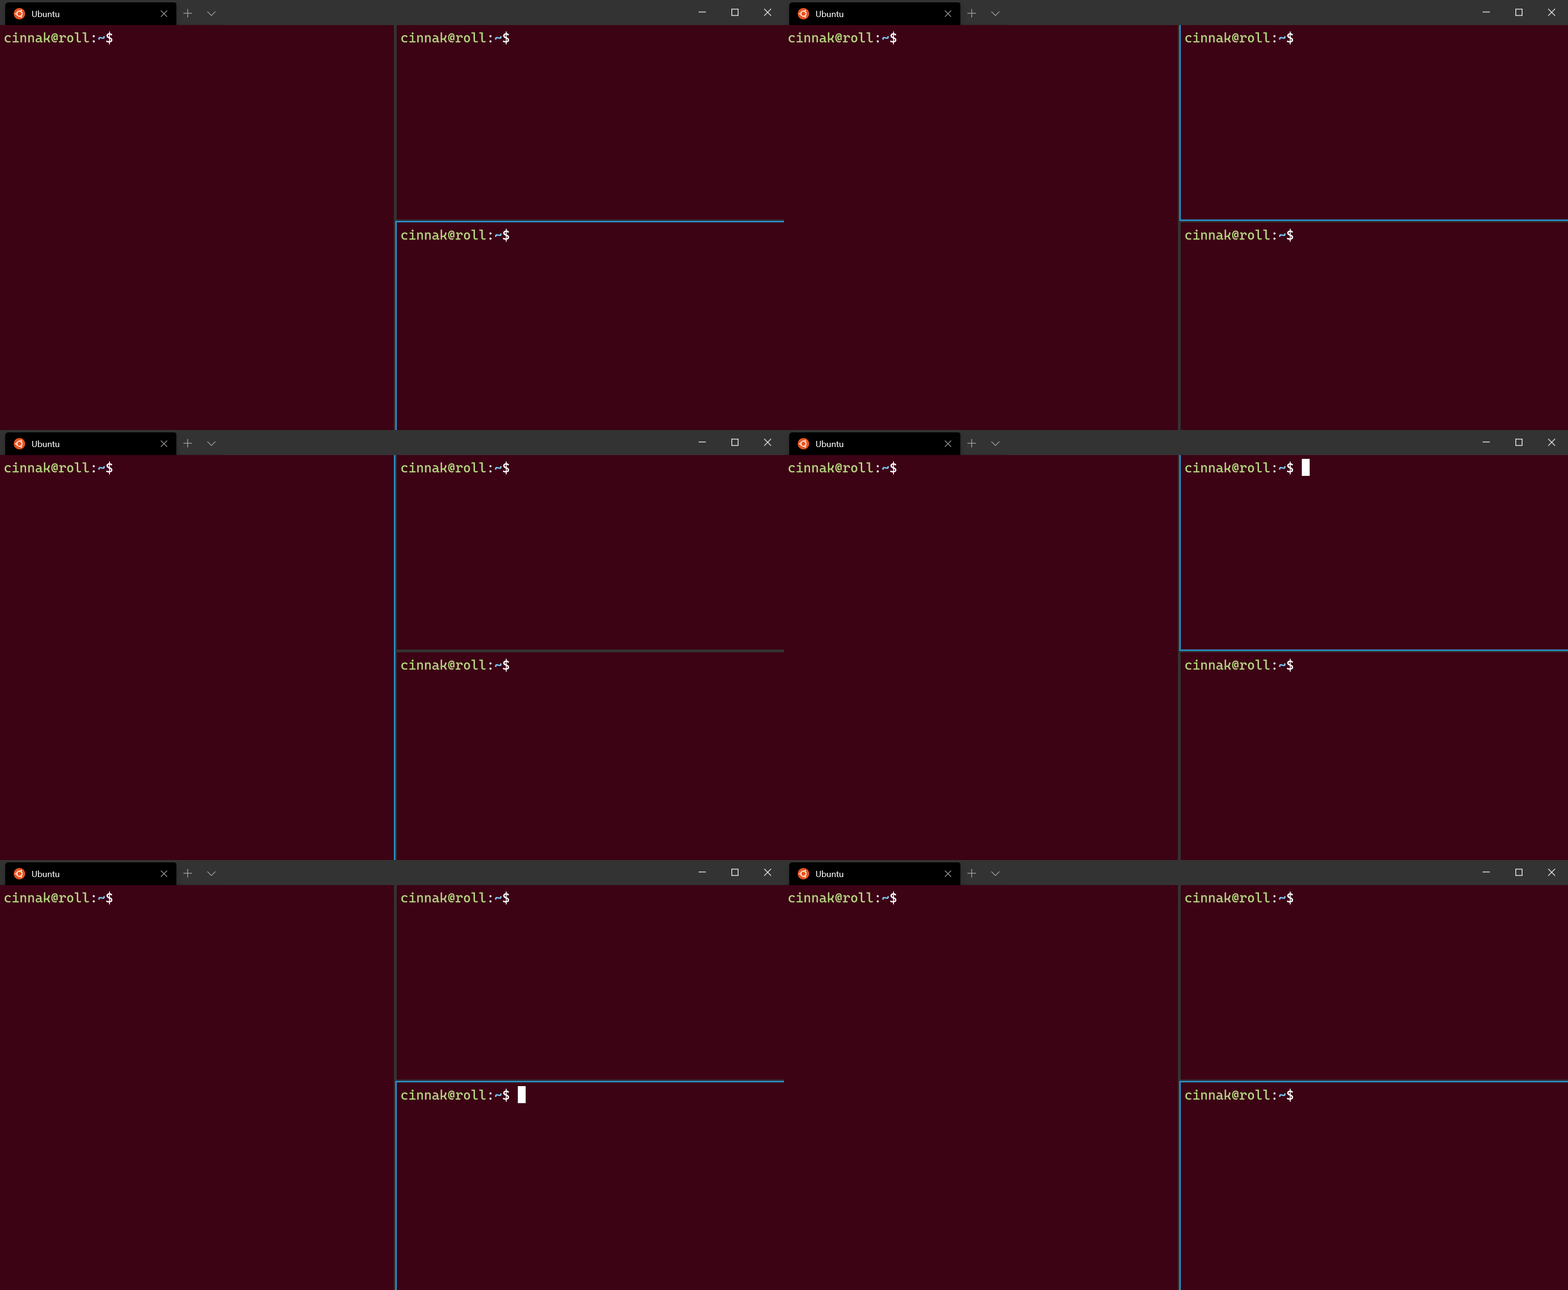
You can customize this by adding key bindings for the moveFocus command and setting the direction to either down, left, right, or up. Additionally, direction can be previous for the last used pane, or previousInOrder or nextInOrder for navigation by tree order, or first for the first pane. Lastly, you can navigate up the tree using the parent direction to select multiple panes, and then child to select fewer panes and move back down the tree. When multiple panes are selected you can perform actions like if you had a single pane focused.
{ "command": { "action": "moveFocus", "direction": "down" }, "keys": "alt+down" },
{ "command": { "action": "moveFocus", "direction": "left" }, "keys": "alt+left" },
{ "command": { "action": "moveFocus", "direction": "right" }, "keys": "alt+right" },
{ "command": { "action": "moveFocus", "direction": "up" }, "keys": "alt+up" },
{ "command": { "action": "moveFocus", "direction": "previous" } },
{ "command": { "action": "moveFocus", "direction": "previousInOrder" } },
{ "command": { "action": "moveFocus", "direction": "nextInOrder" } },
{ "command": { "action": "moveFocus", "direction": "first" } },
{ "command": { "action": "moveFocus", "direction": "parent" } },
{ "command": { "action": "moveFocus", "direction": "child" } }
Swapping panes
Once two panes have been created, you can swap their positions in the terminal.
The swapPane command can be customized using the same navigation directions as moveFocus, except for parent and child. These commands will swap the positions of the currently focused pane and its neighbor according to direction.
{ "command": { "action": "swapPane", "direction": "down" } },
{ "command": { "action": "swapPane", "direction": "left" } },
{ "command": { "action": "swapPane", "direction": "right" } },
{ "command": { "action": "swapPane", "direction": "up" } },
{ "command": { "action": "swapPane", "direction": "previous" } },
{ "command": { "action": "swapPane", "direction": "previousInOrder" } },
{ "command": { "action": "swapPane", "direction": "nextInOrder" } },
{ "command": { "action": "swapPane", "direction": "first" } }
Moving panes
Panes can also be moved between tabs, creating a new tab if one with the target index does not exist.
The key bindings for the movePane command can be customized for moving panes to (zero-indexed) tabs according to their order.
{ "command": { "action": "movePane", "index": 0 } },
{ "command": { "action": "movePane", "index": 1 } },
{ "command": { "action": "movePane", "index": 2 } },
{ "command": { "action": "movePane", "index": 3 } },
{ "command": { "action": "movePane", "index": 4 } },
{ "command": { "action": "movePane", "index": 5 } },
{ "command": { "action": "movePane", "index": 6 } },
{ "command": { "action": "movePane", "index": 7 } },
{ "command": { "action": "movePane", "index": 8 } }
Changing split orientation
After two panes on a tab have been created, the split orientation of those panes can be switched between vertical and horizontal with the toggleSplitOrientation command.
{ "command": "toggleSplitOrientation" }
Swapping panes (Preview)
Once two panes have been created, you can swap their positions in the terminal.
The swapPane command can be customized using the same navigation directions as moveFocus. These commands will swap the positions of the currently focused pane and its neighbor according to direction.
{ "command": { "action": "swapPane", "direction": "down" } },
{ "command": { "action": "swapPane", "direction": "left" } },
{ "command": { "action": "swapPane", "direction": "right" } },
{ "command": { "action": "swapPane", "direction": "up" } },
{ "command": { "action": "swapPane", "direction": "previous" } },
{ "command": { "action": "swapPane", "direction": "previousInOrder" } },
{ "command": { "action": "swapPane", "direction": "nextInOrder" } }
Moving panes (Preview)
Panes can also be moved between tabs, creating a new tab if one with the target index does not exist.
The key bindings for the movePane command can be customized for moving panes to (zero-indexed) tabs according to their order.
{ "command": { "action": "movePane", "index": 0 } },
{ "command": { "action": "movePane", "index": 1 } },
{ "command": { "action": "movePane", "index": 2 } },
{ "command": { "action": "movePane", "index": 3 } },
{ "command": { "action": "movePane", "index": 4 } },
{ "command": { "action": "movePane", "index": 5 } },
{ "command": { "action": "movePane", "index": 6 } },
{ "command": { "action": "movePane", "index": 7 } },
{ "command": { "action": "movePane", "index": 8 } }
Changing split orientation (Preview)
After two panes on a tab have been created, the split orientation of those panes can be switched between vertical and horizontal with the toggleSplitOrientation command.
{ "command": "toggleSplitOrientation" }
Resizing a pane
You can adjust the size of your panes by holding Alt+Shift and using your arrow keys to resize the focused pane.
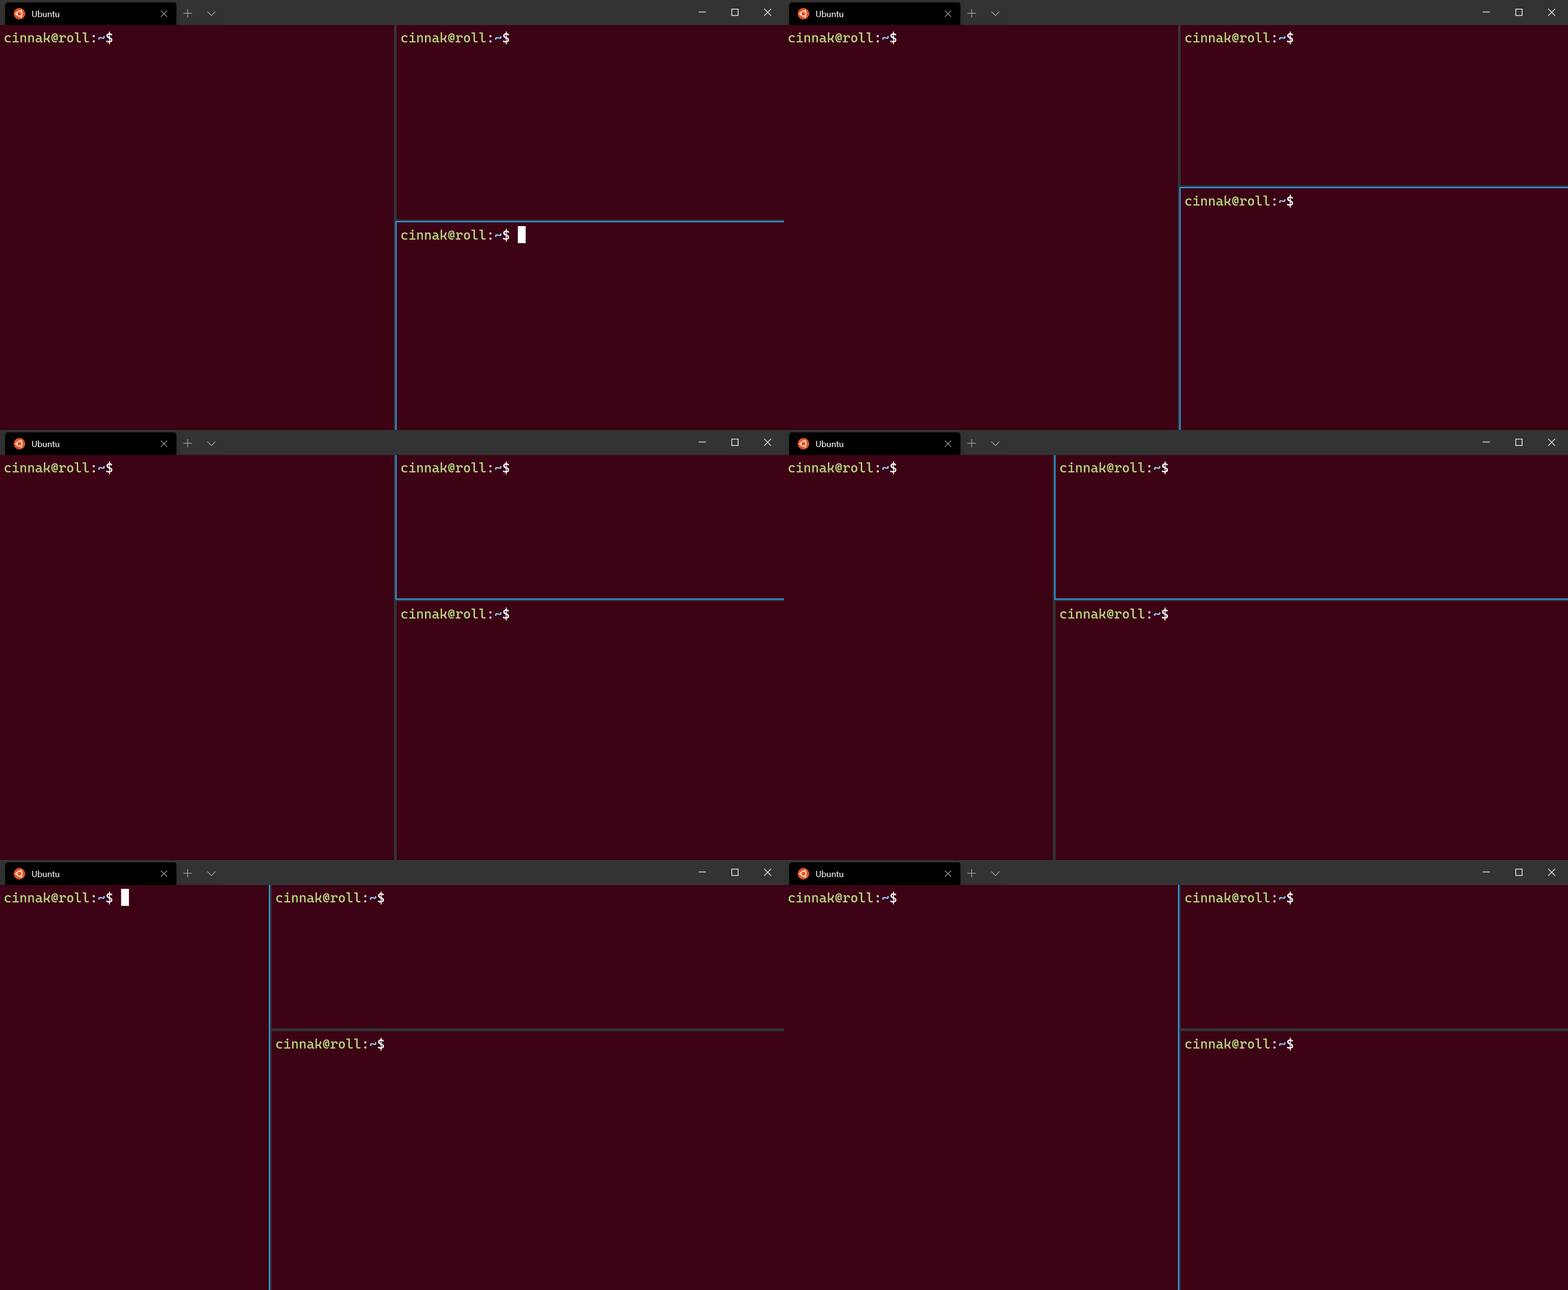
To customize this key binding, you can add new ones using the resizePane action and setting the direction to either down, left, right, or up.
{ "command": { "action": "resizePane", "direction": "down" }, "keys": "alt+shift+down" },
{ "command": { "action": "resizePane", "direction": "left" }, "keys": "alt+shift+left" },
{ "command": { "action": "resizePane", "direction": "right" }, "keys": "alt+shift+right" },
{ "command": { "action": "resizePane", "direction": "up" }, "keys": "alt+shift+up" }
Closing a pane
You can close the focused pane by typing Ctrl+Shift+W. If you only have one pane, Ctrl+Shift+W will close the tab. As always, closing the last tab will close the window.
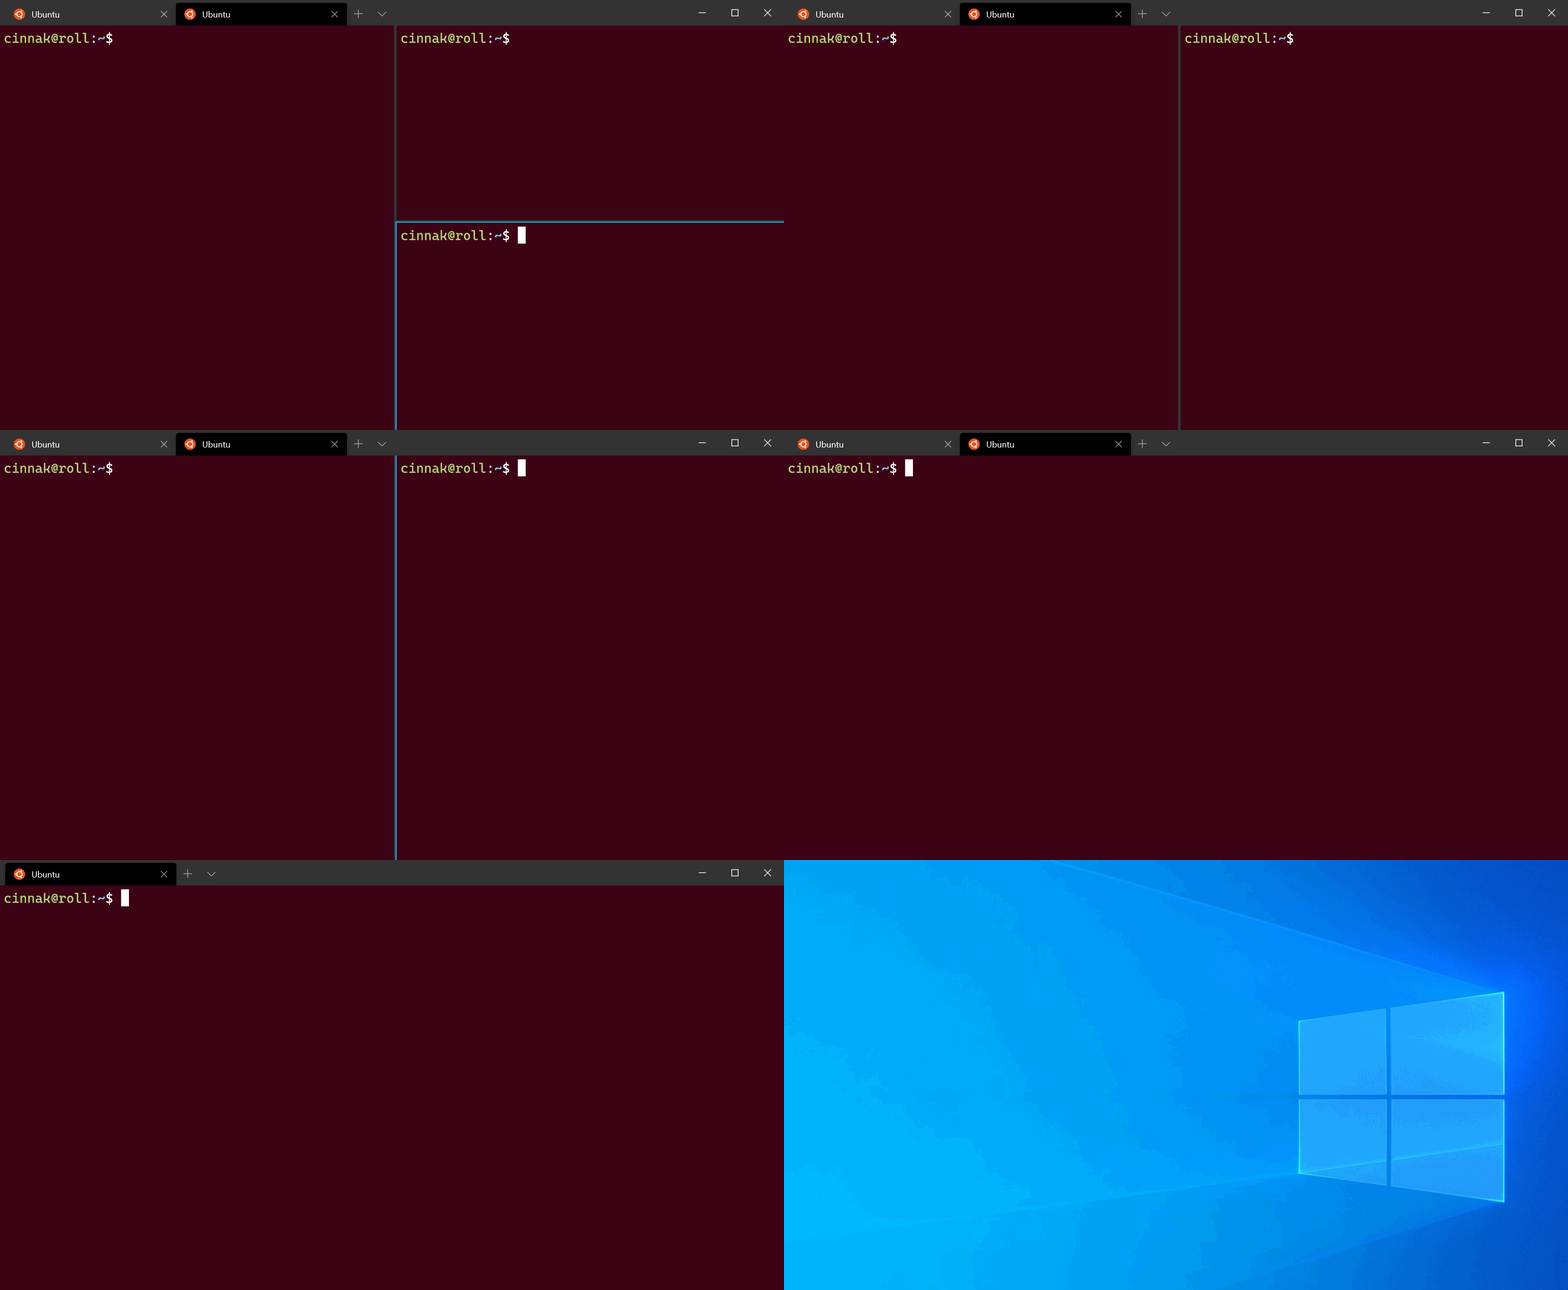
You can change which keys close the pane by adding a key binding that uses the closePane command.
{ "command": "closePane", "keys": "ctrl+shift+w" }
Zooming a pane
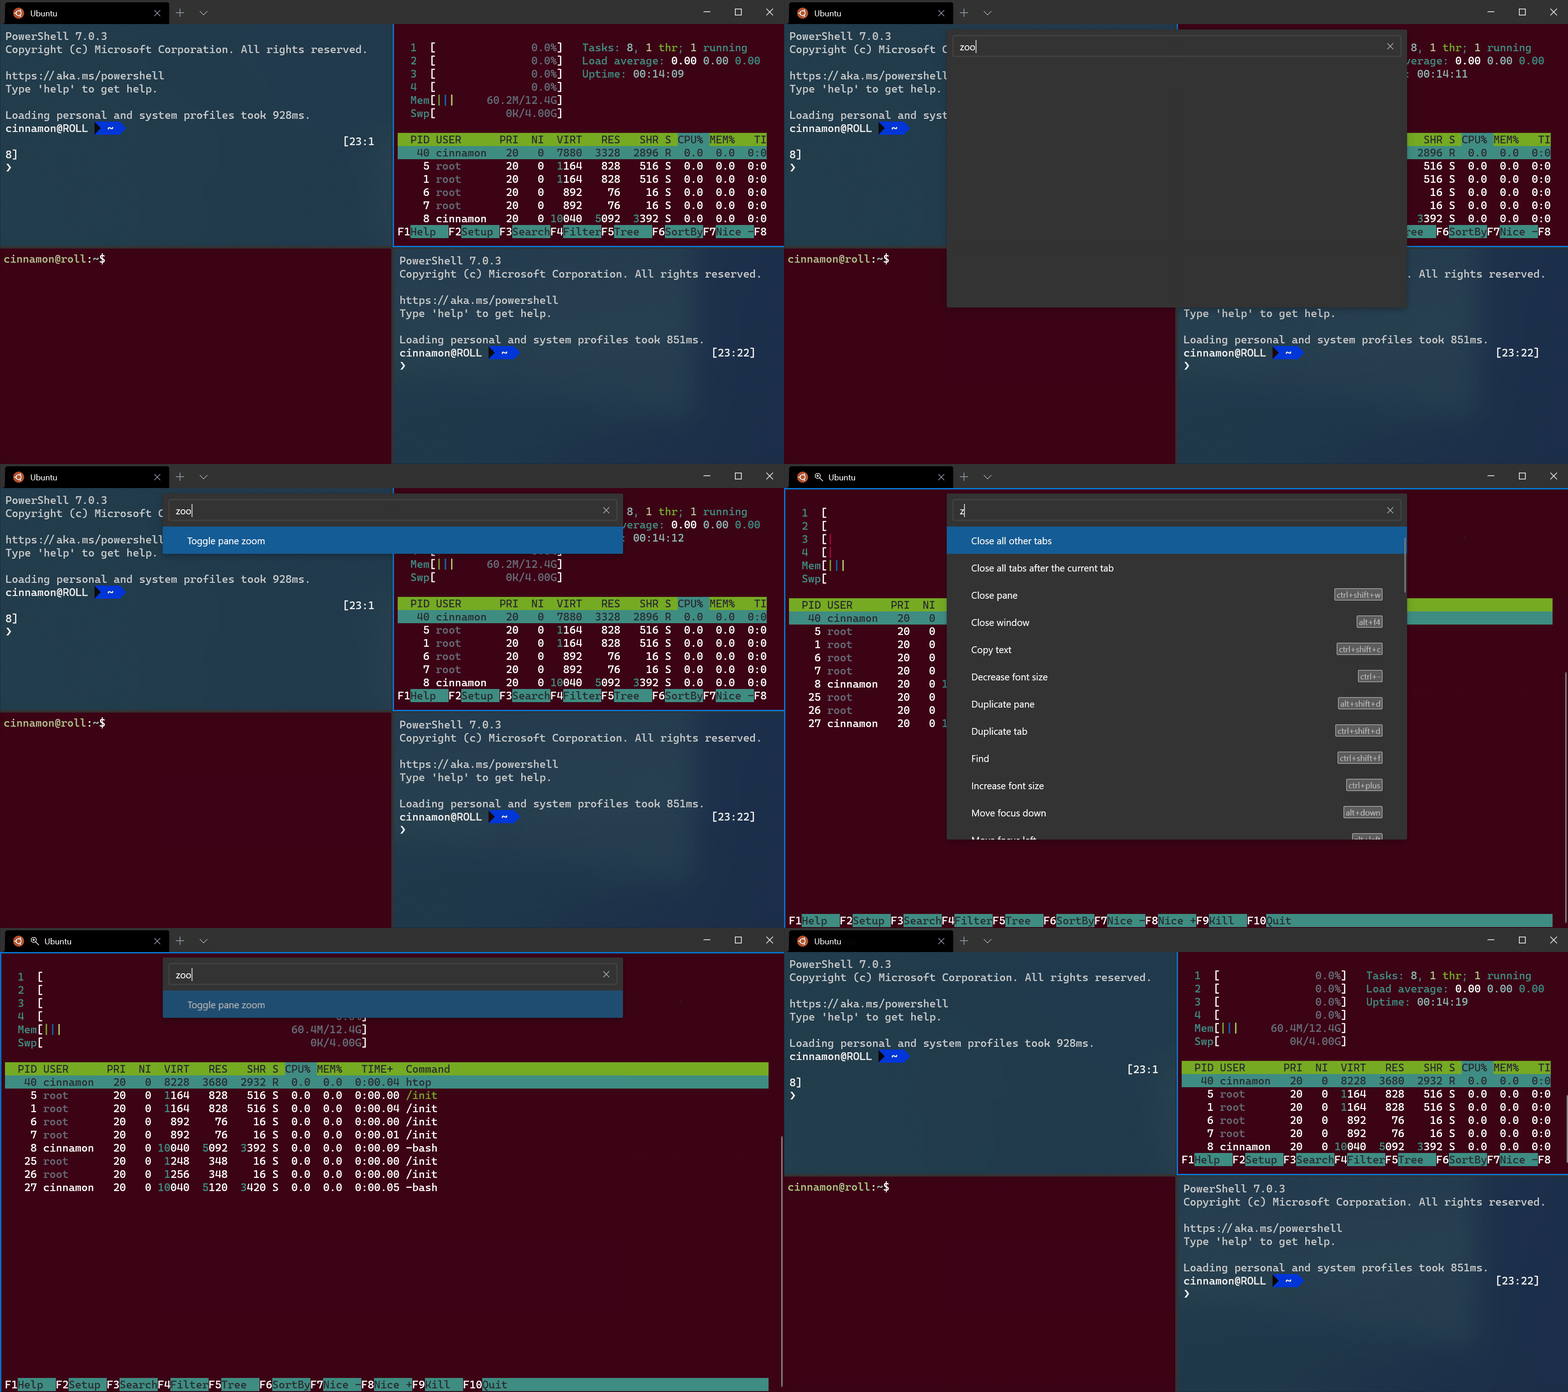
You can zoom the focused pane to fill the entire contents of the window.
Note
The menu in the above gif is the Command Palette, which can be opened with Ctrl+Shift+P by default.
This can be done by using the togglePaneZoom command.
{ "command": "togglePaneZoom" }
Note
The togglePaneZoom action is not bound to any keys by default, but it can be accessed through the command palette, which is bound to Ctrl+Shift+P by default.
Marking a pane as read-only
You can mark a pane as read-only, which will prevent input from going into the text buffer. If you attempt to close or input text into a read-only pane, the terminal will display a popup warning instead.
You can toggle read-only mode on a pane with the toggleReadOnlyMode command.
{ "command": "toggleReadOnlyMode" }
You can enable read-only mode on a pane. This works similarly to toggling, however, will not switch state if triggered again.
Command name: enableReadOnlyMode
Default bindings:
{ "command": "enableReadOnlyMode" }
You can disable read-only mode on a pane. This works similarly to toggling, however, will not switch state if triggered again.
Command name: disableReadOnlyMode
Default bindings:
{ "command": "disableReadOnlyMode" }
Customizing panes using key bindings
You can customize what opens inside a new pane depending on your custom key bindings.
Duplicating a pane
The terminal allows you to duplicate the focused pane's profile into another pane.
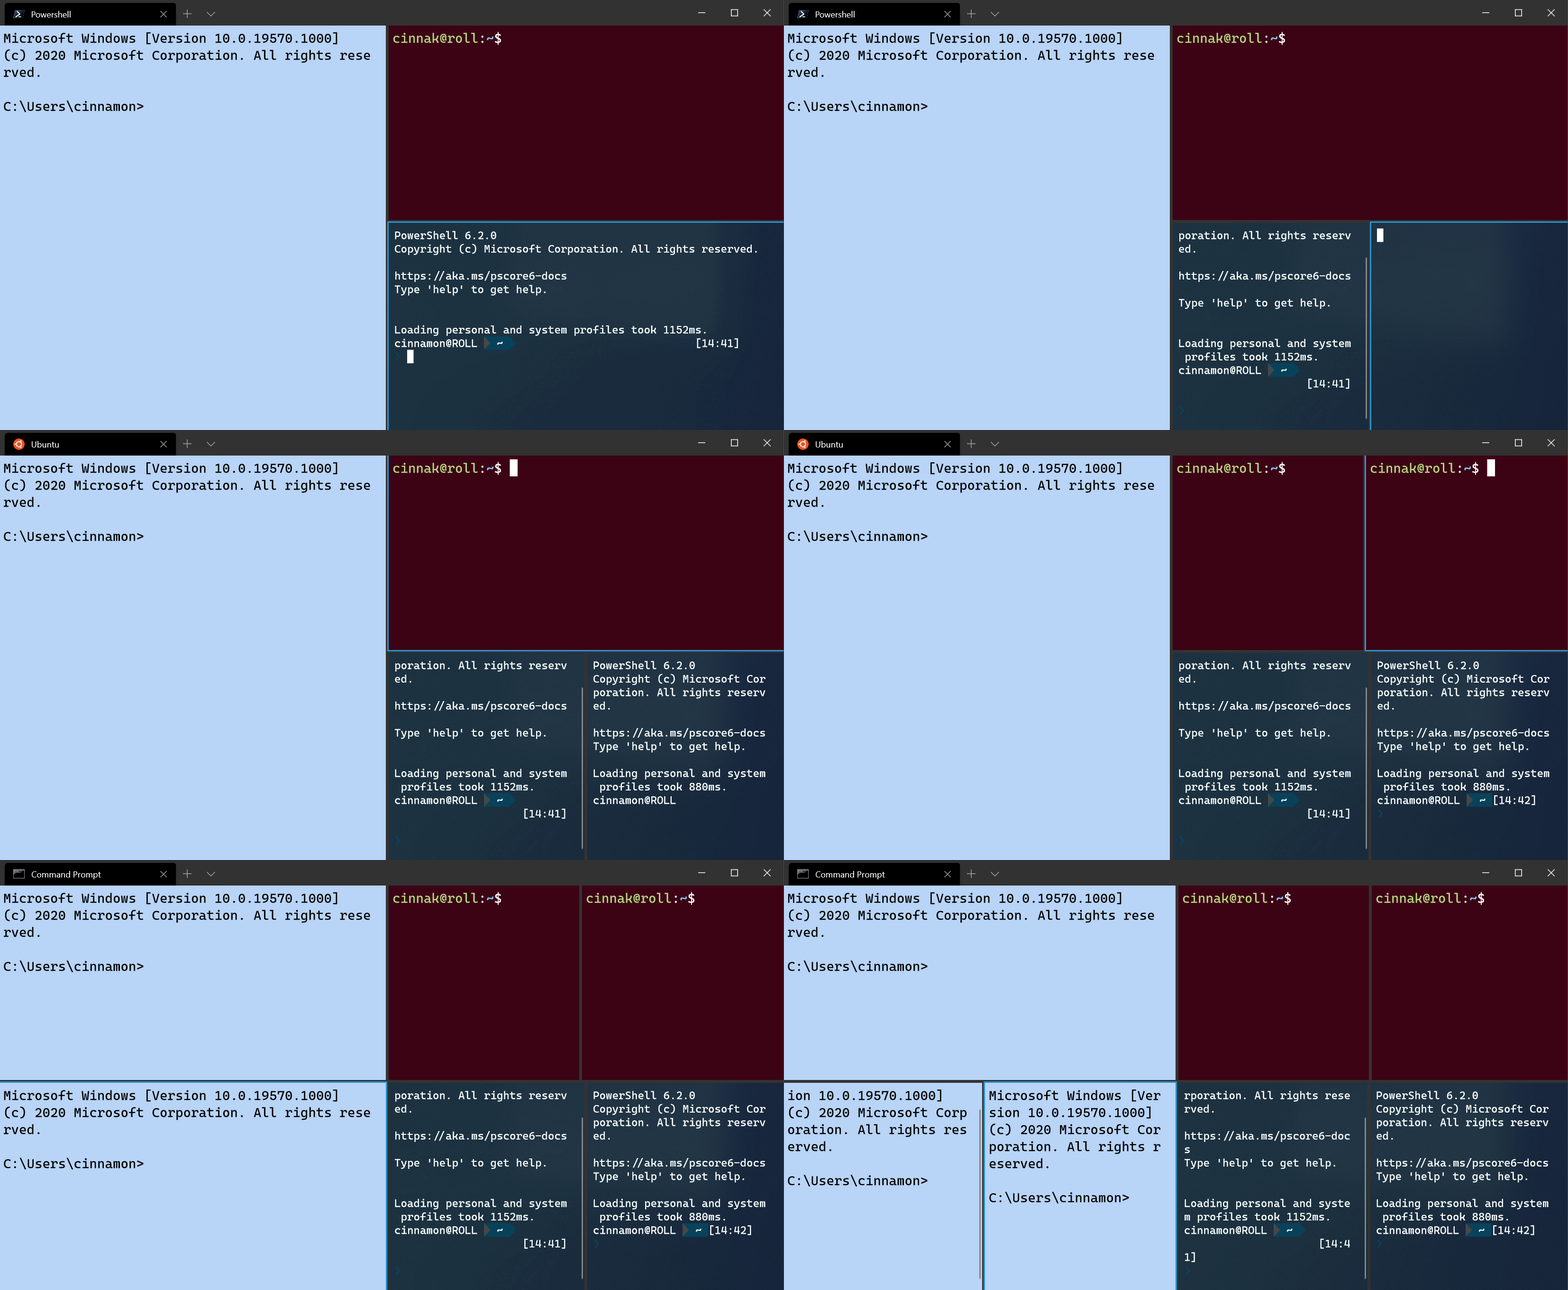
This can be done by adding the splitMode property with duplicate as the value to a splitPane key binding.
{ "command": { "action": "splitPane", "split": "auto", "splitMode": "duplicate" }, "keys": "alt+shift+d" }
New terminal arguments
When opening a new pane or tab with a key binding, you can specify which profile is used by including the profile's name, guid, or index. If none are specified, the default profile is used. This can be done by adding profile or index as an argument to a splitPane or newTab key binding. Note that indexing starts at 0.
{ "command": { "action": "splitPane", "split": "vertical", "profile": "profile1" }, "keys": "ctrl+a" },
{ "command": { "action": "splitPane", "split": "vertical", "profile": "{00000000-0000-0000-0000-000000000000}" }, "keys": "ctrl+b" },
{ "command": { "action": "newTab", "index": 0 }, "keys": "ctrl+c" }
Additionally, you can override certain aspects of the profile such as the profile's command line executable, starting directory, or tab title. This can be accomplished by adding commandline, startingDirectory, and/or tabTitle to a splitPane or newTab key binding.
{ "command": { "action": "splitPane", "split": "auto", "profile": "profile1", "commandline": "foo.exe" }, "keys": "ctrl+a" },
{ "command": { "action": "newTab", "profile": "{00000000-0000-0000-0000-000000000000}", "startingDirectory": "C:\\foo" }, "keys": "ctrl+b" },
{ "command": { "action": "newTab", "index": 0, "tabTitle": "bar", "startingDirectory": "C:\\foo", "commandline": "foo.exe" }, "keys": "ctrl+c" }
Windows Terminal
