Note
Access to this page requires authorization. You can try signing in or changing directories.
Access to this page requires authorization. You can try changing directories.
Container runtime antimalware detects and blocks malware when a container runs an executable that the system identifies as malicious software.
This feature sends alerts when it identifies malware and lets you block malware.
You can define antimalware policies that set conditions for alerts and blocking. These policies help you distinguish legitimate activity from potential threats.
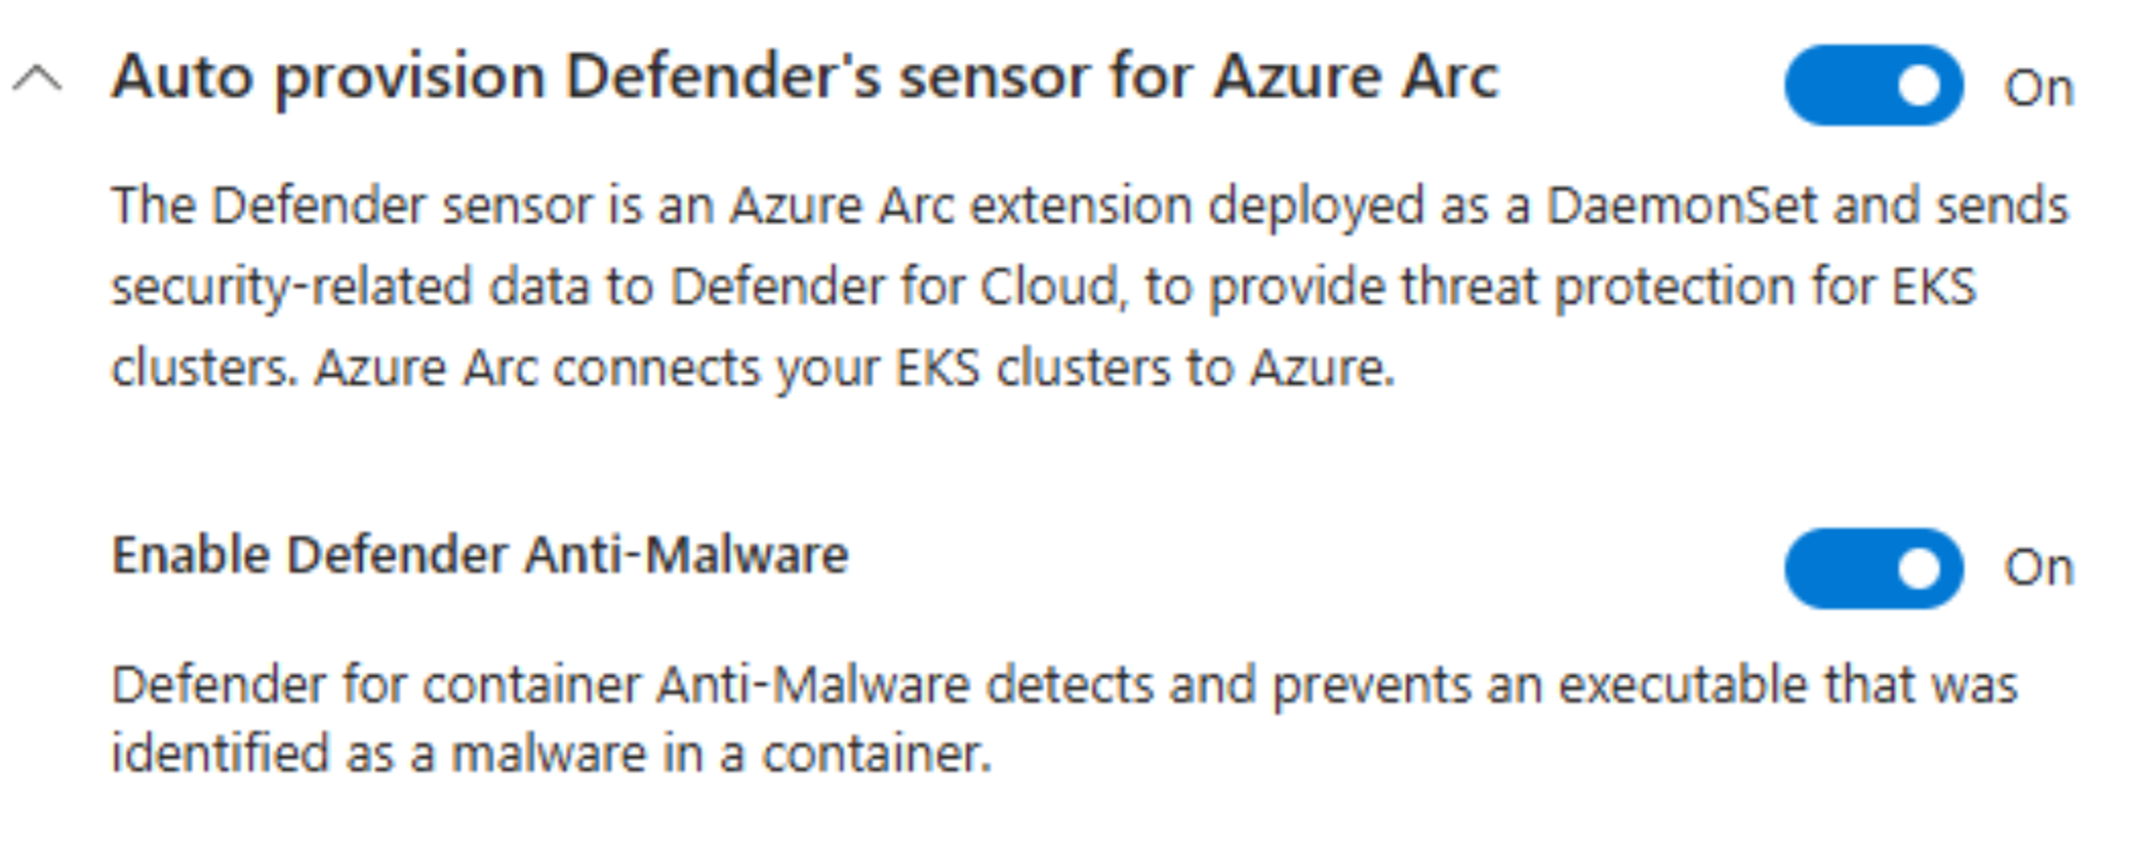
Container runtime antimalware detection and blocking is part of the Defender for Containers plan. This feature is available for Azure Kubernetes Service (AKS), Amazon Elastic Kubernetes Service (EKS), and Google Kubernetes Engine (GKE).
Prerequisites
To use container runtime antimalware detection and blocking, you need to run the Defender for Container sensor, which is available for the AWS, GCP, and AKS clouds. This feature is supported for:
- AKS: Helm provisioning with sensor version 0.10.X GA latest version.
- Multicloud:
Enable ARC auto-provisioning on the enablement page
Helm provisioning with sensor version 0.10.X GA latest version or the ARC extension, with the command
--configuration-settings collectors.antimalwareCollector.enable='true'.For example:
az k8s-extension create --name microsoft.azuredefender.kubernetes --extension-type microsoft.azuredefender.kubernetes --cluster-name <name> --resource-group <rg> --cluster-type connectedClusters --configuration-settings collectors.antimalwareCollector.enable='true'
You must enable the Defender for Container sensor on the subscriptions and connectors.
To create and modify antimalware policies, you need Security Admin or higher permissions on the tenant. To view antimalware policies, you need Security Reader or higher permissions on the tenant.
In addition to the core sensor memory and CPU requirements, you need:
Component Request Limit CPU 50 m 300 m Memory 128Mi 500Mi

Learn more about antimalware detection and blocking availability.
Components
The following components are part of antimalware detection and blocking:
An enhanced sensor that detects and prevents malware.
Antimalware policy configuration options.
Antimalware alerts.
Enable antimalware detection and blocking
Antimalware isn't enabled by default because it consumes extra cluster resources.
To install the sensor with antimalware enabled, follow the instructions to install Defender for Containers sensor by using Helm and include the --antimalware flag.
Add antimalware rules
When you install the sensor with antimalware enabled, it configures three antimalware rules by default. These rules include:
Malware alert on binaries not originated from original image: a suggested rule for situations where the system detects a drifted binary.Default antimalware workload rule.Default anitmalware host rule.
The two default antimalware rules (workload and host) apply to every potential situation if no other rule matches first. You can only modify the default rule's actions and set it to alert, block, or ignore.
You can create new antimalware rules to define when alerts should be generated, blocked, or ignored. Each rule can define the conditions for generating alerts. This structure allows you to tailor the system to your specific needs and reduce false positives. You can create exclusions by setting higher priority rules for specific scopes or clusters, images, pods, Kubernetes labels, or namespaces.
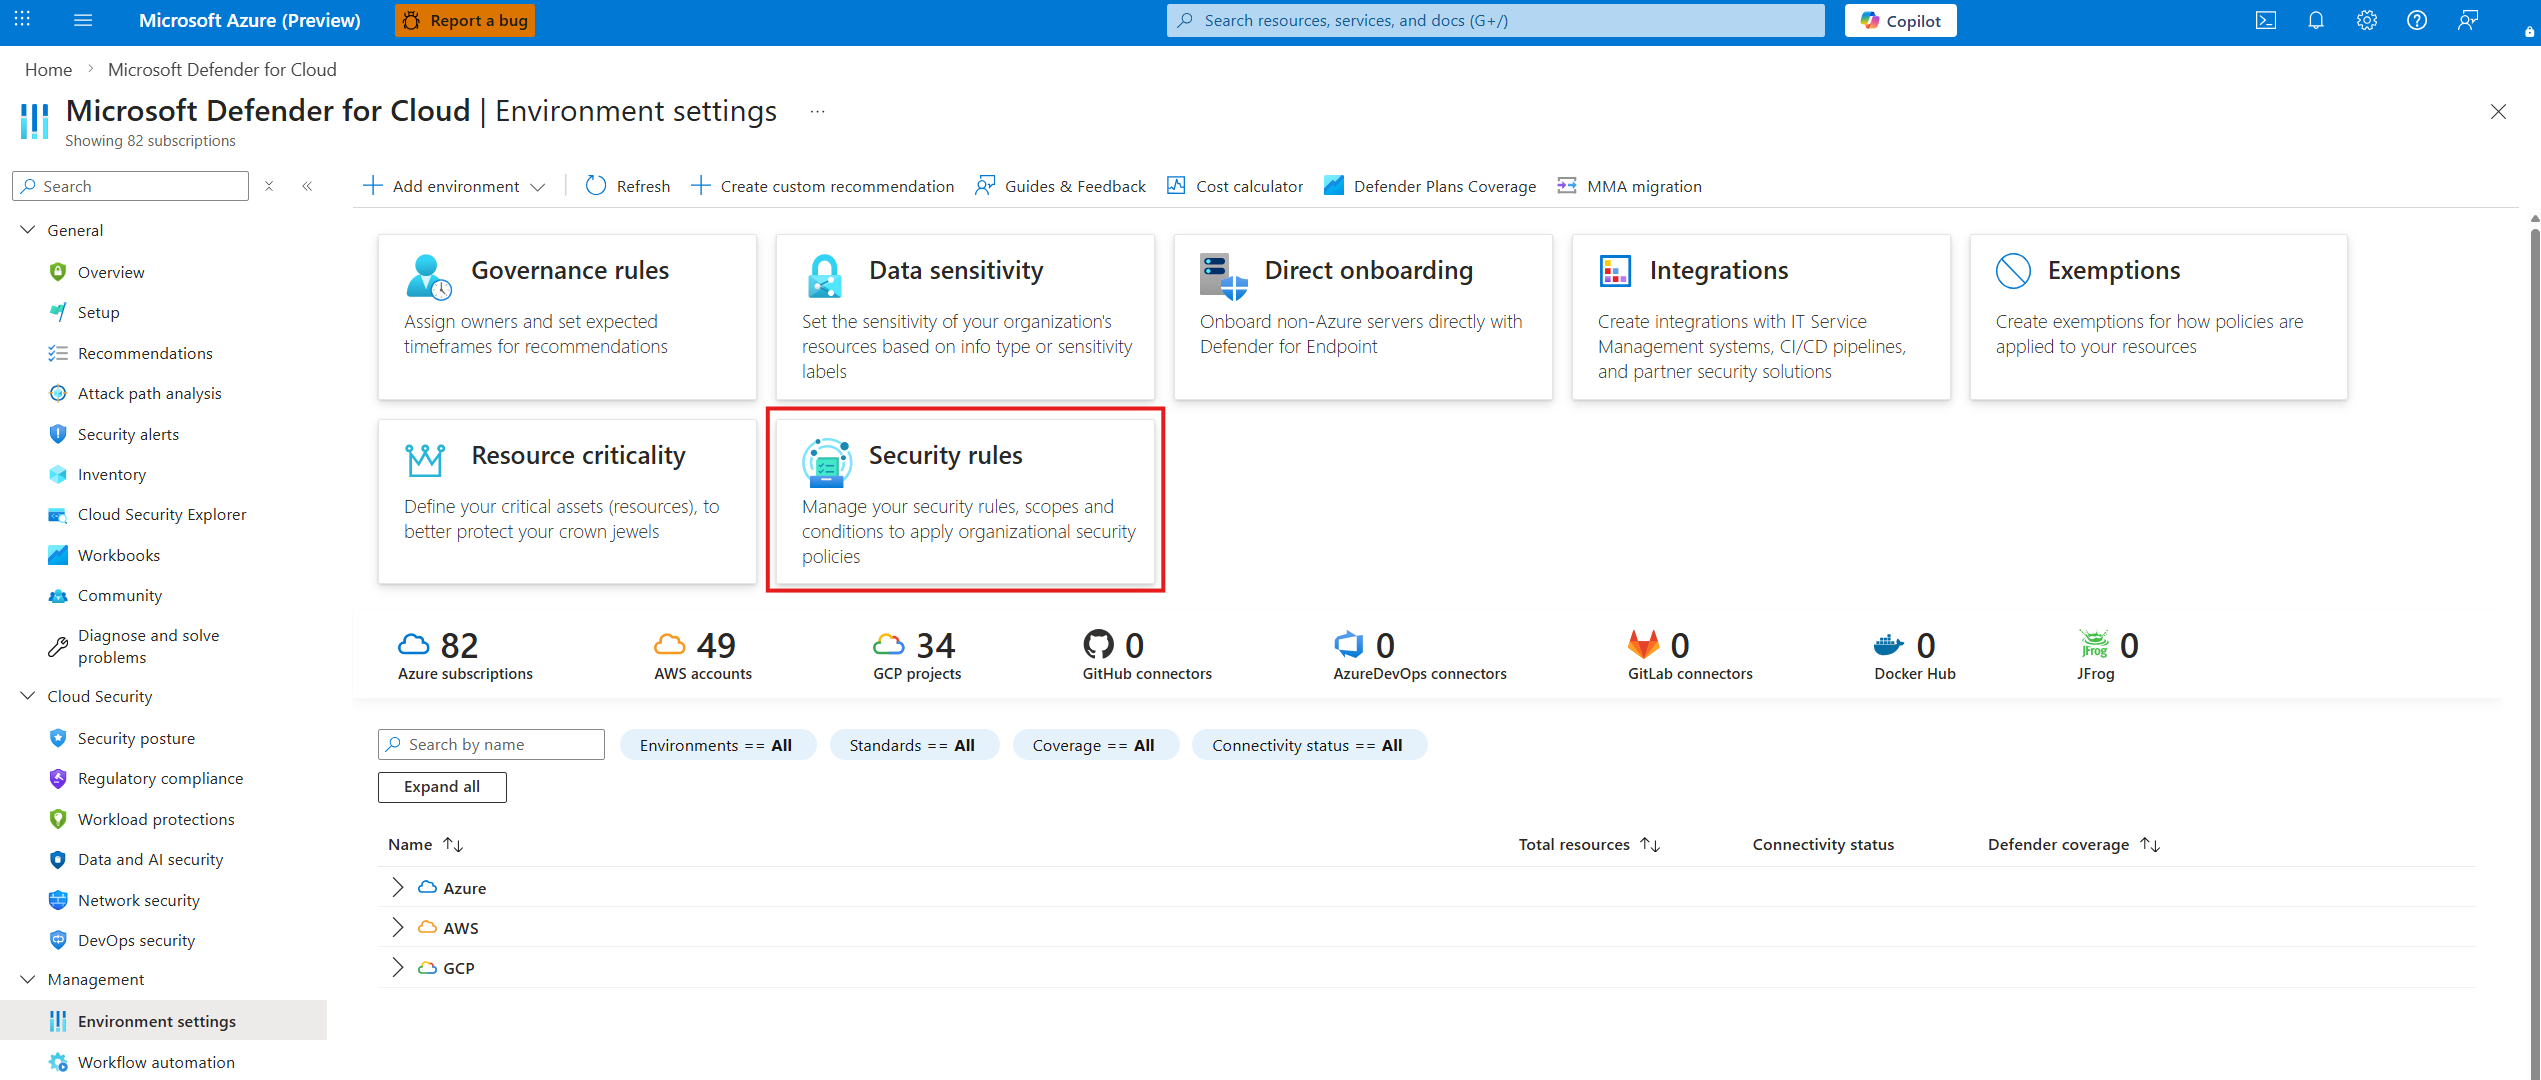
Sign in to the Azure portal.
Go to Defender for Cloud > Environment settings.
Select Security rules.
Select Antimalware > + Add rule.
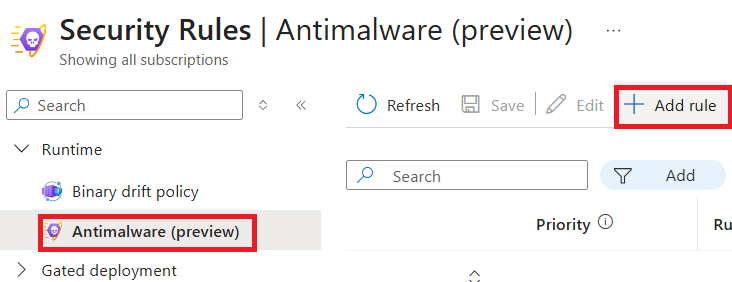
Enter a rule name.
Select an available action:
- Ignore Malware: Ignore the selected malware.
- Alert on Malware: Generate an alert. For example, if a rule detects a drifted binary.
- Block Malware: Block the malware from running.
Enter a scope name.
Select a cloud scope and (optional) specific subscription.
(Optional) Select a resource scope.
(Optional) Add conditions to the resource scope based on the following categories: Container name, Image name, Namespace, Pod labels, Pod name, or Cluster name. Then choose an operator: Starts with, Ends with, Equals, or Contains. Finally, enter the value to match. You can add as many conditions as needed by selecting +Add condition.
(Optional) Select the checkbox to exclude binaries from container image.
(Optional) Add Allow list for processes, a list of processes that are allowed to run in the container. If a process isn't on this list, an alert is generated.
Select Apply.
Select Save.


After 30 minutes, the sensors on the protected clusters are updated with the new rule.
Manage antimalware rules
Based on the alerts, you receive and review, you might need to adjust the rules in the antimalware policy. This adjustment might include refining conditions, adding rules, or removing rules that generate many false positives. The goal is to balance security needs with operational efficiency by using effective antimalware policies and rules.
Effective antimalware detection relies on your active role in configuring, monitoring, and adjusting policies for your environment.
You can arrange rules by priority by selecting the up or down arrow. The rule with the highest priority (the lowest number) runs first. If a rule matches, the rule action runs and the evaluation ends. If no match, the system evaluates the next rule. If no rule matches, the system applies the default rules.
You can manage each rule by using the toolbar controls.

The toolbar lets you edit, duplicate, delete, enable, and disable rules. Select a rule and an action.
Disabling a rule lets you keep the rule and its configuration without applying the rule. This option is useful if you want to stop a rule temporarily without losing its configuration.
After you configure your rules, select Save to apply the changes and create the policy. Within 30 minutes, the sensors on the protected clusters update with the new policy.