Content distribution in multitenant management
Important
Some information in this article relates to a prereleased product which may be substantially modified before it's commercially released. Microsoft makes no warranties, expressed or implied, with respect to the information provided here.
Content distribution helps you manage content at scale, across tenants in multitenant management in Microsoft Defender XDR. In content distribution, you can create tenant groups to copy existing content, like custom detection rules, from the source tenant to the target tenants you assign during tenant group creation. The content then runs on the target tenant's devices or device groups that you set in the tenant group scope.
Distributing content in this manner, across tenants, enables you to organize tenants and content based on categories like business groups or location.
Note
Multitenant management currently supports adding custom detection rules to a tenant group. Additional content types will be added in the future.
Requirements
The following table lists the requirements for content distribution in multitenant management in Microsoft Defender XDR.
| Requirement | Description |
|---|---|
| Microsoft Defender XDR license | To use content distribution, your organization must have a subscription to Microsoft 365 E5 or Office E5. |
| Permissions | Users must be assigned the correct roles and permission at the individual tenant level to view and manage the associated data in multitenant management. Access to content distribution is granted through the Security settings (manage) or Security Data Basic (read) permission in Microsoft 365 Defender Unified role-based access control (URBAC). Both of these roles are assigned to the Security Administrator and Security Reader Microsoft Entra built-in roles by default. |
| Delegate access | Delegated access via Azure B2B or GDAP (CSP Parters only) must be obtained for at least one other tenant. |
Create tenant groups
To create a new tenant group:
Go to the Tenant groups page in multitenant management in Microsoft Defender XDR.
Select Create tenant group:
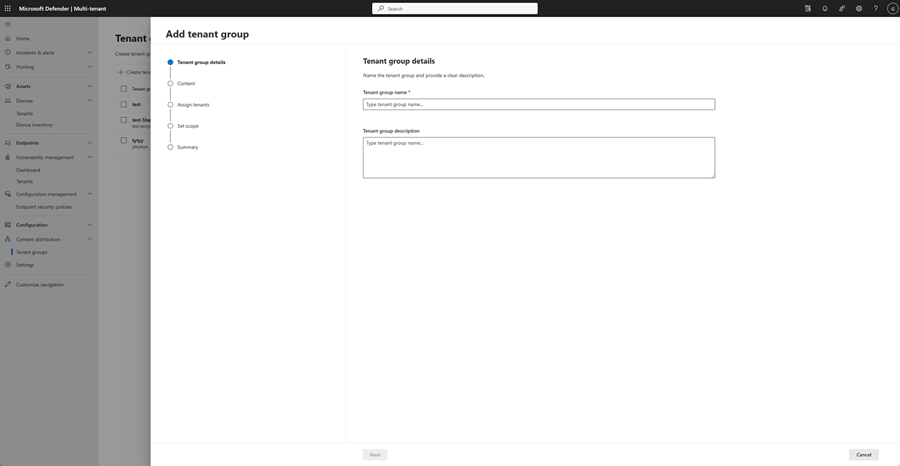
Enter in Tenant group name and Description, then select Next.
Select Add to add custom detection rules.

Note
Multitenant management currently only supports adding custom detection rules to a tenant group. Additional content types will be added in the future.
The Source tenant column displays the tenant the detection rule comes from. Choose the detection rules you want to add to the assignment.
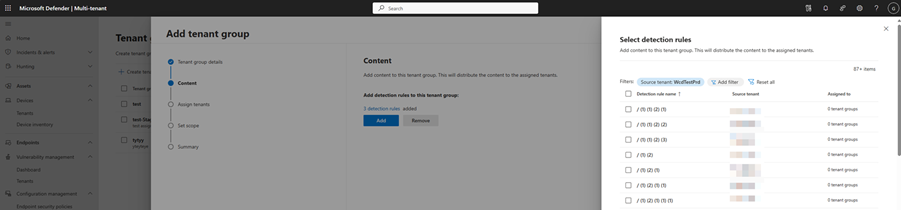
Select Add to tenant group.
Select Next on the Content page.
Select the target tenants for the assignment on the Assign tenants page, then select Next.
For each target tenant, you can opt to select the devices or device groups to include in the scope of the assignment in the Set scope page.
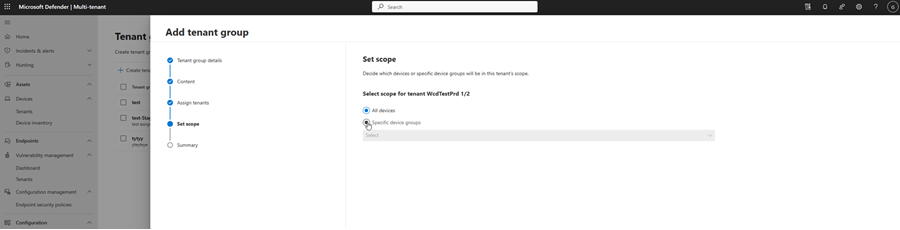
Select Next.
Review the assignment details. Leave the Sync all authorized tenants option checked if content needs to be synchronized now or uncheck it if the sync is planned for a later time.
Select Submit then select Done.


If you chose to Sync all authorized tenants, all the tenants and scope within the tenants you have permission will now sync.
Syncing content among tenant groups
To sync content across tenant groups for the tenants you have permission for:
- Go to the Tenant groups page.
- Select the checkboxes next to the tenant group you want to sync, then select Sync tenant group.
- Select Sync on the prompt that appears.
Note
It may take a few minutes to sync.
- Once the sync is completed, you see one of the following statuses:
Success
Partially successful
Failure
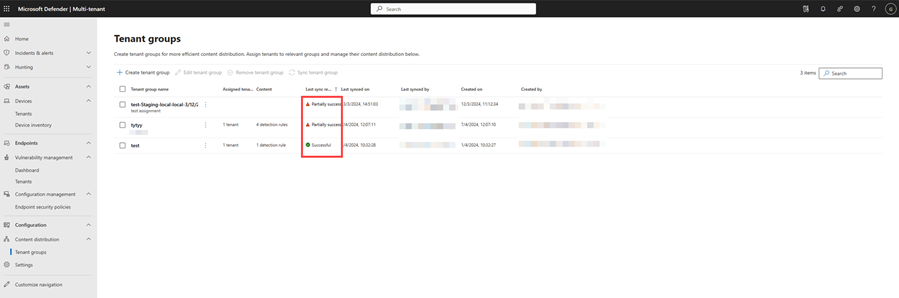

If you experience a partial success or failure state, select on the value in Last Sync Results column to investigate the cause.
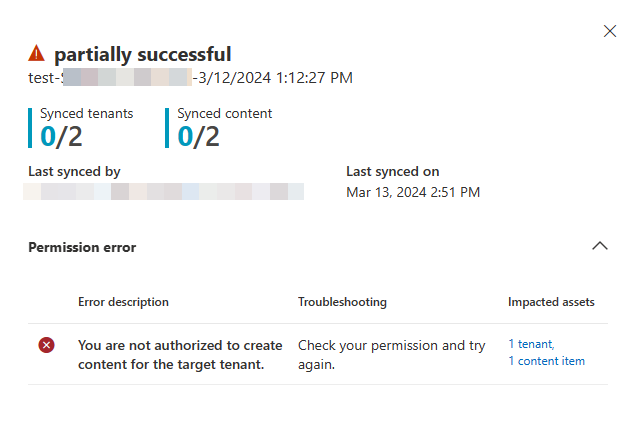
Sync results display the number of synced tenants and synced content. The number of synced tenants shows the number of tenants where all the custom detection rules applied successfully. For example, if you have 3 tenants in a tenant group and all 3 tenants have the same custom detection rules applied successfully, the number of synced tenants is 3. If only 2 out of 3 tenants have the custom detection rules applied successfully, the number of synced tenants is 2. The number of synced content shows the number of custom detection rules that are synced across all target tenants.
Edit tenant groups
- Go to the Tenant groups page.
- Select the checkboxes next to the tenant group you want to edit, then select Edit tenant group.
- Edit the tenant group name and description, then select Save.
Remove tenant groups
- Go to the Tenant groups page.
- Select the checkboxes next to the tenant group you want to remove, then select Remove tenant group.
Troubleshooting
Common reasons for a sync to fail include:
- User doesn't have permission to create custom detection rules on the target tenant.
- User doesn't have permission to read custom detection rules from content source.
- User doesn't have permission for the target device scope.
If the issue is with the target tenant, try creating an identical custom detection rule for further diagnosis. If the issue is with accessing the source data, try accessing the custom detection.
Additional resources
Feedback
Coming soon: Throughout 2024 we will be phasing out GitHub Issues as the feedback mechanism for content and replacing it with a new feedback system. For more information see: https://aka.ms/ContentUserFeedback.
Submit and view feedback for