Märkus.
Juurdepääs sellele lehele nõuab autoriseerimist. Võite proovida sisse logida või kausta vahetada.
Juurdepääs sellele lehele nõuab autoriseerimist. Võite proovida kausta vahetada.
The Azure DevOps Wiki Microsoft 365 Copilot connector allows your organization to index wikis in its instance of the Azure DevOps service. After you configure the connector, end users can search for project wikis and code wikis from Azure DevOps in Microsoft Search and Microsoft 365 Copilot.
This article is for Microsoft 365 administrators or anyone who configures, runs, and monitors an Azure DevOps Wiki Copilot connector.
Important
The Azure DevOps Wiki Copilot connector supports only the Azure DevOps cloud service. It doesn't support Azure DevOps Server 2019, TFS 2018, TFS 2017, TFS 2015, and TFS 2013.
Capabilities
- Index wikis from Azure DevOps
- Enable your end users to ask questions related to project wikis and code wikis.
- Use Semantic search in Copilot to enable users to find relevant content based on keywords, personal preferences, and social connections.
Limitations
- The connector only indexes one ADO organization per connection.
Custom data filters
The Azure DevOps Wiki connector includes the following custom data filters for Copilot Search:
- Area Path
- Assigned to
Prerequisites
You must be the Search admin for your organization's Microsoft 365 tenant.
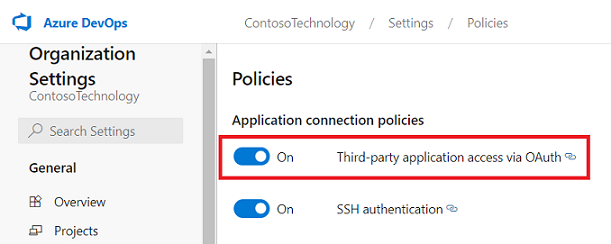
To allow the connector to connect to your Azure DevOps organization, you must enable Third-party application access via OAuth. For more information, see manage security policies to learn more.
Service Account: To connect to Azure DevOps and allow the Azure DevOps Wiki Copilot connector to update wikis regularly, you need a service account with the following permissions granted to it. The service account is either the Microsoft-published service principal (for Federated Credential authentication) or the signed-in Microsoft 365 admin account (for Microsoft Entra ID OAuth authentication), depending on the authentication method selected.
Permission name Permission type Required for View project-level information Project permission Crawling Azure DevOps Wiki. This permission is mandatory for the projects that need to be indexed.
Important
The crawl account must have Basic access level. To learn more about access levels in Azure DevOps, read supported access levels.
Get Started

Choose display name
A display name is used to identify each citation in Copilot, helping users easily recognize the associated file or item. Display name also signifies trusted content. Display name is also used as a content source filter. A default value is present for this field, but you can customize it to a name that users in your organization recognize.
Provide authentication type
To authenticate and sync wikis from Azure DevOps, choose one of the two supported methods:
- Federated Credential (recommended) – Uses a Microsoft-published Microsoft Entra service principal as the crawl service account. The permissions granted to this service principal in Azure DevOps determine what the connector can index.
- Microsoft Entra ID OAuth – Uses delegated OAuth where the signed-in Microsoft 365 admin account acts as the crawl service account. In this case, the Azure DevOps permissions assigned to that admin account determine what the connector can index.
Federated Credential (recommended)
Federated Credential uses a Microsoft‑published enterprise application as the crawl service account. You must grant this service principal the necessary permissions in Azure DevOps.
Confirm that the service principal app is provisioned
- Go to the Microsoft Entra admin center.
- Search for Graph Connector Federated Credential App or use the app ID:
933838e2-bec1-440f-a634-9363c82e5b6d. - If the app isn't provisioned, open the Copilot connectors page in the Microsoft 365 admin center. Provisioning can take several hours.
Grant the Microsoft Entra app access to Azure DevOps projects
Grant the service principal access to the Azure DevOps projects you want to index.
- Go to Azure DevOps and select the organization.
- Select Organization settings.
- In the left pane, under General, select Users.
- Select Add users.
- In Users or Service Principals, enter the app ID:
933838e2-bec1-440f-a634-9363c82e5b6d. - Assign the Basic access level, select the projects to index, and add the app to the Project Readers group (or an equivalent group). Clear the option to send an email invitation.
Configure Federated Credential authentication
Select Federated Credential as the authentication type and authenticate when prompted.
Microsoft Entra ID OAuth
Make sure your ADO organization is connected to Microsoft Entra
The Azure DevOps Wiki Copilot connector only indexes content from an ADO organization connected with Microsoft Entra of your tenant. To ensure that your ADO organization is connected with Microsoft Entra account, use the following steps.
- Navigate to Azure DevOps and select the required organization.
- Select
Organization settings. - On the left navigation pane, select
Microsoft Entraunder the 'General' header. - Ensure that the organization is connected to your tenant's Microsoft Entra account.
Create a Microsoft Entra ID app registration
- Go to the Azure portal and sign in with admin credentials for the tenant.
- Navigate to Microsoft Entra ID -> Manage -> App registrations from the navigation pane and select New registration.
- Provide a name for the app and select Register.
- Make a note of the Application (client) ID. This ID is used to grant the Microsoft Entra app access to projects in the ADO organization.
- Open API permissions from the navigation pane and select Add a permission.
- Select Azure DevOps and then Delegated permissions.
- Search for the following permissions and select Add permissions.
a. Identity (read)
b. Code (read)
c. Entitlements (read)
d. Project and Team (read)
e. Graph (read)
f. MemberEntitlement Management (read)
g. Wiki (read) - Select Grant admin consent for [TenantName] and confirm by selecting Yes.
- Check that the permissions are in the "Granted" state.
- Open Authentication from the navigation pane. Select
Add a platformand chooseWeb. Add one of the following URIs under "Redirect URIs":- For M365 Enterprise:
https://gcs.office.com/v1.0/admin/oauth/callback - For M365 Government:
https://gcsgcc.office.com/v1.0/admin/oauth/callback
- For M365 Enterprise:
- Under Implicit grant and hybrid flows, check the option for
ID tokens (used for implicit and hybrid flows)and click Configure. - From the navigation pane, select Certificates and secrets under Manage.
- Select New Client secret and select an expiry period for the secret. Copy the generated secret (Value) and save it because it isn't shown again.
- Use this Client secret and the application ID to configure the connector.
Grant the Microsoft Entra app access to projects in the ADO organization
You need to provide the Microsoft Entra app with the necessary access to the projects that need to be indexed using the following steps:
- Navigate to Azure DevOps and select the required organization.
- Select
Organization settings. - On the left navigation pane, select
Usersunder the 'General' header. - Select
Add users. - Copy the Application (client) ID obtained from the app to "Users or Service Principals".
- Grant the
Basicaccess level and select the projects to allow access to the index. Also, add to theProject ReaderAzure DevOps group (or equivalent) to ensure access. Deselect the option to send email invitation to users.
Select organization
Provide your Azure DevOps organization name. The Azure DevOps organization name is the segment after https://dev.azure.com/. For example:
- URL:
https://dev.azure.com/contoso - Organization:
contoso
Only the organization name is required—don't provide the full URL.
Roll out to limited audience
Deploy this connection to a limited user base if you want to validate it in Copilot and other Search surfaces before expanding the rollout to a broader audience. To know more about limited rollout, see staged rollout.
At this point, you're ready to create the connection for Azure DevOps wikis. You can click Create to publish your connection and index wikis from your Azure DevOps organization.
For other settings, like Access Permissions, Data Inclusion Rules, Schema, Crawl frequency, etc., we have defaults based on what works best with ADO data. You can see the default values below:
| Users | Description |
|---|---|
| Access permissions | Only people with access to content in Data source. |
| Map Identities | Data source identities mapped using Microsoft Entra IDs. |
| Content | Description |
|---|---|
| Site projects | All projects are indexed. |
| Manage Properties | To check default properties and their schema, see content |
| Sync | Description |
|---|---|
| Incremental Crawl | Frequency: Every 15 mins |
| Full Crawl | Frequency: Every Day |
If you want to edit any of these values, you need to choose the "Custom Setup"
Custom Setup
Custom setup is for those admins who want to edit the default values for settings listed in the above table. Once you click on the "Custom Setup" option, you see three more tabs - Users, Content, and Sync.
Users

Access permissions
The Azure DevOps Wiki Copilot connector supports search permissions visible to Everyone or Only people with access to this data source. If you choose Everyone, indexed data appears in the search results for all users. If you choose Only people with access to this data source, indexed data appears in the search results for users who have access to it.
Note
Updates to groups governing access permissions are synced in full crawls only. Incremental crawls don't support processing of updates to permissions.
Content

Choose projects
In this step, you specify the scope of data that you want to index using the Azure DevOps Wiki Copilot connector. You can then choose for the connection to index either the entire organization or specific projects within the selected organization.
If you choose to index the entire organization, wikis in all projects in the organization are indexed. New projects and wikis are indexed during the next crawl after they're created.
If you choose to index individual projects, only wikis in the selected projects are indexed.
Manage properties
Here, you can add or remove available properties from your Azure DevOps data source, assign a schema to the property (define whether a property is searchable, queryable, retrievable, or refinable), change the semantic label and add an alias to the property. Properties that are selected by default are listed below.
| Source property | Label | Description | Schema |
|---|---|---|---|
| Authors | Authors | Name all the people who participated/collaborated on the item in the data source | Retrieve. |
| CommitId | |||
| Content | Content | The content body of the wiki | Search. |
| GitItemPath | |||
| IconUrl | IconUrl | Icon url that represents the wiki | Retrieve. |
| isParentPage | |||
| LastPublishedAuthorEmail | Last modified by | Retrieve. | |
| LastPublishedDate | Last modified date time | Date and time the item was last modified in the data source | Retrieve. |
| Organization | Retrieve. | ||
| Path | |||
| Project | Retrieve. | ||
| ProjectId | Retrieve. | ||
| RemoteURL | url | The URL of the wiki in the data source | Retrieve. |
| Title | Title | The title of the wiki page | Search, Retrieve. |
| Version | Retrieve. | ||
| WikiId | Retrieve. | ||
| WikiIdentifier | Retrieve. | ||
| WikiType |
Preview data
Use the preview results button to verify the sample values of the selected properties.
Sync

The refresh interval determines how often your data is synced between the data source and the Azure DevOps Wiki Copilot connector index. There are two types of refresh intervals - full crawl and incremental crawl. For more information, see refresh settings.
You can change the default values of the refresh interval from here if you want to.
Set up search result page
After publishing the connection, you need to customize the search results page with verticals and result types. To learn about customizing search results, review how to manage verticals and result types.
You can also use the sample result layout for the Azure DevOps Wiki Copilot connector. Copy and paste the result layout JSON to get started.
Troubleshooting
After publishing your connection, you can review the status in the Connectors section of the admin center. To learn how to make updates and deletions, see Manage your connector.
To troubleshoot issues, see Troubleshooting.