Märkus.
Juurdepääs sellele lehele nõuab autoriseerimist. Võite proovida sisse logida või kausta vahetada.
Juurdepääs sellele lehele nõuab autoriseerimist. Võite proovida kausta vahetada.
In this quickstart, learn how to create a network address translation (NAT) gateway for the Standard SKU of Azure NAT Gateway by using the Azure portal, Azure PowerShell, or the Azure CLI. The Azure NAT Gateway service provides scalable outbound connectivity for virtual machines in Azure.
The following diagram shows the resources that you'll create in this quickstart.

Prerequisites
- An Azure account with an active subscription. Create an account for free.

Create a resource group
In the search box at the top of the portal, enter Resource groups. Select Resource groups in the search results.
Select + Create.
In Create a resource group, enter or select the following values:
Setting Value Project details Subscription Select your Azure subscription. Resource group Enter test-rg. Resource details Region Select (US) East US 2. Select Review + create.
Select Create.
Create a virtual network
The following procedure creates a virtual network with a resource subnet:
In the portal, search for and select Virtual networks.
On the Virtual networks page, select + Create.
On the Basics tab of Create virtual network, enter or select the following information:
Setting Value Project details Subscription Select your subscription. Resource group Select test-rg. Instance details Name Enter vnet-1. Region Select (US) East US 2. Select Next to proceed to the Security tab.
Select Next to proceed to the IP Addresses tab.
In the address space box in Subnets, select the default subnet.
In Edit subnet, enter or select the following information:
Setting Value Subnet purpose Leave Default. Name Enter subnet-1. IPv4 IPv4 address range Leave the default of 10.0.0.0/16. Starting address Leave the default of 10.0.0.0. Size Leave the default of /24 (256 addresses). Select Save.
Select Review + create at the bottom of the pane. When the virtual network passes validation, select Create.
Deploy Azure Bastion
Azure Bastion uses your browser to connect to virtual machines (VMs) in your virtual network over Secure Shell (SSH) or Remote Desktop Protocol (RDP) by using their private IP addresses. The VMs don't need public IP addresses, client software, or special configuration. For more information, see What is Azure Bastion?.
Note
Hourly pricing starts from the moment that Bastion is deployed, regardless of outbound data usage. For more information, see Pricing and SKUs. If you're deploying Bastion as part of a tutorial or test, we recommend that you delete this resource after you finish using it.
In the search box at the top of the portal, enter Bastion. Select Bastions in the search results.
Select + Create.
On the Basics tab of Create a Bastion, enter or select the following information:
Setting Value Project details Subscription Select your subscription. Resource group Select test-rg. Instance details Name Enter bastion. Region Select (US) East US 2. Tier Select Developer. Configure virtual networks Virtual network Select vnet-1. Note
The Developer SKU for Azure Bastion is free and doesn't require a dedicated Azure Bastion subnet. For more information, see Quickstart: Deploy Azure Bastion - Developer SKU.
Select Review + create.
Select Create.
Create a virtual machine
The following procedure creates a Linux virtual machine with SSH key authentication:
In the search box at the top of the portal, enter Virtual machines. Select Virtual machines in the search results.
Select + Create, and then select Azure virtual machine.
On the Basics tab of Create a virtual machine, enter or select the following values:
Setting Value Project details Subscription Select your Azure subscription. Resource group Select test-rg. Instance details Virtual machine name Enter vm-1. Region Select (US) East US 2. Availability options Select No infrastructure redundancy required. Security type Select Standard. Image Select Ubuntu Server 24.04 LTS - x64 Gen2. Size Choose a size or leave the default setting. Administrator account Authentication type Select SSH public key. Username Enter azureuser. SSH public key source Select Generate new key pair. Key pair name Enter vm-1_key. Select the Networking tab, or select Next: Disks > Next: Networking.
Select the following values:
Setting Value Network interface Virtual network Select vnet-1. Subnet Select subnet-1. Public IP Select None. Select Review + create.
Review the settings, and then select Create.
When the Generate new key pair window opens, select Download private key and create resource. The key file is downloaded as vm-1_key.pem. Make sure you know where the .pem file is downloaded. You need the path to the key file to connect to the VM.
Create the NAT gateway
In this section, you create the NAT gateway resource and associate it with the subnet of the virtual network that you created.
In the search box at the top of the portal, enter NAT gateway. Select NAT gateways in the search results.
Select + Create.
In Create network address translation (NAT) gateway, enter or select this information on the Basics tab:
Setting Value Project details Subscription Select your Azure subscription. Resource group Select test-rg. Instance details NAT gateway name Enter nat-gateway. Region Select (US) East US 2. SKU Select Standard. Availability zone Select No Zone. TCP idle timeout (minutes) Leave the default of 4. For information about availability zones and NAT gateway, see Reliability in Azure NAT Gateway.
Select the Outbound IP tab, or select Next: Outbound IP.
Enter or select the following information:
Setting Value Public IP addresses Select Create a new public IP address.
In Name, enter public-ip-nat.
Select OK.Select the Networking tab, or select Next: Networking.
In Virtual network, select vnet-1.
In Subnet name, select the subnet-1 checkbox.
Select the Review + create tab, or select the Review + create button at the bottom of the pane.
Select Create.
Test the NAT gateway
To test the NAT gateway, you first discover its public IP. You then connect to the test virtual machine and verify the outbound connection through that public IP.
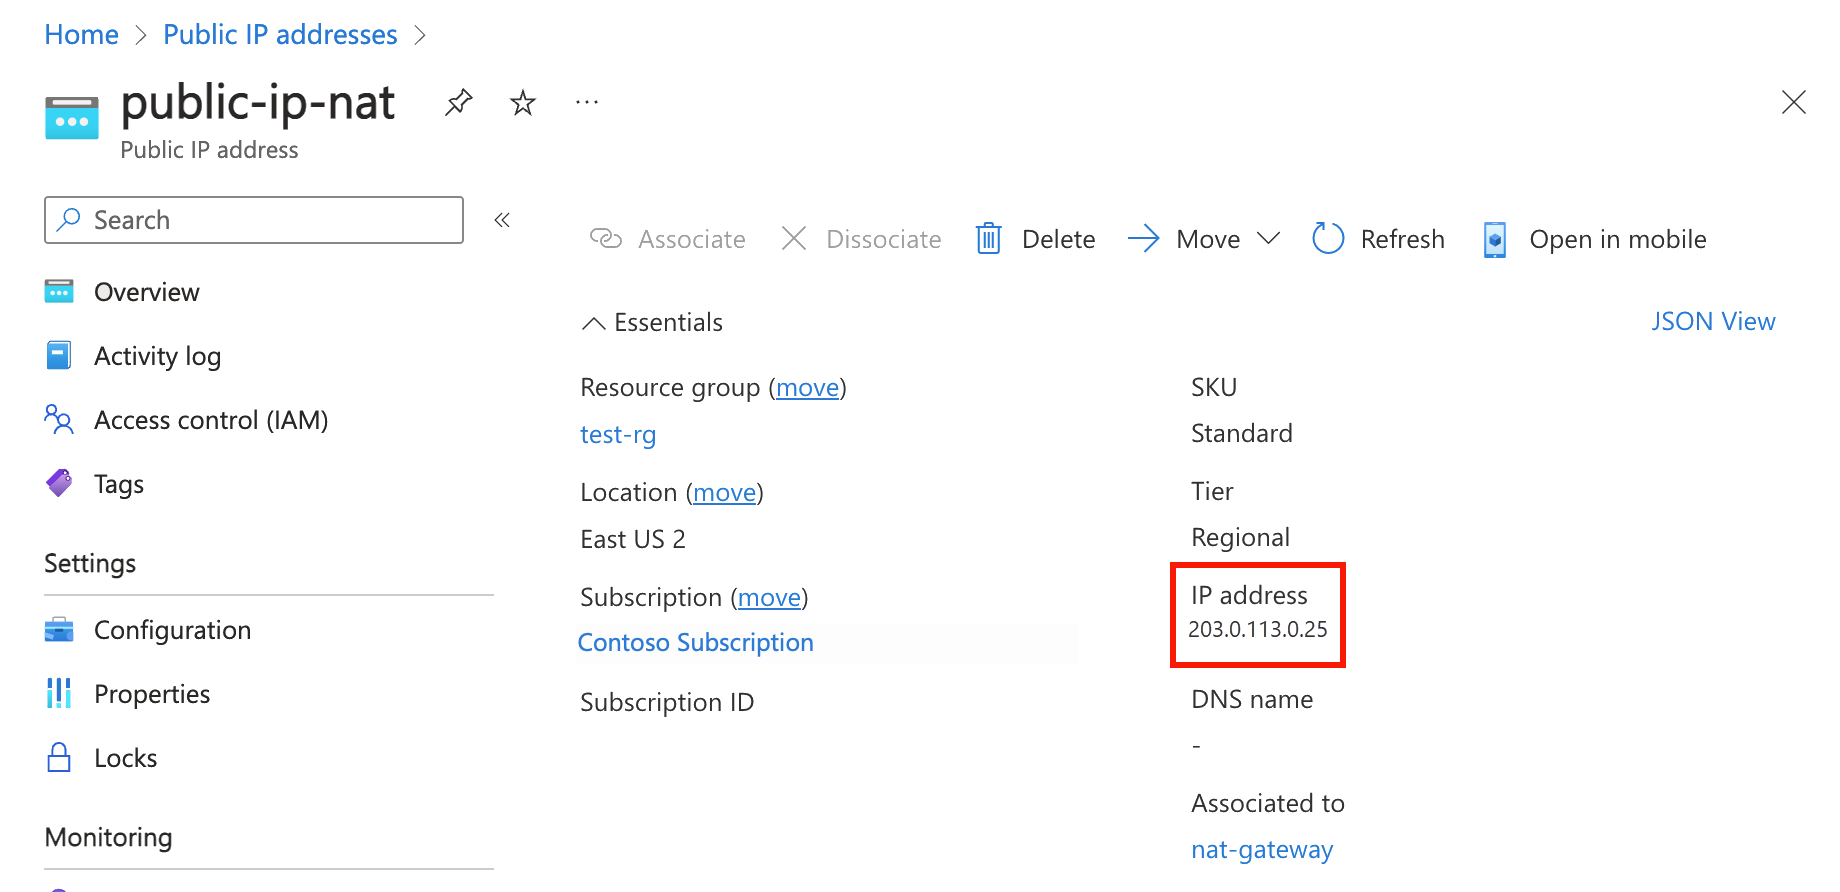
In the search box at the top of the portal, enter Public IP. Select Public IP addresses in the search results.
Select public-ip-nat.
Make note of the public IP address.
In the search box at the top of the portal, enter Virtual machine. Select Virtual machines in the search results.
Select vm-1.
On the Overview page, select Connect, and then select the Bastion tab.
Select Use Bastion.
Under Authentication Type, select SSH Private Key from Local File.
In Username, enter azureuser.
Select Browse and go to the vm-1_key.pem file downloaded during VM creation.
Select Connect.
In the Bash prompt, enter the following command:
curl ifconfig.meVerify that the IP address returned by the command matches the public IP address of the NAT gateway.
azureuser@vm-1:~$ curl ifconfig.me
203.0.113.0.25
Clean up resources
When you finish using the resources that you created, you can delete the resource group and all its resources.
In the Azure portal, search for and select Resource groups.
On the Resource groups page, select the test-rg resource group.
On the test-rg page, select Delete resource group.
Enter test-rg in Enter resource group name to confirm deletion, and then select Delete.