Quickstart: Onboard Microsoft Sentinel
In this quickstart, you'll enable Microsoft Sentinel and install a solution from the content hub. Then, you'll set up a data connector to start ingesting data into Microsoft Sentinel.
Microsoft Sentinel comes with many data connectors for Microsoft products such as the Microsoft Defender XDR service-to-service connector. You can also enable built-in connectors for non-Microsoft products such as Syslog or Common Event Format (CEF). For this quickstart, you'll use the Azure Activity data connector that's available in the Azure Activity solution for Microsoft Sentinel.
To onboard to Microsoft Sentinel by using the API, see the latest supported version of Sentinel Onboarding States.
Prerequisites
Active Azure Subscription. If you don't have one, create a free account before you begin.
Log Analytics workspace. Learn how to create a Log Analytics workspace. For more information about Log Analytics workspaces, see Designing your Azure Monitor Logs deployment.
You may have a default of 30 days retention in the Log Analytics workspace used for Microsoft Sentinel. To make sure that you can use all Microsoft Sentinel functionality and features, raise the retention to 90 days. Configure data retention and archive policies in Azure Monitor Logs.
Permissions:
To enable Microsoft Sentinel, you need contributor permissions to the subscription in which the Microsoft Sentinel workspace resides.
To use Microsoft Sentinel, you need either Microsoft Sentinel Contributor or Microsoft Sentinel Reader permissions on the resource group that the workspace belongs to.
To install or manage solutions in the content hub, you need the Microsoft Sentinel Contributor role on the resource group that the workspace belongs to.
Microsoft Sentinel is a paid service. Review the pricing options and the Microsoft Sentinel pricing page.
Before deploying Microsoft Sentinel to a production environment, review the predeployment activities and prerequisites for deploying Microsoft Sentinel.
Enable Microsoft Sentinel
To get started, add Microsoft Sentinel to an existing workspace or create a new one.
Sign in to the Azure portal.
Search for and select Microsoft Sentinel.

Select Create.
Select the workspace you want to use or create a new one. You can run Microsoft Sentinel on more than one workspace, but the data is isolated to a single workspace.

- The default workspaces created by Microsoft Defender for Cloud aren't shown in the list. You can't install Microsoft Sentinel on these workspaces.
- Once deployed on a workspace, Microsoft Sentinel doesn't support moving that workspace to another resource group or subscription.
Select Add.
Install a solution from the content hub
The content hub in Microsoft Sentinel is the centralized location to discover and manage out-of-the-box content including data connectors. For this quickstart, install the solution for Azure Activity.
In Microsoft Sentinel, select Content hub.
Find and select the Azure Activity solution.

On the toolbar at the top of the page, select
 Install/Update.
Set up the data connector
Microsoft Sentinel ingests data from services and apps by connecting to the service and forwarding the events and logs to Microsoft Sentinel. For this quickstart, install the data connector to forward data for Azure Activity to Microsoft Sentinel.
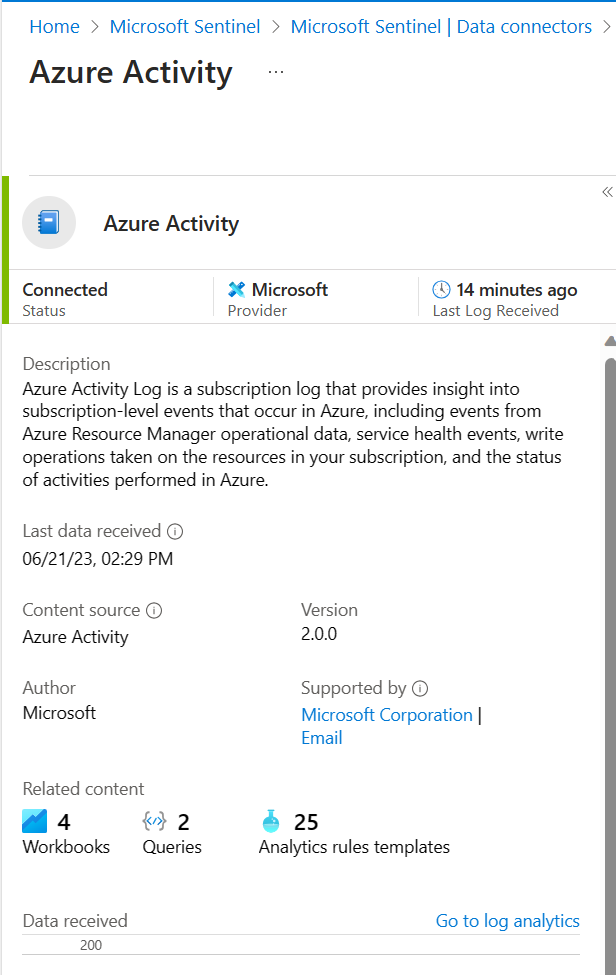
In Microsoft Sentinel, select Data connectors.
Search for and select the Azure Activity data connector.
In the details pane for the connector, select Open connector page.
Review the instructions to configure the connector.
Select Launch Azure Policy Assignment Wizard.
On the Basics tab, set the Scope to the subscription and resource group that has activity to send to Microsoft Sentinel. For example, select the subscription that contains your Microsoft Sentinel instance.
Select the Parameters tab.
Set the Primary Log Analytics workspace. This should be the workspace where Microsoft Sentinel is installed.
Select Review + create and Create.
Generate activity data
Let's generate some activity data by enabling a rule that was included in the Azure Activity solution for Microsoft Sentinel. This step also shows you how to manage content in the content hub.
In Microsoft Sentinel, select Content hub.
Find and select the Azure Activity solution.
From the right-hand side pane, select Manage.
Find and select the rule template Suspicious Resource deployment.
Select Configuration.
Select the rule and Create rule.
On the General tab, change the Status to enabled. Leave the rest of the default values.
Accept the defaults on the other tabs.
On the Review and create tab, select Create.
View data ingested into Microsoft Sentinel
Now that you've enabled the Azure Activity data connector and generated some activity data let's view the activity data added to the workspace.
In Microsoft Sentinel, select Data connectors.
Search for and select the Azure Activity data connector.
In the details pane for the connector, select Open connector page.
Review the Status of the data connector. It should be Connected.

In the left-hand side pane above the chart, select Go to log analytics.
On the top of the pane, next to the New query 1 tab, select the + to add a new query tab.
In the query pane, run the following query to view the activity date ingested into the workspace.
AzureActivity
Next steps
In this quickstart, you enabled Microsoft Sentinel and installed a solution from the content hub. Then, you set up a data connector to start ingesting data into Microsoft Sentinel. You also verified that data is being ingested by viewing the data in the workspace.
- To visualize the data you've collected by using the dashboards and workbooks, see Visualize collected data.
- To detect threats by using analytics rules, see Tutorial: Detect threats by using analytics rules in Microsoft Sentinel.