Märkus.
Juurdepääs sellele lehele nõuab autoriseerimist. Võite proovida sisse logida või kausta vahetada.
Juurdepääs sellele lehele nõuab autoriseerimist. Võite proovida kausta vahetada.
Important
This feature is in preview.
This article covers both ways to interact with Copilot in notebooks: the chat pane, which opens on the right side of your notebook for multi-step conversations, and in-cell Copilot, which lets you generate code or run slash commands directly above a code cell.
For an overview of Copilot capabilities in Data Science and Data Engineering, see Overview of Copilot for Data Engineering and Data Science.
When you open a notebook, Copilot automatically uses notebook context such as your workspace, attached Lakehouse, available schemas, tables, and files, existing notebook code, and runtime.
Prerequisites
Copilot must be enabled for your tenant and your workspace must be on a supported capacity. If your capacity is outside the US or EU, your Fabric admin might need to enable more tenant settings for cross-geo data processing.
For full requirements, see prerequisites in the Copilot overview.
Get started
You don't need to install anything or start a session. Copilot is ready to use as soon as you open the pane.
To use Copilot in Fabric notebooks:
Create a new notebook or open an existing one.
Attach a Lakehouse to provide schema and data context.
Select the Copilot button on the notebook ribbon.
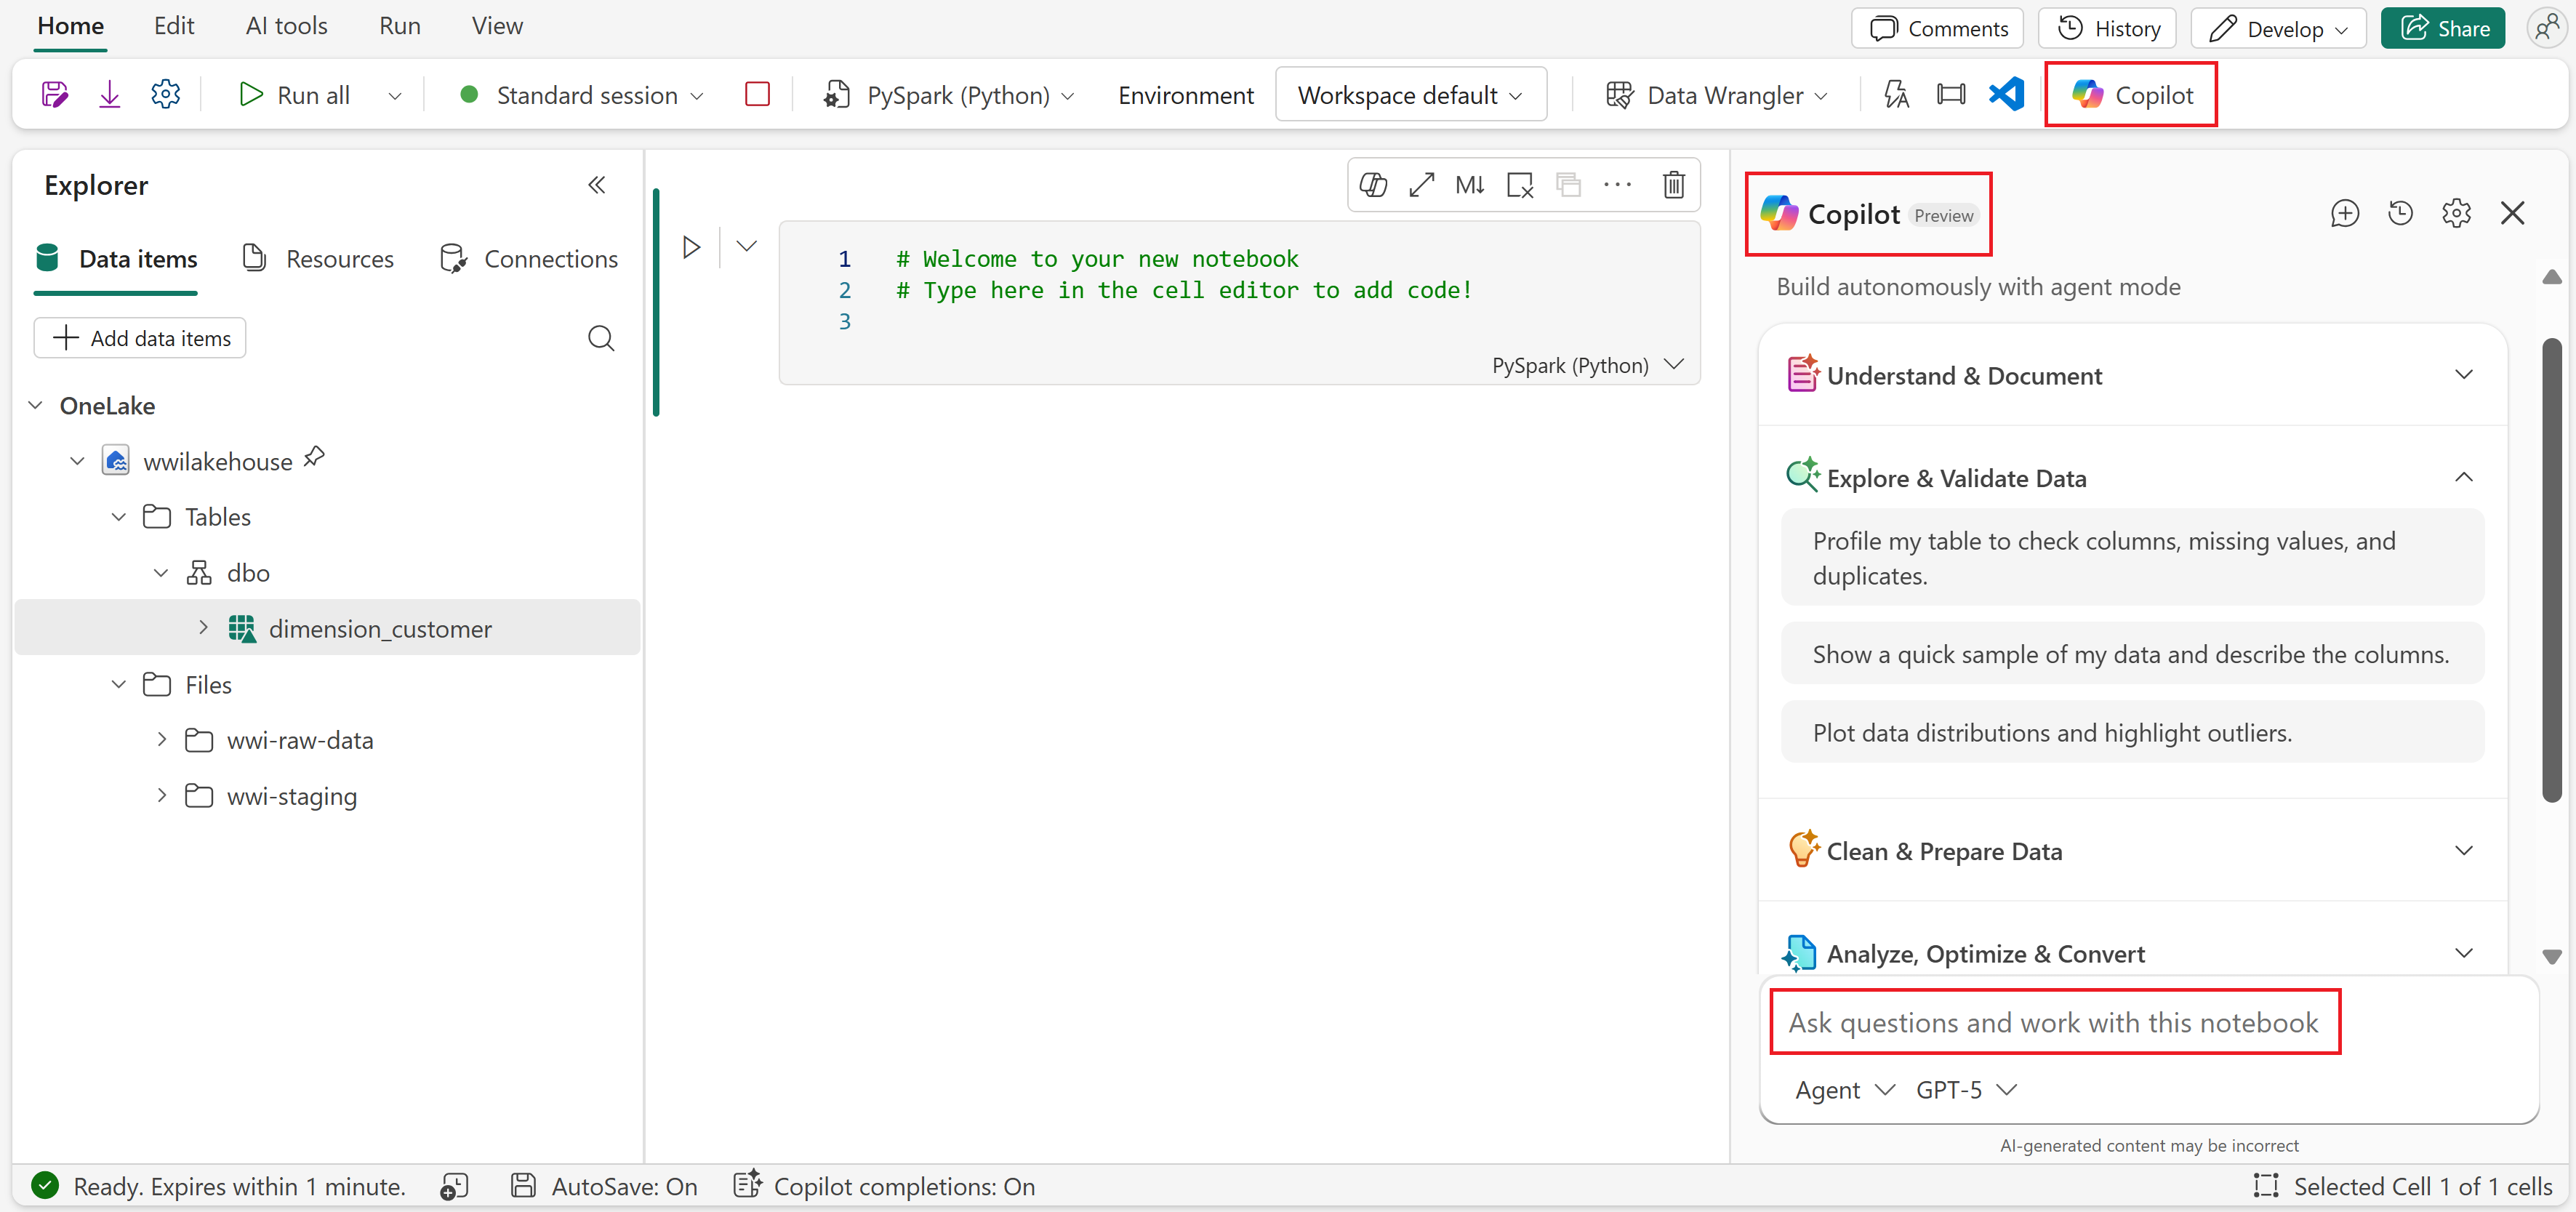
The Copilot chat pane opens on the right side of your notebook.
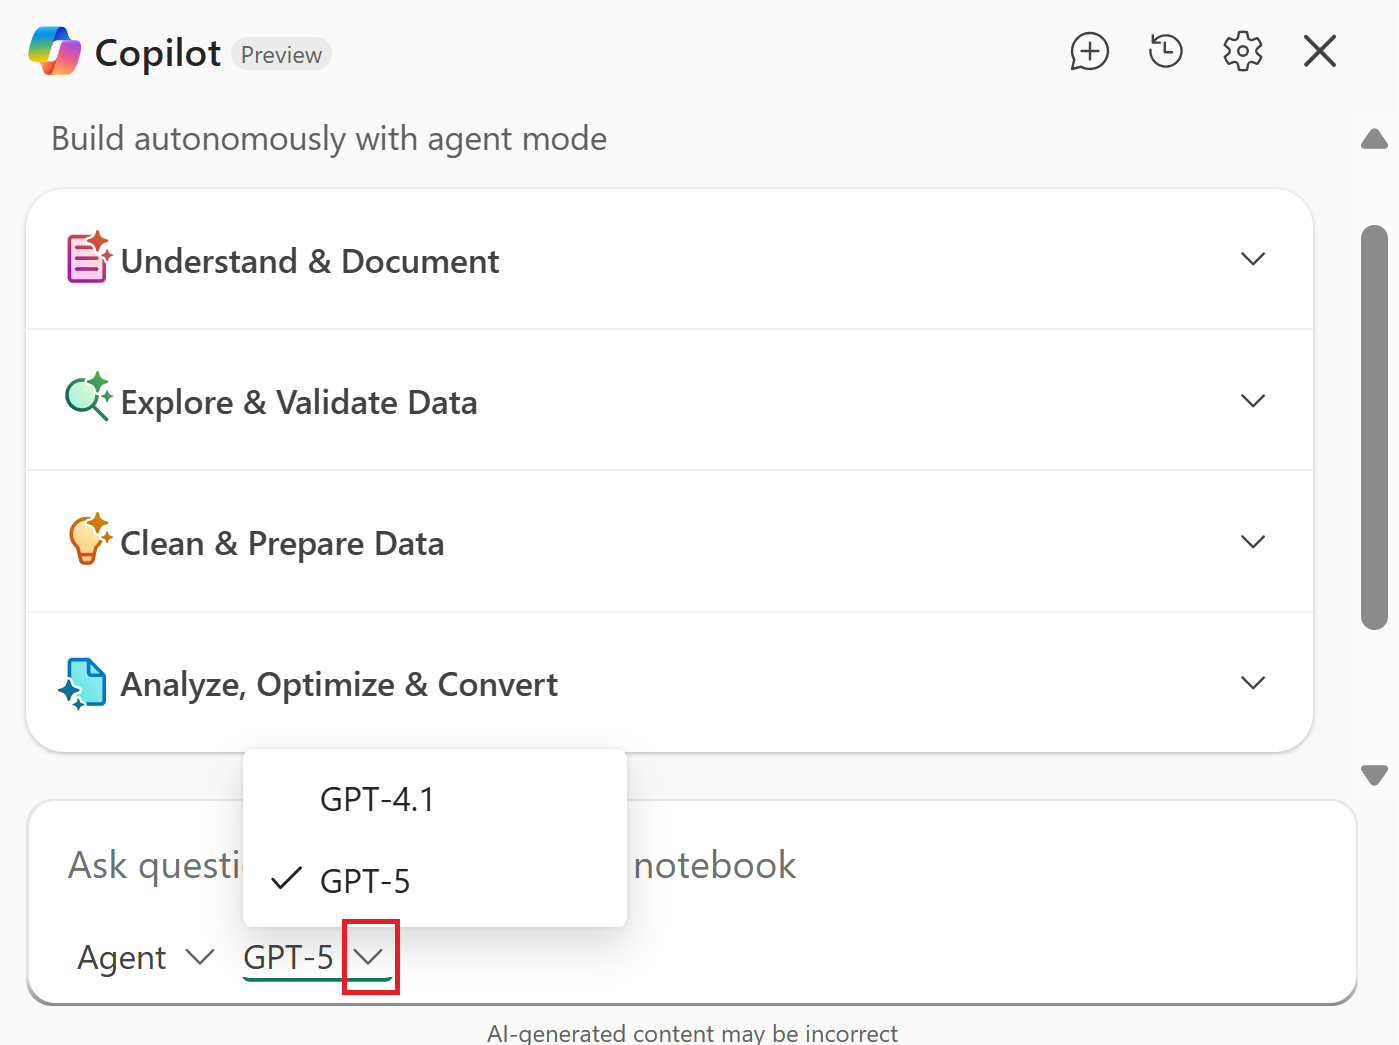
Select a model from the model selector. Different models (for example, GPT-5 or GPT-4.1) might produce different results depending on the complexity of your task.
Enter a prompt or select a suggested starter prompt.


For detailed instructions, example prompts, and a walkthrough of the chat pane experience, see the example walkthrough section.
Example walkthrough
The following walkthrough shows one example of an end-to-end Copilot flow, from selecting a starter prompt through reviewing and approving changes. Your experience might vary — Copilot responses depend on your data, notebook context, and how you phrase your prompts.
Open the notebook and select Copilot from the ribbon to open the chat pane. Select a model from the model selector at the top (for example, GPT-5 or GPT-4.1), then choose one of the prebuilt starter prompts or type a custom question in the chat box.
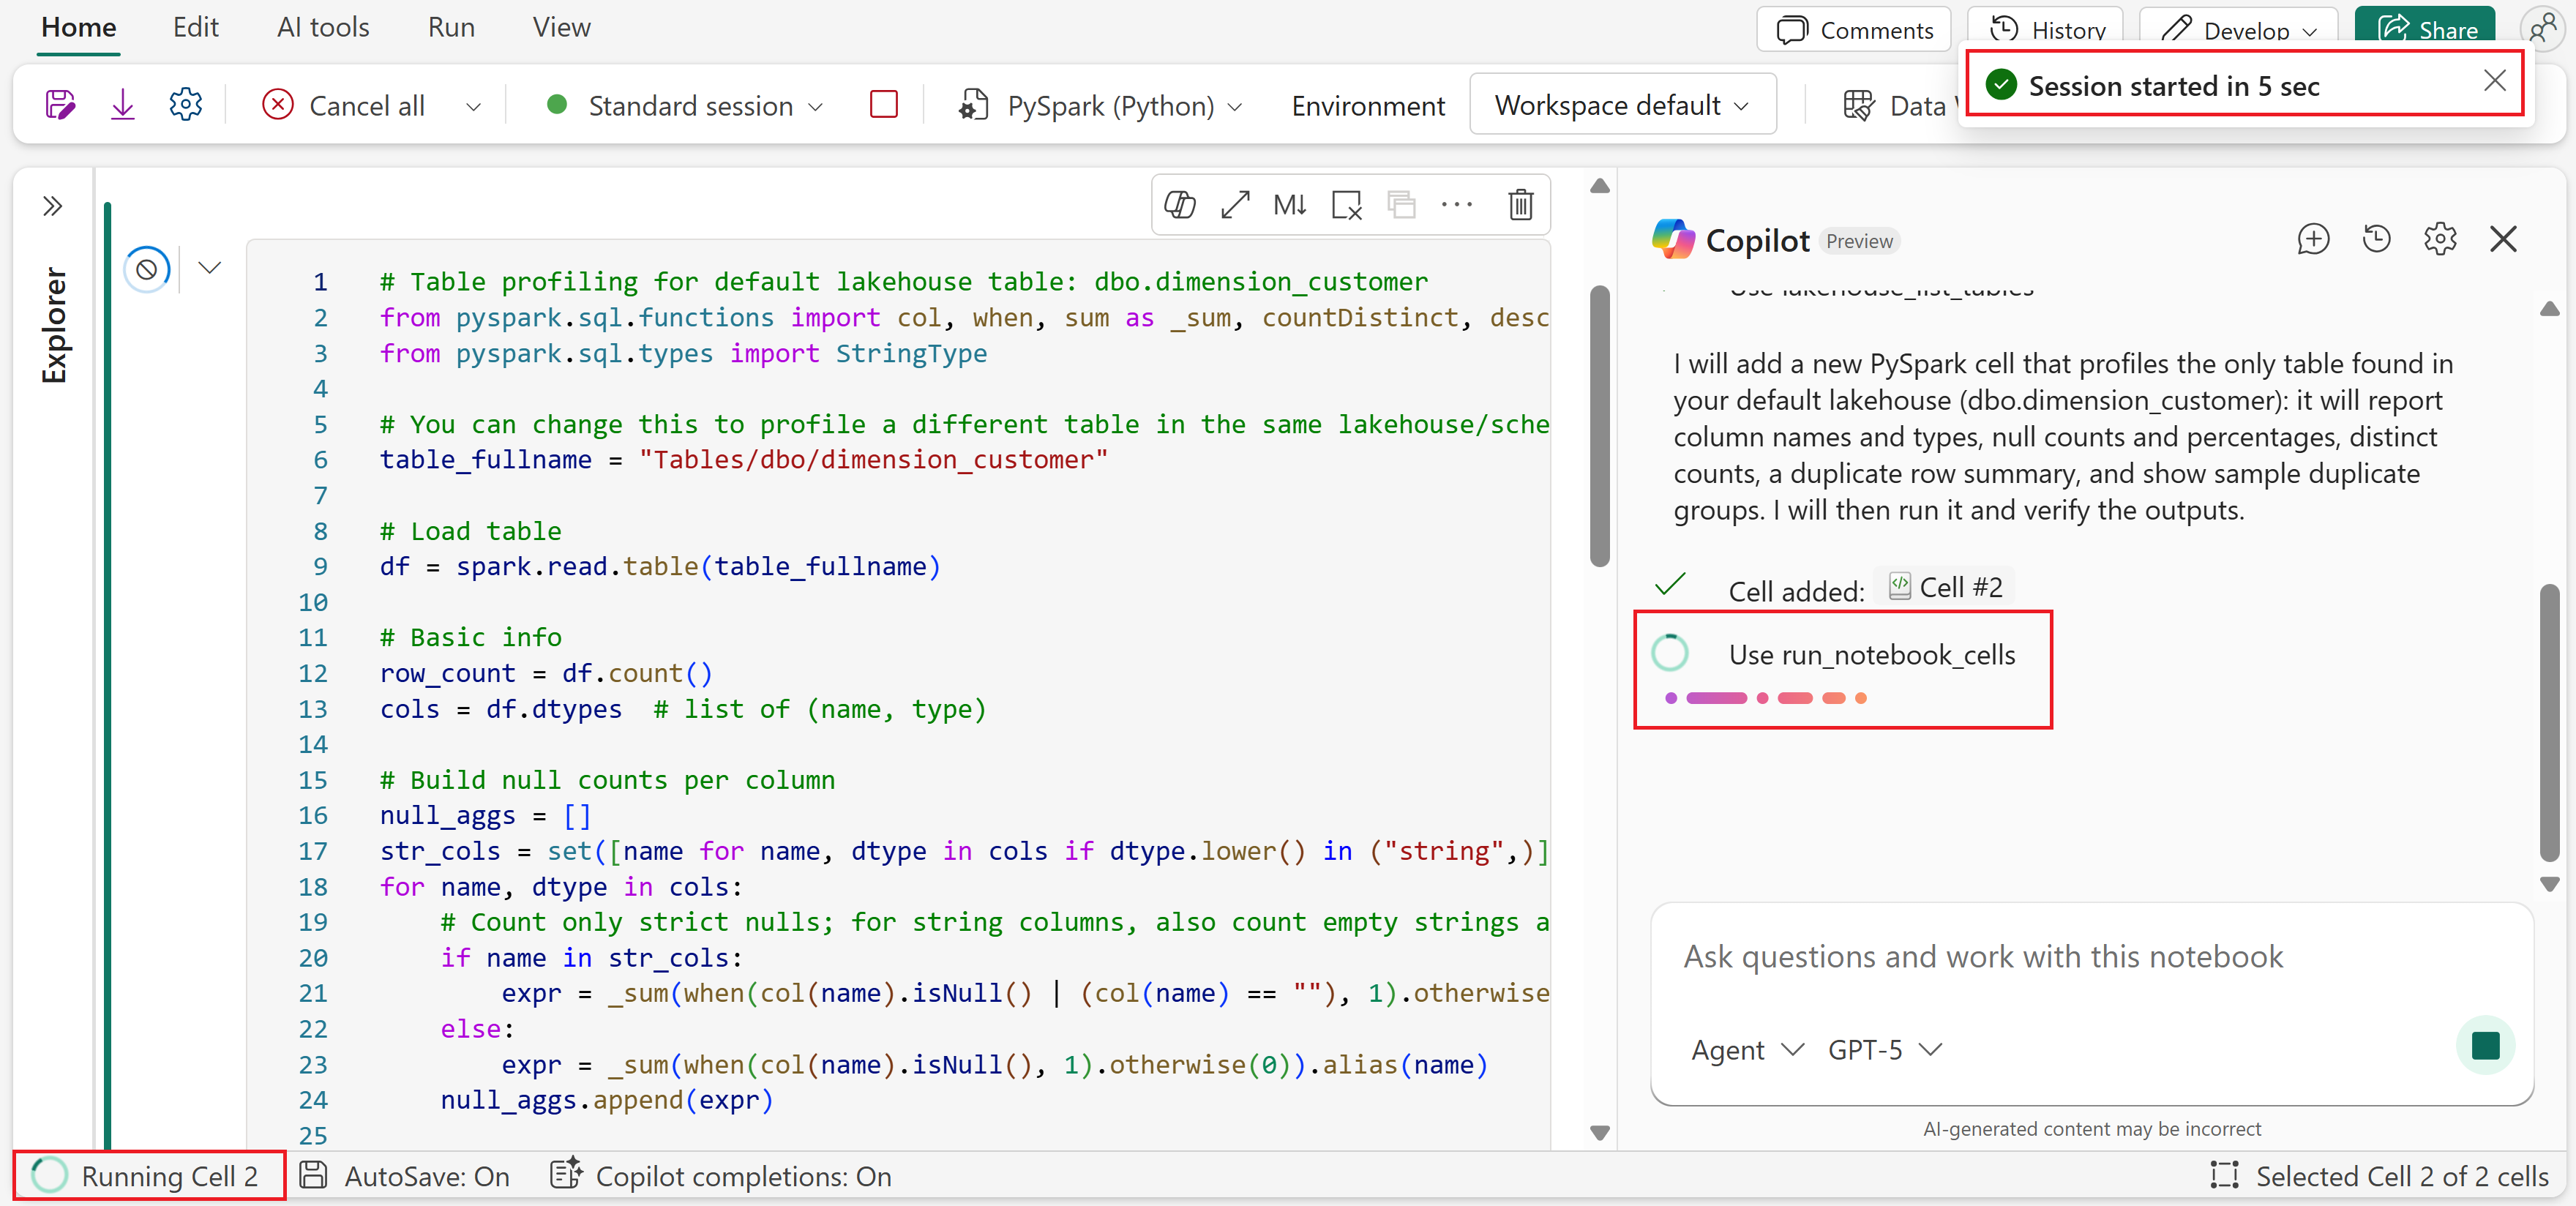
In this example, we select the starter prompt "Profile my table to check columns, missing values, and duplicates" under Explore and Validate Data. Copilot automatically uses notebook context — the attached Lakehouse, available schemas, and tables — to determine which table to profile. You don't need to specify the data source; Copilot discovers it from your workspace.
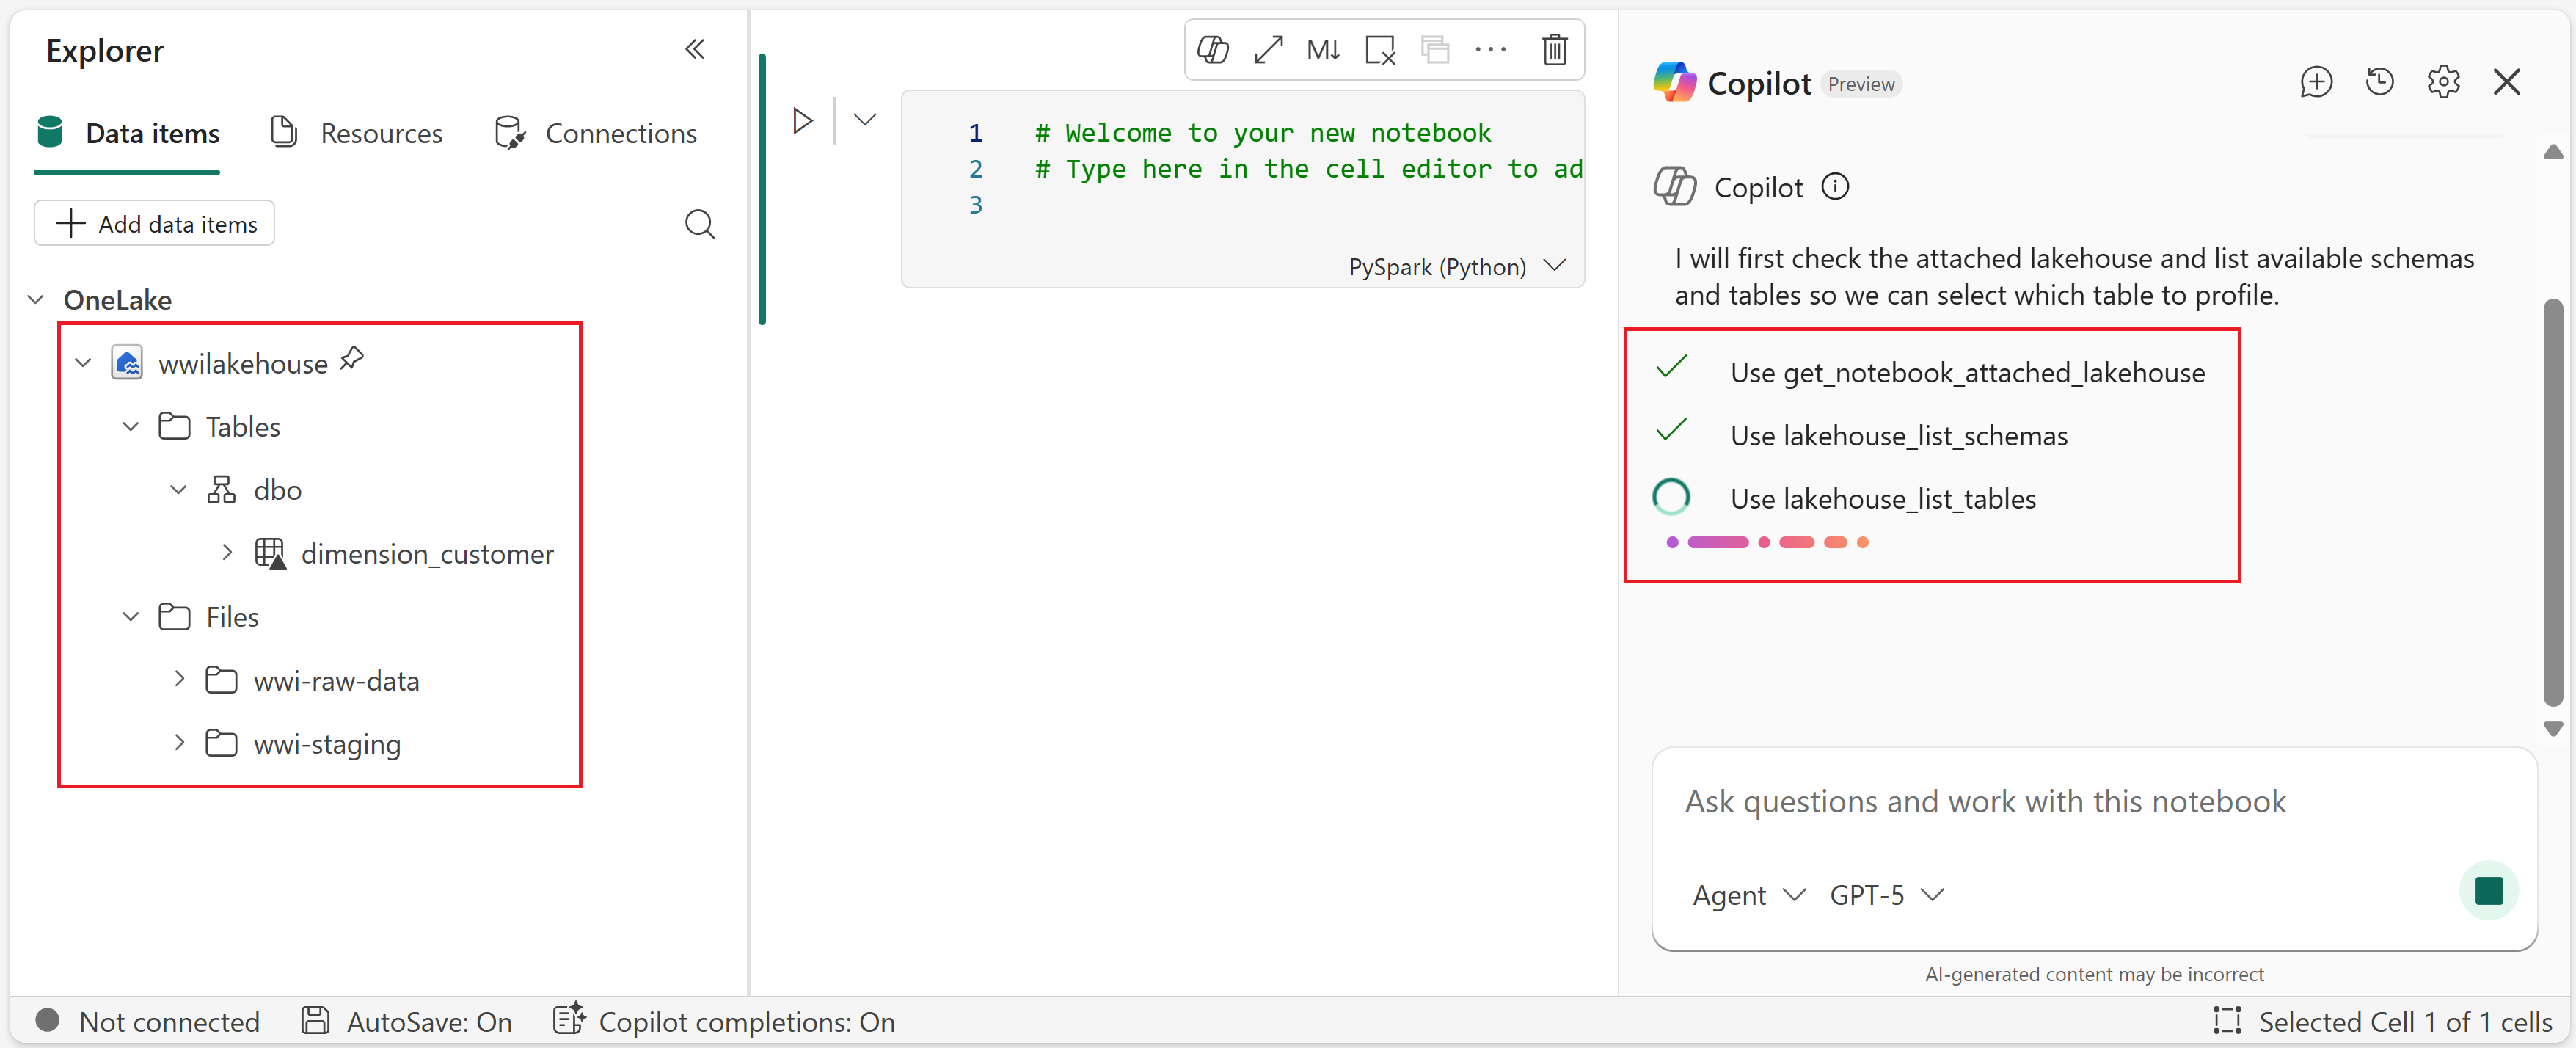
Copilot finds the dimension_customer table in the default Lakehouse and requests permission to add a new code cell.
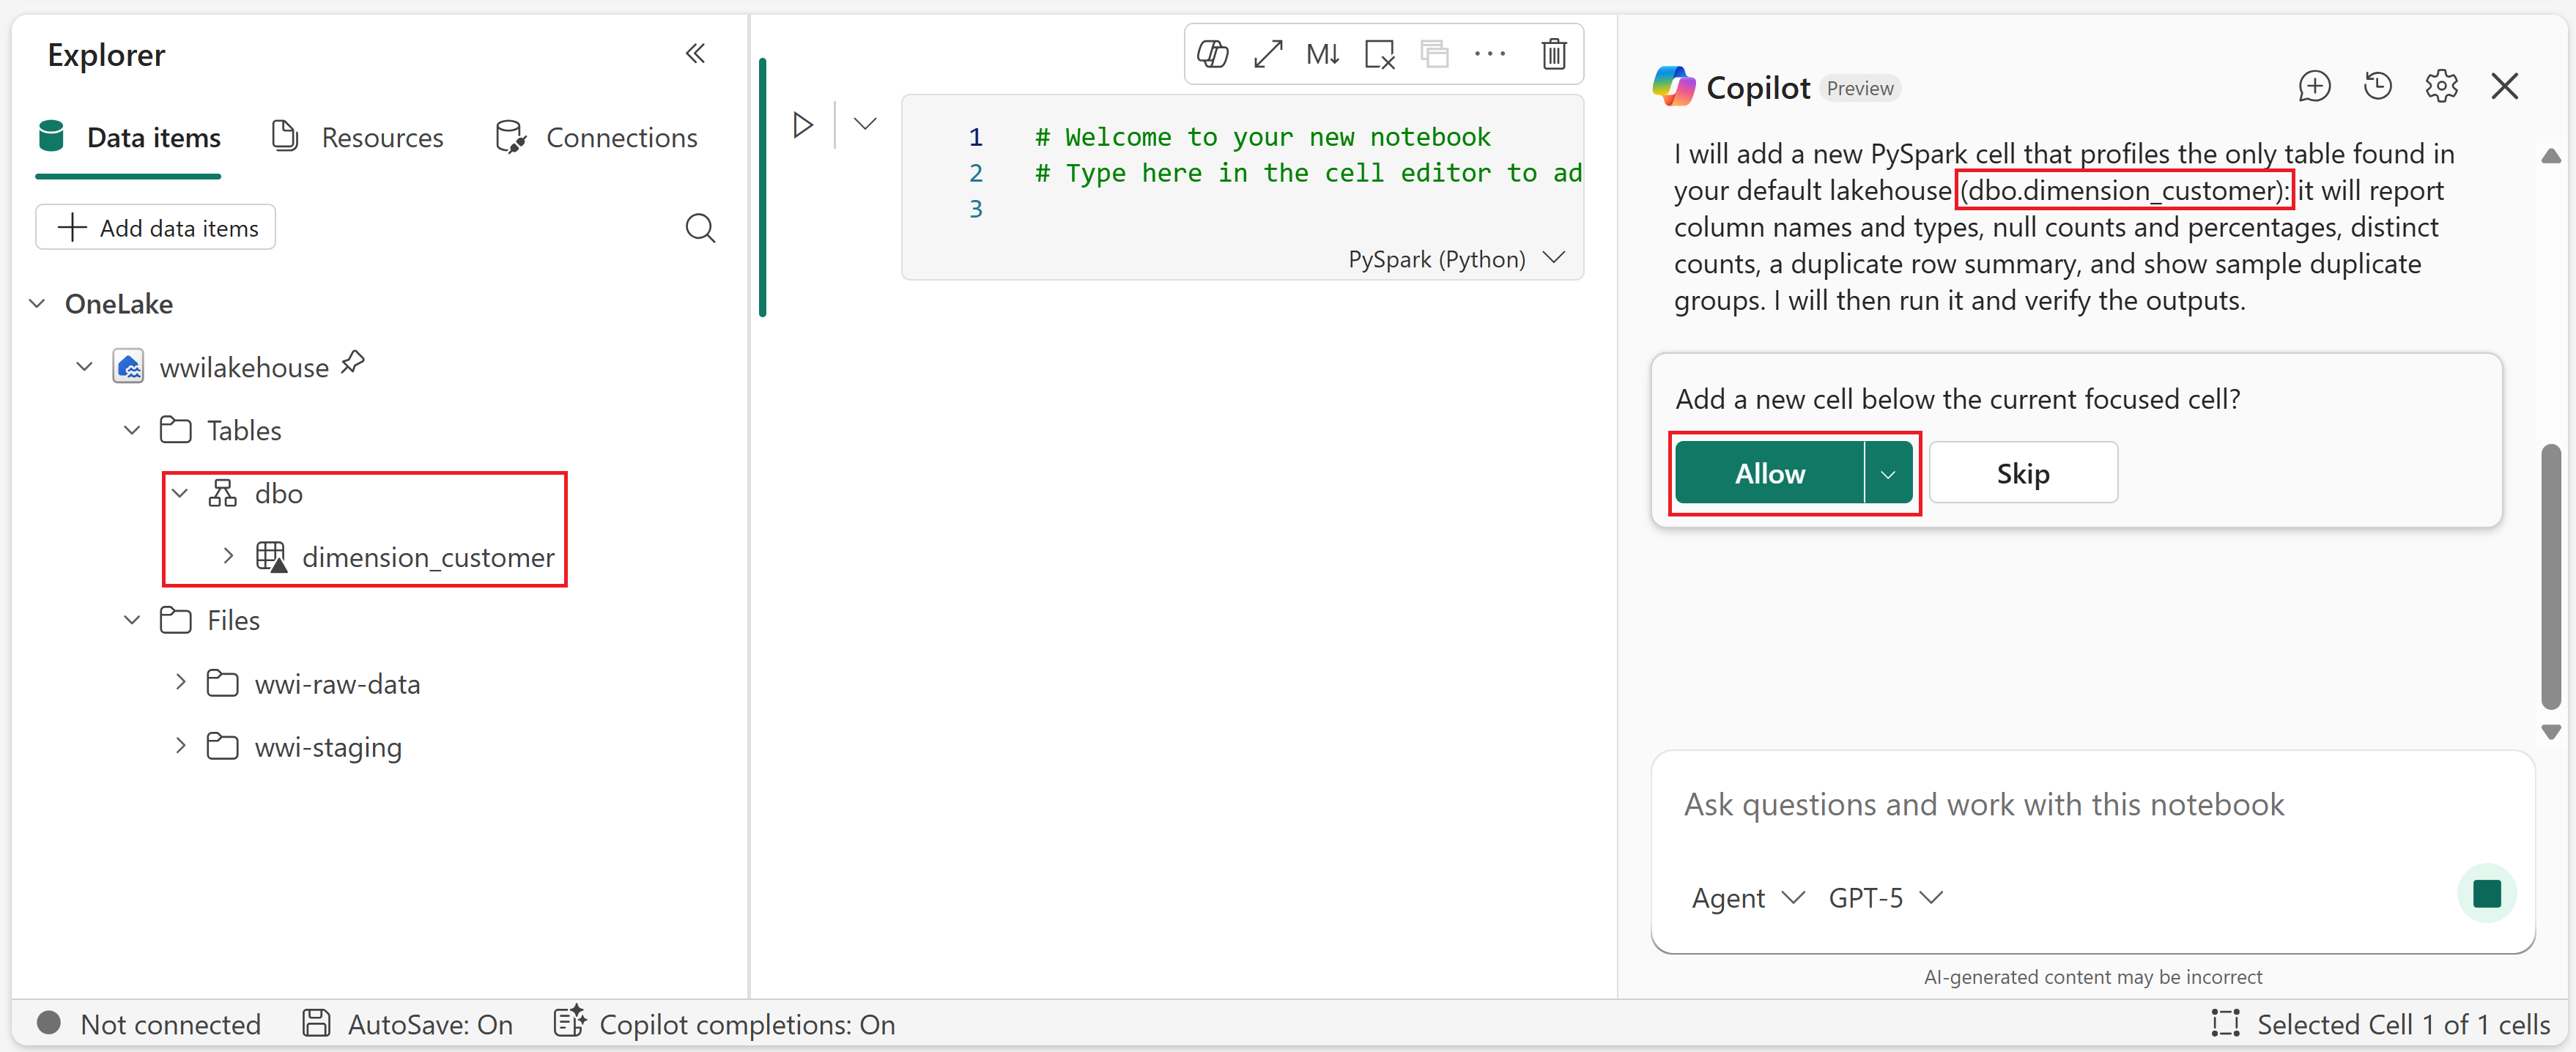
After you approve, the Spark session starts and Copilot runs the code cell it created.
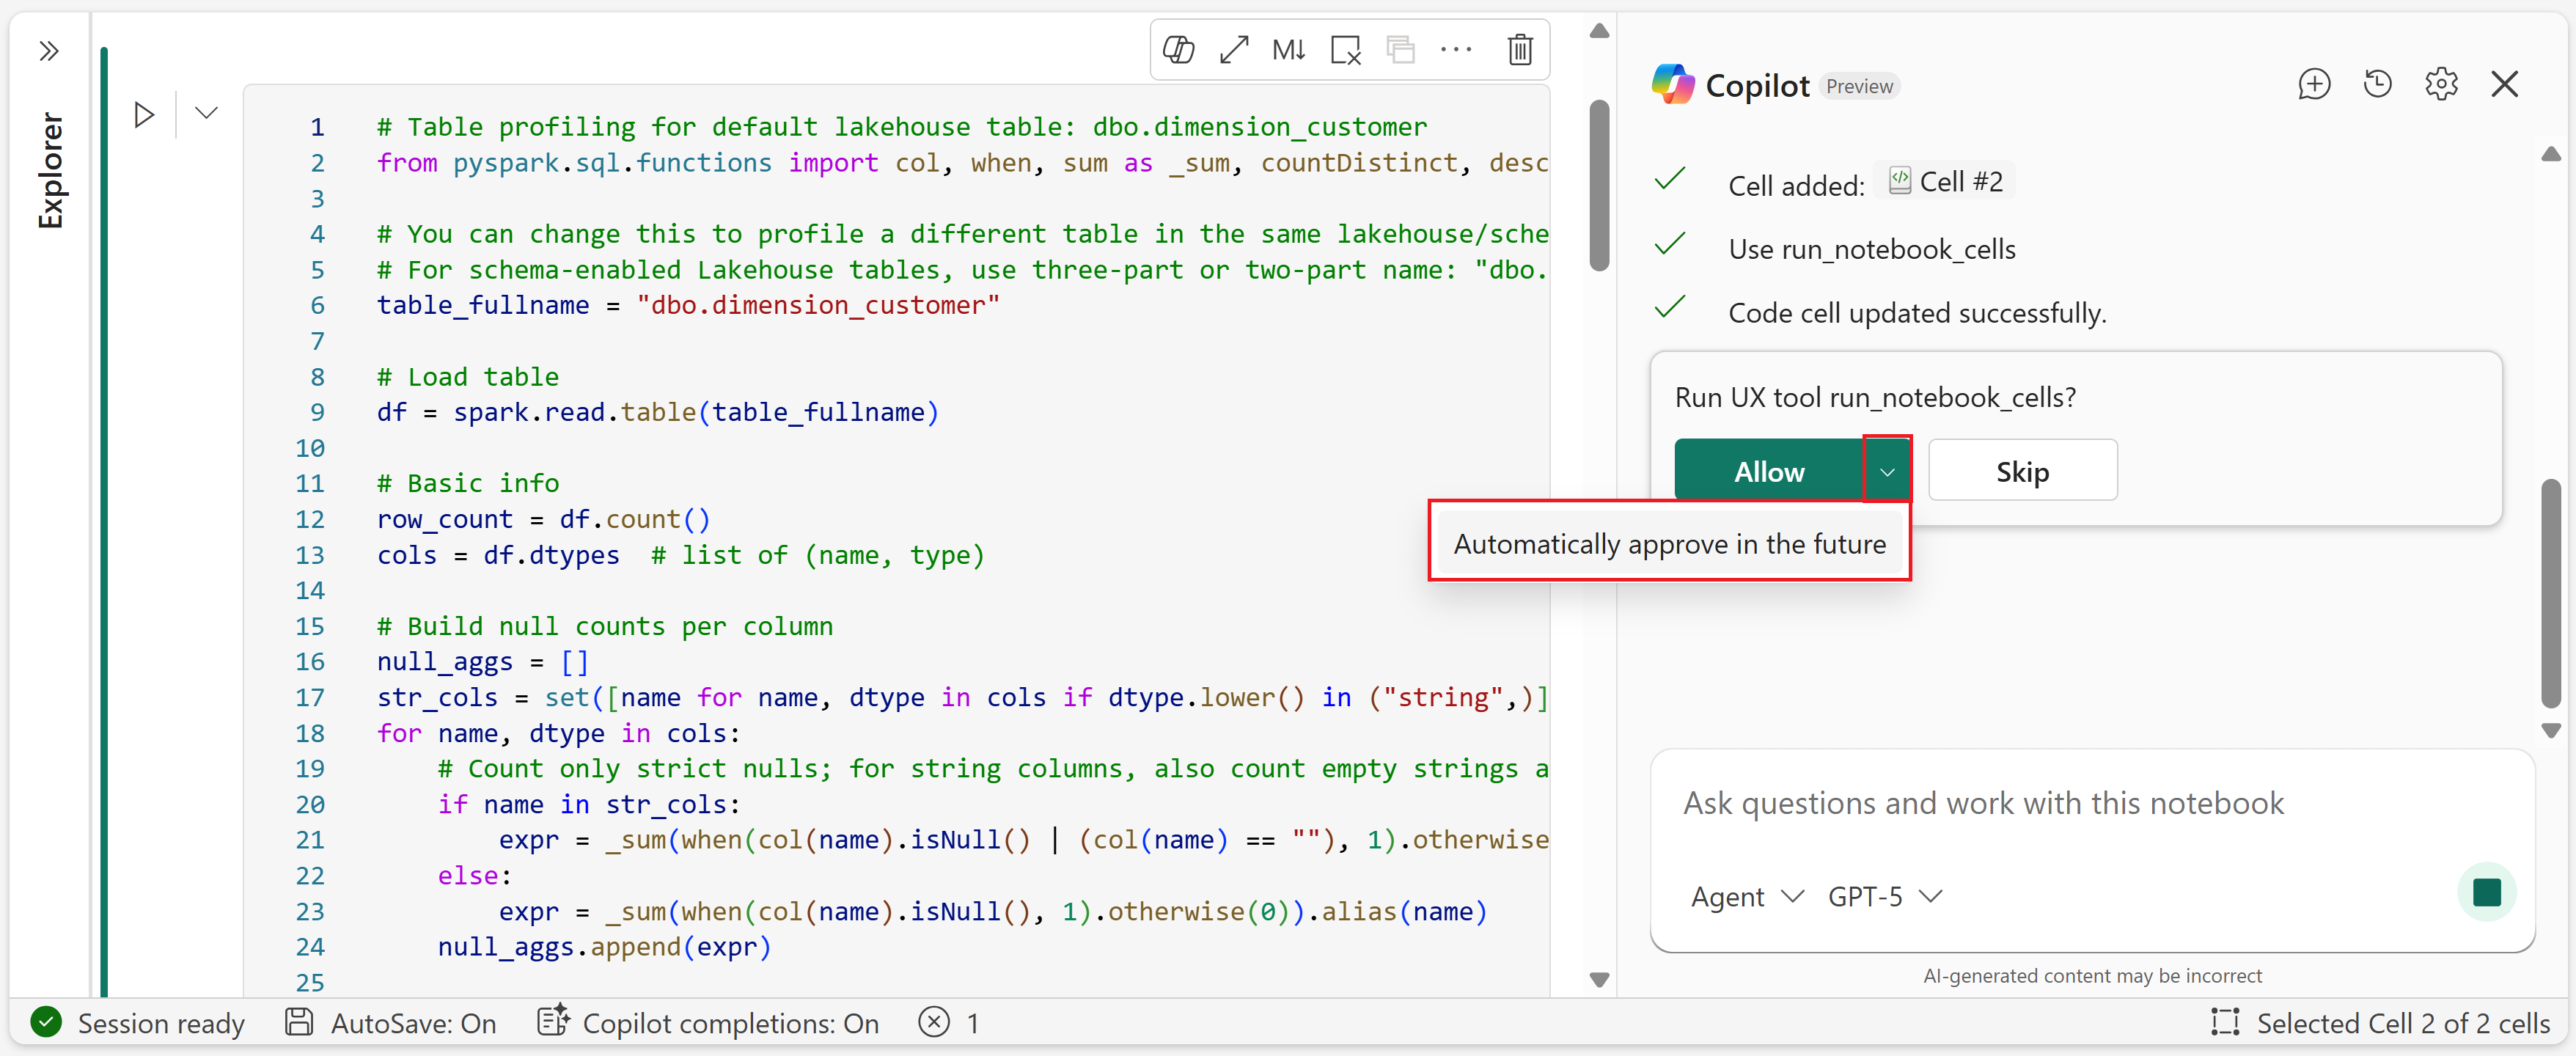
Copilot requests permission to edit code or run cells. You can Allow the action, Allow and automatically approve similar permissions in the future, or Skip to prevent Copilot from running the tool. You can change the default approval behavior at any time — see Approval settings for details.
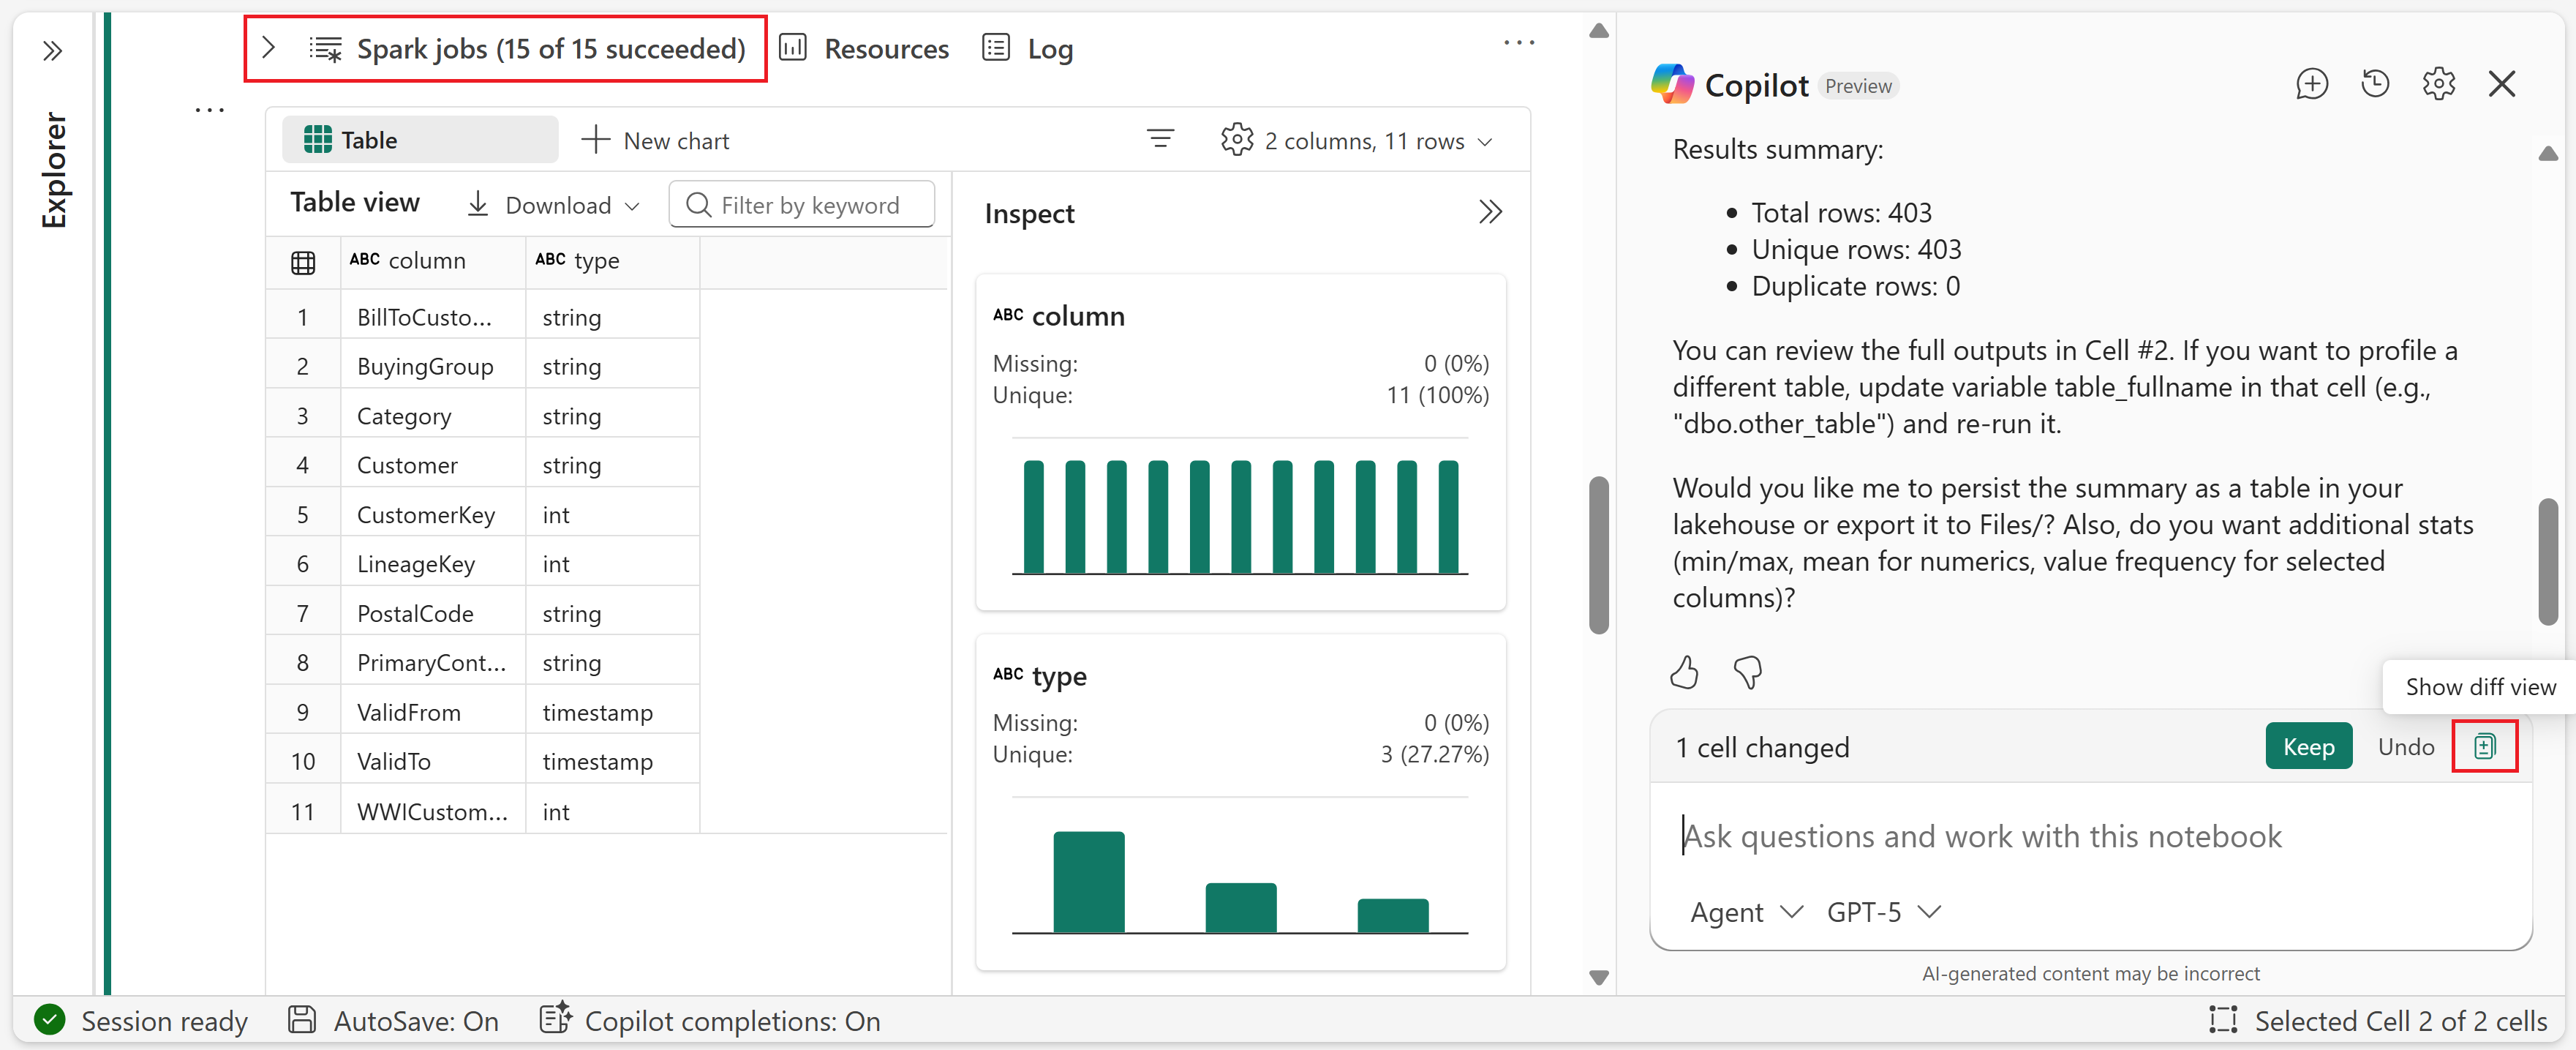
After the Spark job completes, you can choose to Keep or Undo the changes to the notebook. You can also open the diff view to see exactly what Copilot changed.
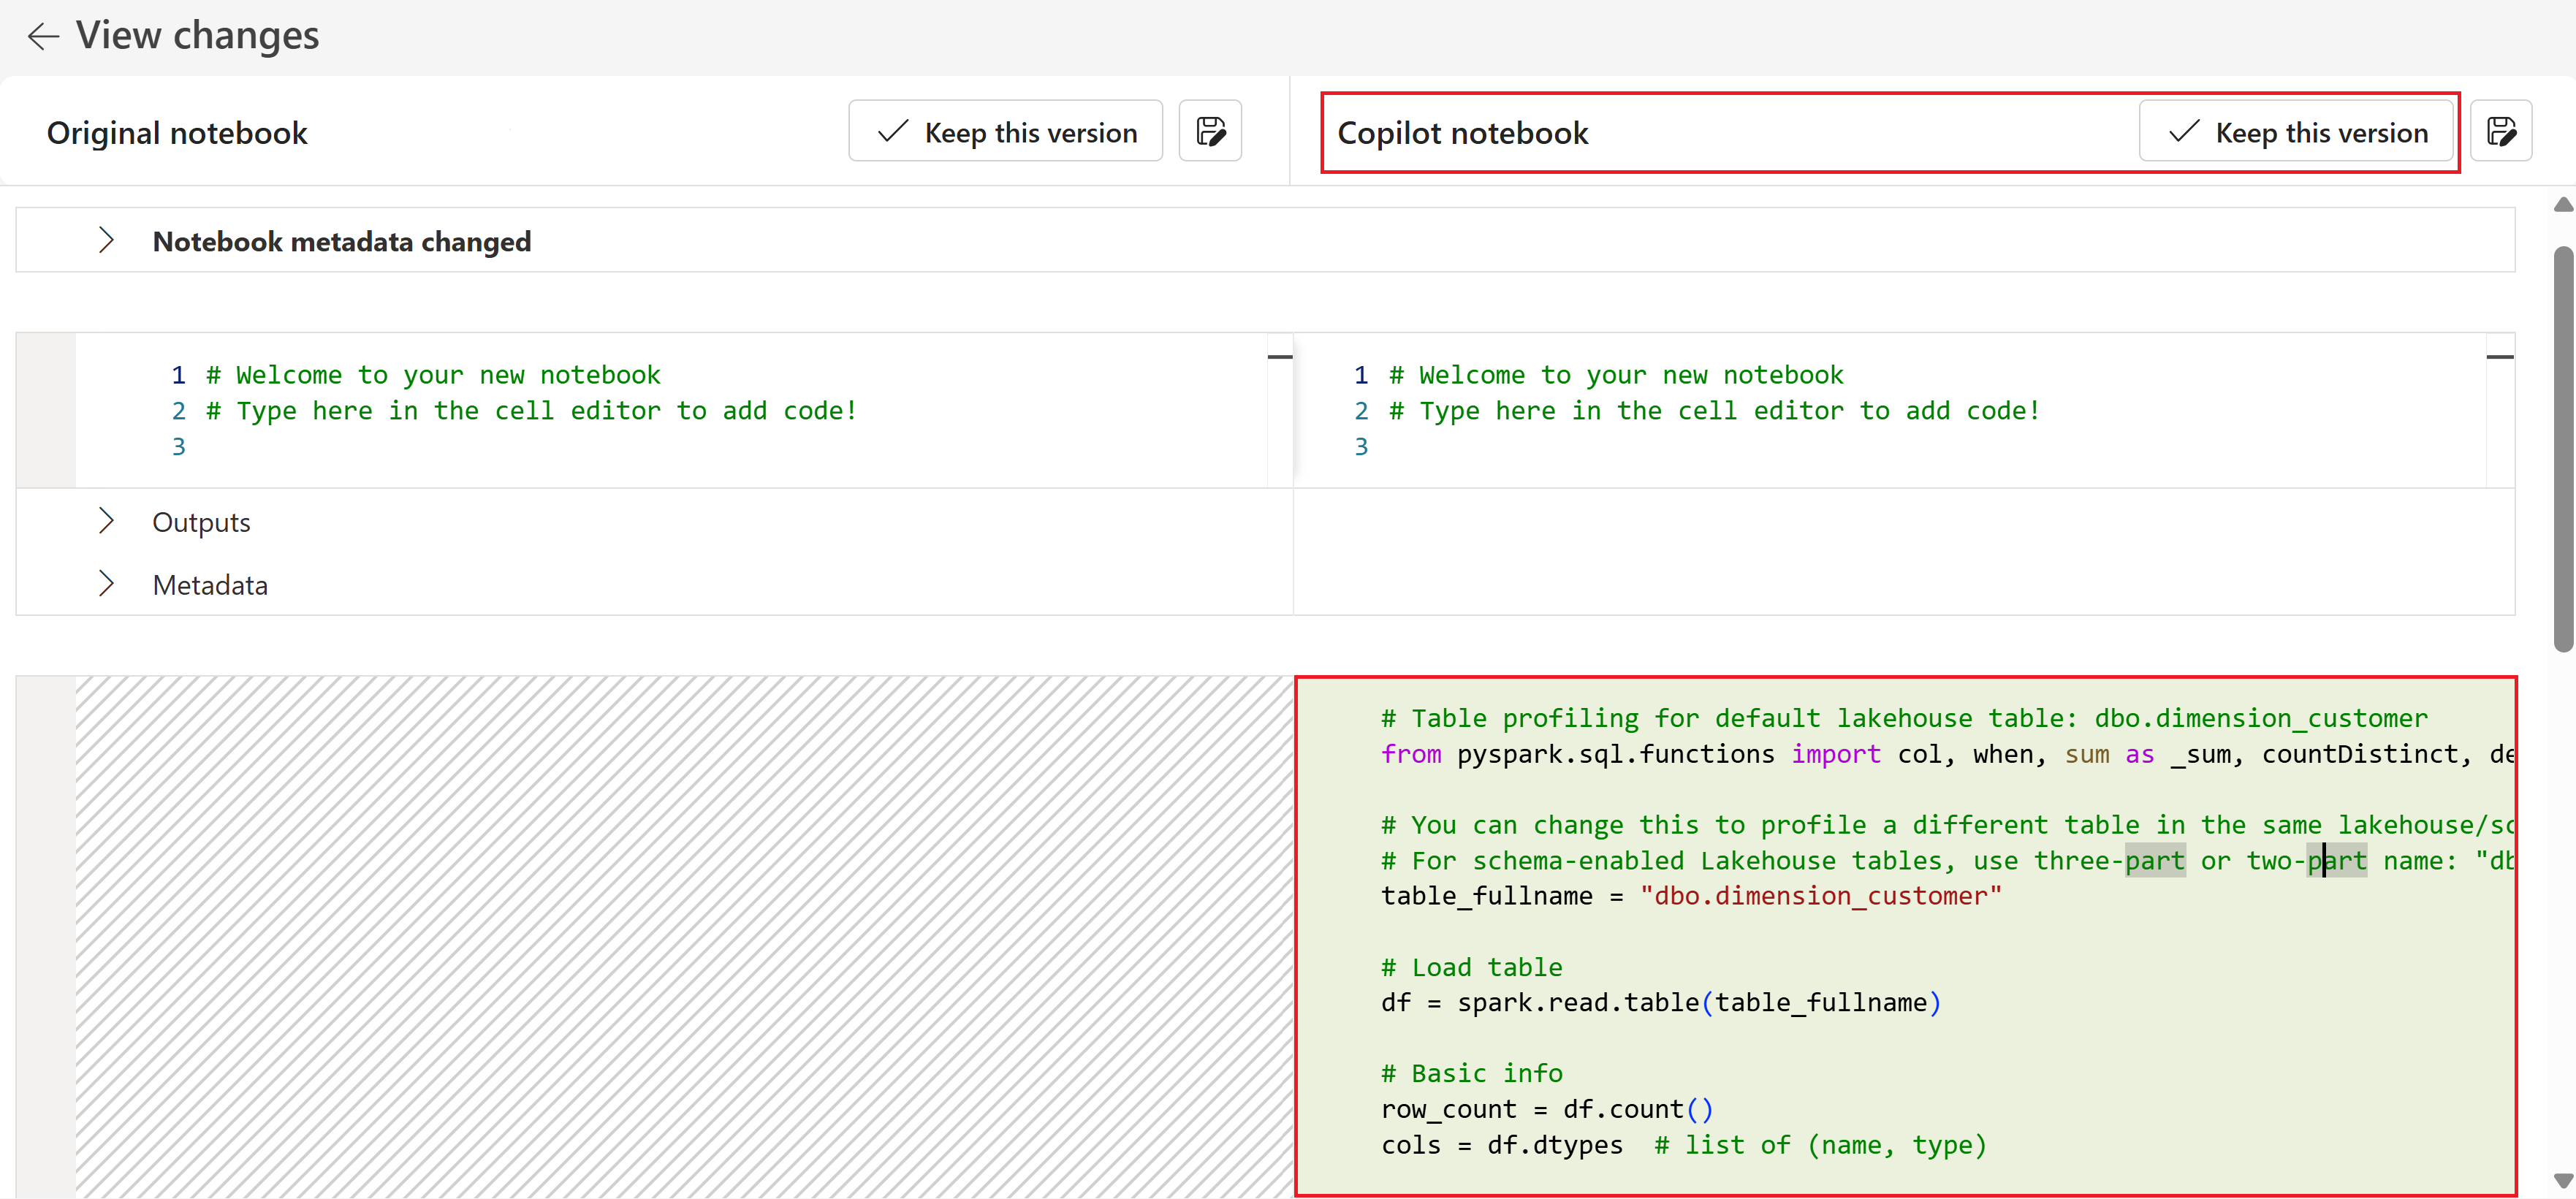
The diff view shows the original notebook contents on the left and Copilot's edits on the right. Each side has a Keep this version button. Select the version you want to keep — either the original or Copilot's version. You can also go back without choosing either option.
You can also type a custom question in the chat box. In this example, Copilot uses one of several tools available to it from MCP servers to process the request. Here, it uses the
microsoft_docs_searchtool to find relevant information.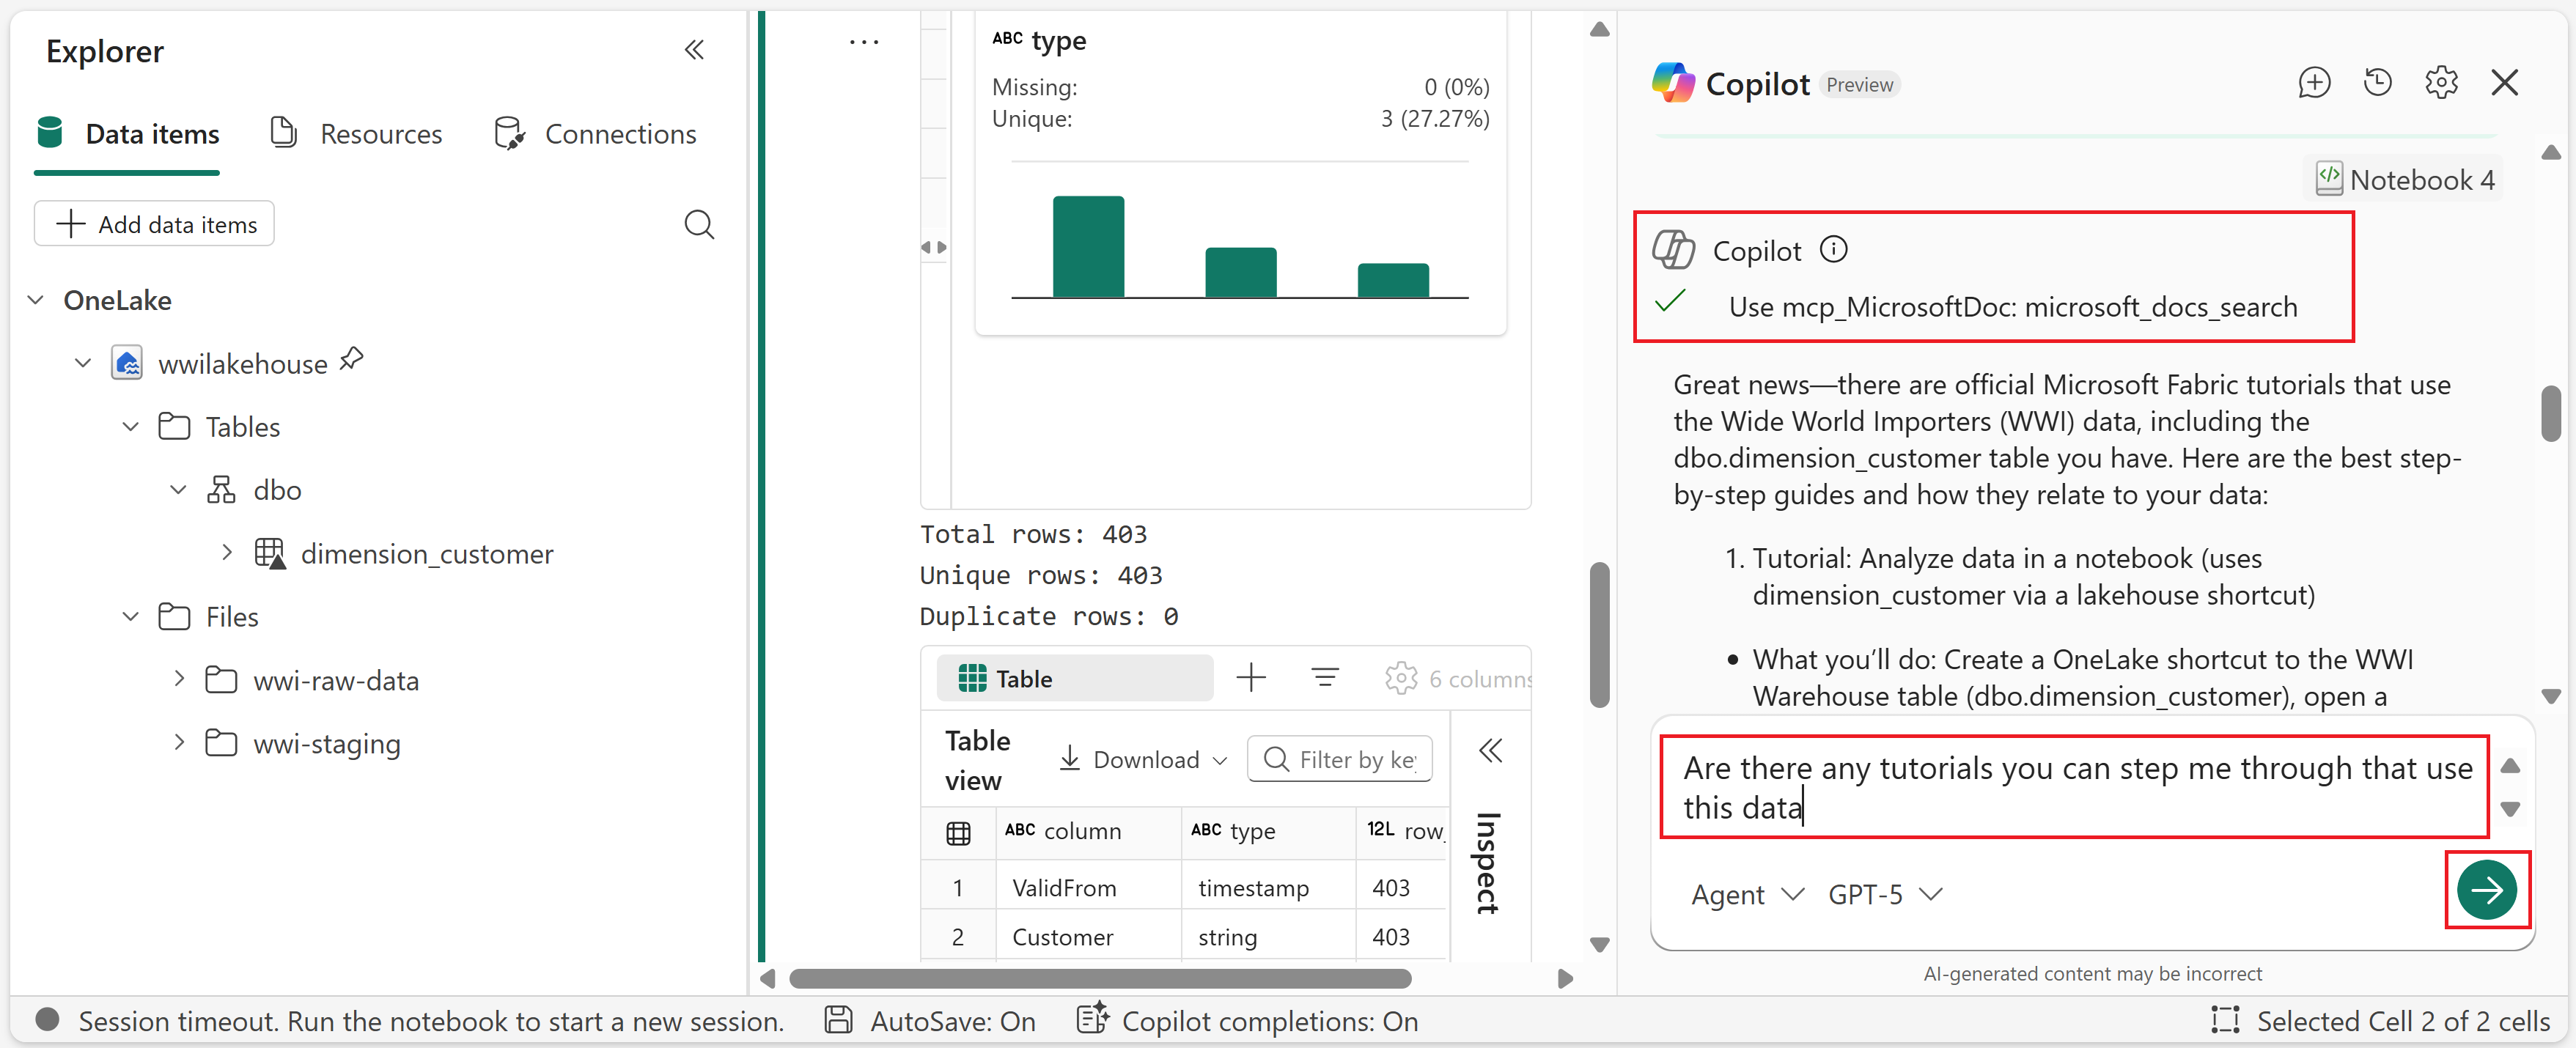


This walkthrough covers the core chat pane flow. The chat pane also supports chat history for reviewing previous conversations, and you can interact with Copilot directly within cells using in-cell Copilot for tasks like fixing, explaining, or optimizing code.
Chat history
Copilot preserves your chat history across sessions. You can view previous conversations by selecting the chat history icon in the chat pane.

To start a new conversation, select the new chat option.

Model selection
You can choose between available models (for example, GPT-5 or GPT-4.1) from the model selector in the chat pane. Different models might provide different results depending on the complexity of your task.
Approval settings
Copilot includes approval settings that control whether it asks for confirmation before running cells. To change approval settings, select the settings gear icon in the chat pane.

The available options are:
- Ask for approval — Copilot asks for confirmation before every cell run.
- Don't ask for approval — Copilot runs cells automatically.
High-risk actions, such as running multiple cells at once or installing packages, always require approval regardless of your setting.
In-cell Copilot
In addition to the chat pane, you can interact with Copilot directly within notebook cells. This experience is ideal for quick, targeted actions on a single cell. Select the Copilot button above a code cell to open a text box where you can enter a request or slash command. For example, enter "Generate code for a logistic regression that fits this data" and Copilot writes the code in the cell below.

You can also use the following slash commands for specific actions on existing code:
/explain— Explain code. Provides a plain-language explanation of any code block./fix— Fix code errors. Identifies errors and suggests corrections./comments— Add code comments. Automatically documents your code with summaries of logic and data changes./optimize— Optimize code. Suggests improvements for performance and efficiency.
Fabric notebooks also offer inline code completion, which provides AI-powered autocomplete suggestions as you type in code cells.
Diagnose notebook failures
When a notebook cell fails, Copilot can help you diagnose and fix the issue directly in your notebook workflow.
Use Fix with Copilot for cell failures
After a cell execution failure (including Spark job failures surfaced in notebook execution), a Fix with Copilot option appears below the failed cell.
When you select Fix with Copilot, Copilot uses notebook context such as:
- Code from the failed cell.
- Runtime and execution context.
- Spark execution details and error logs.
Copilot then provides:
- An error summary.
- A likely root cause.
- Recommended next steps.
If a code change is needed, Copilot can suggest an updated version. Review the change in diff view, then choose whether to keep or undo it.
Use /fix for targeted or broader troubleshooting
You can also troubleshoot from Copilot chat or in-cell Copilot by using /fix.
- Use
/fixon a specific cell for a focused issue. - Use chat context to continue investigating related failures across multiple cells.
Current behavior
Fix with Copilot is available when a failure occurs in the current notebook session. If you reopen the notebook later, the button isn't shown for previous failures.
FAQ
When does Fix with Copilot appear?
Fix with Copilot appears after a notebook cell execution fails in the current session, including failures surfaced from Spark job execution in the notebook.
What information does Copilot use for diagnostics?
Copilot uses notebook context, including failed cell code, runtime and execution context, and available Spark execution details and error logs.
Does Copilot automatically change my code?
Copilot can suggest code fixes when needed. Review the proposed changes in diff view, then choose whether to keep or undo them.
Can Copilot troubleshoot issues across multiple cells?
Yes. Use /fix for a specific cell, and continue in chat to investigate related failures across multiple cells.
Does Copilot replace manual debugging?
No. Copilot accelerates diagnosis and suggests fixes, but you can still inspect logs and perform manual debugging as needed.
Will Fix with Copilot still appear after I reopen a notebook?
No. Today, the button appears only for failures that occur in the current notebook session.