Change row height or column width in a Report Builder paginated report
Applies to: ![]() Microsoft Report Builder (SSRS)
Microsoft Report Builder (SSRS) ![]() Power BI Report Builder
Power BI Report Builder ![]() Report Designer in SQL Server Data Tools
Report Designer in SQL Server Data Tools
When you set a row height, you're specifying the maximum height for the row in the rendered paginated report. However, by default text boxes in the row are set to grow vertically to accommodate their data at run-time. This setting can cause a row to expand beyond the height that you specify. To set a fixed row height, you must change the text box properties so they don't automatically expand.
When you set a column width, you specify the maximum width for the column in the rendered report. Columns don't automatically adjust horizontally to accommodate text.
If a cell in a row or column contains a rectangle or data region, the height and width of the contained item determines the minimum height and width of the cell. For more information, see Rendering behaviors in a paginated report (Report Builder).
Note
You can create and modify paginated report definition (.rdl) files in Microsoft Report Builder, Power BI Report Builder, and in Report Designer in SQL Server Data Tools.
Change row height by moving row handles
In Design view, choose anywhere in the tablix data region to select it. Gray row handles appear on the outside border of the tablix data region.
Hover over the row handle edge that you want to expand. A double-headed arrow appears.
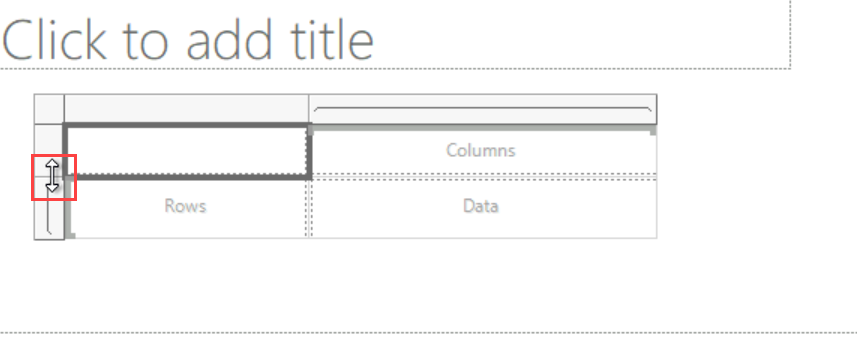
Select the edge of the row and move it higher or lower to adjust the row height.
Change row height by setting cell properties
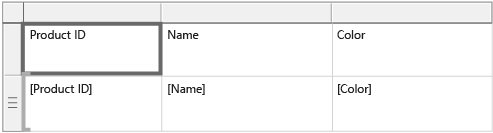
In Design view, choose a cell in the table row.
In the Properties pane go to Position > Size, and then modify the Height property.
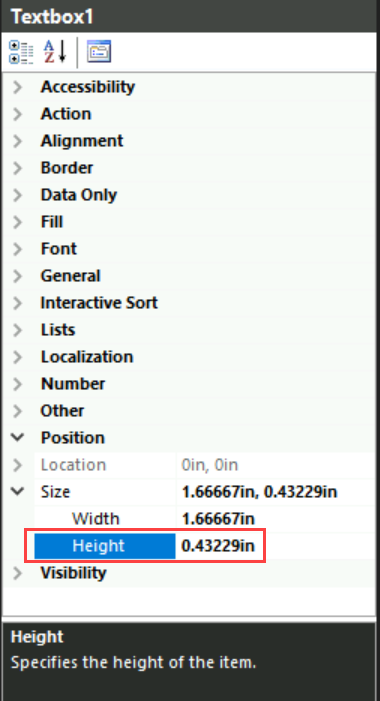
Select anywhere outside the Properties pane to update the table height.
Prevent a row from automatically expanding vertically
In Design view, choose anywhere in the tablix data region to select it. Gray row handles appear on the outside border of the tablix data region.
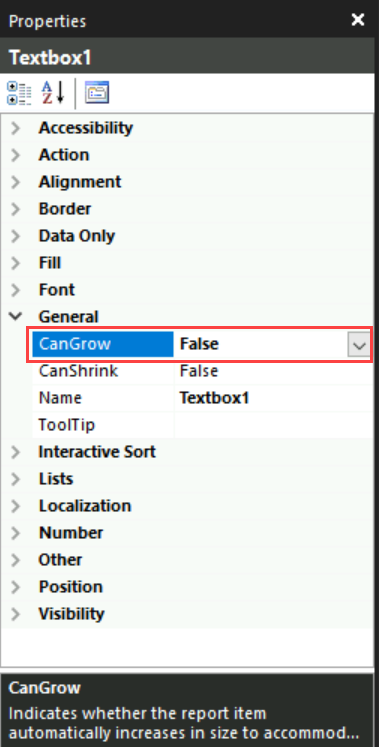
Select the row handle and choose the row.
In the Properties pane under General, set CanGrow to False.
Note
If you can't see the Properties pane, from the View menu, select Properties.
Change column width
In Design view, select anywhere in the tablix data region to select it. Gray column handles appear on the outside border of the tablix data region.
Hover over the column handle edge that you want to expand. A double-headed arrow appears.
Select the edge of the column, and move it left or right to adjust the column width.
Related content
Tagasiside
Varsti tulekul: 2024. aasta jooksul tühistame GitHubi probleemide funktsiooni sisutagasiside mehhanismina ja asendame selle uue tagasisidesüsteemiga. Lisateabe saamiseks vt https://aka.ms/ContentUserFeedback.
Esita ja vaata tagasisidet